1. Уводзіны
The Coby DP772 is a versatile 7-inch widescreen digital photo frame designed to display your digital memories and play audio files. It features an LED-backlit TFT LCD display, ensuring bright and clear image viewing. This device supports various memory card formats, including SD, MMC, xD, and CompactFlash, and includes a USB port for connecting to digital media drives. With integrated stereo speakers, it can play MP3 and WMA audio files, and even combine them with photo slideshows. The DP772 also offers A/V output for connection to home theater systems and comes with interchangeable black and white faceplates to match your decor. It can be used with its included stand or mounted on a wall.
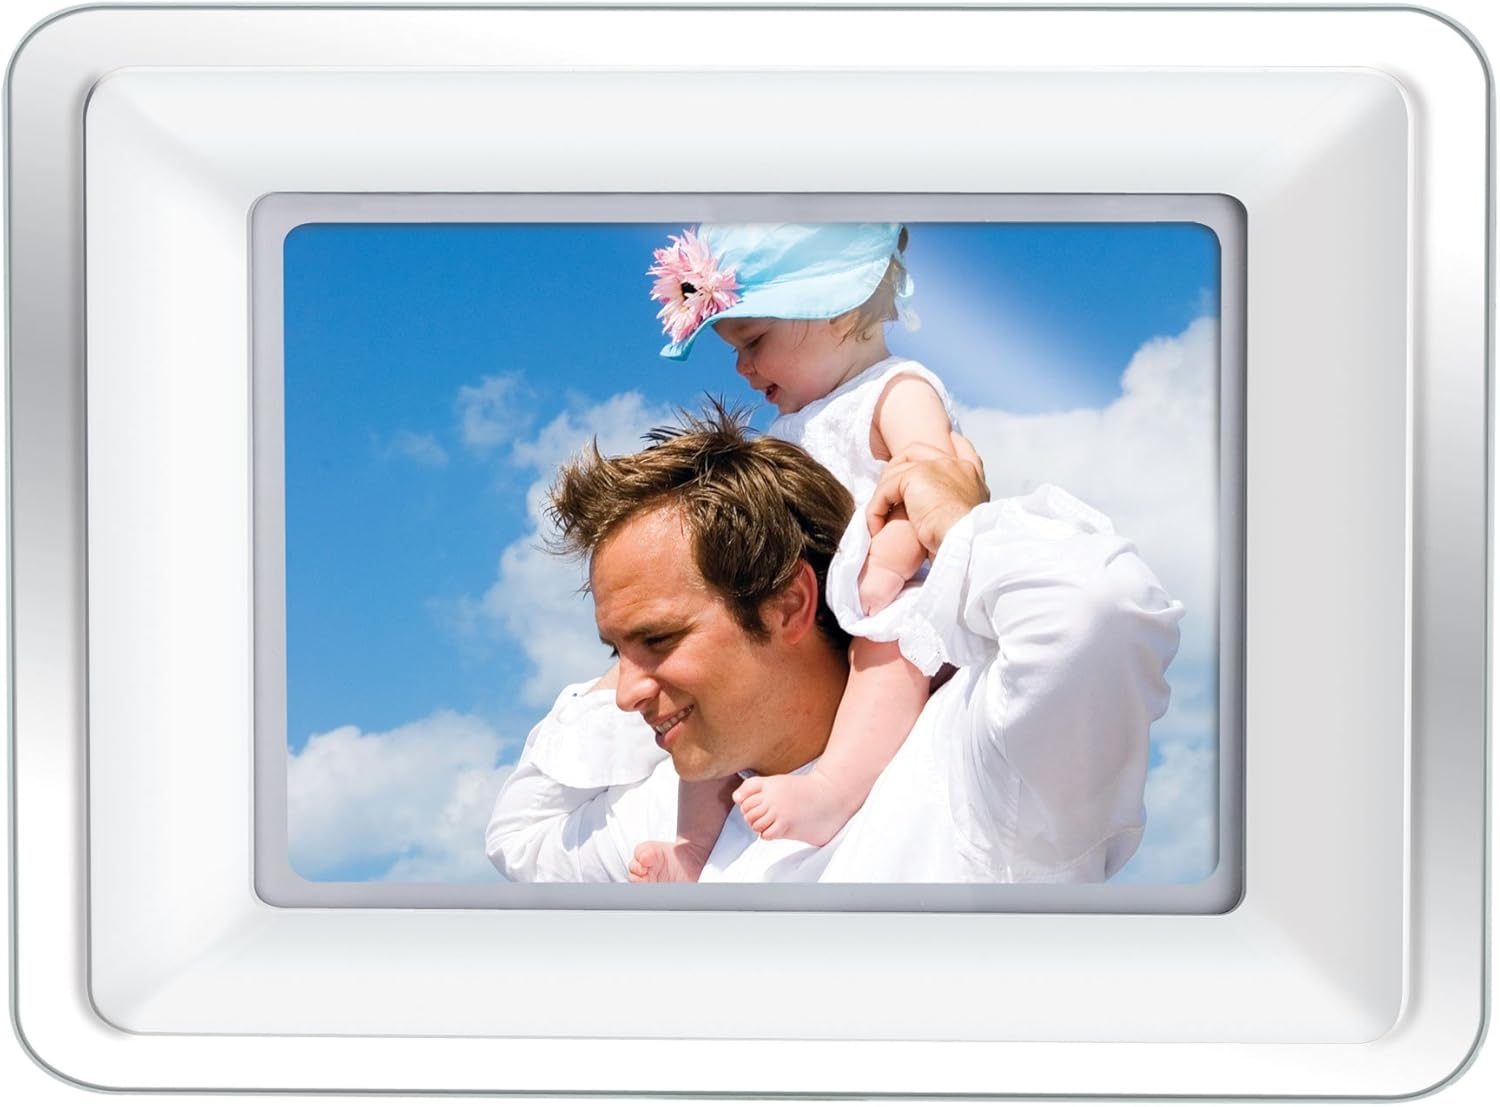
Image 1.1: The Coby DP772 Digital Photo Frame, showcasing its display with a family photo.
2. Настройка
2.1 Распакоўка і змесціва
Асцярожна выміце ўсе кампаненты з упакоўкі. Пераканайцеся, што ў наяўнасці наступныя прадметы:
- Coby DP772 Digital Photo Frame
- Адаптар пераменнага току
- Пульт дыстанцыйнага кіравання
- Interchangeable Faceplates (Black and White)
- Настольная падстаўка
- Кіраўніцтва карыстальніка (гэты дакумент)
2.2 Падключэнне харчавання
- Падключыце адаптар пераменнага току да порта DC IN на задняй панэлі фотарамкі.
- Падключыце другі канец адаптара да звычайнай электрычнай разеткі.
- The frame should power on automatically or can be turned on using the power button.

Image 2.1: The AC Power Adapter, essential for powering the device.
2.3 Inserting Memory Cards or USB Devices
The DP772 supports SD, MMC, xD, and CompactFlash memory cards, as well as USB flash drives.
- Locate the memory card slots or USB port on the side or back of the frame.
- Insert your memory card into the appropriate slot, ensuring it is oriented correctly. Do not force the card.
- For USB devices, insert the USB flash drive into the USB port.
- The frame should automatically detect the media and begin displaying content or prompt you to select a mode.
2.4 Мацаванне падстаўкі або насценнага мацавання
The frame can be displayed on a flat surface using the included stand or mounted on a wall.
- For Tabletop Use: Attach the provided stand to the designated slot on the back of the frame. Ensure it is securely fastened to provide stable support. The stand allows for both landscape and portrait orientation.
- Для насценнага мантажу: Detach the stand if it is already attached. Use appropriate wall mounting hardware (not included) with the mounting holes on the back of the frame. Ensure the wall can support the weight of the frame.

Image 2.2: The detachable stand, used for tabletop display.
2.5 Changing Faceplates
The DP772 comes with interchangeable black and white faceplates.
- Gently remove the currently attached faceplate by prying it off from the edges.
- Align the desired faceplate (black or white) with the frame and press it firmly into place until it clicks securely.

Image 2.3: The interchangeable black and white faceplates, allowing customization of the frame's appearance.
2.6 Усталёўка батарэек пульта дыстанцыйнага кіравання
The remote control requires batteries (not included) for operation.
- Знайдзіце батарэйны адсек на задняй частцы пульта дыстанцыйнага кіравання.
- Адкрыйце крышку адсека.
- Устаўце патрэбныя батарэйкі, выконваючы правільную палярнасць (+/-).
- Надзейна зачыніце крышку батарэйнага адсека.

Image 2.4: The compact remote control for convenient operation of the photo frame.
3. Інструкцыя па эксплуатацыі
3.1 Асноўная навігацыя
The frame can be operated using the buttons on the unit or the included remote control.
- Кнопка харчавання: Уключае або выключае прыладу.
- Кнопка меню: Доступ да галоўнага меню для налад і опцый.
- Кнопкі са стрэлкамі (уверх/уніз/налева/направа): Navigate through menus and select files.
- Enter/Play/Pause Button: Confirms selections, plays media, or pauses playback.
- Exit/Stop Button: Returns to the previous screen or stops media playback.
3.2 Прайграванне фатаграфій
- Insert a memory card or USB device containing JPEG or BMP image files.
- If the frame does not automatically enter photo mode, navigate to the 'Photo' option in the main menu and press Enter.
- Use the arrow buttons to browse through your photos.
- Press the Play button to start a slideshow. You can adjust slideshow intervals and transition effects in the settings menu.
3.3 Прайграванне музыкі
- Ensure your memory card or USB device contains MP3 or WMA audio files.
- Navigate to the 'Music' option in the main menu and press Enter.
- Use the arrow buttons to select an audio file або тэчку.
- Press the Play button to begin playback. Use the remote or frame buttons to control volume, skip tracks, or pause.
3.4 Прайграванне відэа
The DP772 supports most MP4 and AVI video files.
- Insert a memory card or USB device with compatible video files.
- Navigate to the 'Video' option in the main menu and press Enter.
- Выберыце патрэбнае відэа file выкарыстоўваючы кнопкі са стрэлкамі.
- Press the Play button to start the video.
3.5 Slideshow with Music
To enhance your photo slideshows, you can play background music simultaneously.
- Ensure both photo and music files are present on the inserted media.
- Start a photo slideshow as described in section 3.2.
- Access the settings menu (usually via the Menu button) and look for 'Slideshow Music' or a similar option.
- Выберыце патрэбную музыку file or playlist to accompany your photos.
3.6 Connecting to a TV (A/V Output)
The DP772 features an A/V output for displaying content on a larger screen, such as a television. Note: The A/V cable is not included with the product.
- Obtain a compatible A/V cable (typically a 3.5mm jack to RCA composite video and stereo audio).
- Connect one end of the A/V cable to the A/V OUT port on the photo frame.
- Connect the RCA plugs (yellow for video, red/white for audio) to the corresponding input ports on your television.
- Switch your television's input source to the correct A/V input.
- The content displayed on the photo frame will now be mirrored on your television.
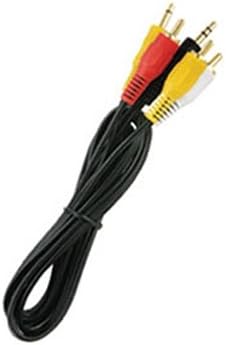
Выява 3.1: Былы/былаяample of the A/V cable required to connect the photo frame to a television.
4. Тэхнічнае абслугоўванне
4.1 Cleaning the Frame and Screen
To maintain the appearance and functionality of your Coby DP772, follow these cleaning guidelines:
- экран: Use a soft, lint-free cloth specifically designed for electronics screens. Gently wipe the screen to remove dust and fingerprints. For stubborn marks, slightly dampen the cloth with water or a screen-cleaning solution (avoid harsh chemicals).
- кадр: Wipe the frame and casing with a soft, dry cloth. Do not use abrasive cleaners or solvents, as these can damage the finish.
- Заўсёды пераканайцеся, што прылада выключана і адключана ад сеткі перад чысткай.
4.2 Захоўванне
If you plan to store the photo frame for an extended period:
- Выключыце прыладу і адключыце яе ад крыніцы харчавання.
- Remove any memory cards or USB devices.
- Захоўвайце рамку ў прахалодным, сухім месцы, удалечыні ад прамых сонечных прамянёў і экстрэмальных тэмператур.
- Consider storing it in its original packaging or a protective bag to prevent dust accumulation and damage.
5. Выпраўленне непаладак
This section addresses common issues you might encounter with your Coby DP772.
| праблема | Магчымая прычына | Рашэнне |
|---|---|---|
| Рамка не ўключаецца. | Адаптар харчавання не падключаны або няспраўны. | Ensure the AC adapter is securely plugged into the frame and a working electrical outlet. Try a different outlet. |
| No image or sound. | Няправільна file format; media not inserted correctly; volume too low. | Verify that image files are JPEG/BMP and audio files are MP3/WMA. Ensure the memory card/USB is fully inserted. Check volume settings. |
| Memory card/USB not recognized. | Card/USB not inserted correctly; incompatible format; corrupted media. | Re-insert the card/USB. Ensure it is a supported type (SD, MMC, xD, CF). Try formatting the card on a computer (this will erase all data). |
| Не працуе пульт дыстанцыйнага кіравання. | Dead batteries; obstruction; out of range. | Replace batteries in the remote. Ensure there is a clear line of sight between the remote and the frame's IR sensor. Operate within close range. |
| Poor picture quality. | Low resolution of original photos; incorrect aspect ratio. | Use higher resolution photos. For optimal display, consider resizing photos to match the frame's native resolution (e.g., 480x234 pixels) and aspect ratio (16:9 for widescreen). |
6. Тэхнічныя характарыстыкі
Key technical specifications for the Coby DP772 Digital Photo Frame:
- Нумар мадэлі: DP772
- Памер экрана: 7 цалі
- Тып дысплея: TFT LCD with LED Backlighting
- дазвол: WXGA (480x234 pixels, 16:9 aspect ratio)
- Падтрымліваюцца фарматы малюнкаў: JPEG, BMP
- Падтрымліваюцца аўдыяфарматы: MP3, WMA
- Падтрымліваюцца фарматы відэа: Most MP4 and AVI files
- Падтрымка карт памяці: SD, MMC, xD, CompactFlash (CF)
- Падключэнне: USB port, A/V output
- Убудаваныя дынамікі: так
- Памеры прадукту: 9 х 7 х 2 цалі
- Вага прадмета: 2 фунта
- колер: White/Black (interchangeable faceplates)
7. Гарантыя і падтрымка
Coby products are manufactured to high-quality standards. For information regarding warranty coverage, please refer to the warranty card included with your product or visit the official Coby webсайт. Захоўвайце чэк аб куплі як пацвярджэнне пакупкі ў выпадку любых гарантыйных прэтэнзій.
For technical assistance or customer support, please visit the Coby support section on their official webсайт або звярніцеся ў службу падтрымкі кліентаў. Кантактная інфармацыя звычайна пазначана на ўпакоўцы прадукту або на інструкцыі вытворцы. webсайт.