1. Інфармацыя па бяспецы
Please read and understand all safety instructions before using the Janome Electric Sewing Machine Model 3090. Failure to follow these instructions may result in electric shock, fire, or personal injury.
- Always unplug the machine from the electrical outlet immediately after using, before cleaning, or when making any adjustments.
- Do not operate the machine with a damaged cord or plug. If the machine is not working properly, has been dropped, damaged, or dropped into water, contact a qualified service technician.
- Keep fingers away from all moving parts, especially the needle area. Use the presser foot lifter to raise and lower the presser foot.
- Ніколі не кідайце і не ўстаўляйце прадметы ў адтуліны.
- Не выкарыстоўвайце на адкрытым паветры.
- Не працуйце там, дзе выкарыстоўваюцца аэразольныя (спрэі) прадукты або дзе падаецца кісларод.
- Для адключэння выключыце ўсе элементы кіравання, затым выміце вілку з разеткі.
2. Настройка
2.1 Распакоўка і размяшчэнне
Carefully remove the sewing machine from its packaging. Place the machine on a stable, flat surface. Ensure there is adequate lighting and space for comfortable operation.
2.2 Connecting the Foot Controller and Power
Insert the foot controller plug into the machine's receptacle. Then, connect the power cord to the machine and plug it into a suitable electrical outlet. Ensure the power switch is in the 'OFF' position before connecting.
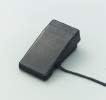
выява: The foot controller, used to regulate sewing speed. Connect it securely to the machine's designated port.
2.3 Намотка шпулькі
- Змесціце катушку з ніткай на катушку.
- Правядзіце нітку праз нітканапраўляльнік і вакол дыска нацяжэння намоткі шпулькі.
- Устаўце пустую шпульку на шпіндзель намотвальніка шпулькі.
- Наматайце нітку некалькі разоў уручную на шпульку.
- Націсніце шпіндзель намоткі шпулькі направа.
- Press the foot controller to start winding. Stop when the bobbin is full.
- Абрэжце нітку і адсуньце шпіндзель назад налева.
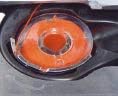
выява: A wound bobbin, ready for insertion into the bobbin case. Proper bobbin winding ensures even stitch formation.
2.4 Запраўка верхняй ніткі
- Падніміце пад'ёмнік лапкі.
- Змесціце катушку з ніткай на катушку.
- Правядзіце нітку праз верхні нітканапраўляльнік.
- Follow the numbered threading path down the front of the machine, around the tension discs, and up to the take-up lever.
- Thread the take-up lever from right to left.
- Continue guiding the thread down through the needle bar thread guide.
- Thread the needle from front to back. Pull about 15 cm (6 inches) of thread through the needle eye.

выява: Close-up of the needle and presser foot area. Correct upper threading is crucial for proper stitch formation.
2.5 Устаўка шпулькі
- Адкрыйце вечка шпулькі.
- Устаўце наматаную шпульку ў шпульны каўпачок, пераканаўшыся, што нітка размотваецца ў правільным кірунку (звычайна супраць гадзіннікавай стрэлкі).
- Guide the bobbin thread through the tension spring slot.
- Зачыніце вечка шпулькі.
2.6 Raising the Bobbin Thread
- Злёгку прытрымвайце верхнюю нітку левай рукой.
- Turn the handwheel towards you (counter-clockwise) to lower the needle into the needle plate and then raise it again.
- The upper thread will catch the bobbin thread, pulling a loop up through the needle plate opening.
- Pull both the upper and bobbin threads to the back under the presser foot.
3. Інструкцыя па эксплуатацыі
3.1 Selecting Stitch Patterns
Your Janome Model 3090 offers various stitch patterns. Use the stitch selector dial to choose the desired pattern. Refer to the stitch pattern guide on the machine or below for available options.

выява: A diagram illustrating various stitch patterns available on the Janome Model 3090, including Buttonhole, Straight Stitch, Zigzag Stitch, Blind Hem Stitch, Hem Stitch, Three-Point Zigzag Stitch, Shell Tuck, Triple Straight Stitch, Triple Zigzag Stitch, Decorative Stitch, and Overcast Stitch.
- пятліца: For creating buttonholes.
- Прамы шво: Basic sewing stitch.
- Зігзагападобны шво: For finishing raw edges or decorative purposes.
- Blind Hem Stitch: For invisible hems.
- Падол: For general hemming.
- Three-Point Zigzag Stitch: Stronger zigzag for elastic fabrics.
- Shell Tuck: Decorative edge finish.
- Тройны прамы шво: Stronger straight stitch for durable seams.
- Triple Zigzag Stitch: Stronger zigzag for stretch fabrics.
- Decorative Stitch: Various ornamental stitches.
- Overcast Stitch: For neatening fabric edges to prevent fraying.
3.2 Рэгуляванне даўжыні і шырыні сцежка
Use the stitch length dial to adjust the length of your stitches. A higher number indicates a longer stitch. Use the stitch width dial to adjust the width of zigzag or decorative stitches. For straight stitch, the width control typically centers the needle.
3.3 Starting and Stopping Sewing
- Пакладзеце тканіна пад лапку.
- Lower the presser foot using the presser foot lifter.
- Turn the handwheel towards you to lower the needle into the fabric at the starting point.
- Gently press the foot controller to start sewing. The harder you press, the faster the machine will sew.
- Guide the fabric gently with both hands, but do not push or pull forcefully.
- To stop, release pressure on the foot controller.
- Raise the needle to its highest position by turning the handwheel.
- Падніміце лапку і зніміце тканіну.
- Cut the threads using the thread cutter on the machine.

выява: The presser foot holding fabric in place during sewing. Ensure the presser foot is lowered before starting to sew.
3.4 Шыццё ў адваротным кірунку
To reinforce stitches at the beginning and end of a seam, press and hold the reverse lever/button. The machine will sew backward. Release the lever/button to resume forward sewing.
3.5 Changing the Needle
Always use the correct needle type and size for your fabric. To change the needle:
- Выключыце сілкаванне і адключыце прыладу ад сеткі.
- Падніміце іголку ў самае высокае становішча.
- Паслабце іголку клamp шруба.
- Выміце старую іголку.
- Insert the new needle with the flat side facing the back, pushing it up as far as it will go.
- Зацягнуць іголку клamp надзейна закруціце.
3.6 Changing the Presser Foot
Different sewing tasks require different presser feet. To change the presser foot:
- Выключыце сілкаванне і адключыце прыладу ад сеткі.
- Падніміце пад'ёмнік лапкі.
- Press the black button on the back of the presser foot holder to release the current foot.
- Position the new presser foot so its pin aligns with the groove on the presser foot holder.
- Lower the presser foot lifter until the foot snaps into place.
4. Тэхнічнае абслугоўванне
Рэгулярнае тэхнічнае абслугоўванне забяспечвае даўгавечнасць і аптымальную прадукцыйнасць вашай швейнай машыны.
4.1 Чыстка прылады
Lint and dust can accumulate in the bobbin area and feed dogs, affecting stitch quality. Clean these areas regularly:
- Выключыце сілкаванне і адключыце прыладу ад сеткі.
- Зніміце іголку і лапку.
- Remove the needle plate (usually by unscrewing or sliding a latch).
- Use a small brush to remove lint and dust from the bobbin case area and feed dogs. Do not use compressed air, as it can push lint further into the machine.
- Reassemble the needle plate, presser foot, and needle.
4.2 Oiling (If Applicable)
The Janome Model 3090 is designed to be largely maintenance-free regarding lubrication for the user. If your machine requires oiling, refer to a specialized service manual or contact a Janome service center. Do not oil parts unless specifically instructed, as this can damage the machine.
4.3 Захоўванне
When not in use, cover the machine with its dust cover to protect it from dust and debris. Store it in a dry, stable environment.

выява: The protective dust cover for the Janome Electric Sewing Machine. Using the cover helps keep the machine clean when not in use.
5. Выпраўленне непаладак
У гэтым раздзеле разглядаюцца распаўсюджаныя праблемы, з якімі вы можаце сутыкнуцца. Калі ў вас праблемы, якія не пералічаны тут, звярніцеся ў службу падтрымкі кліентаў.
5.1 Машына не запускаецца
- Праверце магутнасць: Ensure the power cord is securely plugged into both the machine and the electrical outlet.
- Выключальнік сілкавання: Пераканайцеся, што выключальнік харчавання знаходзіцца ў становішчы «ON».
- Нажны кантролер: Ensure the foot controller is properly connected.
- Намотвальнік шпулькі: Make sure the bobbin winder spindle is pushed to the left (off the winding position).
5.2 Skipped Stitches
- Іголка: Replace the needle. A bent or dull needle can cause skipped stitches. Ensure the needle is inserted correctly.
- Тып іголкі: Use the correct needle type and size for your fabric.
- разьба: Re-thread the upper thread and re-insert the bobbin, ensuring correct tension.
5.3 Thread Breakage
- разьба: Check if the machine is threaded correctly, both upper and bobbin threads.
- Напружанне: Adjust the upper thread tension. It might be too tight.
- Іголка: A bent, dull, or incorrect needle can cause thread breakage. Replace if necessary.
- Thread Quality: Use good quality thread. Old or poor-quality thread can break easily.
- Lint: Clean the bobbin area and tension discs from lint buildup.
5.4 Uneven Stitches / Looping
- Напружанне: Adjust the upper and bobbin thread tension. Incorrect tension is the most common cause of uneven stitches.
- разьба: Ensure both threads are correctly threaded through all guides and tension discs.
- Шпулька: Check if the bobbin is wound evenly and inserted correctly.
6. Тэхнічныя характарыстыкі
| Асаблівасць | Дэталь |
|---|---|
| Вытворца | Джаноме |
| Нумар мадэлі | 3090 |
| Памеры ўпакоўкі | 50.6 х 42.6 х 25.6 см |
| Матэрыял | Алюміній |
| Колер | Белы |
| Вага ўпакоўкі | 8.96 кг |
| Вага прадмета | 8 кг |
| Крыніца харчавання | Правадная электрычная |
| Патрабуюцца батарэі | няма |
| Батарэі ўваходзяць у камплект | няма |
7. Гарантыя і падтрымка
Janome products are manufactured to high-quality standards. For information regarding your product's warranty, please refer to the warranty card included with your purchase or visit the official Janome website. For technical support, service, or to order replacement parts, please contact Janome customer service through their official channels.
Janome Official Webсайт: www.janome.co.jp (Please note: This link is for informational purposes and may lead to a Japanese website. Look for your regional Janome webсайт для мясцовай падтрымкі.)