
1. Уводзіны
This manual provides detailed instructions for the proper setup, operation, and maintenance of your AVerMedia AVerVision CP135 Document Camera. Please read this manual thoroughly before using the device to ensure optimal performance and safety. The AVerVision CP135 is designed to capture and display documents, objects, and images with clarity, making it suitable for educational and presentation environments.
2. Інфармацыя па бяспецы
- крыніца харчавання: Use only the power adapter supplied with the unit. Using an unauthorized adapter may damage the device and void the warranty.
- Вентыляцыя: Забяспечце належную вентыляцыю вакол прылады. Не блакуйце вентыляцыйныя адтуліны.
- Асяроддзе: Avoid exposing the device to moisture, extreme temperatures, or direct sunlight. Operate in a clean, dry environment.
- Апрацоўка: Handle the flexible arm and camera head with care. Avoid excessive force or sudden movements.
- Абслугоўванне: Не спрабуйце адкрываць або абслугоўваць прыладу самастойна. Давярайце любыя паслугі па абслугоўванні кваліфікаванаму персаналу.
3. Змесціва ўпакоўкі
Калі ласка, праверце змесціва пакета, каб пераканацца ў наяўнасці ўсіх прадметаў:
- AVerMedia AVerVision CP135 Document Camera Unit
- Адаптар сілкавання
- Кабель VGA
- Кабель USB
- Пульт дыстанцыйнага кіравання (з батарэйкамі)
- Quick Guide / User Manual CD (if applicable)
4. Прадукт скончыўсяview
Familiarize yourself with the various components and ports of the AVerVision CP135.

Figure 4.1: Front-Side View of the CP135. This image displays the overall structure of the AVerVision CP135, including the base unit, flexible arm, and camera head. The control panel is visible on the base.

Малюнак 4.2: бок View of the CP135. гэта view highlights the flexible gooseneck arm, which allows for versatile positioning of the camera head to capture various angles and objects.

Figure 4.3: Camera Head with Integrated LED Lighting. A close-up of the camera lens and the built-in LED lights, which provide illumination for clear image capture, especially in low-light conditions.

Малюнак 4.4: Заднія парты падключэння. This image shows the various input and output ports on the rear of the base unit, including VGA input (RGB INPUT), VGA output (RGB OUT), Composite Video output (VIDEO OUTPUT), and S-Video output (S-VIDEO OUTPUT).

Малюнак 4.5: унізе View of the CP135. The underside of the unit, displaying the product label with model information, serial number, and power requirements. Note the warning: "DO NOT OPEN THE CASE".
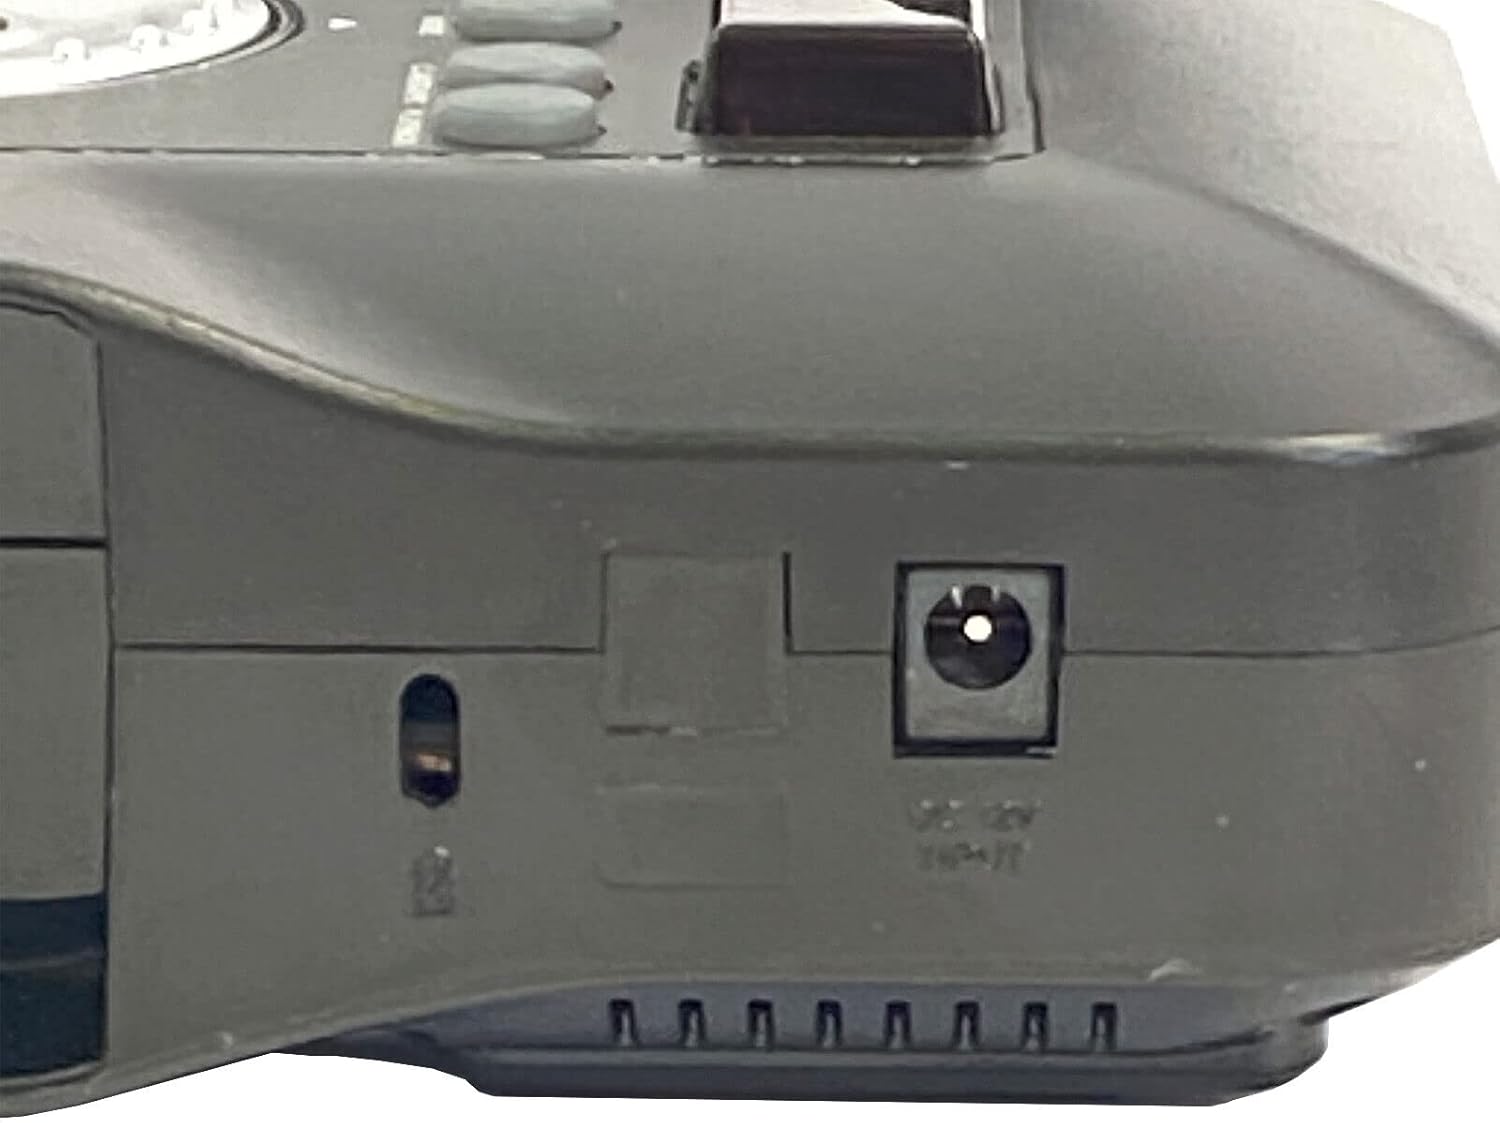
Малюнак 4.6: Уваходнае харчаванне пастаяннага току 12 В. A close-up of the DC 12V power input port located on the side of the base unit, where the power adapter connects.

Малюнак 4.7: Верхняя панэль кіравання. This image shows the main control panel on the base unit, featuring buttons for power, mode selection, camera/PC toggle, zoom, focus, menu, freeze, effects, auto tune, and capture/delete functions.
5. Настройка
- Распакуйце блок: Carefully remove the AVerVision CP135 from its packaging.
- Размясціце камеру: Place the base unit on a stable, flat surface. Adjust the flexible arm to position the camera head over the desired object or document.
- Падключыце харчаванне: Insert the DC plug of the power adapter into the DC 12V IN port on the side of the base unit (refer to Figure 4.6). Plug the power adapter into a standard electrical outlet.
- Падключэнне да дысплея/камп'ютара:
- For Projector/Monitor: Connect a VGA cable from the VGA OUT port (RGB OUT) on the CP135 to the VGA input of your projector or monitor.
- Для кампутара: Connect a USB cable from the USB port on the CP135 (if available, typically on the side or rear) to a USB port on your computer. Install any necessary drivers or software provided by AVerMedia.
- For TV/VCR: Use the Composite Video (VIDEO OUTPUT) or S-Video (S-VIDEO OUTPUT) ports for connection to compatible devices.
- Уключэнне: Націсніце УЛАДА button on the control panel (Figure 4.7) to turn on the unit.
6. Інструкцыя па эксплуатацыі
6.1 Асноўныя аперацыі
- Уключэнне/выключэнне харчавання: Націсніце УЛАДА для ўключэння або выключэння прылады.
- Camera/PC Mode: Націсніце CAMERA/PC button to switch between displaying the camera's live image and a connected computer's output.
- Маштаб: Выкарыстоўвайце ПАВЯЛІЧЫЦЬ (+) і ЗМЯНШЭННЯ (-) buttons to adjust the magnification of the image.
- Фокус: Націсніце АЎТАНАСТРОЙКА button for automatic focus adjustment. Manual focus may also be available via menu options.
- Замарожванне выявы: Націсніце ЗАМАРЫЦЬ button to pause the live image. Press again to resume.
- Святлодыёднае асвятленне: The integrated LED lights (Figure 4.3) can be toggled on/off or adjusted for brightness via the control panel or remote control, if available.
6.2 Advanced Functions (via Menu)
Націсніце МЕНЮ button to access advanced settings. Use the directional buttons and УВОД to navigate and select options. Common menu options include:
- Карэкціроўкі выявы: Brightness, Contrast, Color, White Balance.
- Эфекты: Positive/Negative, Black & White, Mirror, Rotate.
- дазвол: Adjust output resolution to match your display.
- Capture/Delete: If the unit has internal memory or a connected storage device, these buttons allow capturing images or deleting stored files.
7. Тэхнічнае абслугоўванне
- Ачыстка аб'ектыва: Выкарыстоўвайце мяккую тканіну без ворса, спецыяльна распрацаваную для аптычных лінзаў, каб акуратна працерці аб'ектыў камеры. Не выкарыстоўвайце абразіўныя ачышчальнікі або растваральнікі.
- Ачыстка прылады: Wipe the exterior of the unit with a soft, dry cloth. For stubborn dirt, a slightly damp cloth can be used, followed by a dry cloth. Ensure no liquid enters the unit.
- захоўванне: When not in use, store the document camera in a cool, dry place, away from direct sunlight and dust.
8. Выпраўленне непаладак
| праблема | Магчымая прычына | Рашэнне |
|---|---|---|
| Няма ўлады | Power adapter not connected; Power outlet faulty; Unit not turned on. | Ensure power adapter is securely connected to the unit and a working outlet. Press the POWER button. |
| Няма выявы на дысплеі | Incorrect input selected on display; Cable not connected properly; Camera/PC mode incorrect. | Select the correct input source on your projector/monitor. Check all cable connections. Press CAMERA/PC button to switch modes. |
| Відарыс размыты | Out of focus; Object too close/far; Lens dirty. | Press AUTO TUNE for auto-focus. Adjust the distance of the object from the camera. Clean the camera lens. |
| Выява занадта цёмная/яркая | Insufficient/excessive lighting; Brightness/contrast settings incorrect. | Adjust ambient lighting. Use the built-in LED lights. Adjust brightness and contrast settings via the menu. |
9. Тэхнічныя характарыстыкі
- Марка: AVerMedia
- мадэль: AVerVision CP135
- Сумяшчальныя прылады: Camera (Document Camera)
- Падключэнне: VGA Input, VGA Output, Composite Video Output, S-Video Output, DC 12V Power Input
- Вага прадмета: Прыблізна 8.82 фунтаў (4 кг)
- вытворца: AVer Information
- UPC: 848090001183
- ASIN: B006V664TI
10. Гарантыя і падтрымка
For information regarding warranty coverage, technical support, and service, please refer to the warranty card included with your product or visit the official AVerMedia website. AVerMedia provides resources and contact information for customer assistance.
AVerMedia Official Webсайт: www.avermedia.com