1. Уводзіны
The Celestron Advanced VX 8" Newtonian telescope (Model 32062) is a high-performance instrument designed for both visual astronomical observation and astrophotography. This manual provides essential instructions for the assembly, operation, and maintenance of your telescope system.
Key features include an 8-inch (200mm) f/5 optical design with a 1000mm focal length, engineered to minimize chromatic and spherical aberration for clear and sharp images. The robust Advanced VX equatorial mount offers enhanced stability, improved tracking performance, and advanced features such as NexStar+ hand control and All-Star Polar Alignment, making it suitable for a wide range of celestial viewing and imaging activities.
2. Налада і зборка
2.1 Распакаванне
Carefully unpack all components from their packaging. It is recommended to keep the original packaging for future transport or storage. Verify that all parts listed in the packing list are present.
2.2 Mount Assembly
- Налада штатыва: Extend the tripod legs to a suitable height and secure them. Ensure the tripod is stable on a level surface.
- Mount Head Attachment: Place the Advanced VX mount head onto the tripod's mounting platform and secure it using the central bolt.
- Counterweight Shaft: Thread the counterweight shaft into the mount head.
- Counterweight Installation: Slide the counterweight onto the counterweight shaft and secure it with the locking knob. The number of counterweights required depends on the weight of the optical tube.

Image: The Advanced VX equatorial mount head, ready for tripod attachment.
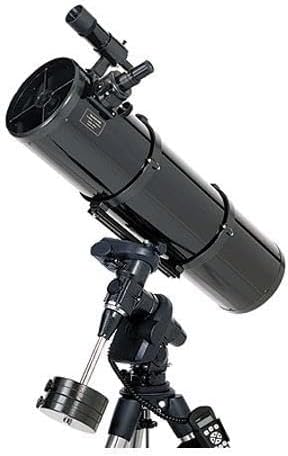
Image: A single counterweight for balancing the telescope on the mount.
2.3 Optical Tube Assembly (OTA) Attachment
- Пласціна з ластаўчын хвост: Ensure the 8" Newtonian optical tube has its dovetail plate securely attached.
- Мантаж: Open the dovetail clamp on the Advanced VX mount. Carefully place the optical tube's dovetail plate into the clamp and tighten the locking knobs until the tube is firmly secured.
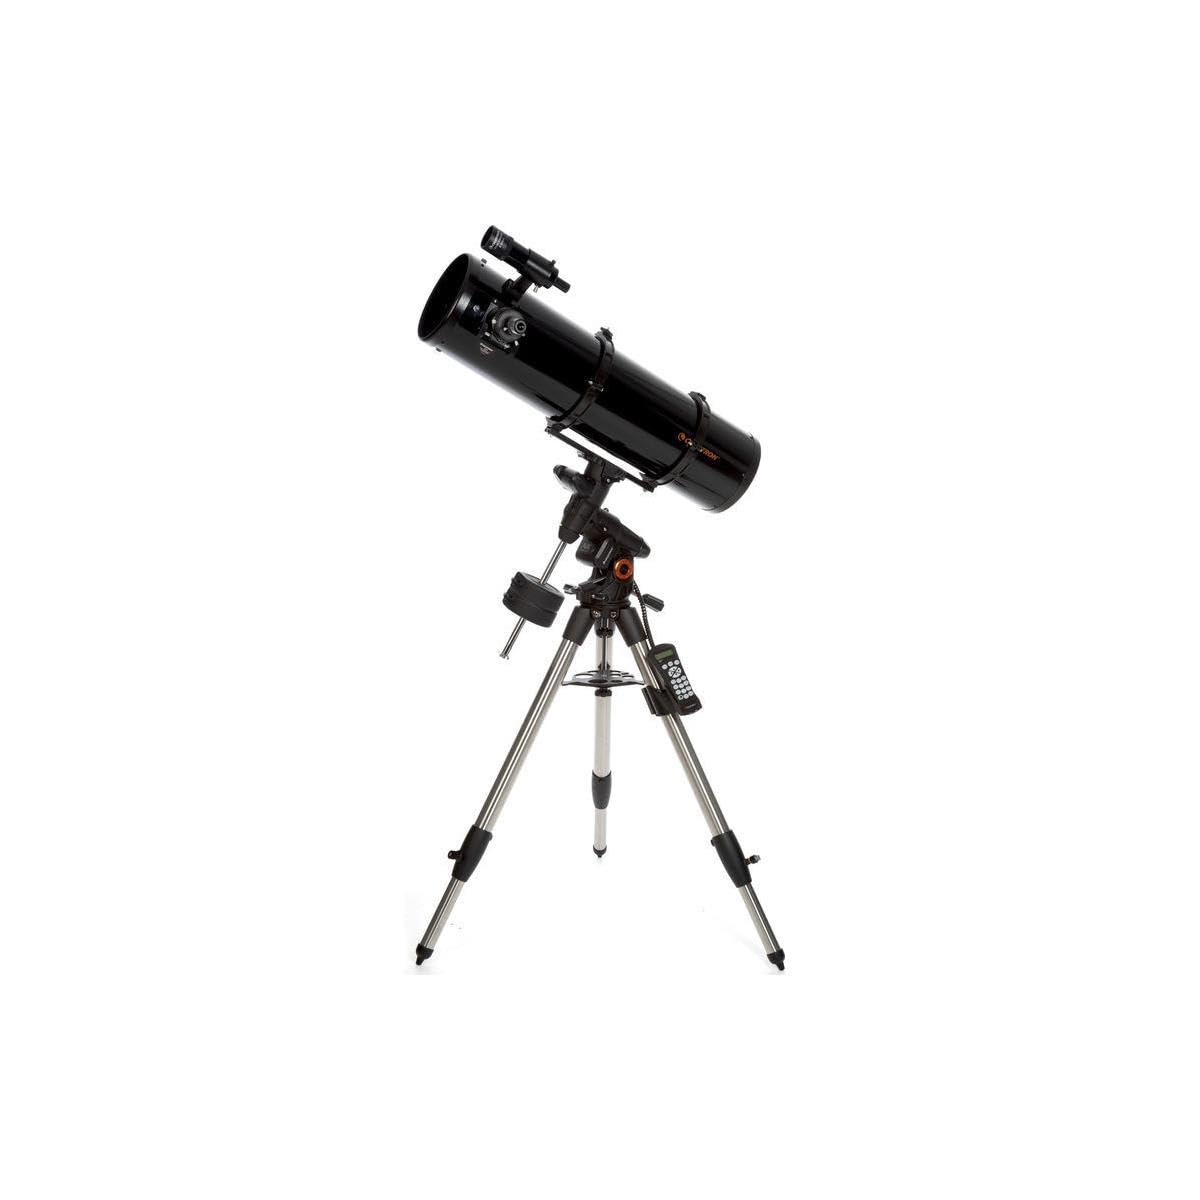
Image: The Celestron Advanced VX 8" Newtonian telescope fully assembled on its equatorial mount and tripod.
2.4 Устаноўка аксесуараў
- Акуляр: Insert the desired eyepiece into the focuser and secure it with the thumbscrew.
- Шукальнік: Attach the reflex finderscope to its bracket on the optical tube. Align the finderscope with the main telescope during daylight hours on a distant object.
- Ручны кантролер: Connect the NexStar+ hand controller to the designated port on the mount.
2.5 Падключэнне харчавання
Connect the DC power supply to the mount's power input jack. Ensure a stable power source is used for optimal performance.
3. Інструкцыя па эксплуатацыі
3.1 Балансіроўка мацавання
Proper balancing is crucial for smooth tracking and to prevent strain on the mount's motors.
- Declination Axis: With the Right Ascension (RA) clutch locked, unlock the Declination (DEC) clutch. Adjust the optical tube within its dovetail clamp until it remains stationary when released. Lock the DEC clutch.
- Right Ascension Axis: With the DEC clutch locked, unlock the RA clutch. Slide the counterweights along the counterweight shaft until the telescope remains stationary when released. Lock the RA clutch.
3.2 Палярнае выраўноўванне
For accurate tracking, especially for astrophotography, polar alignment is essential. The Advanced VX mount features Celestron's All-Star Polar Alignment procedure, which uses any bright star to assist in precise alignment. Refer to the NexStar+ hand controller manual for detailed steps on performing All-Star Polar Alignment.
3.3 Using the NexStar+ Hand Controller
The NexStar+ hand controller provides access to the mount's GoTo capabilities, object databases, and alignment procedures.
- Уключэнне: Turn on the mount. The hand controller will display a welcome message.
- Першапачатковая ўстаноўка: Follow the on-screen prompts to enter date, time, and location.
- Выраўноўванне: Perform a star alignment (e.g., 2-star alignment) as guided by the hand controller to enable accurate GoTo functionality.
- Выбар аб'екта: Use the menu buttons to navigate through object catalogs (e.g., Messier, NGC, Planets) and select a target. Press ENTER to slew the telescope to the selected object.
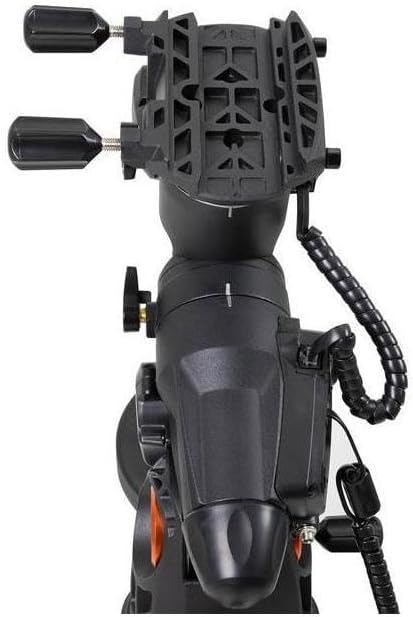
Image: The Advanced VX mount with the NexStar+ hand controller connected via its coiled cable.
3.4 Факусоўка
The 8" Newtonian telescope uses manual focus. Rotate the focuser knobs until the celestial object appears sharp in the eyepiece. For fine adjustments, use a focusing mask or a high-power eyepiece.
3.5 Tracking and PEC
Once aligned, the Advanced VX mount will automatically track celestial objects as they move across the sky. The mount features permanently programmable Periodic Error Correction (PEC), which helps to eliminate recurring tracking errors from the worm gear, improving long-exposure astrophotography results.
4. Тэхнічнае абслугоўванне
4.1 Чыстка оптыкі
- Выдаленне пылу: Use a soft camel hair brush or compressed air (specifically for optics) to gently remove dust from the primary mirror and eyepieces.
- Smudges/Fingerprints: For stubborn smudges, use a specialized optical cleaning solution and lens tissue. Apply the solution to the tissue, not directly to the lens/mirror, and wipe gently in a circular motion from the center outwards. Avoid touching optical surfaces with bare hands.
4.2 Калімацыя
Newtonian telescopes require periodic collimation (alignment of the mirrors) to ensure optimal image quality. The 8" Newtonian features a parabolic primary mirror, which benefits from precise collimation. This can be done using a collimation eyepiece or a laser collimator. Refer to specialized guides or the Celestron support website for detailed collimation procedures.
4.3 Захоўванне
When not in use, store the telescope in a clean, dry environment. Cover the optical tube with dust caps and consider using a padded case for protection against impacts and moisture.
5. Выпраўленне непаладак
- Няма харчавання: Check power connections, ensure the DC power supply is functioning, and verify the power source.
- Tracking Errors: Ensure the mount is properly balanced and accurately polar aligned. Recalibrate PEC if necessary.
- Размытыя выявы: Check focus. If still blurry, verify collimation of the mirrors. Ensure eyepieces are clean and free of condensation.
- GoTo Inaccuracy: Re-perform the star alignment procedure. Ensure correct date, time, and location are entered into the hand controller. Verify the finderscope is accurately aligned with the main telescope.
- Mount Noise: Some motor noise is normal. Excessive or unusual noise may indicate an issue with balancing or internal components. Ensure clutches are properly engaged/disengaged.
For more detailed troubleshooting, consult the full NexStar+ hand controller manual or the Celestron support webсайт.
6. Тэхнічныя характарыстыкі
| Марка | Целестрон |
| Назва мадэлі | 32062 |
| Аптычны дызайн | Адбівальнік Ньютана |
| Дыяметр лінзы аб'ектыва | 200 міліметраў (8 цалі) |
| Фокусная адлегласць | 1000 міліметры |
| Каэфіцыент ачагоў | f/5 |
| Telescope Mount Type | Equatorial Mount (Advanced VX) |
| Шукальнік | Рэфлекс |
| Тып фокусу | Ручная факусоўка |
| Крыніца харчавання | Блок харчавання пастаяннага току |
| Вага прадмета | 103.2 фунта |
| Памеры прадукту (Д х Ш х У) | 8" Г x 15.98" Ш x 17.99" У |
| Сумяшчальныя прылады | Hand Controller, Camera, Eyepiece |
| Пакрыццё | Цалкам пакрыты |
| Дадатковыя магчымасці | All-Star Polar Alignment, Celestron PWI telescope control software, SkyAlign, permanently programmable periodic error correction (PPEC) |
7. Інфармацыя аб гарантыі
This Celestron product is covered by a limited warranty against defects in materials and workmanship. For specific warranty terms, duration, and registration details, please refer to the warranty card included with your product or visit the official Celestron webсайт. Захоўвайце пацвярджэнне пакупкі для прэтэнзій па гарантыі.
8. Падтрымка кліентаў
Should you encounter any issues or require further assistance with your Celestron Advanced VX 8" Newtonian telescope, please contact Celestron customer support.
- Інтэрнэт-рэсурсы: Наведайце афіцыйны сайт Celestron website for FAQs, updated manuals, software downloads, and technical support articles.
- Кантактная інфармацыя: Refer to the Celestron website for current contact methods, including phone numbers and email support.