1. Уводзіны
This manual provides detailed instructions for the installation, operation, and maintenance of your SpeaKa Professional DL-1117 In-Wall/Ceiling Speaker. Please read this manual thoroughly before installation and use to ensure proper function and safety. Keep this manual for future reference.
2. Прадукт скончыўсяview
The SpeaKa Professional DL-1117 is a high-quality in-wall/ceiling speaker designed for various audio applications in both residential and industrial environments. Its robust metallic construction ensures durability and reliable performance.

Малюнак 2.1: Фронт view of the SpeaKa Professional DL-1117 In-Wall/Ceiling Speaker. This image shows the speaker's front grille and mounting frame.
Асноўныя характарыстыкі:
- Ideal for wall and ceiling mounting.
- Suitable for industrial and residential spaces.
- Solid metallic construction for enhanced durability.
3. Тэхнічныя характарыстыкі
| Спецыфікацыя | Каштоўнасць |
|---|---|
| Марка | SpeaKa Professional |
| Назва мадэлі | ДЛ-1117 |
| Нумар мадэлі тавару | СП-1207908 |
| Тып дынаміка | In-Wall/Ceiling Speaker |
| Памер дынаміка | 8 Inches (77mm INWALL SPEAKER as per label) |
| Імпеданс | 8 Ом |
| Power (Nominal) | 15 ват |
| Максімальная выходная магутнасць дынаміка | 25 ват |
| АЧХ | 90Hz - 17,000Hz (as per label) |
| Тып мацавання | Ceiling Mount (also suitable for wall mount) |
| Памеры прадукту (Д х Ш х У) | 11 х 11 х 7 см |
| Вага прадмета | 520 грам |
| Колер | Чорны |
| Колькасць адзінак | 1 адзінка |
| Рэкамендуемае выкарыстанне | For computer (audio output), general audio systems |
| Сумяшчальныя прылады | Desktop computer, Laptop (via amplifier/receiver) |

Малюнак 3.1: Dimensional drawing of the SpeaKa Professional DL-1117 speaker. This diagram illustrates the speaker's diameter (Ø100mm), depth (49mm), and cutout dimensions (Ø74mm, Ø81mm).
Малюнак 3.2: Назад view of the SpeaKa Professional DL-1117 speaker, showing the product label with model number DL-1117BK8, frequency response, power rating, and impedance.
4. Інструкцыі па тэхніцы бяспекі
Калі ласка, выконвайце наступныя меры бяспекі, каб пазбегнуць траўмаў або пашкоджання прадукту:
- Электрабяспека: Ensure all power to the audio system is disconnected before making any connections or performing installation. Incorrect wiring can cause damage to the speaker or ampзадымнік.
- Ўстаноўка: Installation should be performed by a qualified professional if you are unsure about electrical wiring or structural integrity. Ensure the mounting surface (wall or ceiling) can safely support the weight of the speaker.
- Асяроддзе: Do not expose the speaker to excessive moisture, extreme temperatures, or direct sunlight.
- Уборка: Выкарыстоўвайце для чысткі мяккую сухую тканіну. Не выкарыстоўвайце вадкія ачышчальнікі або аэразолі.
- Разборка: Do not attempt to disassemble or modify the speaker. This will void the warranty and may cause damage or injury.
5. Настройка і ўстаноўка
Follow these steps for proper installation of your in-wall/ceiling speaker:
5.1 Неабходныя інструменты
- Дрыль
- Hole saw (matching cutout diameter, approx. Ø74-81mm)
- Адвёртка
- Прылады для зачысткі правадоў
- Speaker wire (appropriate gauge for your amplifier and cable length)
5.2 Месца мацавання
Choose a suitable location in your wall or ceiling. Ensure there are no electrical wires, plumbing, or structural elements behind the chosen area. Use a stud finder if necessary.
5.3 Выразанне праёму
- Carefully mark the desired cutout diameter on the wall or ceiling. Refer to the dimensions in Figure 3.1.
- Using a hole saw, carefully cut the opening.
5.4 Электраправодка
- Run speaker wire from your amplifier/receiver to the cutout opening.
- Strip approximately 1/2 inch (12mm) of insulation from the ends of the speaker wire.
- Connect the speaker wires to the terminals on the back of the DL-1117 speaker. Ensure correct polarity (+ to + and - to -) from the amplifier to the speaker. The terminals are typically screw-type or spring-loaded.
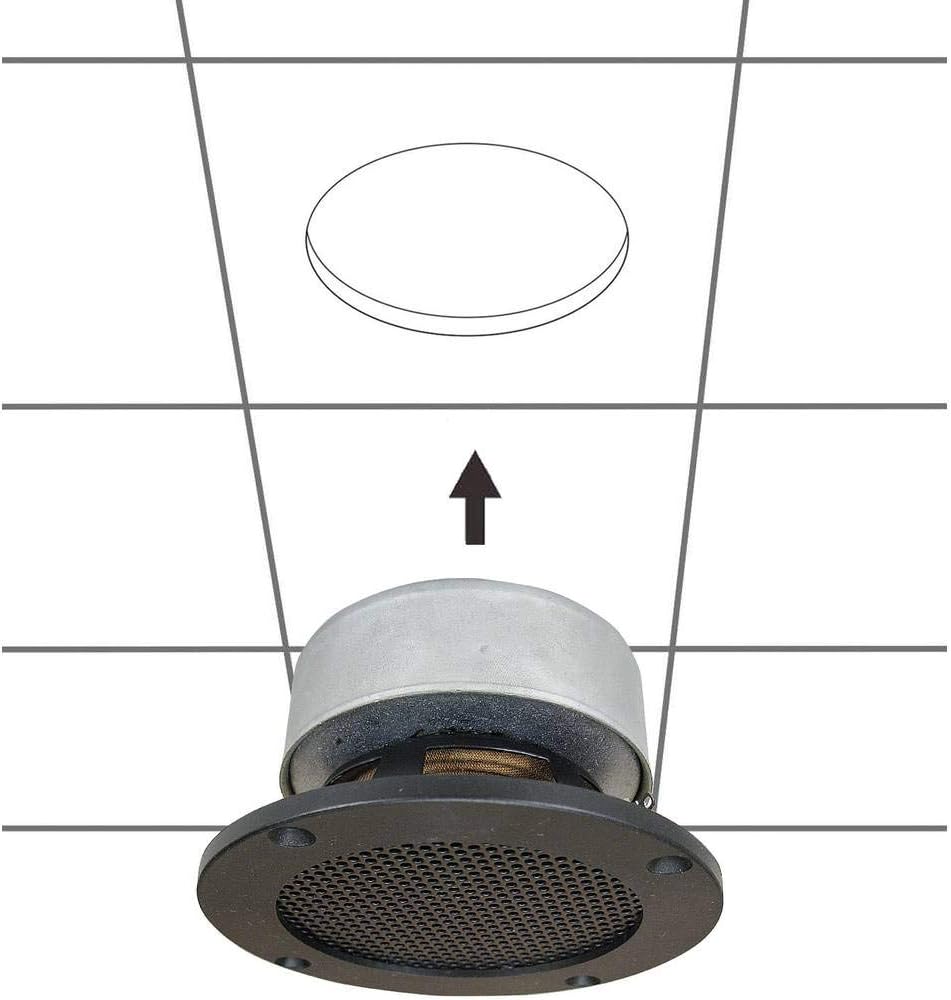
5.5 Installing the Speaker
- Carefully insert the speaker into the cutout opening.
- Secure the speaker using the integrated mounting clips or screws, if applicable. For this model, the design suggests it is inserted and then secured from the front.

Малюнак 5.1: Diagram illustrating the installation process of the SpeaKa Professional DL-1117 speaker into a ceiling opening. The speaker is inserted from below into the pre-cut hole.
6. Інструкцыя па эксплуатацыі
Once the speaker is correctly installed and wired to your amplifier or receiver:
- Пераканайцеся, што ўсе злучэнні надзейныя.
- Уключыце свой ampліфатор/прыёмнік.
- Start playing audio through your connected source.
- Адрэгулюйце гучнасць на вашым amplifier/receiver to a comfortable listening level. Avoid excessively high volumes that could distort the sound or damage the speaker.
7. Тэхнічнае абслугоўванне
The SpeaKa Professional DL-1117 speaker requires minimal maintenance:
- Уборка: Periodically wipe the speaker grille and frame with a soft, dry cloth to remove dust. Do not use abrasive cleaners or solvents.
- агляд: Occasionally check the speaker for any visible damage or loose connections.
8. Выпраўленне непаладак
Калі ў вас узніклі праблемы з дынамікам, звярніцеся да наступных распаўсюджаных праблем і іх рашэнняў:
| праблема | Магчымая прычына | Рашэнне |
|---|---|---|
| Няма гуку з дынаміка | Няспраўная або няправільная праводка Amplifier/receiver off or muted Зыходная прылада не прайгравае аўдыё | Check all speaker wire connections for proper polarity and tightness. Забяспечыць amplifier/receiver is on and not muted, and volume is up. Verify audio is playing from the source device. |
| Скажоны гук | Занадта высокая гучнасць Крыніца гуку нізкай якасці Пашкоджаны провад дынаміка | Зменшце гучнасць на вашым ampліфатор/прыёмнік. Try a different audio source to rule out source issues. Inspect speaker wires for fraying or damage and replace if necessary. |
| Перарывісты гук | Няшчыльныя сувязі Няспраўны ampканал ліф | Праверце і замацуйце ўсе злучэнні правадоў дынамікаў. Test the speaker with a different amplifier channel or a known working ampзадымнік. |
If the problem persists after trying these solutions, please contact SpeaKa Professional customer support.
9. Гарантыя і падтрымка
For warranty information and customer support, please refer to the documentation provided with your purchase or visit the official SpeaKa Professional webсайт. Захоўвайце пацвярджэнне пакупкі для прэтэнзій па гарантыі.
вытворца: SpeaKa Professional
ASIN: B00CS2V1AQ