Singer 114-50 to 114-56
Instruction Manual for Singer Sewing Machines
Models 114-50, 114-51, 114-52, 114-53, 114-54, 114-55, and 114-56
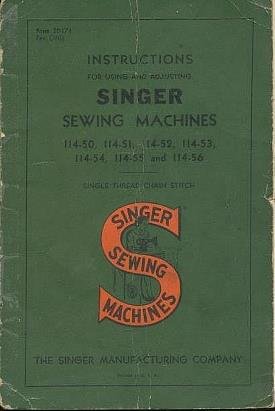
This image displays the front cover of the instruction manual for Singer Sewing Machines models 114-50 through 114-56. The cover is green with the title 'INSTRUCTIONS FOR USING AND ADJUSTING SINGER SEWING MACHINES' prominently displayed, along with the model numbers. A large orange 'S' logo for Singer Sewing Machines is also visible.
Уводзіны
This manual provides comprehensive instructions for the proper use, adjustment, and maintenance of Singer Sewing Machines models 114-50, 114-51, 114-52, 114-53, 114-54, 114-55, and 114-56. These machines are designed for single-thread chain stitch operations.
To ensure optimal performance and longevity of your machine, please read this manual thoroughly before operation and keep it for future reference. Adherence to these instructions will help you achieve consistent and high-quality results.
Настройка і ўстаноўка
1. Распакаванне і размяшчэнне
- Асцярожна выміце машыну і ўсе аксэсуары з упакоўкі.
- Place the machine on a stable, level surface, ensuring adequate space for operation and material handling.
- Ensure the area is well-lit and free from obstructions.
2. Падключэнне сілкавання
- Connect the power cord to the machine and then to a suitable electrical outlet. Verify that the voltagе адпавядае патрабаванням машыны.
- Ensure the power switch is in the "OFF" position before connecting to power.
3. Запраўка ніткі ў машыну
Proper threading is crucial for correct stitch formation. Follow these general steps:
- Надзеньце шпульку з ніткамі на штыфт.
- Правядзіце нітку праз дыскі нацяжэння.
- Прапусціце нітку праз рычаг ніткапрыцягвальніка.
- Запраўце нітку ў іголку спераду назад.
- Pull a sufficient length of thread through the needle eye.
Інструкцыя па эксплуатацыі
1. Асноўная аперацыя
- Кіраванне нажной педаллю: The speed of the machine is controlled by the pressure applied to the foot pedal. Press gently for slower speeds and more firmly for faster speeds.
- Needle Position: Always ensure the needle is in its highest position before placing or removing fabric.
2. Stitching
- Падніміце лапку.
- Place the fabric under the presser foot, aligning the edge with the desired seam allowance guide.
- Апусціце лапку.
- Begin sewing by gently pressing the foot pedal. Guide the fabric smoothly through the machine.
- At the end of the seam, raise the needle to its highest position, lift the presser foot, and remove the fabric.
- Cut the thread, leaving a tail of a few inches.
3. Adjusting Stitch Length and Tension
- Даўжыня сцежка: Refer to the stitch length regulator dial or lever on your specific model to adjust the length of the stitches. Turn clockwise for longer stitches, counter-clockwise for shorter stitches.
- Нацяжэнне ніткі: The tension dial controls the tightness of the thread. Adjust as needed to achieve a balanced stitch. A balanced stitch will have the thread loops meeting evenly between the layers of fabric. Increase tension if the thread is too loose, decrease if too tight.
Тэхнічнае абслугоўванне і догляд
Regular maintenance ensures the smooth operation and extends the life of your Singer sewing machine.
1. Уборка
- Штодзённая ўборка: After each use, remove lint and dust from the needle plate area, feed dogs, and bobbin case using a small brush.
- Перыядычная чыстка: Refer to your machine's specific instructions for removing the needle plate and cleaning deeper areas where lint can accumulate.
- Always disconnect the machine from power before cleaning.
2. Oiling
- Apply a small drop of high-quality sewing machine oil to designated oiling points as indicated in your machine's diagrams.
- Oiling frequency depends on usage; for regular use, oil weekly or bi-weekly.
- Do not over-oil, as excess oil can attract lint and dust.
3. Замена іголкі
- Replace the needle regularly, especially after 8-10 hours of sewing or if it becomes bent, dull, or burred.
- Use only the correct type and size of needle for your machine and fabric.
- To replace, loosen the needle clamp шруба, выміце старую іголку, устаўце новую іголку плоскім бокам назад і надзейна зацягніце шрубу.
Ліквідацыю распаўсюджаных праблем
У гэтым раздзеле разглядаюцца распаўсюджаныя праблемы, з якімі вы можаце сутыкнуцца, і іх магчымыя рашэнні.
| праблема | Магчымая прычына | Рашэнне |
|---|---|---|
| Прапушчаныя шыўкі | Incorrect needle insertion, bent needle, wrong needle type, improper threading. | Re-insert needle correctly, replace needle, use correct needle for fabric, re-thread machine. |
| Абрыў ніткі | Incorrect tension, poor quality thread, burr on needle or machine parts, improper threading. | Adjust tension, use good quality thread, check for burrs, re-thread machine. |
| Няроўныя швы | Incorrect tension, inconsistent fabric feeding. | Adjust tension, ensure smooth and consistent fabric feeding. |
| Machine Jams | Thread tangled in bobbin area, lint buildup, incorrect needle. | Clear tangled thread, clean bobbin area, replace needle. |
If problems persist after attempting these solutions, consult a qualified sewing machine technician.
Тэхнічныя характарыстыкі
- Тып прадукту: Industrial Sewing Machine Manual
- Марка: Спявачка
- Ахопленыя мадэлі: 114-50, 114-51, 114-52, 114-53, 114-54, 114-55, 114-56
- Тып шва: Single Thread Chain Stitch
- вытворца: Singer Manufacturing Co.
- Дата публікацыі: January 1, 1946 (Original Manual)
Гарантыя і падтрымка
For information regarding warranty coverage or technical support for your Singer sewing machine, please refer to the original purchase documentation or contact Singer Manufacturing Co. directly. Support resources may include authorized service centers and customer service hotlines.
It is recommended to keep your purchase receipt and machine serial number readily available when seeking support.
Ask a question about this manual
Ask about setup, troubleshooting, compatibility, parts, safety, or missing instructions. Manuals+ will review the question and use this page’s manual context to help answer it.