Уводзіны
Thank you for choosing the Magnasonic EAAC470 Alarm Clock Radio. This manual provides essential instructions for setting up, operating, and maintaining your device. Please read it thoroughly to ensure proper use and to maximize the features of your alarm clock radio.
Малюнак 1: Спераду view of the Magnasonic EAAC470 Alarm Clock Radio.
Змест пакета
- Magnasonic EAAC470 Alarm Clock Radio
- Адаптар сілкавання
- Кіраўніцтва карыстальніка (гэты дакумент)
- CR2032 Lithium Battery (for backup)
Настройка
1. Падключэнне сілкавання
- Connect the power adapter to the DC input jack on the back of the alarm clock.
- Plug the power adapter into a standard wall outlet. The display will illuminate.
2. Устаноўка рэзервовага акумулятара
The EAAC470 includes a CR2032 lithium battery for backup power. This ensures that time and alarm settings are maintained during a power outage, and the alarm will still sound.
- Знайдзіце батарэйны адсек на ніжняй частцы прылады.
- Адкрыйце крышку батарэйнага адсека.
- Insert one CR2032 lithium battery, observing the correct polarity (+/-).
- Надзейна зачыніце крышку батарэйнага адсека.
3. Automatic Time Setting (SelfSet Technology)
The alarm clock is equipped with SelfSet technology, which automatically displays the correct time upon initial power-up. You only need to set your time zone.
- Upon first power-up, the clock will display a default time.
- Націсніце ЧАСАВЫ ПОЯС button (location may vary, refer to device buttons).
- Выкарыстоўвайце ГАДЗІНА or ХВІЛІНА buttons to select your correct time zone.
- The clock will automatically adjust to the correct time for your selected zone.
- Заўвага: If the time is incorrect after setting the time zone, manual adjustment may be required.
4. Manual Time and Date Adjustment
If the automatic time setting is inaccurate or if you need to adjust the time manually:
- Націсніце і ўтрымлівайце УСТАНОВА ЧАСУ кнопку, пакуль дысплей не пачне міргаць.
- Выкарыстоўвайце ГАДЗІНА і ХВІЛІНА кнопкі для ўстаноўкі бягучага часу.
- Прэса УСТАНОВА ЧАСУ яшчэ раз, каб пацвердзіць час.
- Follow similar steps to adjust the year, month, and day if necessary, using the appropriate buttons.
5. Налада FM-антэны
For optimal FM radio reception, fully extend the wire antenna located on the back of the unit. Position it for the best signal.
Інструкцыя па эксплуатацыі
1. Налада сігналаў трывогі (сігнал трывогі 1 і сігнал трывогі 2)
The EAAC470 features dual alarms that can be set independently.
- Націсніце і ўтрымлівайце любы ТРЫВОГА 1 or ТРЫВОГА 2 кнопку, пакуль не пачне міргаць час будзільніка.
- Выкарыстоўвайце ГАДЗІНА і ХВІЛІНА кнопкі, каб усталяваць патрэбны час будзільніка.
- Націсніце адпаведную ТРЫВОГА зноў націсніце кнопку, каб выбраць крыніцу будзільніка (гукавы сігнал або радыё).
- Націсніце ТРЫВОГА button a third time to select the alarm schedule (Every Day, Weekdays, Weekends).
- Націсніце ТРЫВОГА button a fourth time to confirm and activate the alarm. An alarm indicator will appear on the display.
- To disable an alarm, repeatedly press its ТРЫВОГА button until the alarm indicator disappears.
2. Праца з радыё (AM/FM)
The clock radio includes a digital AM/FM tuner with station presets.
- Націсніце РАДЫЁ ВКЛ/ВЫКЛ кнопка, каб уключыць радыё.
- Націсніце AM/FM button to switch between bands.
- Выкарыстоўвайце НАСТРОЙКА +/- кнопкі для ручной налады станцыі або націсніце і ўтрымлівайце для аўтаматычнага пошуку наступнай даступнай станцыі.
- Каб захаваць перадусталёўку:
- Настройцеся на патрэбную станцыю.
- Націсніце і ўтрымлівайце ПРАДУСТАЎКА кнопку, пакуль не пачне міргаць нумар зададзенай праграмы.
- Выкарыстоўвайце ПРАДУСТАНОЎКА +/- кнопкі, каб выбраць нумар зададзенай налады (1-20).
- Прэса ПРАДУСТАЎКА зноў, каб выратаваць станцыю.
- Каб выклікаць папярэднюю наладу: коратка націсніце кнопку ПРАДУСТАЎКА кнопку і выкарыстоўвайце ПРАДУСТАНОЎКА +/- каб пераключацца паміж захаванымі станцыямі.
- Адрэгулюйце гучнасць з дапамогай ГУЧКА +/- кнопкі.
Note on Radio Quality: The built-in speaker is designed for alarm clock functionality. Sound quality may not match dedicated audio systems. AM reception can be directional; adjust the unit's position for better clarity.
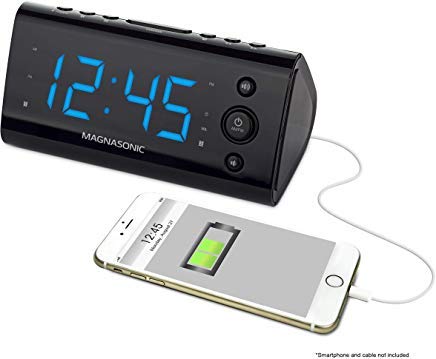
3. Порт для зарадкі USB
A convenient USB charging port is located on the front of the unit.

Малюнак 2: Спераду view highlighting the USB charging port.
Plug your smartphone, tablet, or other USB-powered device into this port to charge. This port provides power for charging and does not transfer data.
4. Display Dimming Options
The 1.2" LED display offers four brightness settings (High, Medium, Low, Off).

Figure 3: Close-up of the LED display.
Націсніце ДЫММЕР button (often integrated with the SNOOZE button) repeatedly to cycle through the brightness levels: High → Medium → Low → Off.
Note on Brightness: Even the lowest setting may appear bright in a completely dark room. The "Off" setting allows for a completely dark display if preferred.
5. Snooze and Sleep Functions
- Адклад: Калі гучыць будзільнік, націсніце кнопку СНАОЗ кнопка, каб часова адключыць сігнал будзільніка на зададзены перыяд (напрыклад, на 9 хвілін). Пасля перыяду паўторнага сігналу сігнал будзільніка зноў загучыць.
- Таймер сну: Пакуль гучыць радыё, націсніце кнопку СПАЦЬ button repeatedly to set a sleep timer (e.g., 90, 60, 30, 15 minutes). The radio will play for the selected duration and then automatically turn off.
6. Адлюстраванне тэмпературы
The unit can display the indoor temperature. Press the ТЭМП button (or a multi-function button) to cycle between time and temperature display.
Тэхнічнае абслугоўванне
Уборка
- Адключыце адаптар сілкавання перад чысткай.
- Выкарыстоўвайце мяккую сухую тканіну, каб працерці вонкавую частку прылады.
- Не выкарыстоўвайце абразіўныя ачышчальнікі, воск або растваральнікі, бо яны могуць пашкодзіць пакрыццё.
- Пазбягайце траплення вільгаці ў любыя адтуліны.
Замена батарэі
The CR2032 backup battery typically lasts for several years. If the time or settings are lost during a power outage, it may be time to replace the battery.
- Адключыце адаптар сілкавання.
- Адкрыйце адсек для батарэй у ніжняй частцы прыбора.
- Выміце старую батарэю CR2032.
- Устаўце новую літыевую батарэйку CR2032, сачыце за правільнай палярнасцю.
- Зачыніце батарэйны адсек.
- Reconnect power. You may need to reset the time zone and any manual time adjustments.
Ліквідацыю непаладак
| праблема | Магчымая прычына / рашэнне |
|---|---|
| Дысплей гадзінніка пусты або не працуе. |
|
| Сігналізацыя не гучыць. |
|
| Radio reception is poor or static. |
|
| Зарадка праз USB не працуе. |
|
| Time is incorrect after power-up. |
|
| Display is too bright even on the lowest setting. |
|
Тэхнічныя характарыстыкі
| Асаблівасць | Дэталь |
|---|---|
| Марка | Магнасічны |
| Нумар мадэлі | EAAC470 |
| Тып дысплея | Лічбавы святлодыёдны дысплей (1.2 цалі) |
| Зацямненне дысплея | 4 Options (High, Medium, Low, Off) |
| Крыніца харчавання | Адаптар пераменнага току |
| Рэзервовы акумулятар | 1 літыевая батарэйка CR2032 (у камплекце) |
| Сувязь | USB (for charging only) |
| Радыё цюнэр | Digital AM/FM (20 programmable stations) |
| Сігналізацыя | Dual Alarm with selectable source (Buzzer/Radio) and schedule |
| Асаблівасці | Auto Time Set (SelfSet), Indoor Temperature Display |
| Памеры прадукту | 6 х 3.1 х 3 цалі |
| Вага прадмета | 12 унцыі (0.75 фунта) |
| Матэрыял | Акрыланітрыл бутадыен стырол |
Інфармацыя аб гарантыі
The Magnasonic EAAC470 Alarm Clock Radio is covered by a 1 Year Manufacturer's Direct Warranty. This warranty covers defects in materials and workmanship under normal use. Please retain your proof of purchase for warranty claims. For specific terms and conditions, refer to the warranty card included with your product or visit the Magnasonic official webсайт.
Падтрымка
For further assistance, technical support, or warranty inquiries, please contact Magnasonic customer service. Contact information can typically be found on the manufacturer's webсайце або на ўпакоўцы прадукту.
Webсайт: www.magnasonic.com (Заўвага: Гэта запаўняльнік URL, please refer to official product documentation for the correct support webсайт.)