
1. Уводзіны
This manual provides detailed instructions for the assembly, operation, and maintenance of your Sharkoon VS4-W Series ATX/MicroATX Mid-Tower PC Case, model SHA-VS4-WBK. Please read this manual thoroughly before beginning installation to ensure proper setup and to maximize the lifespan of your product.
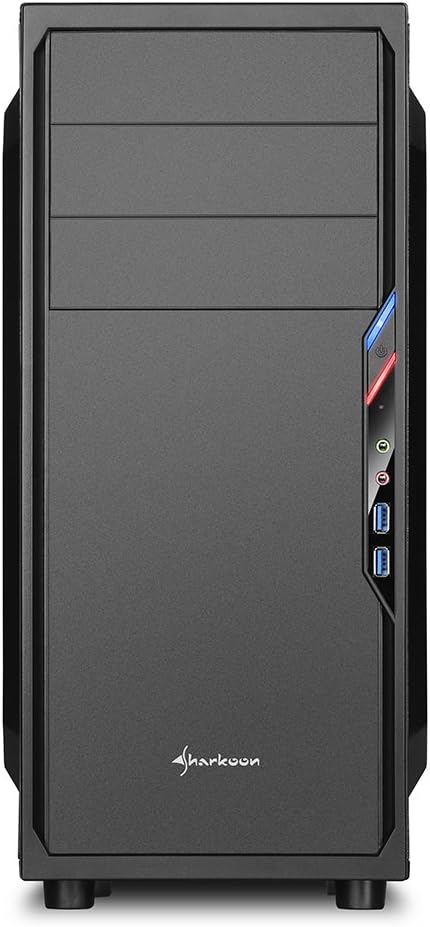
The Sharkoon VS4-W Series is designed for users seeking a cost-effective and functional PC case. It features a full-black aesthetic with an acrylic side window panel, offering a clear view of your internal components. The case supports ATX and Micro-ATX motherboards and provides ample space for various components, including multiple storage drives and long graphics cards.
2. Прадукт скончыўсяview
2.1. Асноўныя магчымасці
- Acrylic side window panel for component visibility.
- Full-black interior and exterior design.
- Support for ATX and Micro-ATX motherboards.
- Three 5.25-inch drive bays, two with tool-less mechanisms.
- Seven drive bays for storage: three 3.5-inch and four 2.5-inch.
- Generous expansion card space, up to 385mm with 2.5-inch cage removed.
- Cable management space behind the motherboard tray due to a bulged side panel design.
- Supports CPU coolers up to 160mm in height.
- Front I/O panel with 2x USB 3.0 and 2x USB 2.0 ports, plus HD Audio.
- Pre-installed 120mm front fan and 120mm blue LED rear fan.
2.2. Ідэнтыфікацыя кампанентаў



3. Настройка і ўстаноўка
3.1. Падрыхтоўка справы
- Unpack the PC case and remove all packaging materials.
- Пастаўце корпус на ўстойлівую, роўную паверхню.
- Remove the side panels by unscrewing the thumbscrews at the rear of the case.
3.2. Устаноўка мацярынскай платы
- Усталюйце шчыток уводу/вываду, які пастаўляецца ў камплекце з матчынай платай, у выраз у задняй частцы корпуса.
- Ensure standoffs are correctly aligned for your ATX or Micro-ATX motherboard. Install additional standoffs if necessary.
- Carefully place the motherboard into the case, aligning it with the standoffs and I/O shield.
- Замацуеце матчыну плату шрубамі.
3.3. Устаноўка блока сілкавання
- Mount the power supply unit (PSU) in the designated area at the bottom rear of the case.
- Замацуеце блок харчавання шрубамі з задняй часткі корпуса.
- Route necessary power cables through the cable management cutouts.
3.4. Устаноўка драйвера
- 5.25-inch Drives: For tool-less bays, slide the drive in until it clicks into place. For other bays, secure with screws.
- 3.5-inch Drives: Slide the 3.5-inch drives into the designated bays and secure them.
- 2.5-inch Drives: Mount 2.5-inch SSDs/HDDs onto the dedicated mounting points.
3.5. Усталёўка платы пашырэння
- Зніміце неабходныя вечкі слотаў PCI з задняй панэлі корпуса.
- Insert your graphics card or other expansion cards into the appropriate PCI-E slots on the motherboard.
- Secure the cards with screws. For longer graphics cards, the 2.5-inch drive cage can be removed to provide up to 385mm of space.
3.6. Кіраванне кабелем
Utilize the space behind the motherboard tray and the various cable routing holes to organize cables. This improves airflow and aesthetics.
4. Інструкцыя па эксплуатацыі
Once all components are installed and connected, replace the side panels and secure them with the thumbscrews. Connect your peripherals (monitor, keyboard, mouse, etc.) to the motherboard's I/O ports. Connect the power cable to the PSU and a wall outlet. Press the power button on the front panel to start your system.
5. Тэхнічнае абслугоўванне
5.1. Уборка
- Regularly clean dust filters (if present) to maintain optimal airflow.
- Выкарыстоўвайце сціснутае паветра для выдалення пылу з унутраных кампанентаў і вентылятараў.
- Працярыце вонкавую паверхню корпуса мяккай губкайamp тканіна. Пазбягайце абразіўных ачышчальнікаў.
5.2. Тэхнічнае абслугоўванне вентылятара
Ensure fans are free from obstructions and spinning correctly. If a fan becomes noisy or stops working, consider replacing it to maintain proper cooling.
6. Выпраўленне непаладак
6.1. Сістэма не ўключаецца
- Check all power connections, including the PSU to the wall, and internal connections to the motherboard and components.
- Пераканайцеся, што кабель кнопкі харчавання ад корпуса правільна падлучаны да раздыма пярэдняй панэлі матчынай платы.
- Пераканайцеся, што перамыкач блока харчавання знаходзіцца ў становішчы «УКЛ».
6.2. Poor Airflow/Overheating
- Clean any dust filters and internal components.
- Ensure fans are operating correctly and oriented for optimal airflow (intake/exhaust).
- Палепшыце кіраванне кабелямі, каб паменшыць перашкоды для паветранага патоку.
6.3. Front Panel USB/Audio Not Working
- Verify that the front panel USB and HD Audio cables are securely connected to the corresponding headers on your motherboard.
7. Тэхнічныя характарыстыкі
| Назва мадэлі | VS4-W Series |
| Нумар мадэлі прадукту | SHA-VS4-WBK |
| Тып корпуса | Сярэдняя вежа |
| Матэрыял | Сталь, пластык, акрыл |
| Колер | Чорны |
| Сумяшчальнасць матчыных поплаткаў | ATX, Micro-ATX |
| 5.25-цалевыя адсекі для дыскаў | 3 (2 with tool-less mechanism) |
| 3.5" Internal Drive Bays | 3 |
| 2.5-цалевыя адсекі для дыскаў | 4 |
| PCI слотаў пашырэння | 7 |
| Макс. Даўжыня відэакарты | 310mm (385mm with 2.5" cage removed) |
| Макс. Вышыня кулера працэсара | 160 мм |
| Макс. Даўжыня БП | 260 мм |
| Пярэднія парты I / O | 2x USB 3.0, 2x USB 2.0, HD Audio (Mic/Headphone) |
| Папярэдне ўсталяваныя вентылятары | Front: 1x 120mm, Rear: 1x 120mm Blue LED |
| Спосаб астуджэння | Паветранае астуджэнне |
| Памеры прадукту (Д х Ш х У) | 44.5 х 20 х 43 см |
| Вага прадмета | 3.5 кг |
8. Гарантыя і падтрымка
For warranty information and technical support, please refer to the official Sharkoon webсайт або звярніцеся да мясцовага прадаўца. Захоўвайце пацвярджэнне пакупкі для прэтэнзій па гарантыі.
Official Sharkoon Webсайт: www.sharkoon.com