1. Прадукт скончыўсяview
The Vonyx STM3030 is a compact and versatile 4-channel DJ mixer designed for various audio applications. Despite its size, it offers extensive connectivity, including two switchable phono/line inputs for turntables and three dedicated line inputs for external audio sources such as CD players, laptops, or smartphones. An integrated MP3 player allows direct music playback from USB drives or SD cards. For wireless convenience, the STM3030 features a Bluetooth receiver, enabling seamless audio streaming from compatible devices. Additionally, it includes a recording function, allowing users to capture their mixes directly to a USB drive or SD card. The mixer is equipped with an LED VU meter for visual signal monitoring and illuminated potentiometers for enhanced visibility in low-light environments. Microphone inputs are provided for vocal performances or announcements, and a headphone output facilitates pre-listening to tracks before they go live.
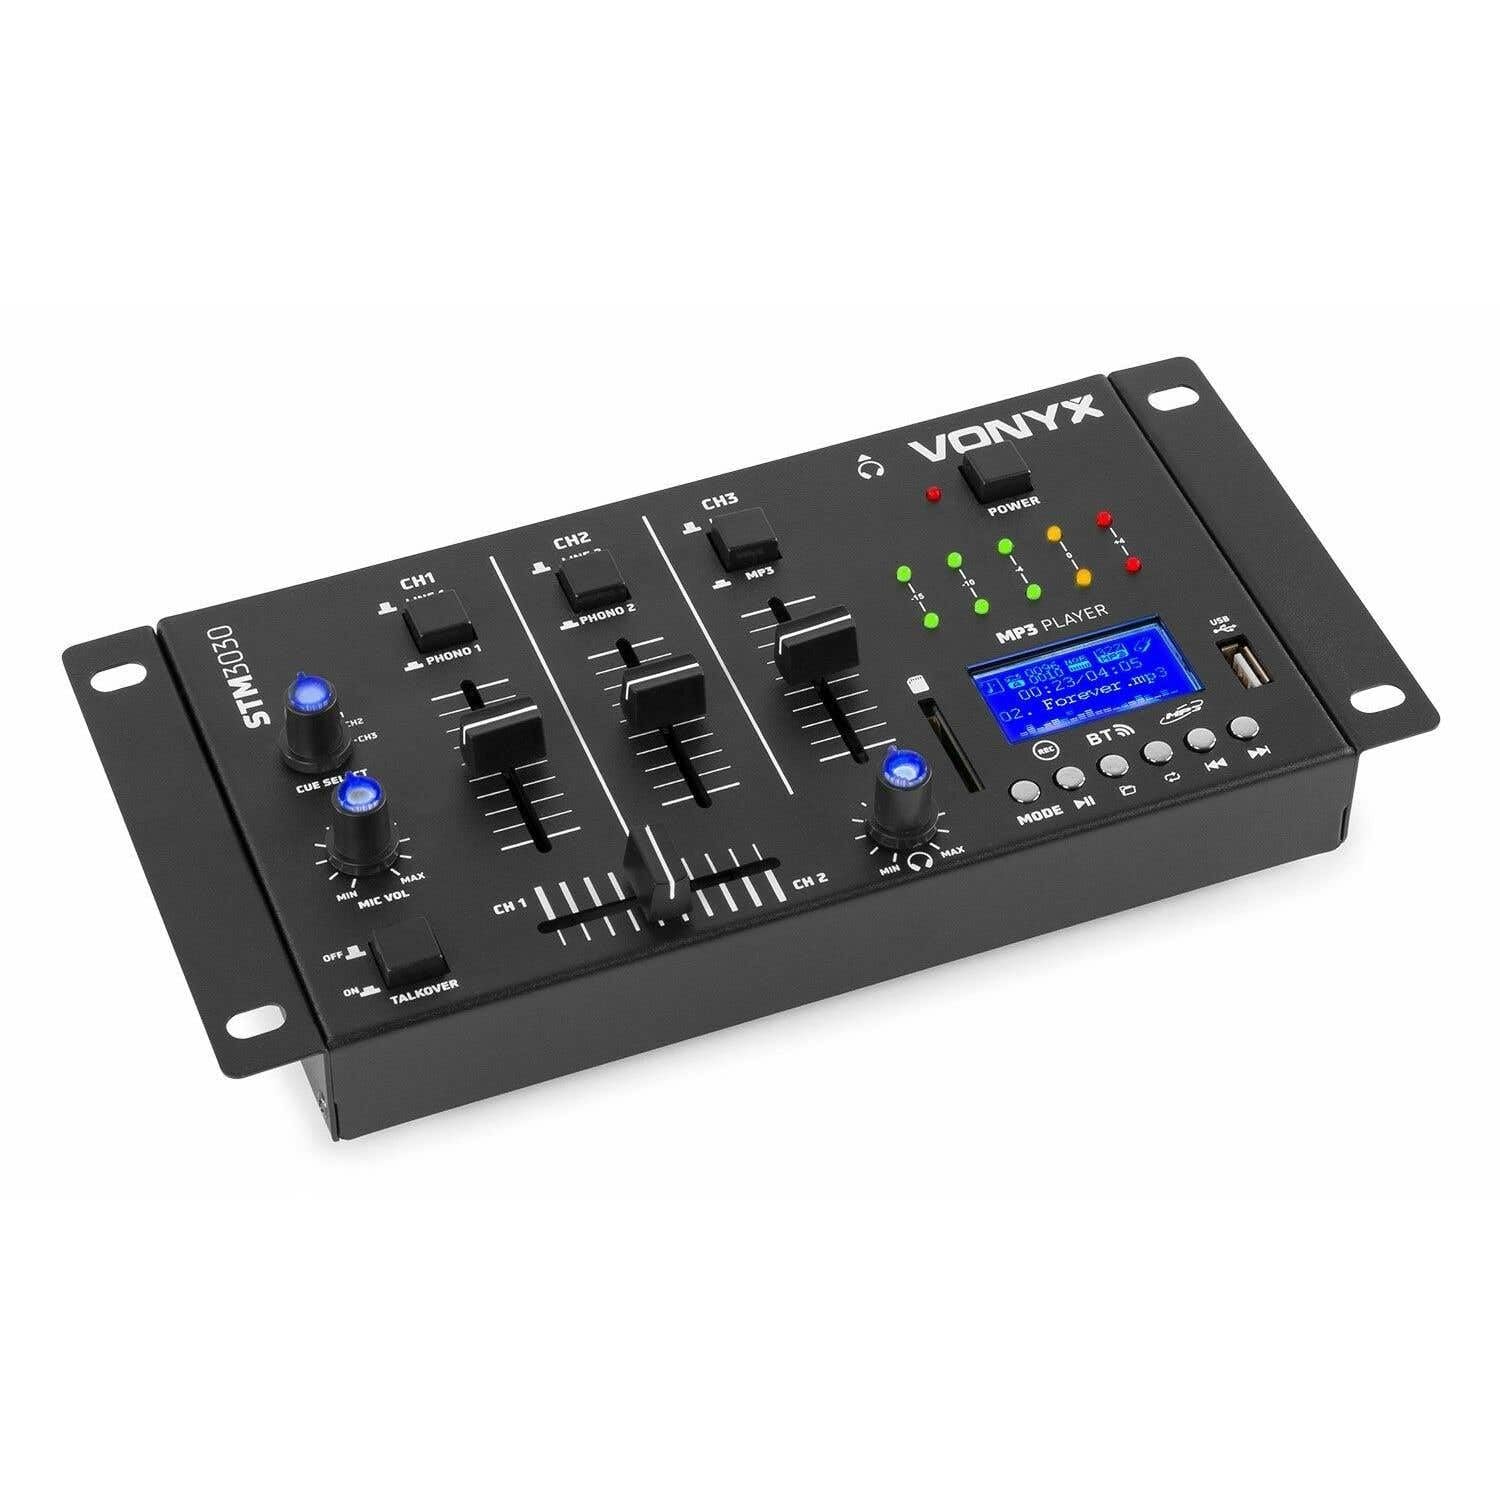
Малюнак 1.1: Фронт view of the Vonyx STM3030 DJ Mixer, showcasinдзякуючы кампактнаму дызайну і размяшчэнню элементаў кіравання.
2. Асноўныя магчымасці
- 4-канальны мікшар: Provides four input channels for connecting multiple audio sources.
- Універсальнае падключэнне: Includes Jack and RCA inputs for various devices.
- Інтэрфейс Bluetooth: Enables wireless music streaming from smartphones, tablets, or computers.
- Інтэграваны MP3-плэер: Supports direct playback from USB drives and SD cards.
- USB Recording Function: Allows recording of live mixes to USB or SD storage.
- Cue Function: For pre-listening to tracks through headphones.
- LED VU Meter: Provides visual feedback on audio signal levels.
- Падсветленыя элементы кіравання: Potentiometers are illuminated for easy operation in dark environments.
- Кросфейдэр: Для плаўных пераходаў паміж каналамі.
- Функцыя Talkover: Automatically reduces music volume when the microphone is used.
- Кампактны дызайн: Easy to integrate into any DJ setup.
3. Інструкцыі па тэхніцы бяспекі
Please read these safety instructions carefully before operating the device and retain them for future reference. Incorrect use may result in electric shock, fire, or other hazards.
- крыніца харчавання: Выкарыстоўвайце толькі прадастаўлены адаптар сілкавання. Пераканайцеся, што гучнасцьtage адпавядае патрабаванням, указаным на прыладзе.
- Вада і вільгаць: Do not expose the device to rain, moisture, or liquids. Never place objects filled with liquids on the device.
- Вентыляцыя: Ensure proper ventilation. Do not block any ventilation openings. Install the device according to the manufacturer's instructions.
- Крыніцы цяпла: Не ўстанаўлівайце побач з крыніцамі цяпла, такімі як радыятары, абагравальнікі, пліты або іншыя прылады (у тым ліку ampLifiers), якія вырабляюць цяпло.
- Абарона шнура харчавання: Абараняйце сеткавы шнур ад наступання або заціскання, асабліва ў месцах вілкі, разеткі і месца выхаду з прылады.
- Уборка: Unplug the device from the power outlet before cleaning. Use only a dry, soft cloth.
- Абслугоўванне: Не спрабуйце абслугоўваць гэты прадукт самастойна. Звяртайцеся па любыя пытанні абслугоўвання да кваліфікаванага персаналу. Абслугоўванне патрабуецца, калі прылада пашкоджана якім-небудзь чынам, напрыклад, калі пашкоджаны шнур харчавання або вілка, калі ўнутр прылады была праліта вадкасць або ўпалі прадметы, прылада падвяргалася ўздзеянню дажджу або вільгаці, яна працуе неналежным чынам або яе ўпусцілі.
- Маланка: Адключайце гэты прыбор ад сеткі падчас навальніцы або калі ён не выкарыстоўваецца на працягу доўгага часу.
4. Элементы кіравання і сувязі
4.1 Элементы кіравання пярэдняй панэлі

Малюнак 4.1: Нахілены верх view of the Vonyx STM3030, highlighting the front panel controls.
- CH1 / CH2 / CH3: Input channels.
- LINE 1 / PHONO 1 (CH1): Selector switch for Channel 1 input source.
- LINE 2 / PHONO 2 (CH2): Selector switch for Channel 2 input source.
- LINE 3 / MP3 (CH3): Selector switch for Channel 3 input source.
- Фейдэры каналаў: Adjust the volume level for each channel.
- Кросфейдэр: Blends audio between Channel 1 and Channel 2.
- CUE SELECT: Rotary knob to select which channel(s) to monitor through headphones.
- MIC VOL (MIN/MAX): Рэгулюе гучнасць уваходнага мікрафона.
- TALKOVER (OFF/ON): Activates the talkover function, which automatically lowers music volume when the microphone is in use.
- Святлодыёд харчавання: Indicates when the mixer is powered on.
- LED VU Meter: Displays the output level of the master mix.
- MP3 PLAYER Display: Shows track information, mode, and status.
- Порт USB: Для падлучэння USB-флэш-назапашвальнікаў.
- Слот для SD-карты: Для ўстаўкі карт памяці SD.
- MP3 Player Controls (MODE, Play/Pause, Skip, REC, BT):
- Рэжым: Switches between USB, SD, and Bluetooth modes.
- Прайграванне/Паўза: Пачынае альбо прыпыняе прайграванне.
- Skip (Previous/Next): Пераключаецца паміж трэкамі.
- ЗАПІС: Initiates or stops recording to USB/SD.
- БТ: Актывуе рэжым спалучэння Bluetooth.

Малюнак 4.2: Close-up of the integrated MP3 player, showing the display, controls, USB port, and SD card slot.
4.2 Злучэнні задняй панэлі

Малюнак 4.3: Rear panel of the Vonyx STM3030, detailing all input and output connections.
- AC 12V 500mA: Power input jack for the included AC adapter.
- Выхад для навушнікаў (раздым 6.3 мм): For connecting headphones for monitoring.
- OUTPUT (RCA L/R): Main stereo RCA output to connect to an amplifier або актыўныя калонкі.
- LINE 3 (RCA L/R): Stereo RCA input for Channel 3.
- LINE 2 / PHONO 2 (RCA L/R): Stereo RCA input for Channel 2, switchable between Line and Phono.
- LINE 1 / PHONO 1 (RCA L/R): Stereo RCA input for Channel 1, switchable between Line and Phono.
- MIC 1 / MIC 2 (6.3mm Jack): Уваходныя раздымы мікрафона.
5. Кіраўніцтва па наладцы
- Распакаваць і размясціць: Carefully remove the mixer from its packaging. Place it on a stable, flat surface with adequate ventilation.
- Падключыце харчаванне: Connect the provided AC power adapter to the 'AC 12V 500mA' input on the rear panel of the mixer. Plug the adapter into a suitable wall outlet. The POWER LED on the front panel should illuminate.
- Connect Main Output: Connect the 'OUTPUT' RCA jacks on the rear panel to the input of your amplifier or powered speakers using RCA cables.
- Падключыце крыніцы гуку:
- Turntables: Connect turntables to the 'PHONO 1' and 'PHONO 2' RCA inputs. Ensure the corresponding channel selector switches (CH1, CH2) are set to 'PHONO'.
- CD Players/Laptops/Other Line Devices: Connect these devices to the 'LINE 1', 'LINE 2', or 'LINE 3' RCA inputs. Set the corresponding channel selector switches to 'LINE'.
- Падключэнне мікрафонаў: If using microphones, plug them into the 'MIC 1' or 'MIC 2' 6.3mm jack inputs on the rear panel.
- Падключыце навушнікі: Plug your headphones into the 6.3mm headphone output jack on the rear panel for monitoring.
6. Інструкцыя па эксплуатацыі
6.1 Асноўныя аперацыі
- Уключэнне: Ensure all connections are secure. Turn on your amplifier/speakers first, then the STM3030 mixer.
- Выберыце ўвод: For each channel, use the LINE/PHONO/MP3 selector switch to choose the desired audio source.
- Adjust Channel Volume: Use the individual channel faders (CH1, CH2, CH3) to adjust the volume of each input.
- Выхад манітора: Observe the LED VU meter to ensure your master output level is not clipping (reaching the red indicators).
6.2 Using the MP3 Player (USB/SD)
- Уставіць медыяфайл: Устаўце флэш-назапашвальнік USB у порт USB або SD-карту ў слот для SD-карты.
- Выберыце рэжым MP3: Ensure the CH3 selector switch is set to 'MP3'. Press the 'MODE' button on the MP3 player until 'USB' or 'SD' is displayed.
- Прайграванне: Use the Play/Pause button to start or pause playback. Use the Skip buttons to navigate between tracks.
6.3 Злучэнне Bluetooth
- Актываваць Bluetooth: Ensure the CH3 selector switch is set to 'MP3'. Press the 'MODE' button on the MP3 player until 'BT' is displayed. The display will show 'BT' and typically flash, indicating it's in pairing mode.
- Спалучыць прыладу: On your smartphone, tablet, or laptop, go to Bluetooth settings and search for available devices. Select 'Vonyx STM3030' (or similar name) to pair.
- Паток аўдыё: Once paired, you can stream audio wirelessly from your device through Channel 3 of the mixer.
6.4 Функцыя запісу
- Prepare Storage: Insert a USB flash drive or SD card into the MP3 player section. Ensure it has sufficient free space and is formatted correctly (FAT32 is generally recommended).
- Пачаць запіс: Press the 'REC' button on the MP3 player. The display will indicate that recording has started.
- Monitor Levels: Adjust your channel faders and monitor the VU meter to ensure optimal recording levels without distortion.
- Спыніць запіс: Націсніце кнопку «REC» яшчэ раз, каб спыніць запіс. Запісаны file будуць захаваны на вашым USB-назапашвальніку або SD-карце.
6.5 Microphone Usage and Talkover
- Падключэнне мікрафона: Plug your microphone(s) into the MIC 1 or MIC 2 jacks on the rear panel.
- Adjust Mic Volume: Use the 'MIC VOL' knob on the front panel to adjust the microphone's volume.
- Activate Talkover: If you wish for the music volume to automatically decrease when you speak into the microphone, set the 'TALKOVER' switch to 'ON'. Set it to 'OFF' to disable this function.
6.6 Headphone Monitoring (Cue)
- Падключыце навушнікі: Plug your headphones into the headphone output jack.
- Выберыце каналы: Use the 'CUE SELECT' rotary knob to choose which channel(s) you want to pre-listen to in your headphones without affecting the main output.
7. Выпраўленне непаладак
- Няма выхаду гуку:
- Check if the mixer is powered on and the POWER LED is lit.
- Ensure all audio cables are securely connected to the correct inputs and outputs.
- Verify that channel faders and the master output level are raised.
- Confirm the correct input source (LINE/PHONO/MP3) is selected for each channel.
- Check the volume and input selection on your connected amplifier або актыўныя калонкі.
- Скажоны гук:
- Reduce the input level of the audio source.
- Lower the channel faders or master output level to prevent clipping (indicated by red LEDs on the VU meter).
- Ensure the correct input type (LINE/PHONO) is selected for turntables; incorrect selection can cause distortion.
- Bluetooth не падключаецца:
- Ensure the mixer's MP3 player is in 'BT' mode and flashing, indicating pairing mode.
- Make sure your Bluetooth device is within range (typically up to 10 meters) and has Bluetooth enabled.
- Паспрабуйце адлучыць прыладу і зноў падлучыць яе.
- USB/SD Recording Not Working:
- Check if the USB drive or SD card is properly inserted.
- Ensure the storage device is formatted to FAT32.
- Verify that there is sufficient free space on the USB drive or SD card.
8. Тэхнічныя характарыстыкі
| Марка | Вонікс |
| мадэль | STM3030 |
| Колькасць каналаў | 4 |
| Тэхналогія падлучэння | Bluetooth, USB |
| Крыніца харчавання | Mains powered (AC 12V / 500mA adapter included) |
| АЧХ | 20 Гц - 20 кГц |
| аўдыё ўваходы | 2x Phono (RCA), 3x Line (RCA), 2x Microphone (6.3mm Jack), USB, SD, Bluetooth |
| Аўдыёвыхады | 1x Master (RCA), 1x Headphone (6.3mm Jack) |
| Supported Data Types | MP3, WAV |
| Памеры (Д х Ш х У) | 125 х 267 х 55 мм |
| Вага прадмета | 0.9 kg (Product weight), 1.3 kg (Shipping weight) |
9. Тэхнічнае абслугоўванне
To ensure the longevity and optimal performance of your Vonyx STM3030 DJ Mixer, follow these maintenance guidelines:
- Уборка: Regularly wipe the mixer with a dry, soft, lint-free cloth. Do not use abrasive cleaners, solvents, or strong detergents, as these can damage the finish and internal components.
- Абарона ад пылу: Keep the mixer free from dust. When not in use for extended periods, consider covering it with a dust cover.
- Асяроддзе: Avoid operating the mixer in excessively hot, cold, humid, or dusty environments. Keep it away from direct sunlight and sources of vibration.
- Кабельнае кіраванне: Ensure cables are not tangled or pinched, which can lead to damage over time.
10. Гарантыя і падтрымка
The Vonyx STM3030 DJ Mixer comes with a Гарантыя 24 месяцаў з даты пакупкі. Гэтая гарантыя распаўсюджваецца на вытворчыя дэфекты і дэфекты матэрыялаў пры нармальным выкарыстанні.
For warranty claims, technical support, or service inquiries, please contact your retailer or the manufacturer directly. Please retain your proof of purchase for warranty validation.