Уводзіны
The UNI-T UT151C is a high-reliability handheld digital multimeter designed for precise electrical measurements. It functions as a multimeter, LCR meter, and temperature tester, capable of measuring DC/AC voltage, DC/AC current, resistance, capacitance, and temperature. This manual provides essential information for the safe and effective operation, setup, and maintenance of your UT151C device.
Інфармацыя па бяспецы
Папярэджанне: To avoid electric shock or personal injury, read all safety information before using this product. Use the product only as specified in this manual, or the protection provided by the product may be impaired.
- Always ensure the test leads are in good condition and properly connected.
- Не наносіце больш за намінальны аб'ёмtage, як пазначана на лічыльніку, паміж клемамі або паміж любой клемай і зазямленнем.
- Праяўляйце асаблівую асцярожнасць пры працы з абtagвышэй за 30 В пераменнага току (RMS), 42 В пікавага або 60 В пастаяннага току. Гэтыя аб'ёмыtagуяўляюць небяспеку паражэння.
- Before measuring current, ensure the circuit is de-energized and the meter is connected in series.
- Перш чым змяняць функцыі, адключыце тэставыя провады ад тэстуемай ланцуга.
- Do not operate the meter with the case open or if the battery cover is not securely closed.
- Замяніце батарэйку, як толькі з'явіцца індыкатар нізкага зараду батарэі, каб забяспечыць дакладныя паказанні.
Прадукт скончаныview
Familiarize yourself with the components of your UNI-T UT151C Digital Multimeter.
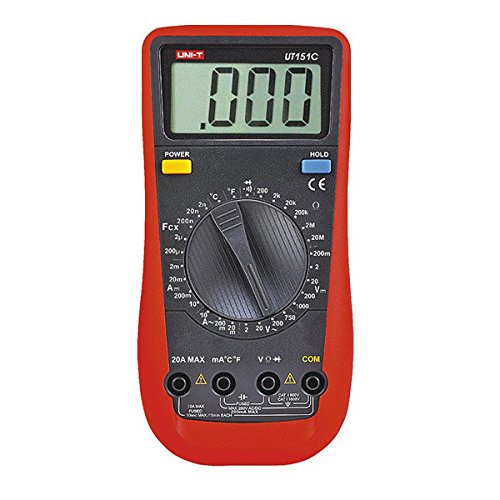
Малюнак 1: Фронт view of the UNI-T UT151C Digital Multimeter. This image displays the LCD screen, the central rotary function switch, and the input terminals at the bottom. The 'HOLD' button is visible on the right side of the display.
- ВК-дысплей: Паказвае паказанні вымярэнняў, адзінкі вымярэння і індыкатары функцый.
- Функцыя паваротнага перамыкача: Used to select the desired measurement function (e.g., V~, V-, A~, A-, Ω, F, °C/°F, Diode, Continuity).
- Уваходныя гнязда: Terminals for connecting test leads. Typically include COM (common), VΩmA (voltage, resistance, small current), and 20A (high current).
- Кнопка HOLD: Зафіксуе бягучае паказанне на дысплеі.
- Кнопка харчавання: Уключае або выключае прыладу.
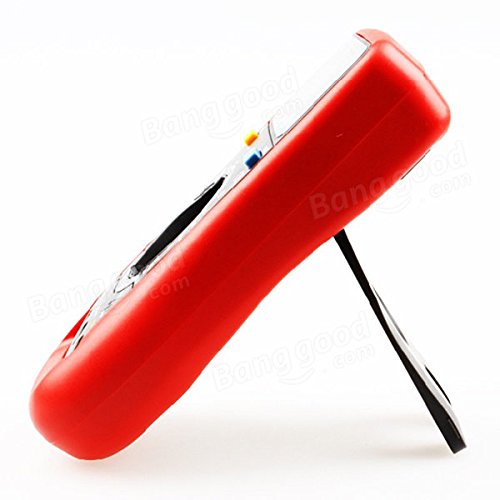
Малюнак 2: Збоку view of the UNI-T UT151C Digital Multimeter. This image highlights the integrated kickstand, allowing the meter to be propped up for easier viewпадчас выкарыстання.
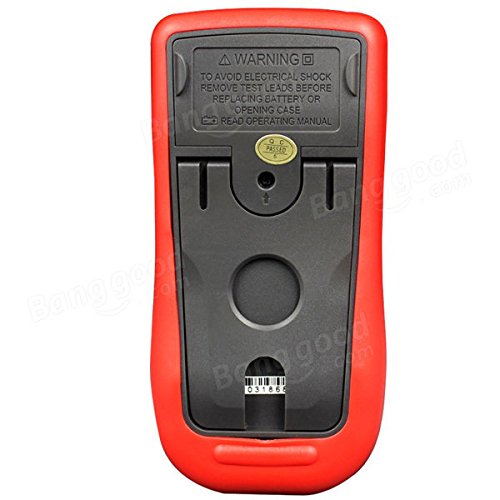
Малюнак 3: Назад view of the UNI-T UT151C Digital Multimeter. This image shows the battery compartment cover and important safety warnings regarding electrical shock and battery replacement.
Настройка
1. Устаноўка батарэі
The UNI-T UT151C requires a 9V (6F22) battery for operation. The battery is not included.
- Ensure the multimeter is powered off and disconnect any test leads.
- Знайдзіце батарэйны адсек на задняй панэлі глюкометра (гл. малюнак 3).
- Адкруціце шрубу (шрубы) мацавання і зніміце вечка батарэйнага адсека.
- Connect a new 9V battery to the battery clips, observing correct polarity.
- Устаўце батарэйку ў адсек і зачыніце вечка, замацаваўшы яго шрубай (шрубамі).
Заўвага: Replace the battery immediately when the low battery indicator appears on the display to maintain measurement accuracy.
2. Падключэнне вымяральных правадоў
Заўсёды падключайце чорны вымяральны шнур да COM (common) jack. Connect the red test lead to the appropriate input jack based on the measurement type:
- Для выпtage, resistance, capacitance, diode, continuity, and temperature measurements, connect the red lead to the VΩmA дамкрат.
- For current measurements up to 200mA, connect the red lead to the VΩmA дамкрат.
- For current measurements up to 20A, connect the red lead to the 20А дамкрат.
Увага: Incorrect lead connection can damage the meter or the circuit under test.
Інструкцыя па эксплуатацыі
Follow these steps for various measurement functions.
1. Уключэнне/выключэнне харчавання
Націсніце УЛАДА button to turn the multimeter on. The meter features an auto power-off function to conserve battery life. To turn it off manually, press the УЛАДА кнопку зноў.
2. Вымярэнне пастаяннага токуtagе (V-)
- Падключыце чорны провад да COM і чырвоны свінец да VΩmA.
- Set the rotary switch to the desired V- range (e.g., 2V, 20V, 200V, 1000V). If the voltagКалі e невядома, пачніце з найбольшага дыяпазону і памяншайце яго па меры неабходнасці.
- Connect the test leads in parallel across the component or circuit to be measured.
- Прачытайце тtagзначэнне на ВК-дысплеі.
3. Вымярэнне пераменнага токуtagе (V~)
- Падключыце чорны провад да COM і чырвоны свінец да VΩmA.
- Set the rotary switch to the desired V~ range (e.g., 2V, 20V, 200V, 750V).
- Connect the test leads in parallel across the AC source or component.
- Прачытайце AC voltagзначэнне на ВК-дысплеі.
4. Measuring DC Current (A-)
- Увага: Always connect the meter in series with the circuit. Never connect it in parallel across a voltage source when measuring current.
- Адключыце харчаванне ланцуга.
- Break the circuit at the point where current is to be measured.
- For currents up to 200mA, connect the black lead to COM і чырвоны свінец да VΩmA.
- For currents up to 20A, connect the black lead to COM і чырвоны свінец да 20А.
- Set the rotary switch to the appropriate A- дыяпазон.
- Connect the test leads to complete the circuit.
- Apply power to the circuit and read the DC current value.
5. Measuring AC Current (A~)
- Follow the same safety precautions and connection steps as for DC Current measurement.
- Set the rotary switch to the appropriate A~ дыяпазон.
- Apply power to the circuit and read the AC current value.
6. Вымярэнне супраціўлення (Ом)
- Ensure the circuit or component is completely de-energized before measuring resistance.
- Падключыце чорны провад да COM і чырвоны свінец да VΩmA.
- Усталюйце паваротны перамыкач у Ом дыяпазон.
- Падключыце вымяральныя дроты да кампанента.
- Прачытайце значэнне супраціву на дысплеі.
7. Вымярэнне ёмістасці (F)
- Перад вымярэннем пераканайцеся, што кандэнсатар цалкам разраджаны, каб пазбегнуць пашкоджання вымяральніка.
- Падключыце чорны провад да COM і чырвоны свінец да VΩmA.
- Усталюйце паваротны перамыкач у F (Capacitance) range.
- Падключыце вымяральныя дроты да вывадаў кандэнсатара.
- Прачытайце значэнне ёмістасці на дысплеі.
8. Measuring Temperature (°C/°F)
- Connect the temperature probe (if included and compatible) to the COM і VΩmA дамкраты, выконваючы палярнасць.
- Усталюйце паваротны перамыкач у °C or °F становішча.
- Размясціце кончык тэмпературнага зонда на аб'екце, тэмпературу якога трэба вымераць, або побач з ім.
- Прачытайце значэнне тэмпературы на дысплеі.
9. Тэст дыёда
- Пераканайцеся, што дыёд адключаны ад ланцуга.
- Падключыце чорны провад да COM і чырвоны свінец да VΩmA.
- Усталюйце паваротны перамыкач у Дыёд сімвал.
- Падключыце чырвоны провад да анода, а чорны — да катода дыёда. Прамы токtage drop (e.g., 0.5V to 0.8V for silicon diodes) will be displayed.
- Памяняйце правады месцамі. На дысплеі павінна адлюстроўвацца «OL» (разамкнуты контур), калі дыёд спраўны.
10. Тэст бесперапыннасці
- Пераканайцеся, што ланцуг або кампанент абясточаны.
- Падключыце чорны провад да COM і чырвоны свінец да VΩmA.
- Усталюйце паваротны перамыкач у Пераемнасць symbol (often shared with Diode test).
- Connect the test leads across the component or circuit path.
- If there is continuity (low resistance), the buzzer will sound, and a low resistance value will be displayed. "OL" indicates an open circuit.
11. Функцыя ўтрымання дадзеных
Націсніце ТРЫМАЦЬ button to freeze the current reading on the display. Press it again to release the hold and resume live measurements.
Тэхнічнае абслугоўванне
Правільнае абслугоўванне забяспечвае даўгавечнасць і дакладнасць вашага мультыметра.
- Уборка: Працярыце корпус рэкламайamp тканіна і мяккі мыйны сродак. Не выкарыстоўвайце абразівы або растваральнікі.
- Замена батарэі: Replace the 9V battery when the low battery indicator appears. Refer to the "Battery Installation" section for instructions.
- Замена засцерагальніка: If the current measurement function fails, the fuse may need replacement. This typically requires opening the back case. Refer to the safety warnings on the back of the meter (Figure 3) and consult a qualified technician if unsure. Use only fuses of the specified type and rating.
- захоўванне: Калі глюкометр не выкарыстоўваецца працяглы час, выміце батарэйку, каб прадухіліць уцечку. Захоўвайце глюкометр у прахалодным, сухім месцы, удалечыні ад прамых сонечных прамянёў і экстрэмальных тэмператур.
Ліквідацыю непаладак
If you encounter issues with your UNI-T UT151C, refer to the following common problems and solutions:
| праблема | Магчымая прычына | Рашэнне |
|---|---|---|
| Няма дысплея або дысплей цьмяны | Разраджаны або нізкі акумулятар | Заменіце батарэю 9 В. |
| Адлюстравана "OL" (перагрузка) | Measurement exceeds selected range or open circuit | Select a higher range or check for an open circuit in the component/leads. |
| Няправільныя паказанні | Incorrect function selected, poor lead connection, or low battery | Verify function selection, ensure leads are securely connected, or replace battery. |
| Вымярэнне току не працуе | Перагарэў засцерагальнік | Replace the fuse (refer to Maintenance section). |
Тэхнічныя характарыстыкі
Technical specifications for the UNI-T UT151C Digital Multimeter.
| Асаблівасць | Спецыфікацыя |
|---|---|
| мадэль | UT151C (Internal Model: 365BG1060568) |
| DC Voltagе (V) | 200mV/2V/20V/200V/1000V; ±(0.5%+1) |
| Пераменнага токуtagе (V) | 2V/20V/200V/750V; ±(0.8%+3) |
| Пастаянны ток (А) | 2mA/20mA/200mA/20A; ±(0.8%+1) |
| Пераменны ток (А) | 20mA/200mA/20A; ±(1%+3) |
| Супраціў (Ω) | 200Ω/2KΩ/20KΩ/200KΩ/2MΩ/20MΩ; ±(1%+2) |
| Ёмістасць (F) | 2nF/20nF/200nF/2µF/100µF; ±(4%+3) |
| Тэмпература (°C) | -40°C ~ 1000°C; ±(1%+3) |
| Тэмпература (°F) | -40°F ~ 1832°F; ±(1%+4) |
| Колькасць дысплея | 1999 |
| Ручной дыяпазон | так |
| Дыёдны тэст | так |
| Аўтаматычнае выключэнне | так |
| Бесперапыннасць зумер | так |
| Індыкацыя разраду батарэі | так |
| Утрыманне дадзеных | так |
| Input Impedance for DC Voltage | ≥10MΩ |
| Электразабеспячэнне | Батарэя 9 В (6F22) (не ўваходзіць у камплект) |
| Памер LCD | 63 мм х 29 мм |
| Колер прадукту | Чырвоны і шэры |
| Вага нета прадукту | 300 г |
Гарантыя і падтрымка
Інфармацыя аб гарантыі на прадукт і падтрымцы кліентаў звычайна змяшчаецца ў дакументах аб куплі або на афіцыйным сайце вытворцы. website. Please refer to those resources for specific details.