1. Уводзіны
This manual provides detailed instructions for the installation, operation, and maintenance of the CP PLUS CP-UVR-1616K1-V3 16-Channel 1080P Digital Video Recorder (DVR). This device supports 16 channels of video input and 16 channels of audio input, offering comprehensive surveillance capabilities. It is designed for reliable performance in various security applications.
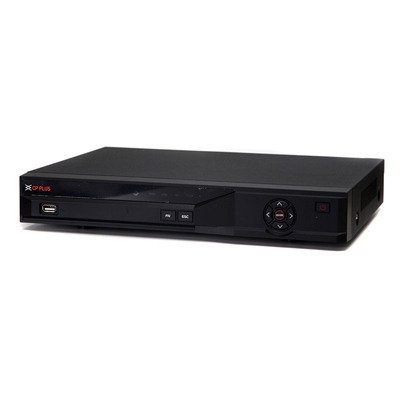
Малюнак 1: Спераду view of the CP PLUS CP-UVR-1616K1-V3 DVR unit.
2. Тэхніка бяспекі
- Ensure proper ventilation around the DVR to prevent overheating.
- Не падвяргайце прыладу ўздзеянню вады і вільгаці.
- Выкарыстоўвайце толькі адаптар сілкавання, які пастаўляецца з прыладай.
- Пазбягайце размяшчэння відэарэгістратара пад прамымі сонечнымі прамянямі або побач з крыніцамі цяпла.
- Звяртайцеся з прыладай асцярожна, каб прадухіліць фізічныя пашкоджанні.
3. Настройка і ўстаноўка
3.1 Распакаванне
Carefully remove all components from the packaging. Verify that all items listed in the packing list are present.
3.2 Апаратныя злучэнні
- Падключэнне камер: Connect your HDCVI, Analog, or IP cameras to the BNC video input ports (16 channels available) on the rear panel of the DVR.
- Падключыць аўдыя: Connect audio input devices to the 16 RCA audio input channels. Connect an audio output device to the 1 RCA audio output channel.
- Падключэнне дысплея: Connect a monitor or television to the HDMI or VGA output port for video display.
- Падключыць сетку: Connect an Ethernet cable from the DVR's network port to your router or network switch for remote access and IP camera integration.
- Усталюйце жорсткі дыск (неабавязкова): If not pre-installed, open the DVR casing and connect a SATA HDD (up to 6TB) to the internal SATA port. Secure the HDD with screws.
- Падключыце прылады USB: Connect a mouse or USB storage device to one of the two USB 2.0 ports.
- Уключэнне: Connect the power adapter to the DVR and then to a power outlet. The DVR will power on automatically.
4. Інструкцыя па эксплуатацыі
4.1 Майстар пачатковай налады
Upon first power-on, the DVR will guide you through an initial setup wizard. Follow the on-screen prompts to configure basic settings such as language, date/time, network settings, and user accounts.
4.2 У прамым эфіры View
Пасля першапачатковай налады відэарэгістратар пакажа жывую трансляцыю view of connected cameras. You can switch between different display splits (1/4/8/9/16 channels) using the on-screen controls or mouse.
4.3 Запіс
The DVR supports various recording modes including continuous, motion detection, and scheduled recording.
- Main Stream Recording: 1080P (1~15fps), 1080N/720P/960H/D1/HD1/BCIF/CIF/QCIF (1~25/30fps).
- Extra Stream Recording: CIF/QCIF (1~15fps).
Access the recording settings through the main menu to configure your preferred recording schedule and parameters.
4.4 Прайграванне
Каб паўторнаview запісана footage, navigate to the Playback menu. You can search for recordings by date, time, and event type.
4.5 Мабільны доступ
Download the official mobile applications (iCMOB, gCMOB, wCMOB) from your device's app store to access live view and playback remotely. Refer to the app's instructions for setup.
4.6 CMS Software
For centralized management of multiple DVRs, use the KVMS or KVMS Pro CMS software. Install the software on a compatible computer and follow the provided instructions for device addition and management.
5. Тэхнічнае абслугоўванне
- Рэгулярная ўборка: Keep the DVR free from dust. Use a soft, dry cloth for cleaning. Do not use liquid cleaners.
- Абнаўленні прашыўкі: Перыядычна правярайце афіцыйную старонку CP PLUS webсайт для абнаўленняў прашыўкі, каб забяспечыць аптымальную прадукцыйнасць і бяспеку.
- Стан жорсткага дыска: Monitor the health of the installed hard drive through the DVR's system settings. Replace the HDD if errors are detected.
- Backup Recordings: Regularly back up important recordings to an external USB storage device or network storage.
6. Выпраўленне непаладак
| праблема | Магчымая прычына | Рашэнне |
|---|---|---|
| Няма відэавыхаду на манітор. | Loose HDMI/VGA cable, incorrect input selected on monitor, DVR not powered on. | Check cable connections, ensure monitor is on correct input, verify DVR power. |
| Камеры не адлюстроўваюць выяву. | Loose BNC cable, camera power issue, incorrect camera type selected. | Check camera connections and power, verify camera compatibility and settings in DVR menu. |
| Няма запісу. | HDD not installed or faulty, recording schedule not configured, insufficient storage. | Install/check HDD, configure recording schedule, check HDD space. |
| Аддалены доступ не працуе. | Network cable disconnected, incorrect network settings, firewall blocking. | Check network cable, verify IP address/gateway/DNS settings, configure port forwarding or P2P. |
7. Тэхнічныя характарыстыкі
| Асаблівасць | Дэталь |
|---|---|
| мадэль | CP-UVR-1616K1-V3 |
| Відэа ўваход | 16 channel BNC (HDCVI/Analog/IP up to 5Mp) |
| Аўдыё ўваход / выхад | 16 channel RCA input, 1 channel RCA output |
| Відэавыхад | 1 HDMI, 1 VGA (Simultaneous) |
| Дазвол відэа | 1080P(1920×1080), 1080N(960×1080), 720P, 960H, D1, HD1, BCIF, CIF, QCIF |
| Кампрэсія відэа | H.264 |
| Сціск аўдыё | G.711 |
| Recording Frame Rate (Main Stream) | 1080P (1~15fps), 1080N/720P/960H/D1/HD1/BCIF/CIF/QCIF (1~25/30fps) |
| Падтрымка жорсткіх дыскаў | 1 SATA port, up to 6TB |
| Інтэрфейс USB | 2 х USB 2.0 |
| Мабільнае праграмнае забеспячэнне | iCMOB, gCMOB, wCMOB |
| Праграмнае забеспячэнне CMS | KVMS, KVMS Pro |
| Памеры | 325 мм х 255 мм х 55 мм |
| Вага | 1.5Kg (without HDD) |
8. Падтрымка і гарантыя
For technical assistance, product support, or warranty inquiries, please contact CP PLUS customer service. Refer to the official CP PLUS website for the most current contact information and warranty terms.
Афіцыйны Webсайт: www.cpplusworld.com
Захоўвайце чэк аб куплі ў якасці пацверджання пакупкі для прэтэнзій па гарантыі.