Project Source 40804
Кіраўніцтва карыстальніка
Project Source 2-Pack 13-in W Bronze Flush Mount Light
Мадэль: 40804
1. Уводзіны
Дзякуй за пакупкуasing the Project Source 2-Pack 13-inch Bronze Flush Mount Light fixtures. These fixtures are designed to provide ambient lighting with a traditional aesthetic, featuring a durable bronze finish and an elegant alabaster glass shade. They are suitable for various indoor spaces, including bathrooms, bedrooms, kitchens, dining rooms, and living rooms, enhancing the decor while providing reliable illumination.
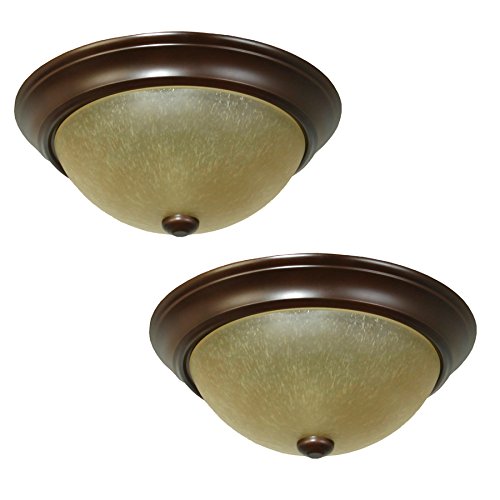
Малюнак 1: Two Project Source 13-inch Bronze Flush Mount Light fixtures. Each fixture features a round bronze base and a dome-shaped alabaster glass shade, secured by a small finial at the bottom center of the shade.
2. Важная інфармацыя па бяспецы
ПАПЯРЭДЖАННЕ: Рызыка паражэння электрычным токам. Адключыце сілкаванне ў блоку засцерагальнікаў або аўтаматычным выключальніку перад устаноўкай або абслугоўваннем.
- Перад пачаткам мантажу ўважліва прачытайце ўсе інструкцыі.
- Усе электрычныя падключэнні павінны адпавядаць мясцовым нормам, пастановам або Нацыянальнаму электрычнаму кодэксу (NEC). Звярніцеся да кваліфікаванага электрыка, калі вы не знаёмыя з правільнымі падключэннямі электрычнай праводкі.
- Use only UL-listed wire connectors for the electrical connections.
- Не перавышайце максімальную ватtage specified for this fixture (14 Watts per bulb).
- Падчас усталёўкі апранайце ахоўныя акуляры і адпаведныя сродкі абароны.
- Пераканайцеся, што свяцільня правільна зазямлены.
3. Змесціва ўпакоўкі
Перад пачаткам усталёўкі пераканайцеся, што ўсе кампаненты наяўныя:
- 2 x 13-inch Bronze Flush Mount Light Fixtures (with alabaster glass shades)
- Мантажныя прыналежнасці (шрубы, гайкі, мантажны кранштэйн)
- Note: Light bulbs are NOT included.
4. Тэхнічныя характарыстыкі
| Асаблівасць | Дэталь |
|---|---|
| Марка | Крыніца праекта |
| Нумар мадэлі | 40804 |
| Памеры (шырыня х вышыня) | 13 цалі x 5.36 цалі |
| Скончыць | Бронза |
| Абажур Матэрыял | Алебастравае шкло |
| Колькасць агнёў | 2 per fixture |
| Тып цокаля лямпачкі | Medium base (E-26) |
| Рэкамендаваная форма лямпачкі | A15 |
| Максімальная лямпачка Wattage | 14 Вт (на лямпачку) |
| Спіс бяспекі | У спісе UL |
| Сумяшчальнасць пакояў | Bathroom, Bedroom, Kitchen, Dining Room, Living Room |
| Тып ўстаноўкі | для ўстаноўкі западліцо |
| Вага прадмета (упакоўкі) | 7.04 фунта |
5. Настройка і ўстаноўка
Неабходныя інструменты: Phillips head screwdriver, flathead screwdriver, wire strippers, electrical tape, safety glasses.
Этапы перад устаноўкай:
- Выключыце харчаванне: Locate the circuit breaker or fuse box that supplies power to the light fixture location. Turn off the power completely before proceeding.
- Падрыхтуйце тэрыторыю: Clear the work area and ensure you have stable footing if using a ladder.
- Распакуйце: Асцярожна выміце прыстасаванне і ўсе кампаненты з упакоўкі.
Этапы ўстаноўкі:
- Прымацуйце мантажны кранштэйн: Secure the mounting bracket (included) to the electrical junction box in the ceiling using the provided screws. Ensure it is firmly attached.
- Падключыце электрычныя правады:
- Падключыце чорны (hot) wire from the ceiling to the чорны wire of the fixture using a wire nut.
- Падключыце белы (neutral) wire from the ceiling to the белы wire of the fixture using a wire nut.
- Падключыце зямлю wire (bare copper or green) from the ceiling to the зямлю wire of the fixture (or the ground screw on the mounting bracket) using a wire nut or by wrapping it securely around the screw.
- Secure Fixture to Mounting Bracket: Carefully push the wired fixture up towards the ceiling, aligning the holes in the fixture base with the screws on the mounting bracket. Secure the fixture in place with the decorative nuts or screws provided.
- Усталяваць лямпачкі: Insert the recommended A15 shape, E-26 medium base light bulbs (not included) into the sockets. Do not exceed 14 Watts per bulb.
- Прымацаваць шкляны абажур: Carefully place the alabaster glass shade onto the fixture. Secure it in place using the finial or retaining ring provided, tightening it gently until snug. Do not overtighten.
- Аднавіць сілу: Пасля завяршэння ўстаноўкі і надзейнасці ўсіх злучэнняў аднавіце электраэнергію з дапамогай аўтаматычнага выключальніка.
6. Інструкцыя па эксплуатацыі
Once the Project Source Flush Mount Light fixtures are correctly installed and power is restored, they can be operated using the standard wall switch connected to the circuit. Simply toggle the wall switch to turn the lights on or off.
7. Догляд і абслугоўванне
Regular cleaning will help maintain the appearance and performance of your light fixtures.
- Ачыстка прыстасавання: Dust the bronze finish regularly with a soft, dry cloth. For more thorough cleaning, wipe the bronze finish with a damp cloth and a mild, non-abrasive soap solution, then dry immediately with a clean, soft cloth to prevent water spots.
- Cleaning the Glass Shade: The alabaster glass shade can be removed for cleaning. Wash it with mild soap and water, then rinse thoroughly and dry completely before reattaching to the fixture.
- Замена лямпачкі: Always ensure the power is turned off at the circuit breaker and the bulbs have cooled down before attempting to replace them. Use only bulbs that meet the specified wattagе і базавы тып.
- Do not use abrasive cleaners, solvents, or polishes on any part of the fixture, as they may damage the finish or glass.
8. Выпраўленне непаладак
Калі ў вас узніклі праблемы са свяцільняй, звярніцеся да наступных распаўсюджаных праблем і рашэнняў:
- Святло не гарыць:
- Check that the power supply is on at the circuit breaker.
- Ensure the light bulbs are correctly installed and are not burnt out. Try replacing with a known working bulb.
- Verify that all wire connections (black to black, white to white, ground) are secure and properly connected.
- Мігценне святла:
- Ensure the light bulbs are fully tightened in their sockets.
- Check for any loose wire connections within the fixture or junction box.
- Confirm that the bulbs used are compatible with the fixture and are not exceeding the maximum wattage.
- Glass shade is loose or wobbles:
- Gently tighten the finial or retaining ring that secures the glass shade. Do not overtighten.
If the problem persists after attempting these solutions, please consult a qualified electrician or contact customer support.
9. Гарантыя і падтрымка кліентаў
For detailed warranty information regarding your Project Source 2-Pack 13-in W Bronze Flush Mount Light, please refer to the documentation included with your original purchase. Warranty terms typically cover defects in materials and workmanship for a specified period.
If you require technical assistance, have questions about installation, or need to report a defect, please contact Project Source customer service directly through their official website or the contact information provided in your product packaging. Please have your model number (40804) and purchase details ready when contacting support.