Уводзіны
Thank you for choosing the EMPIRE GAMING WarMachine ATX Mid-Tower PC Gaming Case. This manual provides detailed instructions for the installation, operation, and maintenance of your new PC case. Please read this manual carefully before proceeding with the installation to ensure proper setup and to maximize the performance and lifespan of your components.
Інфармацыя па бяспецы
Always observe the following safety precautions to prevent damage to your system and to ensure personal safety:
- Адключыце блок харчавання ад разеткі перад усталёўкай або зняццем якіх-небудзь кампанентаў.
- Насіце антыстатычны бранзалет, каб прадухіліць пашкоджанне адчувальных кампанентаў электрастатычным разрадам (ESD).
- Handle components carefully. Avoid touching pins or circuit boards directly.
- Ensure all cables are properly connected and routed to avoid interference with fans or other moving parts.
- Do not operate the PC case with the side panels removed unless performing maintenance or troubleshooting.
- Keep the case away from liquids and excessive humidity.
Змест пакета
Калі ласка, пераканайцеся, што ўсе прадметы прысутнічаюць у вашай упакоўцы:
- EMPIRE GAMING WarMachine ATX Mid-Tower PC Gaming Case
- Скрынка з аксэсуарамі (шрубы, распоркі, кабельныя сцяжкі)
- Кіраўніцтва карыстальніка (гэты дакумент)
Прадукт скончаныview
The EMPIRE GAMING WarMachine case features a sleek design with tempered glass panels and pre-installed RGB LED fans for optimal cooling and aesthetics.
Знешнія асаблівасці
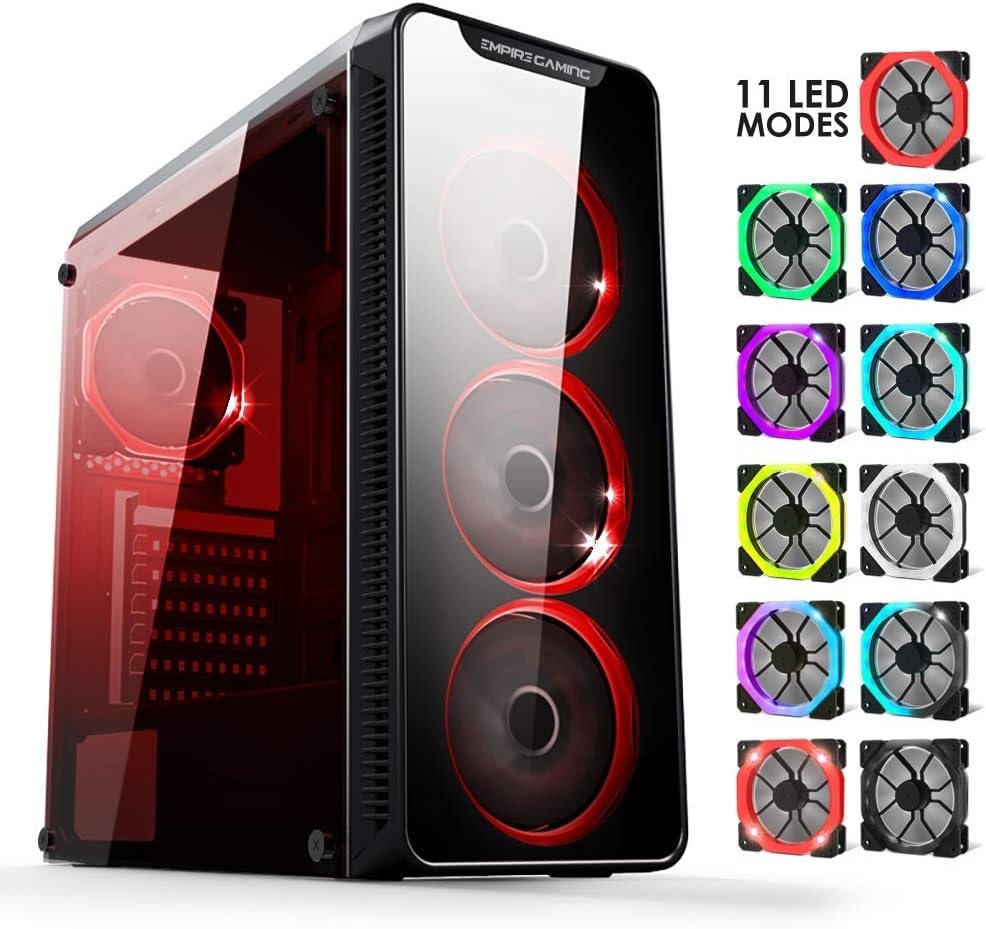
Image: The EMPIRE GAMING WarMachine PC case showcasing its tempered glass side panel and front panel, with multiple RGB fan lighting modes illustrated on the right side.

Выява: Прамы фронт view of the EMPIRE GAMING WarMachine PC case, highlighting the three 120mm RGB fans with blue illumination behind the tempered glass front panel.
Верхнія парты ўводу/вываду

Image: A close-up of the top I/O panel of the EMPIRE GAMING WarMachine PC case, featuring power and reset buttons, LED control button, USB 3.0 port, two USB 2.0 ports, and audio jacks.
- Кнопка харчавання: Каб уключыць/выключыць сістэму.
- Кнопка скіду: Каб перазагрузіць сістэму.
- Кнопка кіравання святлодыёдам: To cycle through 11 predefined RGB lighting modes for the fans.
- Порт USB 3.0: Для хуткаснай перадачы дадзеных.
- Парты USB 2.0 (x2): Для падключэння перыферыйных прылад.
- Аўдыёраздымы: Для навушнікаў і мікрафона.
Унутраная планіроўка

Image: An internal diagram of the EMPIRE GAMING WarMachine PC case, illustrating compatible motherboard sizes (ITX, mATX, ATX), fan placements (FAN X4), and SSD mounting locations (SSD x2).
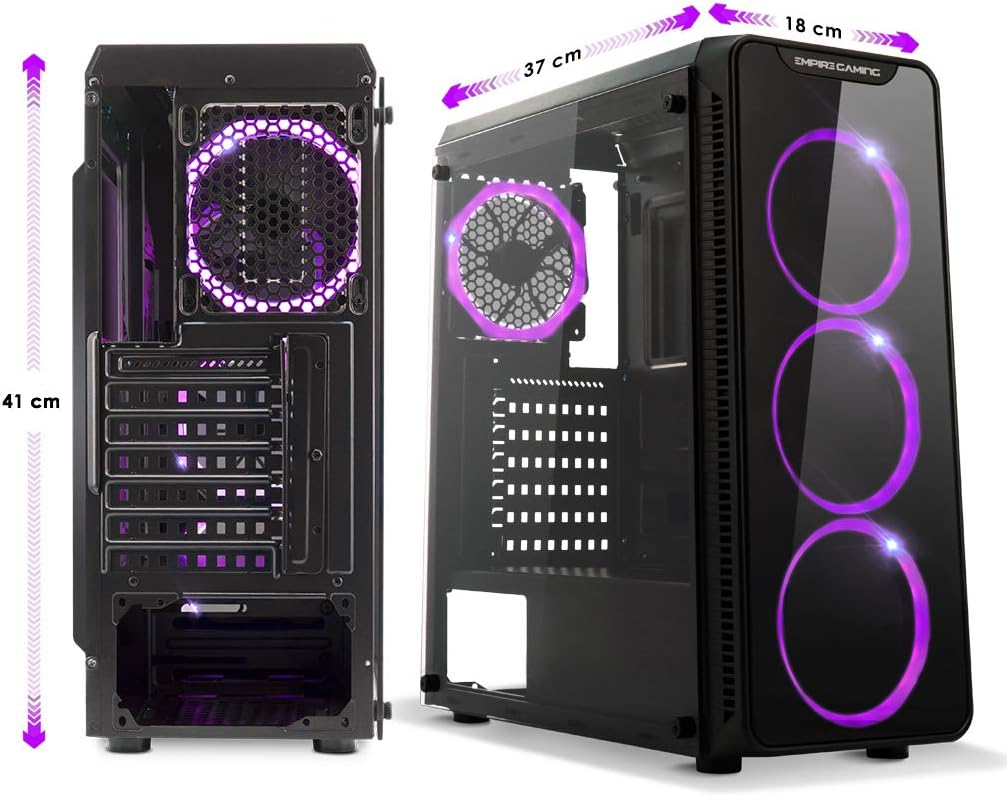
Image: A rear internal diagram of the EMPIRE GAMING WarMachine PC case, detailing the cable management routes, HDD 3.5" bays, and the power supply unit (PSU) compartment.
- Motherboard Tray: Supports ATX, Micro-ATX, and Mini-ITX motherboards.
- Завалы: Dedicated bays for 3.5" HDDs and 2.5" SSDs (4 total storage bays).
- Fan Mounts: Pre-installed 4 x 120mm RGB LED fans. Additional mounting points for optimal airflow.
- Кабельнае кіраванне: Ample space behind the motherboard tray for clean cable routing.
- Крышка БП: Conceals the power supply unit and cables for a cleaner interior.
Кіраўніцтва па ўстаноўцы
Follow these steps to assemble your PC components within the WarMachine case.
1. Падрыхтоўка справы
- Пастаўце корпус на роўную, устойлівую паверхню.
- Carefully remove the tempered glass side panel by unscrewing the thumb screws and gently pulling it away. Set it aside on a soft, non-abrasive surface.
- Remove the rear metal side panel by unscrewing its thumb screws.
2. Устаноўка мацярынскай платы
- Install the I/O shield that came with your motherboard into the designated opening at the rear of the case.
- Align your motherboard with the pre-installed standoffs. Ensure the standoffs match your motherboard's form factor (ATX, Micro-ATX, or Mini-ITX).
- Secure the motherboard with the provided screws from the accessory box.
3. Устаноўка блока сілкавання
- Slide your power supply unit (PSU) into the PSU shroud compartment at the bottom rear of the case.
- Align the PSU with the screw holes at the rear of the case.
- Secure the PSU with the screws provided with your power supply.
4. Усталёўка назапашвальніка (HDD/SSD)
- For 3.5" HDDs, locate the drive cage beneath the PSU shroud. Slide the HDD into the bay and secure it with screws.
- For 2.5" SSDs, mount them on the designated SSD trays located on the motherboard tray or behind it. Secure with screws.
5. Усталёўка відэакарты (GPU)
- Зніміце неабходныя вечкі слотаў пашырэння на задняй панэлі корпуса.
- Устаўце відэакарту ў адпаведны слот PCIe на матчынай плаце.
- Замацуеце відэакарту шрубамі.
6. Усталёўка кулера працэсара
Install your CPU cooler according to its manufacturer's instructions. The WarMachine case supports CPU coolers up to 155mm in height and watercooling radiators of 120mm or 240mm.
7. Кіраванне кабелем
- Connect all necessary power cables from the PSU to your motherboard, GPU, and storage drives.
- Connect the case's front panel cables (Power SW, Reset SW, HDD LED, Power LED, USB 3.0, USB 2.0, Audio) to the corresponding headers on your motherboard.
- Route cables through the cutouts and tie-down points behind the motherboard tray using the provided cable ties to ensure clean airflow and aesthetics.
- Connect the pre-installed fan power cables to your motherboard or a fan controller.
8. Канчатковая зборка
- Once all components are installed and cables are managed, reattach the rear metal side panel and the tempered glass side panel.
- Ensure all thumb screws are tightened securely.
Інструкцыя па эксплуатацыі
Уключэнне
After connecting your monitor, keyboard, mouse, and power cable to the PSU, press the Power Button on the top I/O panel to start your system.
RGB Fan Control

Image: A visual representation of different RGB lighting modes available for the EMPIRE GAMING fans, including solid colors and dynamic effects.
The WarMachine case comes with 4 pre-installed 120mm RGB LED fans. These fans feature 11 predefined backlight modes.
- Націсніце Святлодыёдная кнопка кіравання on the top I/O panel to cycle through the available lighting modes.
- Each press will switch to the next mode.
- The fans are designed with dual-ring RGB lighting for enhanced visual effects.
Тэхнічнае абслугоўванне
Рэгулярнае тэхнічнае абслугоўванне дапамагае забяспечыць аптымальную прадукцыйнасць і даўгавечнасць кампанентаў вашага ПК.
Уборка
- Пылавыя фільтры: Periodically remove and clean the dust filters (if applicable) to maintain good airflow. Wash with water and let them dry completely before reinstallation.
- Інтэр'ер: Use compressed air to blow out dust from inside the case, especially from fan blades, heatsinks, and vents. Do this in a well-ventilated area.
- Знешні выгляд: Працірайце вонкавыя паверхні, у тым ліку панэлі з загартаванага шкла, мяккай губкайamp тканіна. Пазбягайце абразіўных ачышчальнікаў.
Fan Care
- Ensure all fans are spinning freely and are not obstructed by cables or dust buildup.
- If a fan becomes noisy or stops working, consider replacing it.
Ліквідацыю непаладак
If you encounter issues with your PC case, refer to the following common problems and solutions:
- Няма харчавання:
- Check if the power cable is securely connected to the PSU and the wall outlet.
- Пераканайцеся, што перамыкач блока харчавання знаходзіцца ў становішчы «ON».
- Праверце, ці правільна падключаны кабель выключальніка харчавання на пярэдняй панэлі да раздыма харчавання матчынай платы.
- Вентылятары не круцяцца/няма RGB:
- Check if the fan power cables are securely connected to the motherboard or fan controller.
- Ensure the RGB cables (if separate) are properly connected.
- Press the LED Control Button to cycle through modes; it might be on a 'dark' mode.
- Парты USB не працуюць:
- Verify that the USB 3.0 and USB 2.0 headers from the case are correctly plugged into the corresponding headers on your motherboard.
- Audio Jacks Not Working:
- Ensure the HD Audio cable from the case is correctly connected to the audio header on your motherboard.
- Check your operating system's audio settings.
Тэхнічныя характарыстыкі
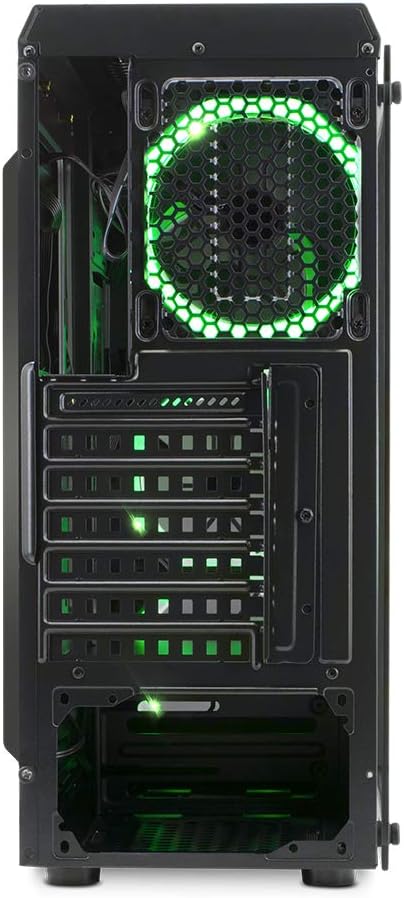
Image: A diagram illustrating the physical dimensions of the EMPIRE GAMING WarMachine PC case: 420mm length, 188mm width, and 440mm height.
| Асаблівасць | Спецыфікацыя |
|---|---|
| Назва мадэлі | WarMachine |
| Нумар мадэлі | OE-CA-13RGB |
| Тып корпуса | Сярэдняя вежа |
| Сумяшчальнасць матчыных поплаткаў | ATX, Micro ATX, Mini ITX |
| Памеры (Д х Ш х У) | 420 х 188 х 440 мм |
| Вага | 5.18 кг |
| Матэрыял | Загартаванае шкло, сталь |
| Уключаны вентылятары | 4 x 120mm RGB LED Fans |
| Рэжымы RGB | 11 Predefined Modes |
| Абмежаванне вышыні кулера працэсара | 155 мм |
| Ліміт даўжыні GPU | 320 мм |
| Watercooling Support | 120mm / 240mm Radiators |
| Прывадныя адсекі | 4 (supports 3.5" HDD and 2.5" SSD) |
| Слоты пашырэння | 4 |
| Пярэднія парты I / O | 1x USB 3.0, 2x USB 2.0, HD Audio (Mic/Headphone), Power, Reset, LED Control |
Гарантыя і падтрымка
EMPIRE GAMING products are designed for reliability and performance. For warranty information, please refer to the warranty card included with your product or visit the official EMPIRE GAMING webсайт.
For technical support, troubleshooting assistance, or spare parts, please contact EMPIRE GAMING customer service through their official channels. Provide your product model number (OE-CA-13RGB) and a detailed description of the issue for faster service.