Tacklife PES01A
Tacklife PES01A Circular Saw User Manual
Model: PES01A
1. Уводзіны
Thank you for choosing the Tacklife PES01A Circular Saw. This powerful and versatile tool is designed for efficient and precise cutting of various materials, including wood and plastic. Featuring a robust 1500W motor, laser guide, and adjustable cutting capabilities, it is an ideal tool for both professional and DIY projects. Please read this manual thoroughly before operation to ensure safe and effective use of your new circular saw.

Figure 1.1: Tacklife PES01A Circular Saw overview.
2. Агульныя інструкцыі па тэхніцы бяспекі
Always follow basic safety precautions when using electrical tools to reduce the risk of fire, electric shock, and personal injury. Keep this manual for future reference.
2.1. Бяспека працоўнага месца
- Трымайце рабочую зону ў чысціні і добра асветленым. Загрувашчаныя або цёмныя месцы выклікаюць аварыі.
- Не выкарыстоўвайце электраінструменты ў выбуханебяспечнай атмасферы, напрыклад, у прысутнасці гаручых вадкасцей, газаў або пылу. Электраінструменты ствараюць іскры, якія могуць запаліць пыл або пары.
- Падчас працы з электраінструментам не дапускайце дзяцей і навакольных. Адцягненне можа прывесці да таго, што вы страціце кантроль.
2.2. Электрычная бяспека
- Вілкі электраінструмента павінны адпавядаць разетцы. Ні ў якім разе не змяняйце вілку.
- Пазбягайце кантакту цела з заземленымі паверхнямі, такімі як трубы, радыятары, пліты і халадзільнікі. Існуе павышаны рызыка паразы электрычным токам, калі ваша цела зазямлена.
- Не падвяргайце электраінструменты ўздзеянню дажджу або вільготнасці. Трапленне вады ў электраінструмент павялічвае рызыку паразы электрычным токам.
- Не злоўжывайце шнуром. Ні ў якім разе не выкарыстоўвайце шнур для пераноскі, выцягвання або адключэння электраінструмента. Трымайце шнур далей ад цяпла, масла, вострых краёў або рухомых частак.
2.3. Асабістая бяспека
- Заўсёды апранайце ахоўныя акуляры. Выкарыстоўвайце ахоўныя акуляры.
- Карыстайцеся ахоўнымі слыхавымі апаратамі пры працяглай працы з інструментам.
- Апранайцеся належным чынам. Не апранайце шырокую вопратку і ўпрыгажэнні. Трымайце валасы і адзенне далей ад рухомых частак.
- Будзьце ўважлівыя, сачыце за тым, што робіце, і карыстайцеся здаровым сэнсам пры працы з электраінструментам.
- Use safety clamps or a vise to secure the workpiece. This is safer than using your hand and it frees both hands to operate the tool.
2.4. Circular Saw Specific Safety
- Трымайце рукі далей ад зоны рэзкі і ляза. Трымайце другую руку на дадатковай ручцы або корпусе рухавіка. Калі абедзве рукі трымаюць пілу, іх нельга парэзаць лязом.
- Не цягніцеся пад нарыхтоўку. Ахоўнік не можа абараніць вас ад ляза пад нарыхтоўкай.
- Адрэгулюйце глыбіню рэзу ў залежнасці ад таўшчыні нарыхтоўкі. Знізу нарыхтоўкі павінна быць відаць менш за поўны зуб ляза.
- Ніколі не трымайце нарыхтоўку ў руках або па назе падчас рэзкі. Замацуеце нарыхтоўку на ўстойлівай платформе.
- Трымайце электраінструмент за ізаляваныя паверхні захопу, калі выконваеце працу, дзе рэжучы інструмент можа закрануць схаваную правадку або ўласны шнур.
- Always ensure the lower guard is closed before placing the saw down.
3. Кампаненты і асаблівасці
Familiarize yourself with the parts of your Tacklife PES01A Circular Saw before operation.

Figure 3.1: Key components of the circular saw.
- 1. Магутны рухавік: Ensures good heat dissipation.
- 2. Лазерны перамыкач: Activates the laser guide.
- 3. 3M Power Cord & Cable Tie: Convenient for storage and use.
- 4. Двайны ахоўны выключальнік: Requires pressing both buttons to start, preventing accidental injury.
- 5. Rubberized Handle: For comfortable and secure grip.
- 6. Support Handle: Provides additional control.
- 7. Aluminum Alloy Cover: Durable housing.
- 8. Iron Base Plate: Sturdy base for cutting.
- 9. Iron Blade Guard: Protects the blade.
Аксэсуары ў камплекце:

Figure 3.2: Standard accessories included with the saw.
- 1 x Tacklife PES01A Circular Saw
- 1 x 185mm 24-Tooth TCT Blade (for wood/plastic)
- 1 x 185mm 40-Tooth TCT Blade (for wood/plastic)
- 1 x Hex Wrench (for blade changes)
- 1 x Parallel Guide Ruler
- 1 x Dust Port Adapter (35mm diameter)
- 1 х Кіраўніцтва карыстальніка
- 1 х гарантыйны талон
4. Налада і зборка
4.1. Усталёўка/зняцце ляза
- Ensure the saw is unplugged from the power source before attempting any blade changes.
- Націсніце і ўтрымлівайце кнопку блакіроўкі шпіндзеля.
- Using the hex wrench, loosen the blade bolt by turning it counter-clockwise.
- Падніміце ніжні ахоўны кожух ляза і асцярожна выміце старое лязо.
- Устаўце новае лязо на шпіндзель, пераканаўшыся, што зуб'і накіраваны ў напрамку стрэлкі на ахоўным кожухе пілы.
- Replace the blade bolt and tighten it securely with the hex wrench while holding the spindle lock button.
- Release the spindle lock and check that the blade rotates freely and the guard moves smoothly.
4.2. Attaching the Parallel Guide Ruler
The parallel guide ruler helps achieve straight cuts parallel to the edge of the workpiece.
- Slide the guide ruler into the slot on the front of the saw's base plate.
- Adjust the ruler to the desired cutting width.
- Tighten the locking screw to secure the ruler in place.
4.3. Падключэнне пылазборніка
For a cleaner work environment, connect a vacuum cleaner to the dust port.
- Attach the 35mm dust port adapter to the dust outlet on the saw.
- Connect your vacuum cleaner hose to the adapter.
5. Інструкцыя па эксплуатацыі
5.1. Рэгуляванне глыбіні рэзання
The cutting depth can be adjusted to match the thickness of your material. The maximum cutting depth at 90° is 65mm (2.5 inches).

Figure 5.1: Adjusting cutting depth for straight and bevel cuts.
- Loosen the depth adjustment lever located at the rear of the saw.
- Raise or lower the base plate to the desired cutting depth. Ensure only a small portion of the blade teeth extends below the workpiece.
- Моцна зацягніце рычаг рэгулявання глыбіні.
5.2. Adjusting Bevel Angle (Miter Cut)
The saw can make bevel cuts up to 45°. The maximum cutting depth at 45° is 45mm (1.8 inches).
- Loosen the bevel adjustment knob/lever at the front of the saw.
- Tilt the base plate to the desired angle (0° to 45°).
- Шчыльна зацягніце ручку/рычаг рэгулявання нахілу.
5.3. Выкарыстанне лазернага накіроўвальніка
The integrated laser guide provides a visual line for precise cutting.

Figure 5.2: The laser guide assists in making straight cuts.
- Locate the laser switch on the saw.
- Flip the switch to turn the laser on. A red laser line will project onto your workpiece, indicating the cutting path.
- Align the laser line with your marked cut line on the material.
- Turn off the laser when not in use to conserve battery (if applicable) or prevent accidental activation.
5.4. Зрабіць разрэз
Заўсёды пераканайцеся, што апрацоўваемая дэталь надзейна замацаванаampперад рэзкай.

Figure 5.3: Cutting a wooden board with the circular saw.

Figure 5.4: Cutting a plastic sheet with the circular saw.
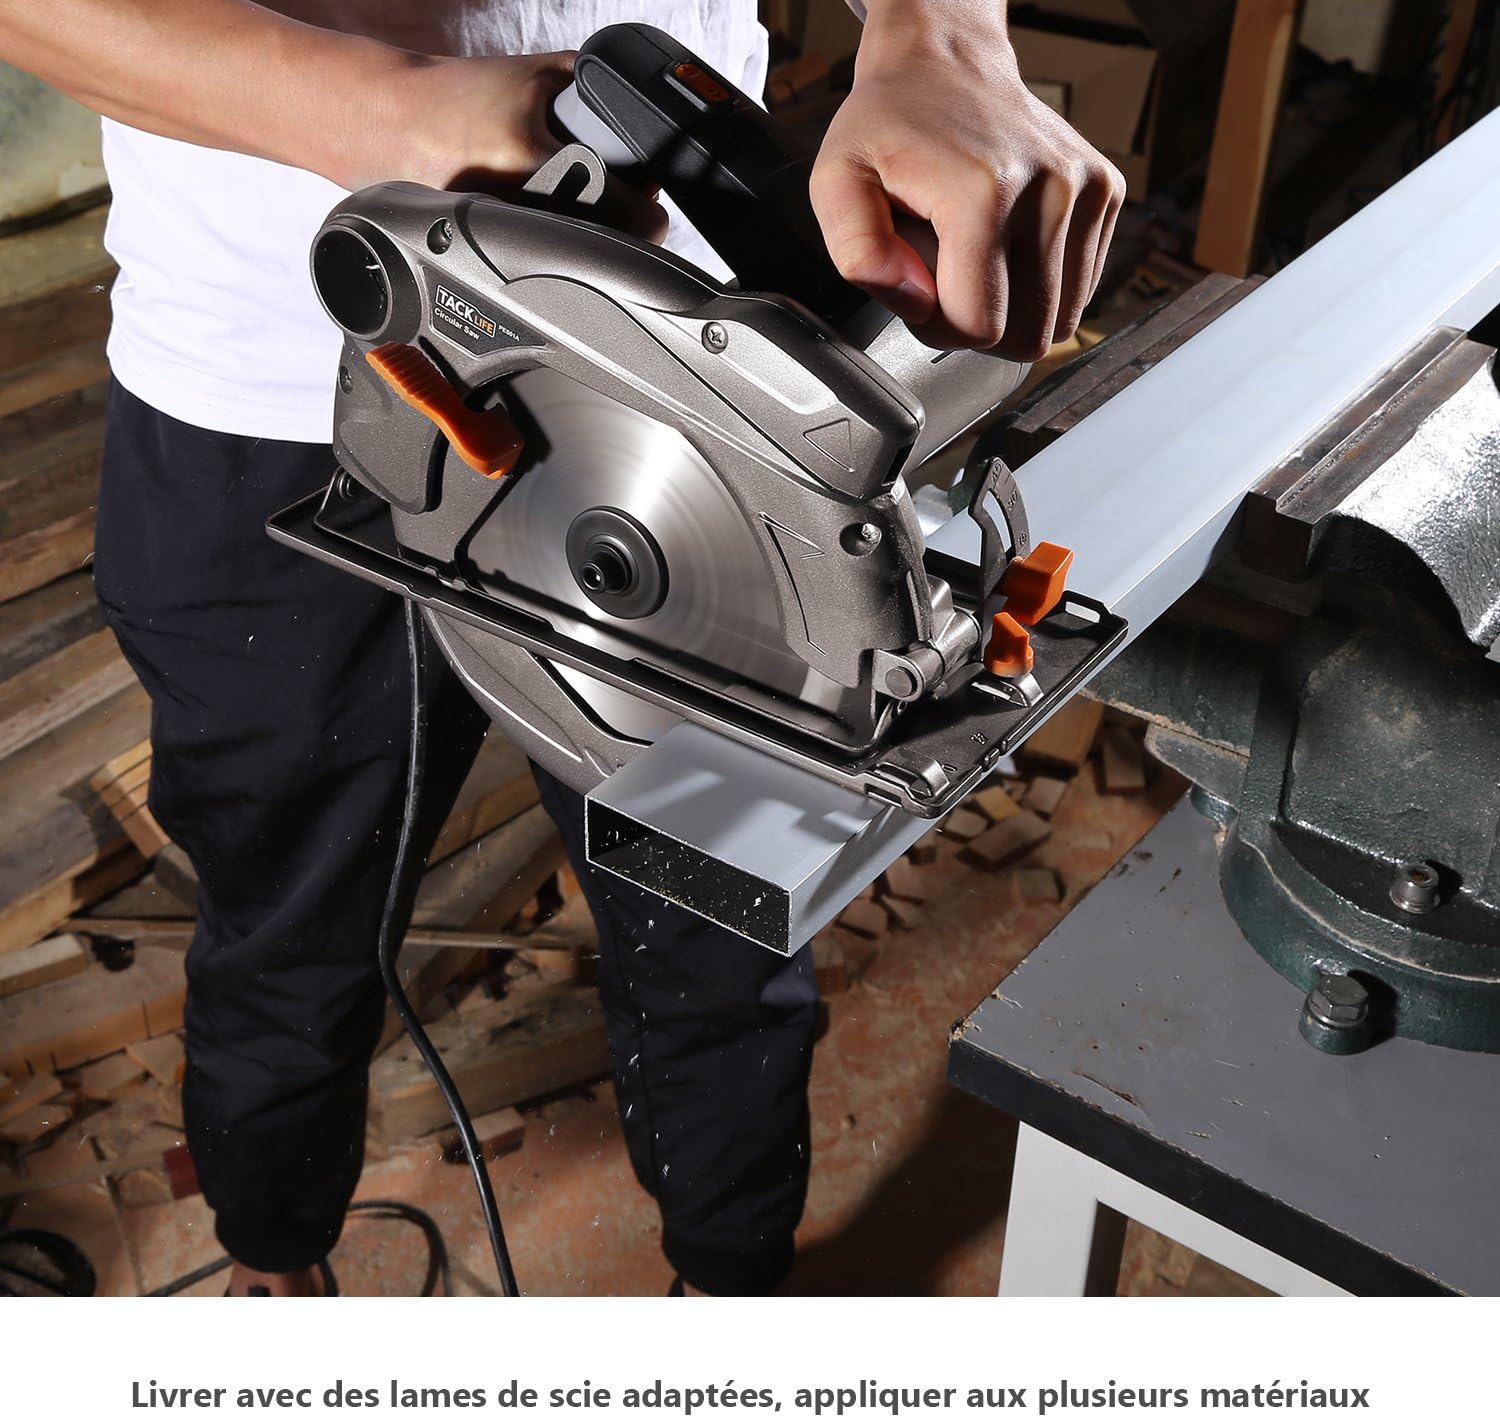
Figure 5.5: Cutting a metal profile with the circular saw (ensure appropriate blade is used).
- Падключыце пілу да адпаведнай разеткі.
- Hold the saw firmly with both hands, ensuring a stable grip on the main and auxiliary handles.
- To start the saw, press the double safety switch (requires pressing both buttons simultaneously for safety).
- Перад пачаткам рэзкі дайце лязу набраць поўную хуткасць.
- Guide the saw smoothly and steadily along your marked line. Do not force the saw; let the blade do the work.
- Maintain a consistent feed rate.
- Пасля завяршэння рэзу адпусціце курок і дайце дыску цалкам спыніцца, перш чым здымаць пілу з апрацоўванай дэталі.
- Unplug the saw after use.
6. Тэхнічнае абслугоўванне
Рэгулярнае тэхнічнае абслугоўванне забяспечвае даўгавечнасць і бяспечную працу вашай цыркулярнай пілы.
6.1. Уборка
- Заўсёды адключайце пілу ад сеткі перад чысткай.
- Use a soft brush or compressed air to remove dust and debris from the motor vents and blade guard.
- Wipe down the exterior of the saw with a damp тканіна. Не выкарыстоўвайце агрэсіўныя хімікаты або абразіўныя ачышчальнікі.
- Keep the base plate clean to ensure smooth gliding over the workpiece.
6.2. Сыход за лязом
- Inspect blades regularly for dullness, cracks, or missing teeth. Replace damaged blades immediately.
- Clean resin and pitch buildup from blades using a suitable blade cleaner.
- Store blades properly to prevent damage and corrosion.
6.3. Захоўванне
- Захоўвайце пілу ў сухім, бяспечным месцы, недаступным для дзяцей.
- Беражыце шнур харчавання ад пашкоджанняў падчас захоўвання.
7. Выпраўленне непаладак
У гэтым раздзеле разглядаюцца распаўсюджаныя праблемы, з якімі вы можаце сутыкнуцца пры выкарыстанні цыркулярнай пілы.
| праблема | Магчымая прычына | Рашэнне |
|---|---|---|
| Піла не заводзіцца. | Няма электрасілкавання; не ўключаны засцерагальны выключальнік; няспраўны шнур харчавання. | Check power outlet and circuit breaker; Ensure both safety switch buttons are pressed; Inspect power cord for damage. |
| Blade not cutting smoothly or burning wood. | Dull or dirty blade; Incorrect blade for material; Overfeeding the saw. | Replace or clean blade; Use appropriate blade for the material; Reduce feed rate. |
| Празмерная вібрацыя. | Аслабленае лязо; пашкоджанае лязо; зношаныя падшыпнікі. | Tighten blade bolt; Replace blade; Contact customer support if bearings are suspected. |
| Laser guide not working. | Laser switch off; Laser lens dirty; Laser module faulty. | Turn on laser switch; Clean laser lens; Contact customer support. |
| Збор пылу дрэнны. | Dust port clogged; Vacuum not powerful enough; Hose not properly connected. | Clear dust port; Use a more powerful vacuum; Ensure hose is securely attached. |
8. Тэхнічныя характарыстыкі
| Асаблівасць | Спецыфікацыя |
|---|---|
| мадэль | PES01A |
| Увод магутнасці | 1500 Вт |
| тtage | 230 вольт |
| Хуткасць без нагрузкі | 4700 XNUMX абаротаў у хвіліну |
| Дыяметр клінка | 185 мм (7-1/4 цалі) |
| Максімальная глыбіня рэзання (90°) | 65 мм (2.5 цаляў) |
| Максімальная глыбіня рэзання (45°) | 45 мм (1.8 цаляў) |
| Ёмістасць фаскі | 0° - 45° |
| Вага | 4.9 кг (10.8 фунтаў) |
| Лазерны гід | так |
| Дыяметр адтуліны для пылу | 35 мм |
9. Гарантыя і падтрымка
Tacklife products are manufactured to high-quality standards and are warranted against defects in materials and workmanship. Please refer to the included warranty card for specific terms and conditions, including the warranty period and registration process.
Малюнак 9.1: Выпample of included warranty card.
Падтрымка кліентаў:
For technical assistance, troubleshooting, or warranty claims, please contact Tacklife customer support. Contact information can typically be found on the warranty card or the official Tacklife webсайт.
- Webсайт: www.tacklife.com (Калі ласка, праверце афіцыйную website for the most up-to-date contact information.)
- электронная пошта: Refer to your warranty card or product packaging.
When contacting support, please have your product model (PES01A) and purchase date ready.