BESDER BES-MH03
BESDER Home Security IP Camera User Manual
Model: BES-MH03
1. Уводзіны
Thank you for choosing the BESDER Home Security IP Camera. This wireless smart WiFi camera is designed to provide reliable surveillance, audio recording, and baby monitoring capabilities with high-definition video. This manual will guide you through the setup, operation, and maintenance of your new device to ensure optimal performance and security.
2. Інфармацыя па бяспецы
- Ensure the camera is powered by the correct voltage (DC 5V) as specified.
- Do not expose the camera to water or moisture. It is designed for indoor use only.
- Пазбягайце размяшчэння камеры пад прамымі сонечнымі прамянямі або побач з крыніцамі цяпла.
- Do not attempt to disassemble or repair the camera yourself. Contact qualified personnel for service.
- Трымайце камеру і яе аксэсуары ў месцах, недаступных для дзяцей.
- Use only the provided power adapter and cable to prevent damage.
3. Змесціва ўпакоўкі
Калі ласка, праверце ўпакоўку, каб пераканацца ў наяўнасці ўсіх прадметаў і іх стане:
- BESDER Home Security IP Camera
- USB кабель харчавання
- Адаптар харчавання (пастаянны ток 5 В)
- Мантажныя шрубы і дзюбелі
- Кіраўніцтва карыстальніка (гэты дакумент)

Image showing the BESDER IP Camera along with its accessories: a USB power cable, a power adapter, and a packet of mounting screws.
4. Прадукт скончыўсяview
Familiarize yourself with the main components of your BESDER IP Camera:
- Аб'ектыў камеры: Захоплівае відэа footage.
- Інфрачырвоныя святлодыёды: Для начнога бачання.
- Мікрафон: Для ўводу гуку.
- Дакладчык: Для двухбаковай гукавой сувязі.
- Слот для SD-карты: Для лакальнага захоўвання відэа (падтрымліваецца да 64 ГБ).
- Power Interface (DC 5V): Падключаецца да адаптара сілкавання.
- Кнопка скіду: Выкарыстоўваецца для аднаўлення заводскіх налад.

Diagram illustrating the side view of the BESDER IP Camera, highlighting the SD Card slot, Power interface (DC 5V), and Reset button.
5. Настройка
5.1. Уключэнне
- Connect the USB power cable to the camera's power interface.
- Падключыце адаптар сілкавання да стандартнай электрычнай разеткі.
- The camera will power on, and its indicator light will begin to flash, indicating it's ready for setup.
5.2. App Installation (iCSee)
The BESDER IP Camera uses the iCSee application for remote monitoring and control.
- Download the iCSee app from your mobile device's app store (App Store for iOS or Google Play Store for Android).
Спампаваць для iOS | Спампаваць для Android - Зарэгіструйце новы ўліковы запіс або ўвайдзіце ў сістэму, калі ён у вас ужо ёсць.
5.3. Злучэнне Wi-Fi
Follow these steps to connect your camera to your home Wi-Fi network:
- Open the iCSee app and tap the "+" icon to add a new device.
- Select "Add My Device" or "Add Camera".
- Choose the "Wi-Fi Camera" option.
- Follow the on-screen prompts to enter your Wi-Fi network name (SSID) and password. Ensure your phone is connected to a 2.4GHz Wi-Fi network, as the camera may not support 5GHz.
- The app will generate a QR code. Position your phone's screen in front of the camera lens (approx. 15-20 cm away) until you hear a confirmation sound from the camera.
- Once connected, the camera's indicator light will turn solid blue. You can now name your camera and start monitoring.
5.4. Мантаж
The camera can be placed on a flat surface or mounted to a wall or ceiling.
- Choose a suitable location with a clear view and within Wi-Fi range.
- If mounting, use the provided mounting screws and wall plugs to secure the camera base.
- Adjust the camera's angle as needed within the app after mounting.
6. Аперацыйная
6.1. Жыць View
Access real-time video feed from your camera through the iCSee app.
- Open the iCSee app and select your camera from the device list.
- The live video feed will appear. You can pan and tilt the camera remotely using the controls in the app.

Screenshot of a multi-camera monitoring interface, likely from the iCSee application, displaying live feeds from multiple cameras and recording controls.
6.2. Запіс і захоўванне
The camera supports local storage via a MicroSD card.
- Insert a MicroSD card (up to 64GB, Class 10 recommended) into the SD card slot.
- In the iCSee app settings, navigate to "Storage Settings" to format the SD card and configure recording modes (e.g., continuous, motion-triggered).
- Запісана footagможа быць viewed and downloaded directly from the app.
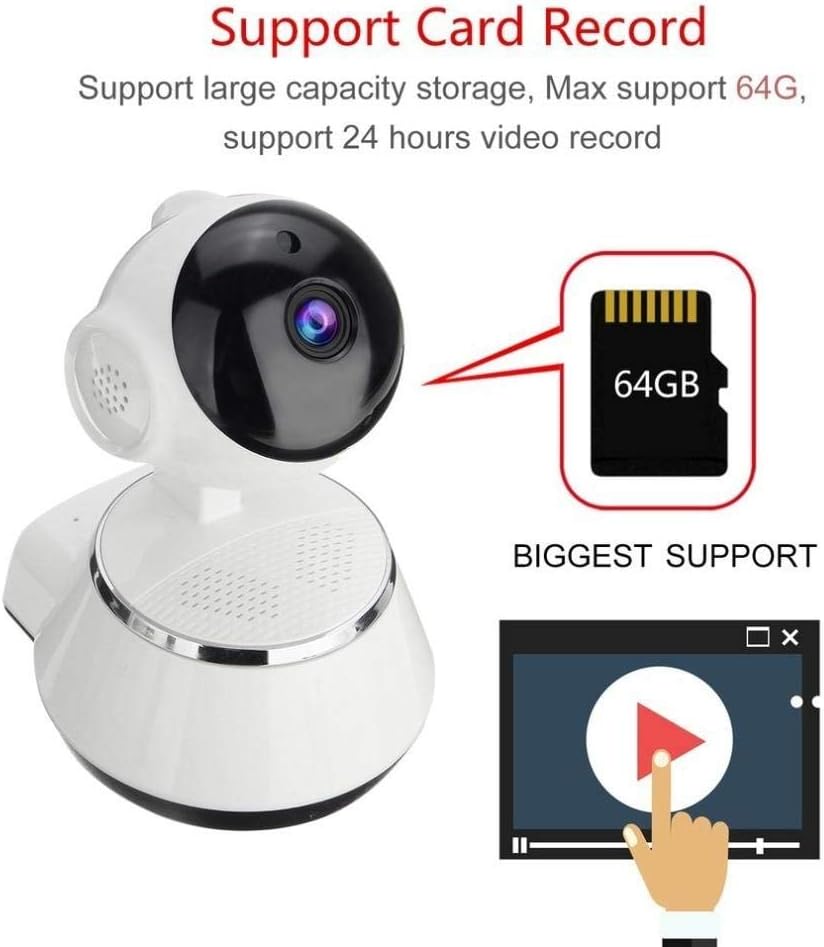
Image demonstrating the camera's support for large capacity storage, specifically showing a 64GB MicroSD card, indicating support for 24-hour video recording.
6.3. Выяўленне руху
Receive alerts when motion is detected in the camera's field of view.
- Enable "Motion Detection" in the camera settings within the iCSee app.
- Adjust sensitivity levels and set up notification preferences (e.g., push notifications, email alerts).
6.4. Начное бачанне
Камера аўтаматычна пераключаецца ў начны рэжым пры слабым асвятленні.
- Infrared LEDs provide clear black-and-white video up to 10 meters in complete darkness.
- No manual intervention is required for night vision activation.

Comparison image displayed on a smartphone screen, showing the difference between daytime and nighttime monitoring views, highlighting the infrared night vision capability.
6.5. Двухбаковая аўдыёсувязь
Звязвайцеся праз камеру з дапамогай убудаванага мікрафона і дынаміка.
- У жывым эфіры view, tap the microphone icon in the iCSee app to speak through the camera.
- Націсніце на значок дынаміка, каб праслухаць гук з наваколля камеры.
6.6. Аддалены доступ
Monitor your property from anywhere with an internet connection.
- As long as your camera is connected to Wi-Fi and your phone has internet access, you can view live feeds and manage settings remotely via the iCSee app.
7. Тэхнічнае абслугоўванне
- Уборка: Выкарыстоўвайце мяккую сухую тканіну для чысткі аб'ектыва і корпуса камеры. Не выкарыстоўвайце вадкія ачышчальнікі або аэразолі.
- Абнаўленні прашыўкі: Regularly check for firmware updates through the iCSee app to ensure your camera has the latest features and security patches.
- Кіраванне SD-картай: Periodically back up important recordings and format the SD card to maintain optimal performance.
- захоўванне: When not in use for extended periods, store the camera in a cool, dry place away from direct sunlight.
8. Выпраўленне непаладак
| праблема | Магчымая прычына / рашэнне |
|---|---|
| Камера не ўключаецца | Ensure the power adapter is securely connected to both the camera and the power outlet. Try a different outlet. |
| Немагчыма падключыцца да Wi-Fi | Check if your Wi-Fi network is 2.4GHz. Ensure the Wi-Fi password is correct. Move the camera closer to the router. Reset the camera and try again. |
| жыць view размытае або цёмнае | Clean the camera lens. Check lighting conditions. Ensure night vision is functioning correctly in low light. |
| SD-карта не запісвае | Ensure the SD card is inserted correctly and formatted in the app. Check if the card is full or corrupted. Try a different SD card. |
| Няма гуку або дрэнная якасць гуку | Check microphone and speaker settings in the app. Ensure there are no obstructions blocking the microphone or speaker. |
| Камера часта адключаецца | Weak Wi-Fi signal. Move the camera closer to the router or consider a Wi-Fi extender. Reduce network congestion. |
9. Тэхнічныя характарыстыкі
| Асаблівасць | Дэталь |
|---|---|
| Нумар мадэлі | BES-MH03 |
| Тэхналогія падлучэння | Бесправадная сувязь (Wi-Fi) |
| Рэкамендуемае выкарыстанне | Baby Monitoring, Home Security |
| Асаблівасці | Motion Sensor, Night Vision (Infrared distance 10m) |
| Формаў-фактар | Купал |
| Ватtage | 3 ват |
| Падтрымка захоўвання | Карта MicroSD (макс. 64 ГБ) |
| Аўдыё | Two-way audio (Audio Record) |
10. Гарантыя і падтрымка
BESDER products are manufactured to high-quality standards. For warranty information, please refer to the terms and conditions provided at the point of purchase or contact your retailer. For technical support or further assistance, please refer to the support section within the iCSee application or visit the official BESDER webсайт (калі ёсць).