1. Уводзіны
Дзякуй за пакупкуasing the UHAPPY U18 Portable Mini HD LED Projector. This manual provides essential information for the safe and efficient operation of your device. Please read it thoroughly before use and retain it for future reference.
Тэхніка бяспекі
- Не глядзіце непасрэдна ў аб'ектыў праектара, калі ён уключаны.amp уключаны.
- Забяспечце належную вентыляцыю вакол праектара, каб прадухіліць перагрэў.
- Не падвяргайце праектар уздзеянню дажджу або вільгаці.
- Выкарыстоўвайце толькі адаптар сілкавання, які пастаўляецца з праектарам.
- Не спрабуйце адкрываць або рамантаваць праектар самастойна. Звяртайцеся па любыя паслугі па абслугоўванні да кваліфікаванага персаналу.
2. Прадукт скончыўсяview
Familiarize yourself with the components and ports of your UHAPPY U18 projector.
Змест пакета
The following items are included in your projector package:

Image: Contents of the UHAPPY U18 projector package, including the projector, power adapter, AV cable, remote control, and user manual.
- UHAPPY U18 Mini LED Projector
- Адаптар сілкавання
- AV-кабель
- Пульт дыстанцыйнага кіравання
- Кіраўніцтва карыстальніка (гэты дакумент)
Projector Components and Ports

Image: Angled top-down view of the UHAPPY U18 projector, highlighting the lens, focus adjustment, and control panel.

Выява: Уверсе view of the UHAPPY U18 projector, showing the integrated control buttons.

Выява: спераду view of the UHAPPY U18 projector, focusing on the projection lens.
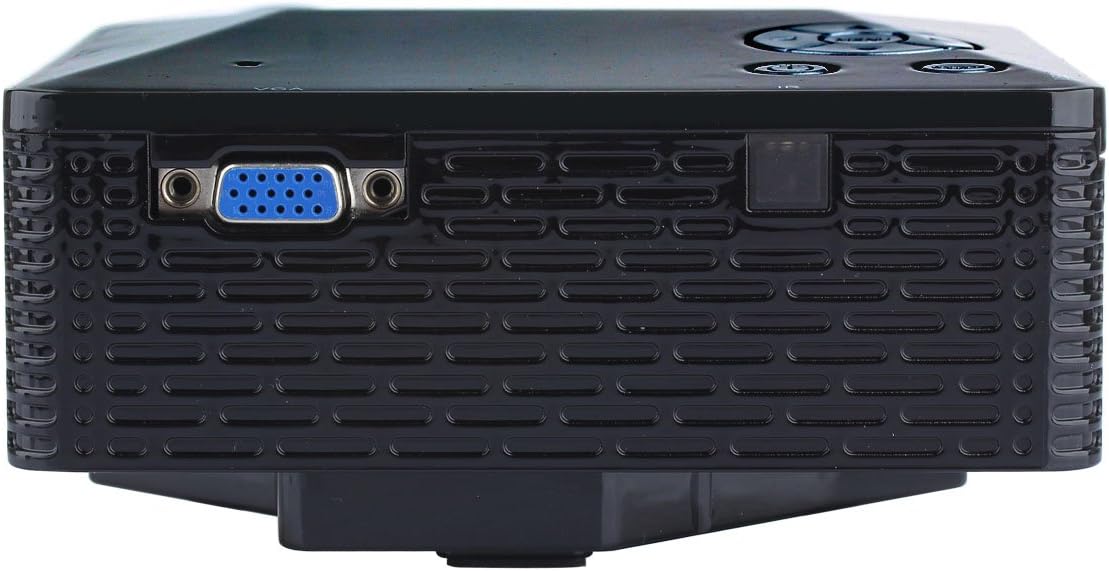
Выява: Збоку view of the UHAPPY U18 projector, illustrating the VGA input port.
The projector features various input ports for connectivity:
- Уваход HDMI: For connecting devices like laptops, gaming consoles, or media players.
- Порт USB: For connecting USB storage devices to play media directly.
- Слот для SD-карты: For inserting SD memory cards to play media directly.
- AV-уваход: For connecting older devices using the included AV cable.
- Уваход VGA: For connecting computers or laptops with a VGA output.
- DC-IN: Порт ўводу харчавання.
- Выхад для навушнікаў: For connecting external audio devices or headphones.
- Ручка факусоўкі: Located near the lens for adjusting image clarity.
3. Настройка
3.1 Размяшчэнне
Place the projector on a stable, flat surface. Ensure there is adequate space around the projector for ventilation. The ideal projection distance is between 1 to 4 meters, yielding an image size of 20 to 80 inches.
3.2 Падключэнне харчавання
- Connect the power adapter to the DC-IN port on the projector.
- Падключыце адаптар сілкавання да адпаведнай электрычнай разеткі.
3.3 Падключэнне ўваходных прылад
Choose the appropriate cable and port based on your source device:
- HDMI: Connect an HDMI cable from your device (e.g., laptop, DVD player) to the projector's HDMI port.
- VGA: Падключыце кабель VGA ад кампутара да порта VGA праектара.
- АВ: Use the provided AV cable to connect devices with AV output (e.g., older DVD players, set-top boxes) to the projector's AV port.
- USB/SD-карта: Устаўце USB-назапашвальнік у USB-порт або SD-карту ў слот для SD-карты.
4. Інструкцыя па эксплуатацыі
4.1 Уключэнне/выключэнне
- Каб уключыць: Націсніце кнопку харчавання на праектары або пульце дыстанцыйнага кіравання. Загарыцца святлодыёдны індыкатар.
- Каб выключыць: Press the power button again. It is recommended to allow the projector to cool down for a few minutes before unplugging it.
4.2 Выбар крыніцы
Пасля ўключэння вам можа спатрэбіцца выбраць крыніцу ўваходнага сігналу:
- Press the 'Source' button on the projector or the remote control.
- Use the navigation buttons to select the desired input (HDMI, VGA, AV, USB, SD) and press 'OK' or 'Enter'.
4.3 Рэгуляванне фокусу
If the projected image appears blurry:
- Rotate the focus knob located near the projector lens until the image becomes clear and sharp.
4.4 Навігацыя па меню
Use the 'Menu' button on the projector or remote to access settings. Use the navigation arrows to move through options and 'OK' or 'Enter' to confirm selections. The projector supports multiple languages including English, Czech, Slovak, Danish, German, Spanish, French, Croatian, Italian, Hungarian, Dutch, Norwegian, Polish, Portuguese, Romanian, Slovene, Serbian, Finnish, Swedish, Bulgarian, Greek, Russian, and Chinese.
4.5 Падтрымоўваныя медыяфарматы
When playing media directly from USB or SD card, the projector supports the following formats:
- выява: BMP, JPEG, PNG
- Відэа: MPEG1, MPEG2, MPEG4, RM, RMVB, AVI, FLV, WMV
5. Тэхнічнае абслугоўванне
5.1 Ачыстка аб'ектыва
Выкарыстоўвайце мяккую тканіну без ворса, спецыяльна распрацаваную для аптычных лінзаў, каб акуратна праціраць аб'ектыў праектара. Пазбягайце выкарыстання абразіўных матэрыялаў або агрэсіўных хімічных рэчываў.
5.2 Генеральная ўборка
Wipe the projector's exterior with a soft, dry cloth. Do not use liquid cleaners directly on the device. Ensure ventilation openings are free from dust and obstructions.
5.3 Захоўванне
When not in use, store the projector in a cool, dry place, away from direct sunlight and extreme temperatures. It is advisable to cover the lens to protect it from dust.
6. Выпраўленне непаладак
Калі ў вас узніклі праблемы з праектарам, звярніцеся да наступных распаўсюджаных праблем і рашэнняў:
| праблема | Магчымая прычына | Рашэнне |
|---|---|---|
| Няма выявы на экране | Выбрана няправільная крыніца ўводу Няшчыльнае злучэнне кабеля Source device not powered on | Выберыце правільную крыніцу ўваходу. Праверце ўсе кабельныя злучэнні. Пераканайцеся, што прылада-крыніца ўключана і выводзіць сігнал. |
| Відарыс размыты | Фокус не адрэгуляваны | Rotate the focus knob until the image is clear. |
| Няма гуку | Занадта нізкая гучнасць Знешняя аўдыёпрылада не падключана Налады гуку зыходнай прылады | Павялічце гучнасць праектара. Connect external speakers/headphones to the audio output. Праверце налады гуку на прыладзе-крыніцы. |
| Праектар пераграваецца і выключаецца | Заблакаваная вентыляцыя Працяглае выкарыстанне ў гарачым асяроддзі | Пераканайцеся, што вентыляцыйныя адтуліны чыстыя. Allow the projector to cool down. Operate in a well-ventilated area. |
7. Тэхнічныя характарыстыкі
Technical specifications for the UHAPPY U18 Portable Mini HD LED Projector:
- Сістэма выявы: ВК
- Уласнае раздзяленне: 320x240
- Lamp: святлодыёд
- Тэрмін службы святлодыёда: 20,000 гадзіны
- Яркасць: 60 LM
- Кантраст: 300:1
- Аб'ектыў: F=125
- Памер выявы: 20-80 цаляў
- Адлегласць праекцыі: 1-4 метраў
- Рэжым праекцыі: Пярэдняя выступ
- Рэжым працы: Кіраванне ўручную/дыстанцыйнае
- Уваходныя тэрміналы: AV, VGA, USB, SD, HDMI
- выхад: Навушнік
- Магутнасць: 24 Вт
- колер: 16.77 мільёна кветак
- Дакладчык: 1.0 Вт*2
- Працоўная тэмпература: 10-35°C
- Памеры: 135 х 132 х 52 мм
- Вага: 0.44 кг
8. Гарантыя і падтрымка
This product is manufactured by Generic. For warranty information and technical support, please refer to the documentation provided at the time of purchase or contact your retailer. Keep your purchase receipt as proof of purchase.