1. Уводзіны
Дзякуй за пакупкуasing the VIVIBRIGHT GP100UP LED Projector. This manual provides essential information for the safe and efficient operation of your device. Please read it thoroughly before use and retain it for future reference.
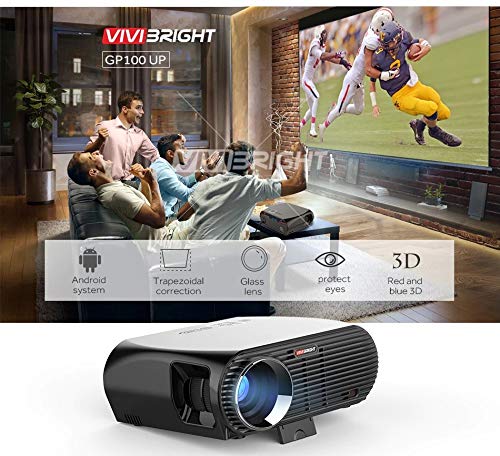
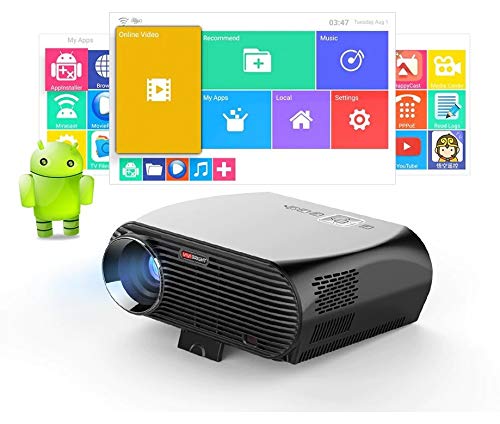
The VIVIBRIGHT GP100UP is an Android 6.0-based LED projector featuring built-in Wi-Fi and Bluetooth, designed for home theater and office presentations. It supports Full HD content and offers a bright projection experience.
2. Інфармацыя па бяспецы
- крыніца харчавання: Выкарыстоўвайце толькі пазначаны адаптар сілкавання. Пераканайцеся, што гучнасцьtage адпавядае вашай мясцовай крыніцы харчавання.
- Вентыляцыя: Не блакуйце вентыляцыйныя адтуліны. Забяспечце дастатковую цыркуляцыю паветра вакол праектара, каб пазбегнуць перагрэву.
- Ўздзеянне вадкасці: Keep the projector away from water or other liquids. Do not operate in damp асяроддзях.
- Уборка: Адключыце сілкаванне перад чысткай. Выкарыстоўвайце мяккую сухую тканіну. Пазбягайце вадкіх або аэразольных ачышчальнікаў.
- Устаўка аб'екта: Never insert objects of any kind into the projector openings as they may touch dangerous voltagэлектронныя кропкі або кароткія часткі.
- Абслугоўванне: Не спрабуйце самастойна абслугоўваць гэты прадукт. Звярніцеся да ўсіх абслугоўванняў кваліфікаванага абслуговага персаналу.
- Абарона вачэй: Не глядзіце непасрэдна ў аб'ектыў праектара, калі ён уключаны.amp уключаны. Яркае святло можа пашкодзіць вочы.
3. Змесціва ўпакоўкі
Праверце, ці ўсе пералічаныя ніжэй прадметы ўваходзяць у вашу ўпакоўку:
- VIVIBRIGHT GP100UP Projector
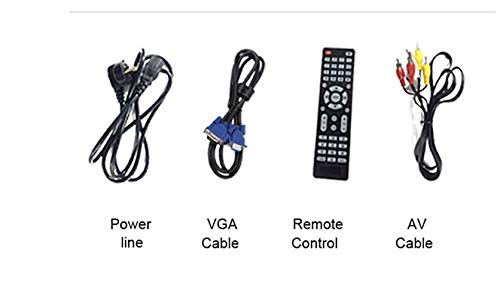
- Сілавы кабель
- Кабель VGA
- AV-кабель
- Пульт дыстанцыйнага кіравання
- Кіраўніцтва карыстальніка (гэты дакумент)
Малюнак 3.1: Included accessories with the VIVIBRIGHT GP100UP projector, including power cable, VGA cable, remote control, and AV cable.
4. Прадукт скончыўсяview
4.1. Projector Dimensions
Малюнак 4.1: Спераду і зверху view of the VIVIBRIGHT GP100UP projector with approximate dimensions: 11 inches (length), 8.85 inches (width), and 4 inches (height).
4.2. Парты ўводу/вываду
The projector features various ports for connecting external devices:
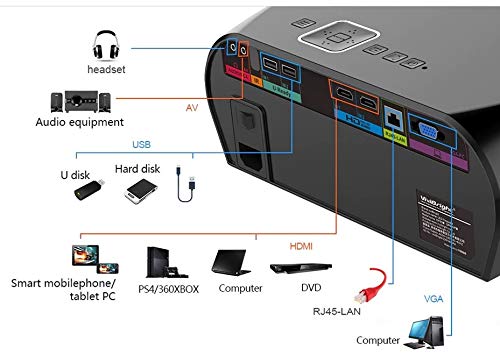
Малюнак 4.2: Detailed diagram of the projector's rear panel, illustrating connectivity options including headset, audio equipment (AV), USB ports for U disk and hard disk, HDMI ports, RJ45-LAN, and VGA port.
- HDMI: Connect to Blu-ray players, gaming consoles, laptops, or other HDMI-enabled devices.
- USB: For connecting USB drives (U disk) or external hard drives.
- АВ: Для падлучэння старых прылад з выкарыстаннем кампазітнага відэа і стэрэаўдыё.
- VGA: For connecting to computers or laptops with a VGA output.
- RJ45-LAN: Для падлучэння да правадной сеткі.
- Раз'ём для навушнікаў: Для падлучэння знешніх навушнікаў або дынамікаў.
4.3. Пульт дыстанцыйнага кіравання
The included remote control allows for convenient operation of the projector.
Малюнак 4.3: Remote control layout with key functions: ON/OFF, Volume Up/Down, OK, Menu, Home, Speed, Mute, Back, Mouse Mode, and the USB receiver.
- ВКЛ/ВЫКЛ: Power on or off the projector.
- Гучнасць +/-: Адрэгулюйце гучнасць гуку.
- OK: Пацвердзіце выбар.
- Меню: Доступ да налад праектара.
- Дом: Return to the main Android interface.
- Назад: Вярнуцца да папярэдняга экрана.
- Рэжым мышкі: Activate/deactivate air mouse function (if applicable).
- Адключэнне гуку: Выключыць або ўключыць гук.
5. Настройка
5.1. размяшчэнне
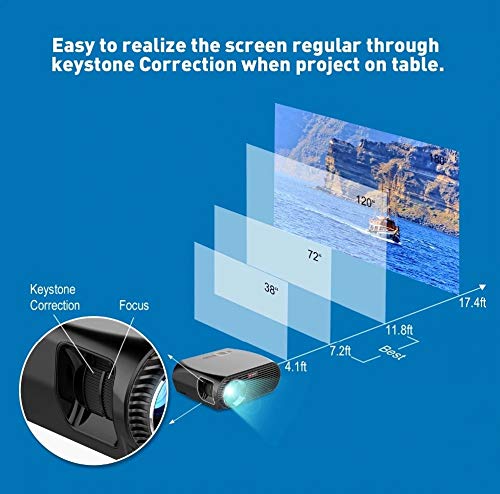
Place the projector on a stable, flat surface or mount it to the ceiling. Ensure there are no obstructions to the lens or ventilation ports. The optimal projection distance for a clear image is between 1 to 5 meters.
Малюнак 5.1: Illustration of projection distances and corresponding screen sizes, along with the location of the keystone correction and focus rings on the projector.
- For a 72-inch screen, the recommended distance is approximately 7.2 feet (2.2 meters).
- For a 120-inch screen, the recommended distance is approximately 11.8 feet (3.6 meters).
5.2. Падключэнне сілкавання
- Падключыце кабель харчавання да ўваходу харчавання праектара.
- Падключыце другі канец кабеля харчавання да адпаведнай электрычнай разеткі.
- Індыкатар харчавання на праектары павінен загарэцца.
5.3. Фокус і карэкцыя трапецападобнага скажэння
After powering on, adjust the image for clarity and proper geometry.
- Фокус: Rotate the focus ring near the lens until the projected image is sharp and clear.
- Карэкцыя трапецеідальных скажэнняў: If the projected image appears trapezoidal (wider at the top or bottom), use the keystone correction ring or lever (usually located near the focus ring) to adjust the image until it is rectangular. The GP100UP supports +/- 15 degrees vertical keystone correction.
6. Інструкцыя па эксплуатацыі
6.1. Initial Power On and Android Interface
Press the power button on the projector or remote control to turn on the device. The projector will boot into its Android 6.0 operating system interface.
Малюнак 6.1: The VIVIBRIGHT GP100UP projector in operation, highlighting its Android system capabilities and other features.
Navigate the Android interface using the remote control. You can access pre-installed applications, settings, and media files.
6.2. Падключэнне знешніх прылад
To project content from external sources:
- Connect your device (e.g., laptop, gaming console, USB drive) to the appropriate port on the projector (HDMI, USB, AV, VGA).
- On the projector's Android interface, navigate to the "Input Source" or "Source" option.
- Select the corresponding input source (e.g., HDMI1, USB, AV, VGA) to display content from your connected device.
6.3. Wireless Connectivity (Wi-Fi, Bluetooth, Screen Mirroring)
The GP100UP supports various wireless functions:
- Wi-Fi:
- Go to "Settings" on the Android interface.
- Выберыце «Wi-Fi» і ўключыце яго.
- Choose your desired network and enter the password to connect.
- Bluetooth:
- Go to "Settings" on the Android interface.
- Select "Bluetooth" and turn it on.
- Pair with Bluetooth audio devices like headphones or speakers.
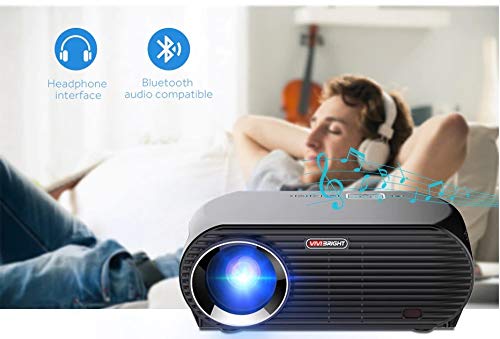
Малюнак 6.2: The projector's Bluetooth audio compatibility, allowing connection to wireless headphones or speakers.
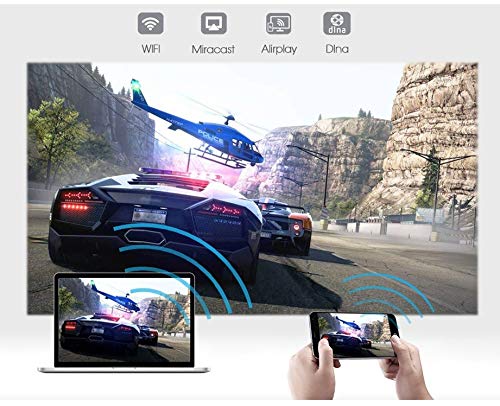
- Screen Mirroring (Miracast/Airplay/DLNA):
The projector supports mirroring content from compatible smartphones, tablets, and laptops via Wi-Fi, Miracast, Airplay, and DLNA.
- Ensure both your device and the projector are connected to the same Wi-Fi network.
- On the projector's Android interface, open the relevant screen mirroring application (e.g., Miracast, Airplay, DLNA).
- On your smartphone/tablet/laptop, activate its screen mirroring function (e.g., "Screen Mirroring," "Smart View," "Cast," "AirPlay").
- Select the projector from the list of available devices to begin mirroring.

Малюнак 6.3: Wireless screen mirroring capabilities, enabling content from mobile devices and laptops to be displayed on the projector.
7. Тэхнічнае абслугоўванне
7.1. Ачыстка аб'ектыва
Выкарыстоўвайце мяккую тканіну без ворса, спецыяльна прызначаную для аптычных лінзаў. Акуратна працярыце лінзу, каб выдаліць пыл або плямы. Пазбягайце выкарыстання абразіўных матэрыялаў або агрэсіўных хімічных рэчываў.
7.2. Чыстка праектара Casing
Працярыце знешнія паверхні праектара мяккай сухой тканінай. Для выдалення ўстойлівых плям злёгкуamp cloth can be used, followed by a dry cloth. Ensure no liquid enters the ventilation openings.
7.3. Air Filter (if applicable)
While LED projectors typically have sealed optical engines, regularly check ventilation openings for dust accumulation. Use a soft brush or compressed air to clear any blockages.
8. Выпраўленне непаладак
| праблема | Магчымая прычына | Рашэнне |
|---|---|---|
| Не адлюстроўваецца выява |
|
|
| Відарыс размыты |
|
|
| Выява мае трапецападобную форму |
|
|
| Няма гуку |
|
|
| Праблемы з падключэннем Wi-Fi/Bluetooth |
|
|
9. Тэхнічныя характарыстыкі
| Асаблівасць | Дэталь |
|---|---|
| Нумар мадэлі | GP100UP |
| Тэхналогія адлюстравання | ВК |
| Роднае дазвол | 1280x800dpi (WXGA) |
| Яркасць | 3500 люмен |
| Каэфіцыент кантраснасці | 1000:1-2000:1 |
| Крыніца святла | святлодыёд |
| Жыццё крыніцы святла | Not specified (typically 20,000+ hours for LED) |
| Адлегласць праекцыі | 1-5м |
| Прагназаваны памер | 40-300 inches (Best image size: 72-120 inches) |
| Экранная шкала | 4:3/16:9 |
| Карэкцыя Keystone | Manual Correction, +/- 15 degrees (vertical) |
| сістэма | Android 6.0.1, CPU: Quad core ARM Cortex-A53 |
| Памяць (RAM/ROM) | RAM: 1G / ROM: 8G |
| Бесправоднае падключэнне | Wi-Fi, Bluetooth, DLNA, Miracast, Airplay |
| Уваходныя парты | HDMI, USB, AV, VGA, RJ45-LAN |
| Электразабеспячэнне | Пераменны ток 90-240 В, 50/60 Гц |
| Энергаспажыванне | 140 Вт |
| Памеры (прыбл.) | 37 х 30.5 х 15.9 см |
| Вага (прыбл.) | 2.6 кг |
| Функцыя 3D | Red-blue 3D |
10. Гарантыя і падтрымка
The VIVIBRIGHT GP100UP Projector comes with a Гарантыя 1 год з даты пакупкі. Гэтая гарантыя распаўсюджваецца на вытворчыя дэфекты пры нармальным выкарыстанні.
For technical support, warranty claims, or service inquiries, please contact your retailer or the official VIVIBRIGHT customer service channel. Please have your product model number (GP100UP) and proof of purchase ready when contacting support.