1. Уводзіны
The SINGER SGM-M3405 is a versatile household sewing machine designed to meet a wide range of sewing needs, from basic repairs to creative decorative projects. Featuring 23 stitch patterns, including essential, stretch, and decorative options, this machine offers flexibility for various fabrics and techniques. Its user-friendly design incorporates features such as a one-step buttonhole, adjustable stitch length and width, an integrated needle threader, and a bright LED light for enhanced visibility. The heavy-duty metal frame ensures stability and durability, making it a reliable tool for all your sewing endeavors.
2. Важныя інструкцыі па бяспецы
To ensure safe operation and prevent injury or damage, please read and follow these instructions carefully:
- Заўсёды адключайце машыну ад электрычнай разеткі падчас чысткі, змазкі або калі яна не выкарыстоўваецца.
- Трымайце пальцы далей ад усіх рухомых частак. Патрэбна асаблівая асцярожнасць вакол іголкі швейнай машынкі.
- Выкарыстоўвайце правільную ігольную пласціну. Няправільная пласціна можа прывесці да зламання іголкі.
- Do not pull or push fabric while stitching. This may deflect the needle and cause it to break.
- Выключайце швейную машыну, калі робіце якія-небудзь рэгуляванні ў зоне іголкі, такія як запраўка ніткі ў іголку, замена іголкі, запраўка ніткі ў шпульку або замена прыціскной лапкі.
- Use only genuine SINGER accessories and parts.
- Ніколі не працуйце з машынай, калі якія-небудзь паветраныя адтуліны заблакіраваны. Сачыце за тым, каб вентыляцыйныя адтуліны швейнай машыны і педалі не назапашваліся ад ворса, пылу і няшчыльнай тканіны.
3. Ідэнтыфікацыя частак
Familiarize yourself with the main components of your SINGER SGM-M3405 sewing machine:


4. Усталёўка і першае выкарыстанне
4.1 Распакаванне
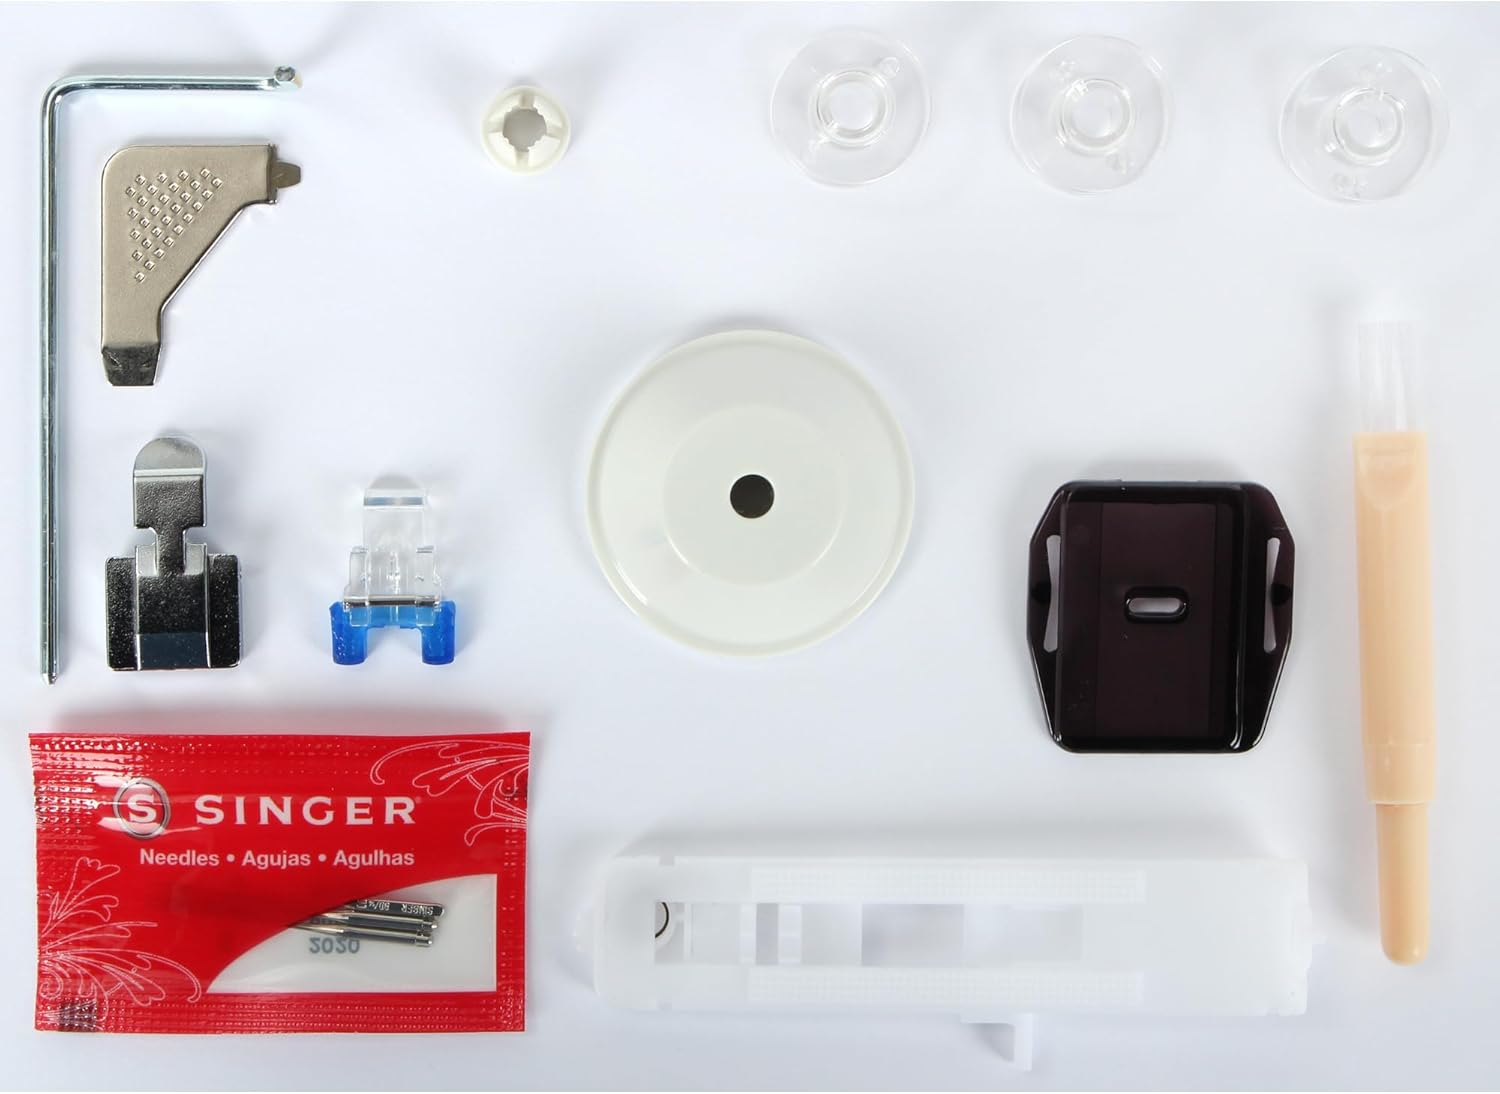
Carefully remove the machine from its packaging. Retain all packaging materials for future storage or transport. Ensure all included accessories are present as shown in Figure 3.7.
4.2 Падключэнне харчавання
Locate the power input socket at the rear of the machine (Figure 3.8). Connect the power cord to the machine and then to a suitable electrical outlet (127 Volts). Turn on the main power switch, also located at the rear.
4.3 Намотка шпулькі
- Place an empty bobbin onto the bobbin winder spindle on the top right of the machine (Figure 3.2).
- Змесціце катушку з ніткай на катушку.
- Правядзіце нітку праз дыск нацяжэння намоткі шпулькі.
- Wind the thread clockwise around the bobbin a few times.
- Націсніце шпіндзель намоткі шпулькі направа.
- Gently press the foot controller. The bobbin will begin to wind.
- Once the bobbin is full, the winding will stop automatically. Cut the thread and push the spindle back to the left.
4.4 Inserting the Bobbin (Front-Loading)
- Open the bobbin case cover located at the front of the machine, beneath the needle plate.
- Устаўце наматаную шпульку ў шпульны каўпачок, пераканаўшыся, што нітка размотваецца ў правільным кірунку (звычайна супраць гадзіннікавай стрэлкі).
- Працягніце нітку праз спружыну нацяжэння шпулькі.
- Close the bobbin case cover securely.
4.5 Запраўка верхняй ніткі
- Падніміце пад'ёмнік лапкі.
- Змесціце катушку з ніткай на катушку.
- Правядзіце нітку праз верхні нітканапраўляльнік.
- Bring the thread down through the right channel, around the U-turn, and up through the left channel (Figure 3.2).
- Правядзіце нітку праз рычаг падцягвальніка справа налева.
- Bring the thread down through the remaining guides to the needle.
- Use the built-in needle threader or manually thread the needle from front to back.
4.6 Raising the Bobbin Thread
- Злёгку прытрымвайце верхнюю нітку левай рукой.
- Turn the handwheel towards you (counter-clockwise) to lower the needle into the needle plate and then raise it.
- Верхняя нітка зачапіць нітку шпулькі, утвараючы пятлю.
- Pull the loop to bring the bobbin thread up through the needle plate opening.
- Pull both upper and bobbin threads under the presser foot and towards the back of the machine.
5. Кіраванне машынай
5.1 Выбар строчкі
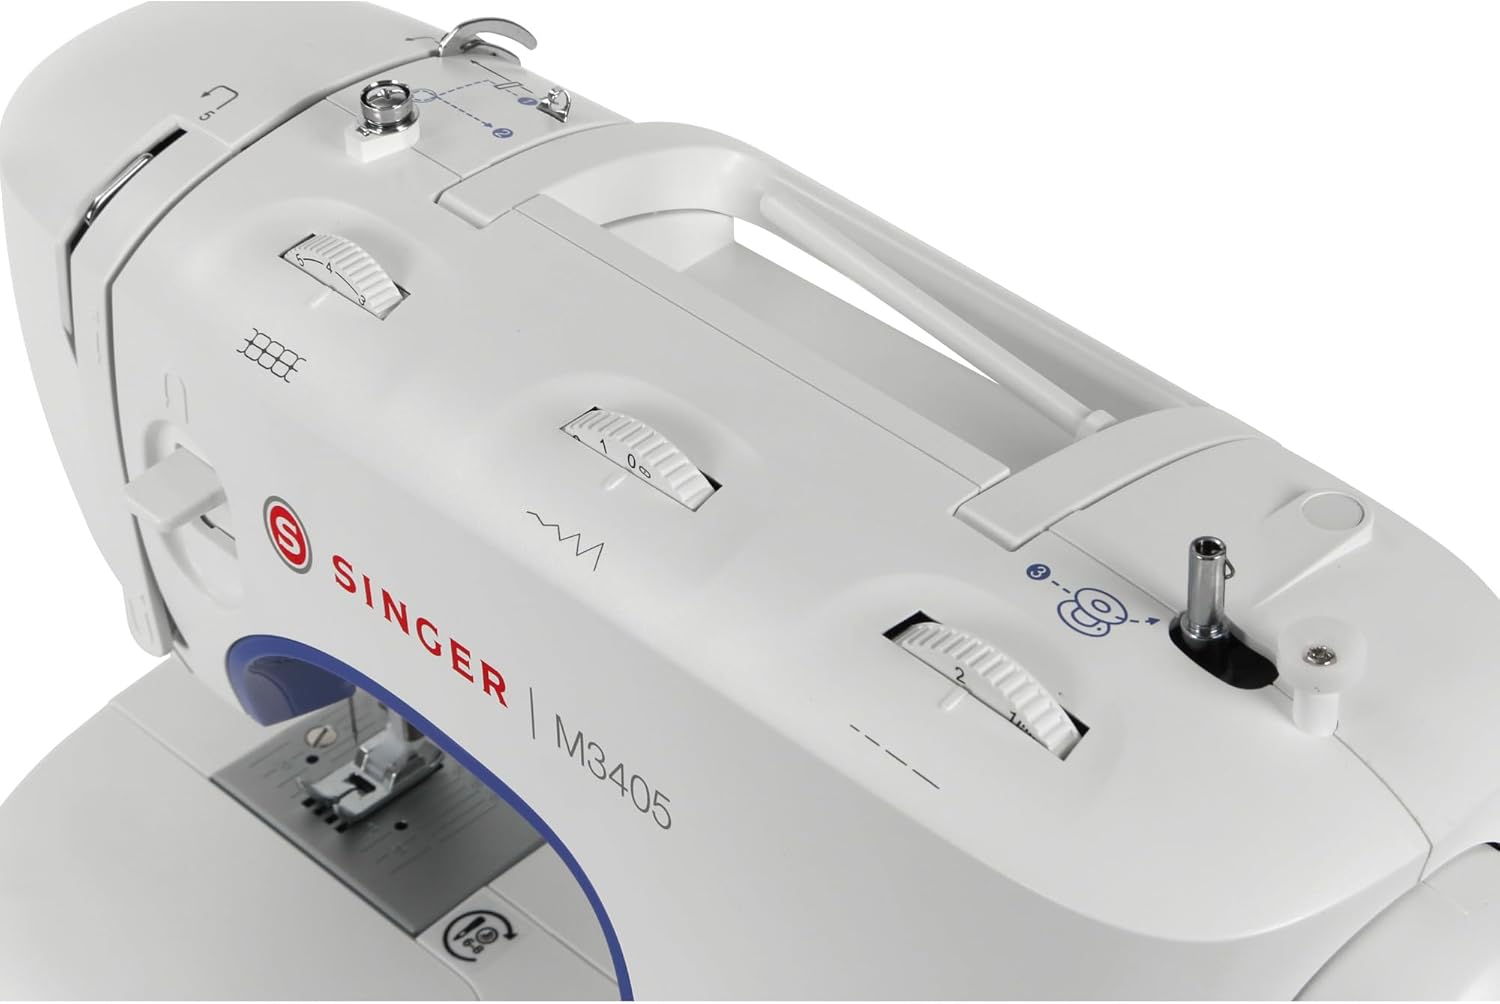
The SGM-M3405 offers 23 stitch patterns. To select a stitch, simply turn the stitch selection dial (Figure 3.3) until the desired stitch pattern aligns with the indicator mark. The dial clearly displays basic, stretch, and decorative stitches.
5.2 Рэгуляванне даўжыні і шырыні сцежка
The machine features separate dials for adjusting stitch length and width, providing creative control over your projects. Turn the stitch length dial to increase or decrease the length of your stitches. Turn the stitch width dial to adjust the width of zigzag and decorative stitches. Experiment with different settings to achieve desired effects for various sewing techniques and decorative applications.
5.3 Пашыццё шва
- Падкладзеце тканіну пад прыціскную лапку, сумясціўшы край з патрэбным прыпускам на шво на ігольнай пласціне.
- Апусціце лапку.
- Акуратна націсніце на педаль, каб пачаць шыць.
- To secure the beginning and end of a seam, use the reverse lever to sew a few stitches backward, then forward again.
- When finished, raise the needle to its highest position, lift the presser foot, and pull the fabric away from the machine.
- Cut the threads using the thread cutter located on the machine.
5.4 Аднакрокавая пятліца
The SGM-M3405 simplifies buttonhole creation with its one-step feature. Attach the buttonhole foot. Place the button you intend to use into the buttonhole foot's holder. The machine will automatically sew a buttonhole perfectly sized for your button, ensuring consistent results every time.
5.5 Выкарыстанне свабоднай рукі
To access the free arm (Figure 3.5), simply slide off the removable accessory storage compartment (Figure 3.6). The free arm is ideal for sewing small, cylindrical items such as cuffs, collars, pant hems, and children's clothing, allowing the fabric to rotate freely around the arm.
5.6 Using the Needle Threader
The integrated needle threader provides quick and easy needle threading. With the needle in its highest position, lower the threader mechanism and align the small hook with the needle eye. Guide the thread through the hook, and it will pull the thread through the needle eye as you release the mechanism.
5.7 святлодыёдным асвятленне
The long-lasting LED light illuminates the sewing area, providing clear visibility and eliminating shadows. This feature is particularly useful when working on dark fabrics or in dimly lit environments, enhancing precision and reducing eye strain.
6. Тэхнічнае абслугоўванне
Рэгулярнае тэхнічнае абслугоўванне забяспечвае даўгавечнасць і аптымальную прадукцыйнасць вашай швейнай машыны.
6.1 Ачыстка
Periodically clean the lint and dust from the bobbin area and feed dogs using a small brush. Always unplug the machine before cleaning. Do not use harsh chemicals or abrasive materials.
6.2 Змазка
Refer to your machine's specific lubrication points if indicated in the full manual. Many modern sewing machines, including this model, are designed to be self-lubricating in key areas and may not require user lubrication.
6.3 Замена іголкі
Replace the needle regularly, especially if it becomes bent, dull, or if you notice skipped stitches. To replace, loosen the needle clamp screw, remove the old needle, insert a new needle with the flat side facing the back, and tighten the screw securely.
7. Выпраўленне непаладак
У гэтым раздзеле разглядаюцца распаўсюджаныя праблемы, з якімі вы можаце сутыкнуцца, і іх рашэнні.
| праблема | Магчымая прычына | Рашэнне |
|---|---|---|
| Прапушчаныя шыўкі | Няправільная іголка, пагнутая іголка, няправільная запраўка ніткі, няправільны памер іголкі для тканіны. | Change needle, re-thread machine, ensure correct needle type/size. |
| Абрыў ніткі | Incorrect threading, too much upper thread tension, poor quality thread, bent needle. | Re-thread, adjust tension, use good quality thread, replace needle. |
| Tangled Thread (Bird's Nest) | Improper upper threading, incorrect bobbin insertion, incorrect tension. | Re-thread upper and bobbin, check bobbin insertion, adjust tension. |
| Машына не шые | Machine unplugged, power switch off, bobbin winder engaged, foot controller not connected. | Check power, ensure bobbin winder is disengaged, check foot controller connection. |
8. Тэхнічныя характарыстыкі
| Асаблівасць | Спецыфікацыя |
|---|---|
| Марка | СІГЕР |
| Нумар мадэлі | SGM-M3405 (230218102) |
| Колер | Белы/блакітны |
| Памеры прадукту (Д х Ш х У) | 38 х 20 х 30 см |
| Вага прадмета | 6 кілаграма |
| Магутнасць/Ватtage | 70 ват |
| тtage | 127 вольт |
| Матэрыял | Metal (Heavy-Duty Metal Frame) |
| Аўтаматычнае адключэнне | няма |
| Узровень шуму | 44 дэцыбел |
| Схемы вышыўкі | 23 (Basic, Stretch, Decorative) |
| Тып пятліцы для гузікаў | One-Step |
| Тып шпулькі | Фронтальная загрузка |
| Асвятленне | святлодыёд |
| Вольная рука | так |
| Іголка нітка | так |
9. Гарантыя і падтрымка кліентаў
For information regarding your product's warranty, please refer to the warranty card included with your purchase or visit the official SINGER website. For technical assistance, spare parts, or service inquiries, please contact SINGER customer support through their official channels. Keep your proof of purchase for warranty claims.