1. Уводзіны
Thank you for choosing the Oasser P2A Cordless Air Compressor. This manual provides essential information for the safe and efficient operation, maintenance, and troubleshooting of your device. Please read this manual thoroughly before use and retain it for future reference.
The Oasser P2A is a portable, rechargeable electric air compressor designed for inflating tires on cars, motorcycles, bicycles, and other inflatable items. It features a built-in 2000 mAh lithium battery, a maximum pressure of 120 PSI, an LED light for dark conditions, and an LCD screen for precise pressure monitoring.
2. Інструкцыі па тэхніцы бяспекі
To ensure safe operation, always follow these precautions:
- Перад выкарыстаннем прылады ўважліва прачытайце ўсе інструкцыі.
- Захоўвайце прыладу ў месцах, недаступных дзецям.
- Не выкарыстоўвайце кампрэсар у вільготных умовах або побач з лёгкаўзгаральнымі вадкасцямі ці газамі.
- Ensure the air hose is securely connected to both the compressor and the item being inflated before starting.
- Do not over-inflate items. Always refer to the manufacturer's recommended pressure for the item being inflated.
- Monitor the pressure gauge during inflation to prevent over-inflation. The device features automatic shut-off, but manual monitoring is still recommended.
- Не пакідайце кампрэсар без нагляду падчас працы.
- Avoid directing the air stream at people or animals.
- Charge the battery in a well-ventilated area. Do not charge if the device or charger is damaged.
- If the device becomes unusually hot during use or charging, discontinue use immediately and contact customer support.
- Always disconnect the air hose and store the device properly after use.
3. Змесціва ўпакоўкі
Праверце, ці ёсць усе прадметы ў вашай упакоўцы:
- 1 x Oasser P2A Air Pump
- 1 x Short Air Hose
- 1 x Long Air Hose
- 1 х шарыкавая іголка
- 1 x Plastic Nozzle
- 1 х адаптар клапана Presta
- 1 x USB Charging Cable (USB charger not included)
- 1 х сумка для захоўвання
- 1 х Кіраўніцтва карыстальніка

Image: Oasser P2A Cordless Air Compressor with all included accessories, such as air hoses, nozzles, and charging cable.
4. Прадукт скончыўсяview
Familiarize yourself with the components of your Oasser P2A air compressor:

Image: Diagram illustrating the main components of the Oasser P2A, including the LED light, digital LCD display, and rechargeable lithium battery.
- Святлодыёдны святло: Забяспечвае падсветку для выкарыстання ва ўмовах нізкай асветленасці.
- Лічбавы ВК-дысплей: Shows real-time and preset pressure values.
- Кнопкі кіравання: Power, unit selection, and pressure adjustment (+/-).
- Злучэнне паветранага шланга: Point for attaching the air hose.
- Trigger/Start Button: Initiates the inflation process.
- Rechargeable Lithium Battery (2000 mAh): Забяспечвае бесправадное харчаванне.
- Порт для зарадкі USB: Для падзарадкі прылады.
5. Зарадка прылады
Before first use, fully charge the air compressor. It takes approximately 4 hours for a complete charge.
- Connect the provided USB charging cable to the USB charging port on the compressor.
- Connect the other end of the USB cable to a compatible USB power adapter (not included) or a USB port.
- Індыкатар зарадкі загарыцца. Пасля поўнай зарадкі індыкатар можа змяніць колер або выключыцца ў залежнасці ад мадэлі.
Important: Please charge the battery completely within 3 days after each use to maintain battery health.
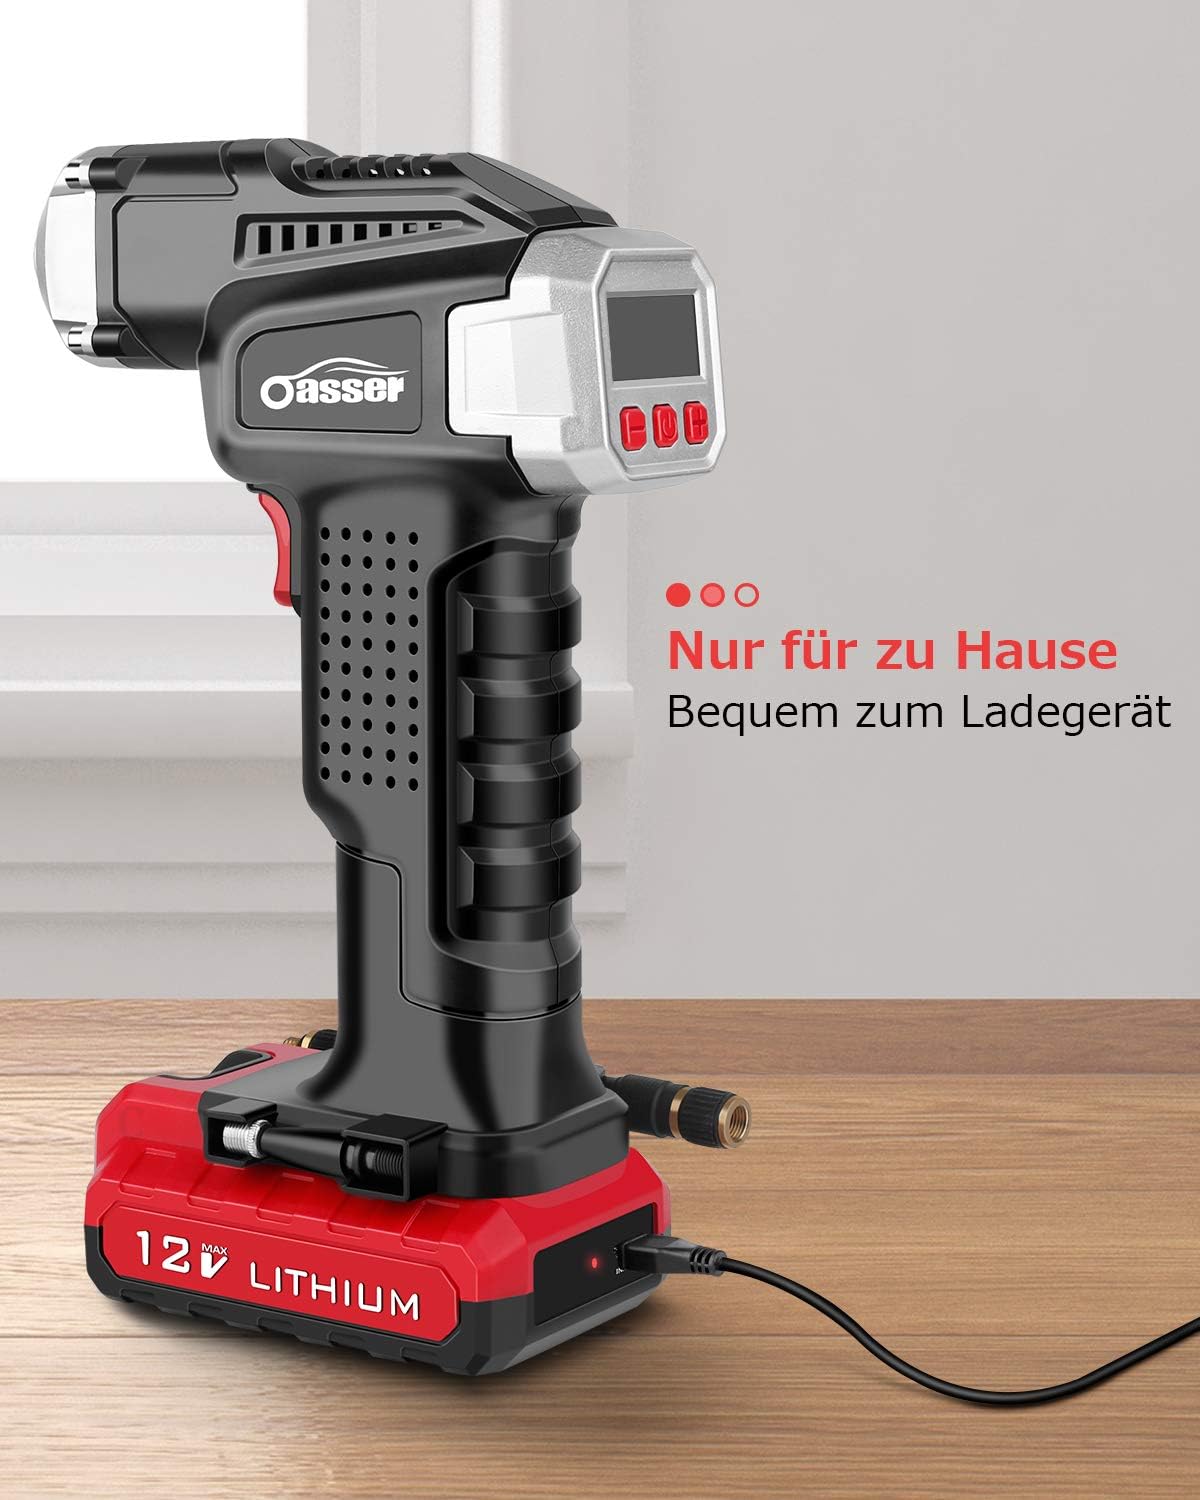
Image: The Oasser P2A air compressor connected to a USB charging cable, indicating the charging process.
6. Настройка
Prepare your air compressor for inflation:
- Падключыце паветраны шланг: Screw the desired air hose (short or long) onto the air hose connection port at the front of the compressor until secure.
- Выберыце правільны адаптар: Choose the appropriate nozzle or adapter for the item you wish to inflate (e.g., Presta valve adapter for bicycles, ball needle for sports balls, plastic nozzle for inflatable toys). Attach it to the end of the air hose.
7. Інструкцыя па эксплуатацыі
Follow these steps to inflate an item:
- Уключэнне: Press the middle button on the control panel to turn on the device. The LCD display will illuminate.
- Падключэнне да клапана: Securely connect the air hose adapter to the valve of the item you intend to inflate. The current pressure will be displayed on the LCD screen.
- Усталюйце патрэбны ціск: Use the '+' and '-' buttons to adjust the target pressure. You can cycle through pressure units (PSI, BAR, KPA, kg/cm²) by pressing the unit selection button (often the power button briefly).
- Пачаць інфляцыю: Press the red trigger/start button on the handle to begin inflation. The compressor will operate, and the real-time pressure will be shown on the display.
- Аўтаматычнае адключэнне: Кампрэсар аўтаматычна спыніцца, як толькі будзе дасягнуты зададзены ціск.
- Адключыць: Carefully disconnect the air hose from the item's valve.
- Выключэнне: Press and hold the middle button to turn off the device.
Выкарыстанне святлодыёднага святла: Press the dedicated LED light button (if available, often integrated with another button) to turn the light on or off for visibility in dark environments.
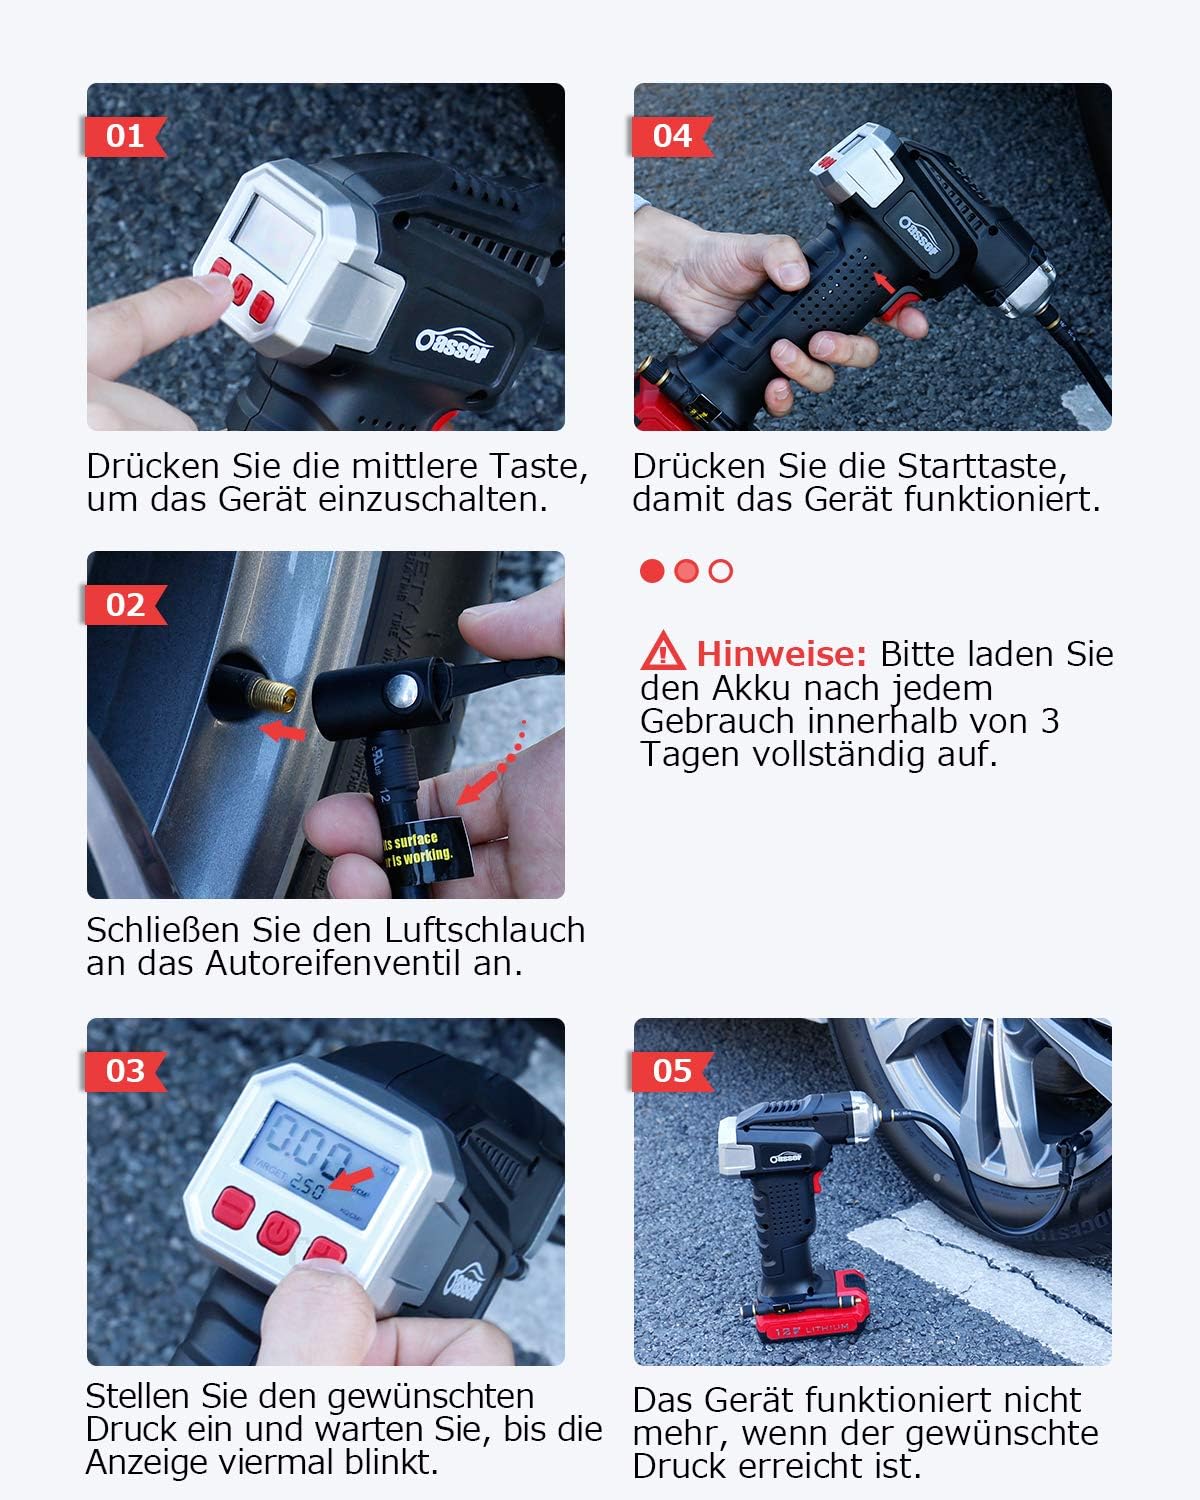
Image: Visual guide demonstrating the operational steps: powering on, connecting the hose, setting pressure, and starting inflation.

Image: The Oasser P2A air compressor actively inflating a car tire, demonstrating its practical application.

Выява: Падрабязны view of the Oasser P2A's digital LCD display, clearly showing pressure readings and unit selection.
8. Тэхнічнае абслугоўванне
Proper maintenance ensures the longevity and performance of your air compressor:
- Уборка: Працярыце прыладу мяккай, damp тканіна. Не выкарыстоўвайце агрэсіўныя хімікаты або абразіўныя ачышчальнікі. Перад захоўваннем пераканайцеся, што прылада сухая.
- захоўванне: Store the compressor in a cool, dry place, away from direct sunlight and extreme temperatures. Use the provided storage bag to protect it from dust and damage.
- Сыход за батарэяй: Recharge the battery regularly, especially if the device has not been used for an extended period. Avoid completely draining the battery frequently to prolong its lifespan.
- Праверка шланга і фарсункі: Periodically check the air hoses and nozzles for any signs of wear, cracks, or damage. Replace them if necessary to ensure a proper seal and efficient inflation.
9. Выпраўленне непаладак
If you encounter issues with your Oasser P2A, refer to the following common problems and solutions:
| праблема | Магчымая прычына | Рашэнне |
|---|---|---|
| Прылада не ўключаецца. | Акумулятар разраджаны. | Зарадзіце прыладу цалкам. |
| Device turns on but does not inflate. | Air hose not securely connected. Incorrect pressure setting. | Ensure air hose is tightly screwed on. Check that the target pressure is set above the current pressure. |
| Няправільныя паказанні ціску. | Слабае злучэнне з клапанам. | Ensure the nozzle is firmly attached to the item's valve without air leaks. |
| Прылада спыняецца заўчасна. | Target pressure reached. Battery low. | This is normal if target pressure is met. If not, recharge the battery. |
| Device is very loud during operation. | Normal operation noise. | Air compressors generate noise during operation. This is generally normal. |
10. Тэхнічныя характарыстыкі
| Асаблівасць | Спецыфікацыя |
|---|---|
| Нумар мадэлі | P2A |
| Марка | Оасер |
| Тып батарэі | 1 літый-іённы акумулятар (у камплекце) |
| Ёмістасць батарэі | 2000 мАг |
| Максімальны ціск | 120 PSI |
| тtage | 12 вольт |
| Крыніца харчавання | Харчаванне ад батарэі |
| Вага прадмета | 1.08 кілаграма |
| Памеры ўпакоўкі | 26 х 17.6 х 8.4 см |
| Тып дысплея | 1.5-цалевы лічбавы ВК-дысплей |
| Inflation Units | PSI, BAR, KPA, kg/cm² |
11. Гарантыя і падтрымка
Oasser is committed to providing high-quality products and excellent customer service. If you have any questions, concerns, or require assistance with your Oasser P2A Cordless Air Compressor, please refer to the contact information provided with your purchase or visit the official Oasser webсайт для падтрымкі.