1. Уводзіны
Гэта кіраўніцтва змяшчае падрабязныя інструкцыі па ўсталёўцы, эксплуатацыі і абслугоўванні вашага CP PLUS 16-Channel IP 2MP CCTV Camera System. This system includes a Network Video Recorder (NVR), 8 IP 2MP bullet cameras, 8 IP 2MP dome cameras, and a 2TB hard disk for storage. Please read this manual thoroughly before setup to ensure proper functioning and to maximize the system's security capabilities.
This is a network-based surveillance system. It requires CAT6 Ethernet cables for camera connections and a network switch to integrate the cameras with the NVR and your local network. Cables, network switch, and RJ45 connectors are не ўключаны у гэтым камплекце.
2. Змесціва ўпакоўкі
Carefully unpack your CP PLUS CCTV Camera System and verify that all components are present. The package should contain the following items:
- 1 x CP PLUS 16-Channel NVR
- 8 x CP PLUS 2MP IP Bullet Cameras
- 8 x CP PLUS 2MP IP Dome Cameras
- 1 x 2TB Hard Disk Drive
- 1 х адаптар харчавання для відэарэгістратара
- 1 х правадная мыш
- Hard Drive Screws
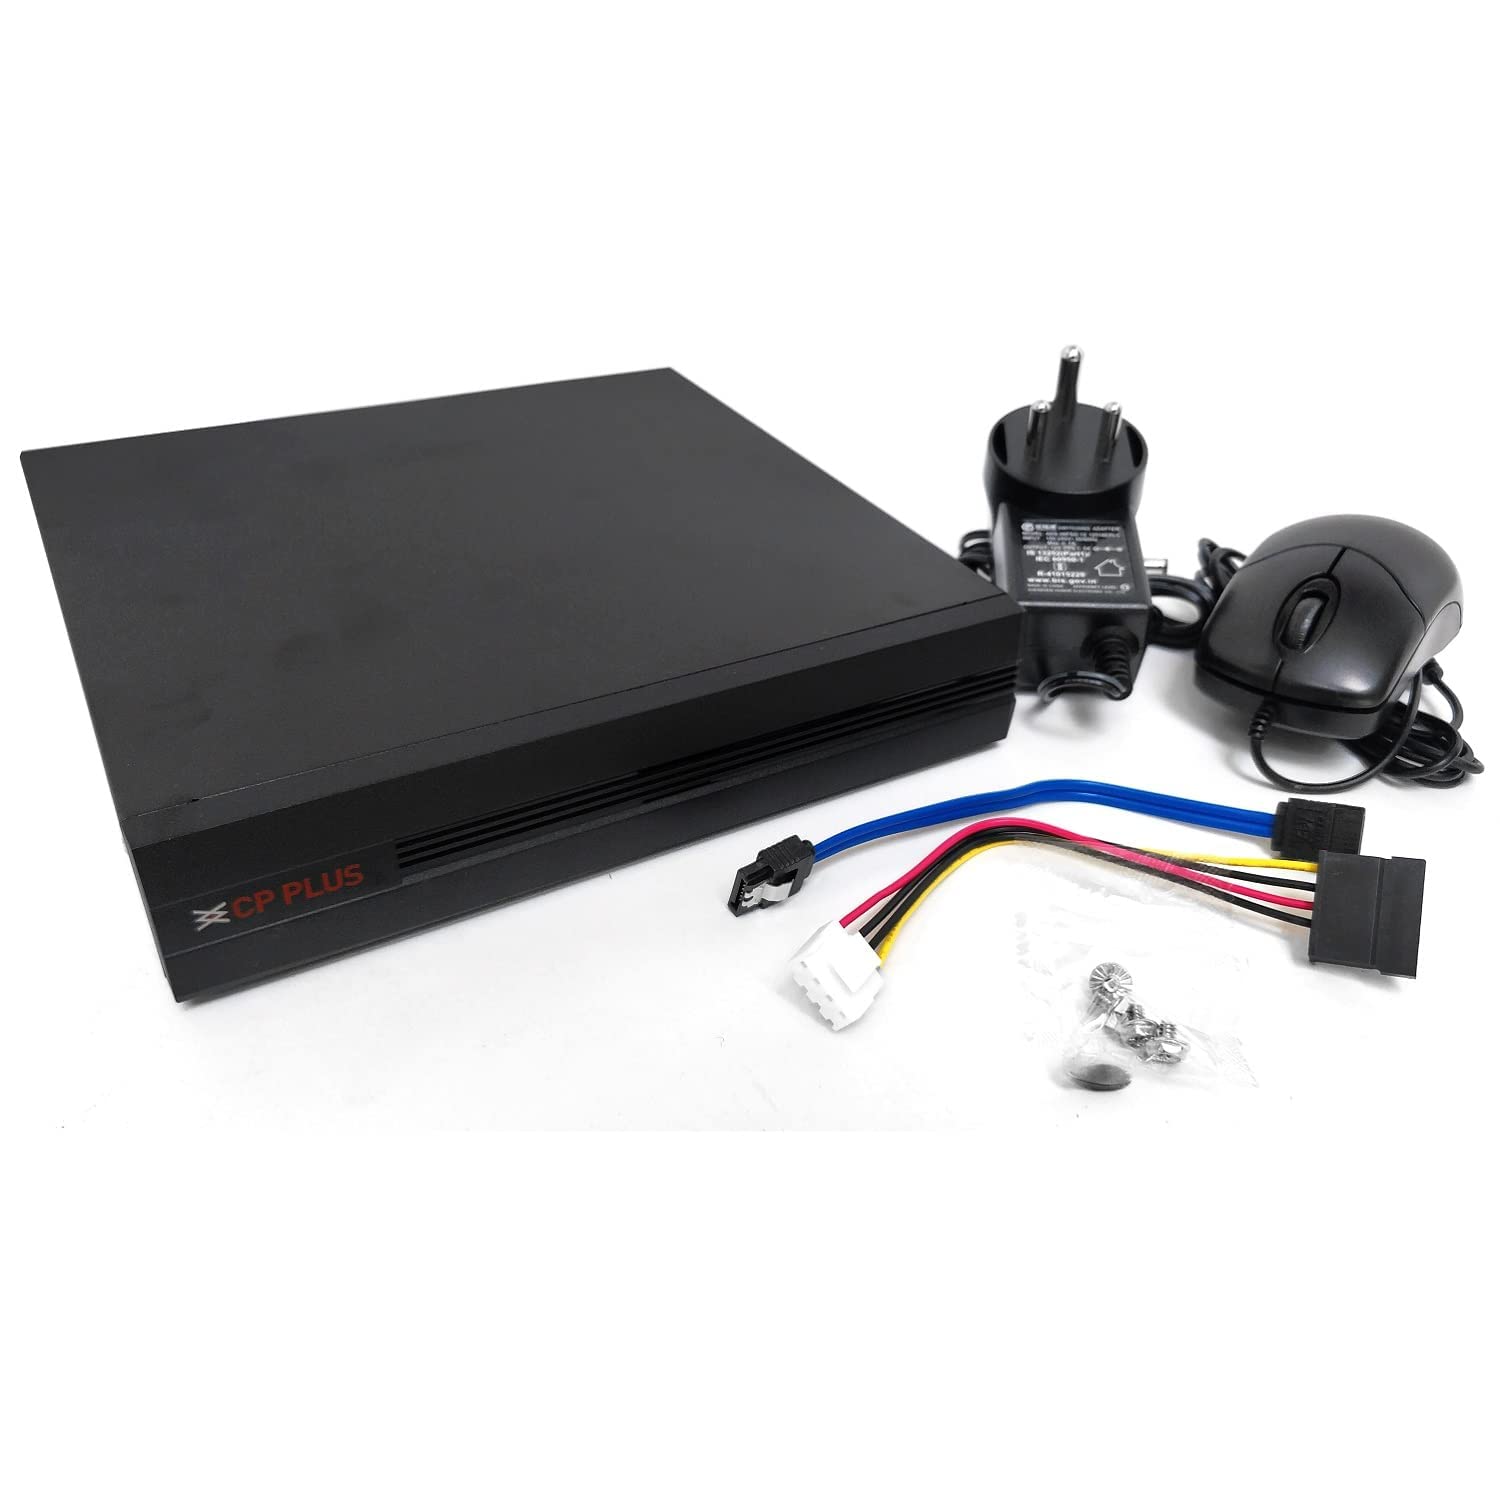
Image 2.1: CP PLUS NVR and included accessories.
3. Тэхнічныя характарыстыкі
Key technical specifications of the CP PLUS 16-Channel IP 2MP CCTV Camera System:
| Асаблівасць | Апісанне |
|---|---|
| Марка | КП ПЛЮС |
| Тэхналогія падлучэння | Правадной (Ethernet) |
| Дазвол відэазахопу | 1080p (2 МП) |
| Асаблівасць | Начное бачанне |
| Колькасць каналаў | 16 |
| Ёмістасць памяці | 2 TB (Hard Disk) |
| Сумяшчальнасць аперацыйнай сістэмы | Android, iOS (for mobile app) |
| Сумяшчальныя прылады | Smartphones, Tablets, Cameras |
| Апісанне камеры | 8 x 2MP IP Bullet Camera, 8 x 2MP IP Dome Camera |
| Тып начнога бачання | Начны колер |
| Частата кадраў | 30 кадраў у секунду |
| Рэжым запісу | Бесперапынны |
| Абсталяванне інтэрфейсу | Ethernet |
| Відэа ўваход | RJ45 |
| Тэхналогія аптычнага датчыка | CMOS |
| Колер | Белы |
4. Сістэма скончанаview і падключэнне
The CP PLUS IP CCTV Camera System is designed for network-based surveillance. It utilizes IP cameras that connect to the NVR via CAT6 Ethernet cables. A network switch is required to connect multiple cameras to the NVR and to integrate the NVR into your local network for remote access. Cables, network switch, and RJ45 connectors are not included and must be acquired separately.

Image 4.1: System Connectivity Diagram.
5. Camera Types
5.1. IP Bullet Camera
The bullet cameras are typically used for outdoor surveillance due to their robust, weather-resistant design. They offer a fixed lens and night vision capabilities, providing clear 2MP resolution footage.

Image 5.1: CP PLUS IP 2MP Bullet Camera.
5.2. IP Dome Camera
Dome cameras are often preferred for indoor use or areas where a more discreet appearance is desired. They also feature a fixed lens and night vision, delivering 2MP resolution. Their design makes them suitable for ceiling or wall mounting.

Image 5.2: CP PLUS IP 2MP Dome Camera.
6. NVR (сеткавы відэарэгістратар)
The NVR is the central recording unit for your IP camera system. It manages video streams from all connected cameras, stores footage on the installed hard disk, and provides interfaces for viewing and system configuration.

Image 6.1: CP PLUS NVR Rear Panel.
7. Настройка
7.1. Усталёўка жорсткага дыска
The 2TB hard disk drive is essential for recording and storing surveillance footage. Follow these steps to install it into the NVR:
- Адкруціце і зніміце верхнюю крышку шасі відэарэгістратара.
- Connect the SATA data cable and power cable from the NVR to the 2TB hard disk drive.
- Secure the hard disk drive to the NVR chassis using the provided screws.
- Replace the NVR top cover and secure it with screws.

Image 7.1: 2TB Hard Disk Drive.
7.2. Падключэнне камеры
Connect each IP camera to a network switch using CAT6 Ethernet cables. Ensure the network switch provides Power over Ethernet (PoE) if your cameras are PoE-compatible, or use separate power adapters for each camera. Connect the network switch to the NVR's LAN port.
7.3. NVR Initial Configuration
Follow these steps for the initial setup of your NVR:
- Падключыце відэарэгістратар да манітора з дапамогай кабеля HDMI або VGA.
- Connect the wired mouse to a USB port on the NVR.
- Power on the NVR using the provided adapter.
- Follow the on-screen prompts to complete the initial setup, including setting up an administrator password and network settings.
8. Кіраванне сістэмай
8.1. Жыць View
Once cameras are connected and configured, you can view live feeds directly on the monitor connected to the NVR or via the mobile application.
8.2. Запіс
The NVR is configured for continuous recording by default. You can adjust recording schedules, motion detection settings, and other parameters through the NVR's user interface.
8.3. Прайграванне
Каб паўторнаview запісана footage, access the playback function on the NVR's interface. You can search by date, time, and event type to quickly find specific recordings.
8.4. Remote Access (Mobile App)
Для аддаленага viewing and management, download the CP PLUS gCMOB mobile application from the Android Play Store or Apple App Store. Follow the in-app instructions to add your NVR by scanning the QR code displayed on the NVR's monitor or by manually entering its details. This allows you to view live feeds, playback recordings, and receive alerts from your smartphone or tablet.

Image 8.1: CP PLUS Mobile App Live View.
9. Тэхнічнае абслугоўванне
Regular maintenance ensures optimal performance and longevity of your CCTV system:
- Чыстка камеры: Перыядычна чысціце аб'ектывы камеры мяккай сурвэткайamp тканінай, каб выдаліць пыл і плямы, якія могуць паўплываць на выразнасць выявы.
- Абнаўленні прашыўкі: Check the CP PLUS official website for available firmware updates for your NVR and cameras. Keeping firmware updated can improve system stability and add new features.
- Hard Disk Health: Monitor the health of your 2TB hard disk through the NVR's system settings. Replace the hard disk if any errors or warnings are detected to prevent data loss.
- Праверка кабеля: Regularly inspect all Ethernet cables for any signs of wear, damage, or loose connections.
10. Выпраўленне непаладак
Звярніцеся да наступных распаўсюджаных праблем і іх магчымых рашэнняў:
- Няма відэадысплея: Ensure the NVR is powered on, connected to a monitor, and the monitor input is correctly selected. Check camera power and network connections.
- Cameras Not Recording: Verify the 2TB hard disk is correctly installed and initialized in the NVR settings. Check recording schedules and ensure sufficient storage space.
- Памылка аддаленага доступу: Confirm the NVR is connected to the internet and network settings are correct. Ensure the gCMOB app is properly configured and the NVR is added. Check your router's firewall settings.
- Дрэнная якасць выявы: Clean camera lenses. Check network bandwidth and ensure cameras are receiving adequate power.
- Праблемы з начным бачаннем: Ensure the area is within the camera's IR range. Check for obstructions blocking the IR illuminators.
11. Пашыраныя магчымасці
11.1. H.265+ Video Compression
The CP PLUS NVR supports H.265+ video compression technology. This advanced compression standard significantly reduces bandwidth usage and storage requirements compared to older standards like H.264, without compromising video quality. This allows for longer recording times on the 2TB hard disk and more efficient streaming.

Image 11.1: H.265+ Video Compression Efficiency.
12. Гарантыя і падтрымка
This product comes with a standard brand warranty. For specific warranty terms and conditions, please refer to the documentation provided with your purchase or visit the official CP PLUS website. For technical support, troubleshooting assistance, or service requests, please contact CP PLUS customer service or your authorized dealer.
CP PLUS Customer Service: Refer to your product packaging or the official CP PLUS webсайт для атрымання самай актуальнай кантактнай інфармацыі.