Singer HD6335M
SINGER Heavy Duty 6335M Sewing Machine User Manual
Мадэль: HD6335M
1. Уводзіны
Thank you for choosing the SINGER Heavy Duty 6335M Sewing Machine. This machine is engineered for durability and performance, designed to handle a wide range of fabrics, including heavy materials like denim. With its robust construction and powerful motor, it provides reliable and efficient sewing for various projects. This manual provides essential information for the safe operation, setup, maintenance, and troubleshooting of your new sewing machine. Please read it thoroughly before use.
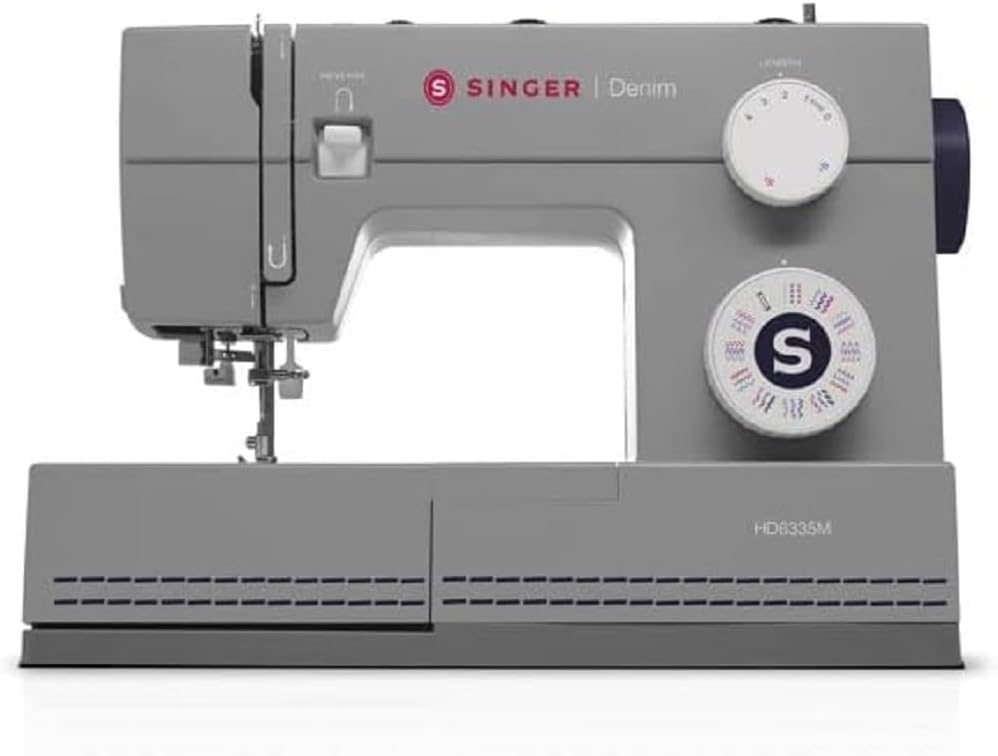
Figure 1: The SINGER Heavy Duty 6335M Sewing Machine. This image shows the overall design of the machine, highlighting its grey color and the prominent SINGER branding.
2. Інструкцыі па тэхніцы бяспекі
Заўсёды выконвайце асноўныя меры бяспекі пры выкарыстанні электрапрыбораў, каб знізіць рызыку пажару, паражэння электрычным токам або траўмаў людзей.
- Прачытайце ўсе інструкцыі перад выкарыстаннем машыны.
- Трымайце пальцы далей ад усіх рухомых частак. Патрэбна асаблівая асцярожнасць вакол іголкі швейнай машынкі.
- Заўсёды адключайце швейную машыну ад электрычнай разеткі пры зняцці вокладак, змазцы або пры правядзенні любых іншых налад па абслугоўванні карыстальнікаў, згаданых у інструкцыі па эксплуатацыі.
- Never operate the sewing machine if it has a damaged cord or plug, if it is not working properly, if it has been dropped or damaged, or dropped into water.
- Ніколі не кідайце і не ўстаўляйце прадметы ў адтуліны.
- Не выкарыстоўвайце на адкрытым паветры.
- Не працуйце там, дзе выкарыстоўваюцца аэразольныя (спрэі) прадукты або дзе падаецца кісларод.
- Для адключэння выключыце ўсе элементы кіравання, затым выміце вілку з разеткі.
- Не адключайце вілку, цягнучы за шнур. Каб адключыць вілку, вазьміцеся за вілку, а не за шнур.
3. Змесціва ўпакоўкі
Upon unpacking your SINGER Heavy Duty 6335M, please verify that all components are present. The standard package typically includes:
- SINGER Heavy Duty 6335M Sewing Machine
- Нажны кантролер
- Шнур харчавання
- Standard Accessories (e.g., various presser feet, needles, bobbins, seam ripper, lint brush, screwdriver)
- Soft Dust Cover
- Інструкцыя па эксплуатацыі (гэты дакумент)
Note: Specific accessories may vary by region or package. Refer to your product packaging list for exact contents.
4. Настройка
4.1 Падключэнне харчавання
- Пастаўце машыну на ўстойлівую роўную паверхню.
- Connect the foot controller plug to the machine's receptacle.
- Падключыце шнур харчавання да ўваходу харчавання прылады, а затым да адпаведнай электрычнай разеткі.
- Уключыце выключальнік харчавання, які звычайна знаходзіцца збоку машыны.
4.2 Намотка шпулькі
Proper bobbin winding ensures smooth stitching.
- Змесціце катушку з ніткай на катушку.
- Правядзіце нітку праз верхні накіроўвальнік ніткі і вакол дыска нацяжэння намоткі шпулькі.
- Устаўце пустую шпульку на шпіндзель намотвальніка шпулькі.
- Абгарніце нітку некалькі разоў вакол шпулькі, затым павярніце шпіндзель намотвальніка шпулькі направа.
- Акуратна націсніце на педаль, каб пачаць намотванне. Спыніце намотванне, калі шпулька поўная.
- Абрэжце нітку і зніміце шпульку.
4.3 Устаўка шпулькі
The SINGER Heavy Duty 6335M features a top drop-in bobbin system for easy access.
- Адкрыйце вечка шпулькі.
- Insert the full bobbin into the bobbin case, ensuring the thread unwinds in the correct direction (usually counter-clockwise).
- Guide the thread through the tension spring and into the thread guide channel.
- Pull out about 6 inches of thread and close the bobbin cover.
4.4 Запраўка верхняй ніткі
Correct upper threading is crucial for balanced stitches.
- Падніміце пад'ёмнік лапкі.
- Змесціце катушку з ніткай на катушку.
- Правядзіце нітку праз верхні нітканапраўляльнік.
- Bring the thread down the right channel, around the tension discs, and up the left channel.
- Hook the thread into the take-up lever from right to left.
- Bring the thread down through the guides to the needle.
- Use the built-in needle threader (if available) or manually thread the needle from front to back.

Figure 2: Threading the needle. This image illustrates the process of threading the needle, showing the thread being guided through the needle eye.
4.5 Drawing Up the Bobbin Thread
- Злёгку прытрымвайце верхнюю нітку левай рукой.
- Turn the handwheel towards you to lower the needle into the needle plate and then raise it.
- The upper thread will catch the bobbin thread, forming a loop. Pull the loop up through the needle plate opening.
- Пацягніце абедзве ніткі (верхнюю і шпульку) пад прыціскную лапку і ў бок задняй часткі машыны.
5. Інструкцыя па эксплуатацыі
5.1 Выбар строчкі
Your SINGER Heavy Duty 6335M offers 32 built-in stitches. Use the stitch selector dial to choose the desired stitch pattern. Refer to the stitch chart on the machine for visual guidance.
5.2 Stitch Length and Width Adjustment
Adjust stitch length and width using the corresponding dials to suit your fabric and project needs. Longer stitches are generally for thicker fabrics, while shorter stitches are for finer details.
5.3 Sewing Speed Control
The sewing speed is controlled by the foot controller. Press gently for slower speeds and apply more pressure for higher speeds. The machine is capable of high-speed sewing for efficient work.
5.4 Sewing Heavy Fabrics
This machine is specifically designed for heavy-duty sewing, including multiple layers and denim fabrics.
- Use appropriate heavy-duty needles (e.g., denim needles) for thick materials.
- Adjust the presser foot pressure if your machine has this feature (refer to specific machine details).
- Ensure proper thread tension for heavy fabrics to prevent skipped stitches or thread breakage.
5.5 Шыццё на вольным рукаве
Remove the accessory storage compartment to reveal the free arm. This feature is ideal for sewing cylindrical items like cuffs, sleeves, and pant hems.
5.6 Шыццё пятліц для гузікаў
The machine supports easy buttonhole creation.
- Attach the one-step buttonhole foot.
- Insert the button into the back of the buttonhole foot.
- Select the buttonhole stitch on the stitch selector dial.
- Апусціце рычаг пятліцы.
- Begin sewing; the machine will automatically create the buttonhole to the size of your button.

Figure 3: Buttonhole foot in position. This image shows the buttonhole presser foot attached to the machine, positioned over fabric, ready for automatic buttonhole stitching.
6. Тэхнічнае абслугоўванне
Рэгулярнае тэхнічнае абслугоўванне забяспечвае даўгавечнасць і аптымальную прадукцыйнасць вашай швейнай машыны.
6.1 Ачыстка
- Перад чысткай заўсёды адключайце прыладу ад сеткі.
- Зніміце ігольную пласціну і шпульку.
- Use the lint brush (included with accessories) to remove lint and dust from the feed dogs and bobbin area.
- Працірайце знешнія паверхні прылады мяккай сухой тканінай. Не выкарыстоўвайце агрэсіўныя хімікаты або абразіўныя ачышчальнікі.
6.2 Змазка
Your SINGER Heavy Duty 6335M is designed to require minimal lubrication. Refer to the full instruction manual for specific oiling points if necessary. Over-oiling can attract lint and cause issues.
6.3 Замена іголкі
Replace needles frequently (after every 8-10 hours of sewing or when bent/dull) to prevent skipped stitches and fabric damage.
- Выключыце і адключыце машыну ад сеткі.
- Паслабце іголку клamp шруба.
- Выміце старую іголку.
- Устаўце новую іголку плоскім бокам да задняй часткі машыны і прасуньце яе ўверх да ўпора.
- Зацягнуць іголку клamp надзейна закруціце.
7. Выпраўленне непаладак
У гэтым раздзеле разглядаюцца распаўсюджаныя праблемы, з якімі вы можаце сутыкнуцца.
| праблема | Магчымая прычына | Рашэнне |
|---|---|---|
| Машына не шые | Machine not plugged in; power switch off; bobbin winder engaged. | Check power connection; turn power switch on; disengage bobbin winder. |
| Прапушчаны швы | Incorrect needle size/type; bent or dull needle; improper threading; incorrect tension. | Change needle to correct type/size; replace needle; re-thread machine correctly; adjust tension. |
| Thread breaking (upper) | Improper threading; tension too tight; poor quality thread; burr on needle plate or bobbin case. | Re-thread machine; loosen upper tension; use good quality thread; check for burrs and smooth them. |
| Thread breaking (bobbin) | Improperly wound bobbin; bobbin inserted incorrectly; lint in bobbin case. | Re-wind bobbin evenly; re-insert bobbin correctly; clean bobbin case area. |
| Тканіна не падаецца | Feed dogs lowered; lint in feed dogs; presser foot pressure too low. | Raise feed dogs; clean feed dogs; increase presser foot pressure. |
For more detailed troubleshooting, please refer to the comprehensive manual available on the SINGER webсайт або звярніцеся ў службу падтрымкі кліентаў.
8. Тэхнічныя характарыстыкі
| Асаблівасць | Дэталь |
|---|---|
| Нумар мадэлі | HD6335M |
| Марка | Спявачка |
| Швы | 32 убудаваных шыўкоў |
| хуткасць | High Speed Capability |
| Тып рукі | Вольная рука |
| Памеры прадукту | 22T x 45B x 34H см |
| Памеры ўпакоўкі | 44.8 х 34 х 21.8 см |
| Вага ўпакоўкі | 7.9 кілаграма |
| Колер | Шэры |
9. Гарантыя і падтрымка
9.1 Гарантыя на выраб
The SINGER Heavy Duty 6335M Sewing Machine comes with a 2-гадовая гарантыя вытворцыГэтая гарантыя распаўсюджваецца на дэфекты матэрыялаў і вырабу пры нармальным выкарыстанні. Калі ласка, захавайце пацвярджэнне пакупкі для прэтэнзій па гарантыі.
9.2 Падтрымка кліентаў
For technical assistance, service, or to inquire about replacement parts, please contact SINGER customer support. You can find contact information and additional resources, including a digital version of this manual and FAQs, on the official SINGER webсайт: www.singer.com.
EU replacement parts availability is guaranteed for 2 years.
Ask a question about this manual
Ask about setup, troubleshooting, compatibility, parts, safety, or missing instructions. Manuals+ will review the question and use this page’s manual context to help answer it.