1. Уводзіны
Thank you for choosing the VEVOR TS-08 Portable Tennis Ball Machine. This manual provides essential information for the safe operation, setup, maintenance, and troubleshooting of your device. Please read this manual thoroughly before using the machine to ensure optimal performance and longevity.
2. Інструкцыі па тэхніцы бяспекі
- Заўсёды пераканайцеся, што машына размешчана на ўстойлівай, роўнай паверхні перад пачаткам працы.
- Keep hands, hair, and loose clothing away from the ball dispensing mechanism during operation.
- Do not attempt to open or repair the machine yourself. Refer all servicing to qualified personnel.
- Use only standard tennis balls with the machine. Do not use wet, damaged, or non-standard balls, as this may cause jamming or damage.
- Трымайце дзяцей і хатніх жывёл на бяспечнай адлегласці ад машыны падчас выкарыстання.
- Charge the battery fully before initial use and after each session to maintain battery health.
- Адключыце электрасілкаванне перад чысткай або любым тэхнічным абслугоўваннем.
3. Прадукт скончыўсяview
The VEVOR TS-08 is a portable tennis ball machine designed for both professionals and beginners. It features a durable construction and an intelligent app control system.

Figure 1: Key Components of the VEVOR TS-08 Tennis Ball Machine. This image highlights the main parts: the ABS material casing, the removable hopper for ball storage, the ball dispenser outlet, the main body housing the internal mechanisms, and the rubber feet for stability.

Малюнак 2: Спераду view of the VEVOR TS-08, illustrating the ball dispenser opening where tennis balls are launched.
Асноўныя характарыстыкі:
- Трывалая канструкцыя: Made from ABS plastic and polymer composite wheels for robustness.
- Removable Hopper: Large capacity, capable of holding up to 150 tennis balls, designed for easy storage and transport.
- Партатыўны дызайн: Equipped with wheels and a retractable handle for effortless movement.
- Працяглая батарэя: Integrated 16AH battery provides approximately 6 hours of operation on a full charge.
- Кіраванне праграмамі: Intelligent control via a dedicated Android application for various training modes and settings.
4. Настройка
4.1 Распакаванне
Carefully remove all components from the packaging. Verify that all parts are present according to the packing list. Retain packaging for future storage or transport.
4.2 Assembling the Hopper
Attach the removable hopper to the main body of the machine. Ensure it is securely seated to prevent dislodging during operation.
4.3 Зарадка акумулятара
Before first use, fully charge the machine's internal battery. Connect the charger to the machine's charging port and plug it into a standard power outlet. A full charge typically takes approximately 8 hours. The machine operates for about 6 hours on a full charge.

Figure 3: Battery specifications, indicating a 16AH capacity and an operational duration of 6-8 hours on a full charge.
4.4 Усталёўка і падключэнне праграмы
The VEVOR TS-08 is controlled via a smartphone application. Please note that the app currently supports Android systems only.
- Download the 'TennisSmash Remote' application from the Google Play Store.
- Ensure your machine is powered on and your smartphone's Bluetooth is enabled.
- Open the app and follow the on-screen instructions to pair your device with the tennis ball machine.
5. Інструкцыя па эксплуатацыі
5.1 Loading Tennis Balls
Open the hopper lid and carefully place up to 150 standard tennis balls into the hopper. Ensure balls are dry and free from debris.
5.2 Уключэнне/выключэнне
Locate the power switch on the machine and turn it to the 'ON' position. To power off, switch it to 'OFF'.
5.3 Using the App Control
Once connected via the 'TennisSmash Remote' app, you can control various aspects of the ball machine:

Figure 4: The 'TennisSmash Remote' app interface. This image displays controls for ball depth, line, cross-court shots, and various modes like random, fixed, and custom. It also shows sliders for adjusting serve speed, topspin, and backspin, along with a start/stop button.
- Рэжымы: Select from five different modes, including 27 kinds of ball routes (e.g., Depth, Line, Cross, Random, Fix, Custom).
- Serve Speed: Adjust the ball launch speed using the 'SPEED +' and 'SPEED -' buttons.
- Кручэнне: Apply topspin or backspin using the 'TOP SPIN +' and 'BACK SPIN +' controls.
- Частата: Adjust the interval between ball launches.
- Пуск/Стоп: Use the 'ON' button to start ball delivery and the 'START/STOP' button to pause or end the session.
5.4 Размяшчэнне машыны
Place the machine on the tennis court according to your training requirements. The machine's wheels and retractable handle facilitate easy repositioning.
6. Тэхнічнае абслугоўванне
6.1 Ачыстка
Regularly wipe the exterior of the machine with a soft, damp cloth. Ensure no moisture enters the internal components. Keep the ball dispensing area clear of dust and debris.
6.2 Сыход за акумулятарам
To prolong battery life, fully charge the battery after each use. If storing the machine for an extended period, charge the battery every 3 months to prevent deep discharge.
6.3 Захоўванне
When not in use, detach the hopper and store the machine in a dry, cool place. The detachable hopper design helps save space during storage.
7. Выпраўленне непаладак
| праблема | Магчымая прычына | Рашэнне |
|---|---|---|
| Машына не ўключаецца. | Батарэя разраджана або выключаны выключальнік харчавання. | Ensure the power switch is in the 'ON' position. Charge the battery fully. |
| Balls are not dispensing. | Hopper is empty, balls are jammed, or dispenser is blocked. | Refill hopper. Power off the machine, clear any jammed balls or obstructions from the dispenser. |
| Праграма не можа падключыцца да машыны. | Bluetooth is off, machine is off, or app issue. | Ensure machine is powered on and Bluetooth is enabled on your Android device. Restart the app and try pairing again. |
| Inconsistent ball speed/spin. | Low battery, worn balls, or internal mechanism issue. | Charge the battery. Use new, dry tennis balls. If the problem persists, contact VEVOR support. |
| Машына нечакана спыняецца. | Overload protection activated (fuse). | The machine may have a protection fuse that can trip under heavy load. Turn off the machine, wait a few minutes, and restart. If a fuse needs replacement, consult the manufacturer. |
8. Тэхнічныя характарыстыкі
| Асаблівасць | Спецыфікацыя |
|---|---|
| мадэль | ТС-08 |
| Марка | ВЕВОР |
| Памеры прадукту (Д х Ш х У) | 57.91 х 55.12 х 45.97 см |
| Вага прадмета | 24.6 кілаграма |
| Матэрыял | Акрыланітрылбутадыенстырол (АБС) |
| Колер | Шэры |
| Ёмістасць бункера | 150 Tennis Balls |
| Ёмістасць батарэі | 16AH |
| Час працы (пры поўнай зарадцы) | Прыбл. 6 гадзіны |
| Час зарадкі | Прыбл. 8 гадзіны |
| Метад кантролю | Smartphone App (Android only) |
| Спартыўны тып | Тэніс |
| Тып канструкцыі | Combination of ABS plastic and polymer composite wheels |
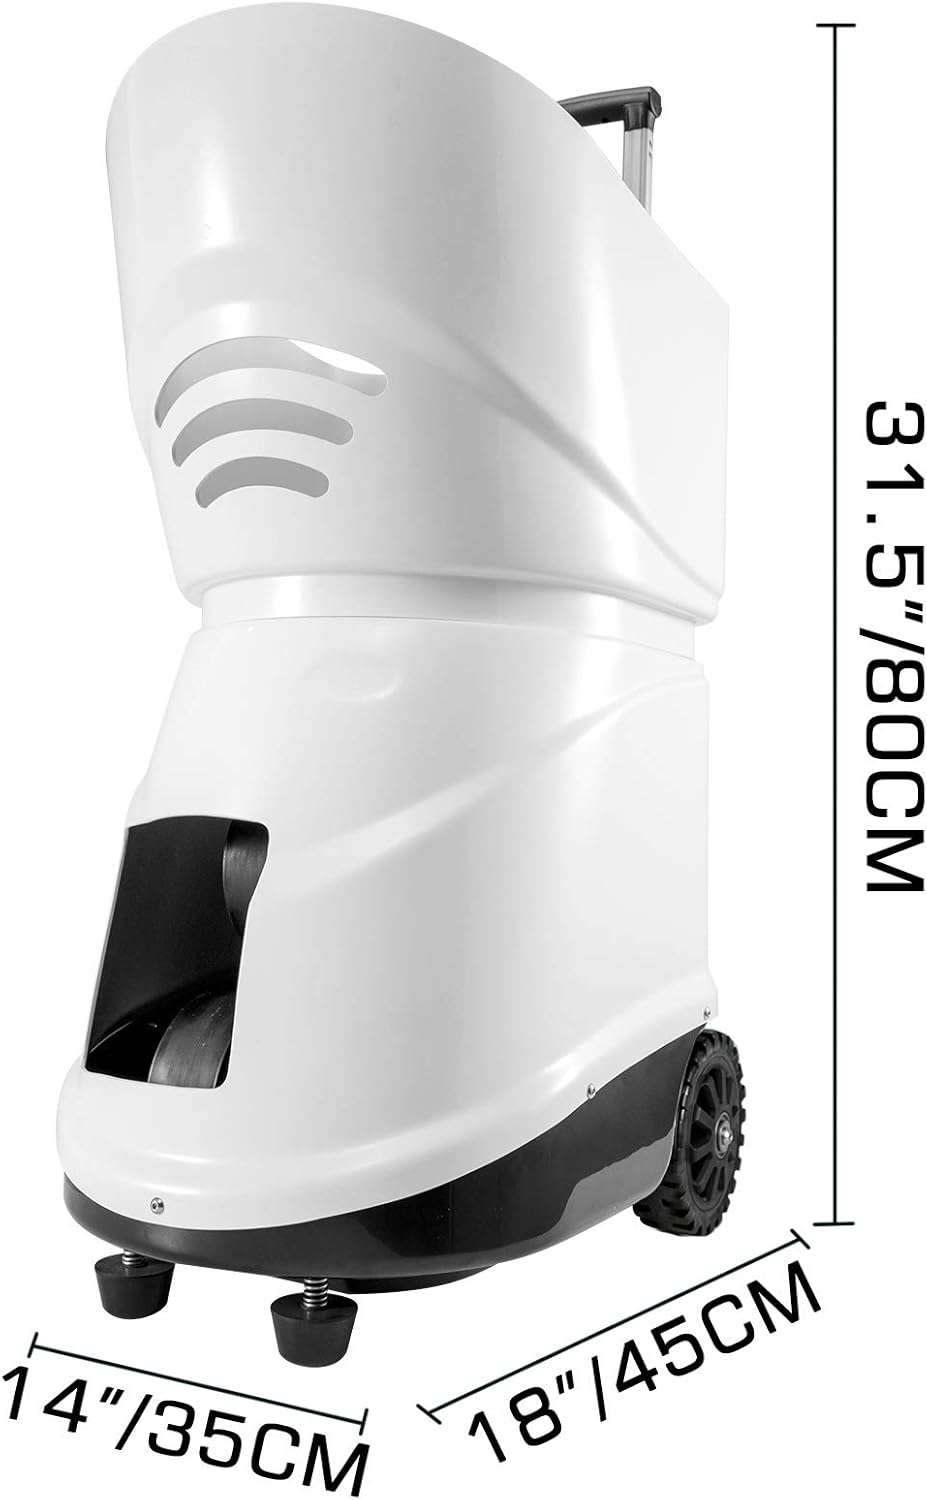
Figure 5: Physical dimensions of the VEVOR TS-08 tennis ball machine, showing its height, width, and depth.
9. Гарантыя і падтрымка
VEVOR products are designed for durability and performance. For warranty information, please refer to the documentation included with your purchase or visit the official VEVOR website. If you encounter any issues or require technical assistance, please contact VEVOR customer support. Have your model number (TS-08) and purchase details ready when contacting support.
Падтрымка кліентаў VEVOR: Please refer to your product packaging or the VEVOR official webсайт для кантактных дадзеных.