1. Уводзіны
Thank you for choosing the CREATE SILKAIR CONNECT 3-in-1 Mobile Air Conditioner. This versatile appliance is designed to provide cooling, dehumidification, and fan functions for your living space. With its Wi-Fi connectivity, you can conveniently control the unit via a mobile application. Please read this manual thoroughly before operation to ensure safe and efficient use.
мадэль: 64274_145198
Марка: СТВАРЫЦЬ
2. Інфармацыя па бяспецы
Заўсёды выконвайце асноўныя меры бяспекі пры выкарыстанні электрапрыбораў, каб знізіць рызыку пажару, паражэння электрычным токам і траўмаў.
- Пераканайцеся, што крыніца харчавання адпавядае аб'ёмуtage, указаны на этыкетцы з ацэнкай.
- Не выкарыстоўвайце прыладу з пашкоджаным шнуром або вілкай.
- Трымайце прыладу далей ад крыніц цяпла і прамых сонечных прамянёў.
- Не закрывайце ўваходныя і выпускныя адтуліны для паветра.
- Заўсёды адключайце прыладу ад сеткі перад чысткай або тэхнічным абслугоўваннем.
- У гэтай прыладзе выкарыстоўваецца хладагент R290. Не праколвайце хладагентны контур.
- Сачыце за дзецьмі і не дапускайце, каб яны гулялі з прыладай.
3. Змесціва ўпакоўкі
Carefully unpack your air conditioner and check that all items are present and in good condition.
- CREATE SILKAIR CONNECT Mobile Air Conditioner Unit
- Выцяжны шланг
- Window Sealing Kit (Adjustable window slider, hose adapter)
- Пульт дыстанцыйнага кіравання
- Кіраўніцтва карыстальніка

Figure 1: The CREATE SILKAIR CONNECT Mobile Air Conditioner unit shown alongside a smartphone displaying its control application interface.
4. Прадукт скончыўсяview
4.1 Панэль кіравання

Figure 2: Close-up of the top-mounted control panel, featuring an LED display and touch-sensitive buttons for various functions such as power, mode selection, fan speed, and timer.
4.2 Кампаненты і памеры
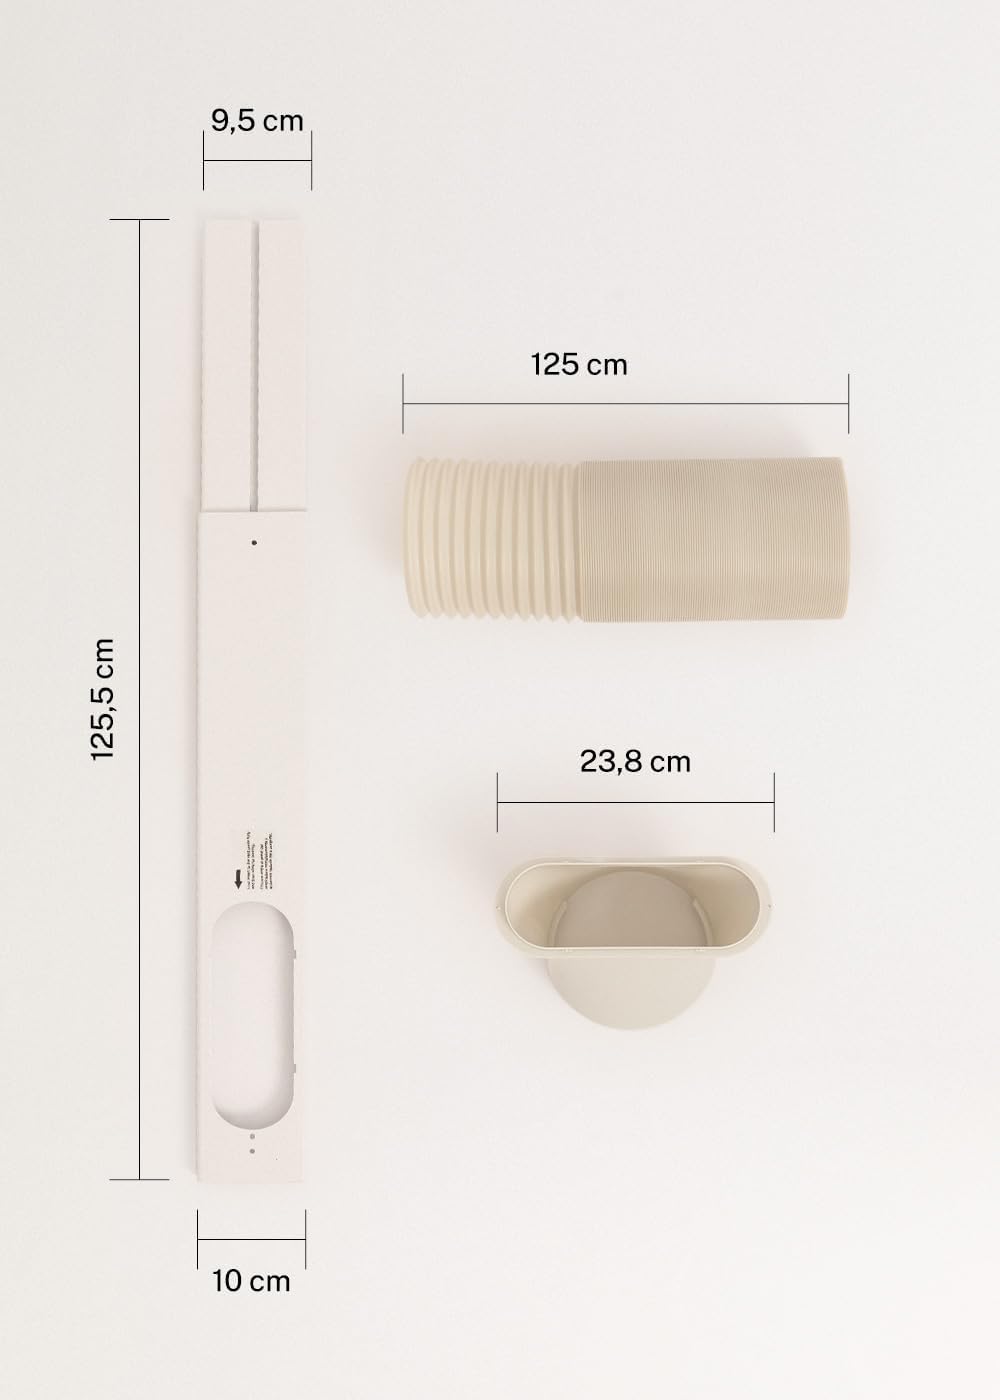
Figure 3: Detailed diagram illustrating the dimensions of the window sealing plate (125.5 cm length, 10 cm width, 9.5 cm adjustable width) and the exhaust hose (125 cm length) with its adapter (23.8 cm diameter).
5. Настройка і ўстаноўка
Proper installation is crucial for the efficient operation of your mobile air conditioner.
5.1 Размяшчэнне прылады
- Размесціце прыладу на роўнай устойлівай паверхні.
- Для належнай цыркуляцыі паветра вакол прылады пераканайцеся, што ёсць не менш за 30 см прасторы.
- Размясціце прыладу побач з акном або адтулінай для выхлапнога шланга.
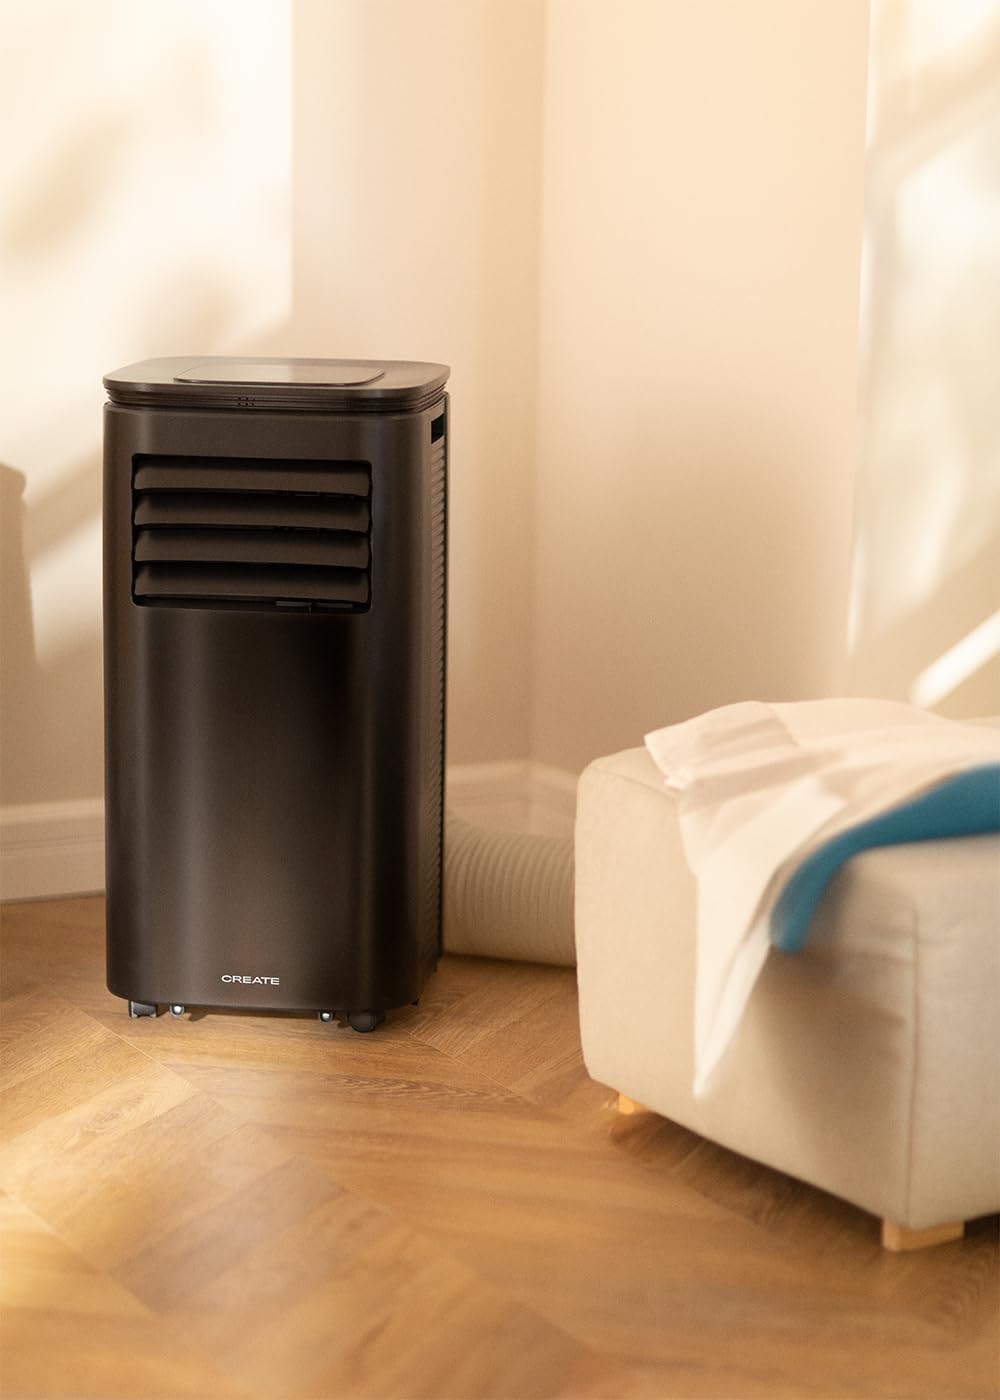
Figure 4: The air conditioner unit positioned in a room, demonstrating the typical setup with the exhaust hose directed towards a window for heat expulsion.
5.2 Усталёўка выхлапнога шланга і камплекта для вокнаў
- Прымацуеце адаптар шланга да аднаго канца выпускнога шланга.
- Падключыце другі канец выхлапнога шланга да паветраадводнай адтуліны на задняй панэлі прылады.
- Install the adjustable window sealing kit in your window opening. Extend it to fit the window frame.
- Insert the hose adapter into the opening of the window sealing kit.

Figure 5: Illustrates the secure connection of the flexible exhaust hose to the designated port at the rear of the air conditioning unit.
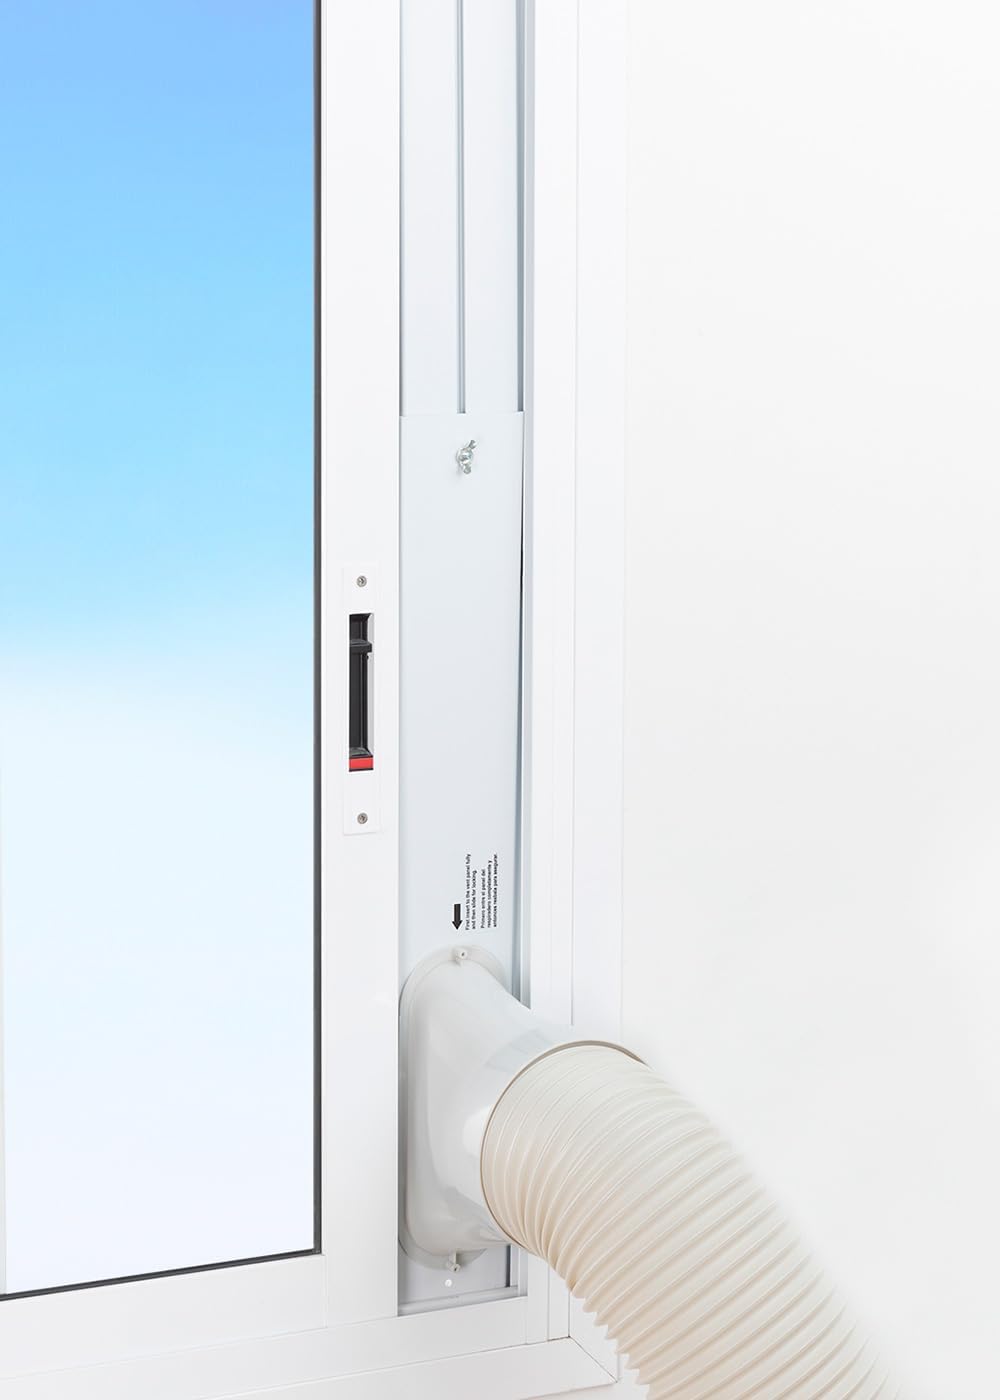
Figure 6: The window sealing kit is shown properly installed in a window frame, with the exhaust hose securely fitted into the kit's opening to vent hot air outside.
6. Інструкцыя па эксплуатацыі
6.1 З дапамогай панэлі кіравання
The control panel on top of the unit allows direct operation.
- Кнопка харчавання: Націсніце, каб уключыць або выключыць прыладу.
- Кнопка рэжыму: Пераключайцеся паміж рэжымамі астуджэння, вентыляцыі і асушвання паветра.
- Кнопка хуткасці вентылятара: Adjust fan speed (Low, High).
- Кнопкі тэмпературы (+/-): Adjust desired temperature in Cooling mode.
- Кнопка таймера: Set the auto-on or auto-off timer (up to 24 hours).
- Кнопка рэжыму сну: Актывуе больш ціхі рэжым працы для выкарыстання ў начны час.
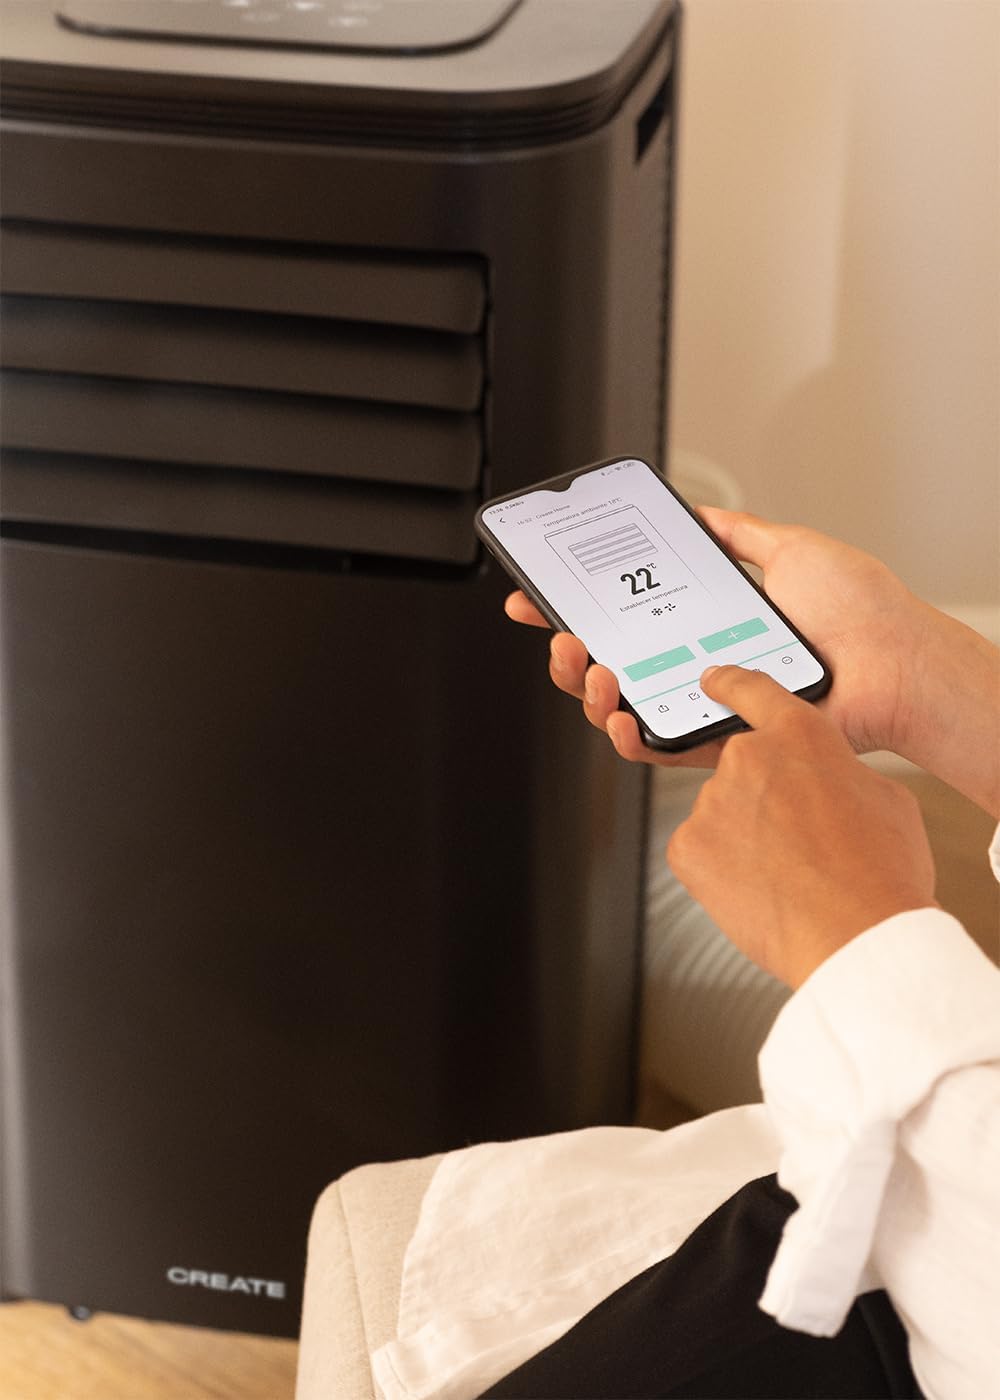
Figure 7: A user's hand interacting with the touch-sensitive control panel located on the top surface of the air conditioner, demonstrating direct manual operation.
6.2 Выкарыстанне пульта дыстанцыйнага кіравання
The remote control provides convenient operation from a distance.

Figure 8: A hand holding the dedicated remote control for the air conditioner, illustrating its use for convenient operation from a distance.
6.3 Wi-Fi and App Control
Download the CREATE Home app from your smartphone's app store. Follow the in-app instructions to connect your air conditioner to your home Wi-Fi network. Once connected, you can control all functions of the unit from your smartphone, including mode selection, temperature adjustment, fan speed, and timer settings.
Figure 9: A user interacting with the mobile application on a smartphone to remotely control the air conditioner, showcasing the Wi-Fi connectivity feature.
7. Тэхнічнае абслугоўванне
Рэгулярнае тэхнічнае абслугоўванне забяспечвае аптымальную прадукцыйнасць і падаўжае тэрмін службы вашай прылады.
7.1 Ачыстка паветранага фільтра
Паветраны фільтр варта чысціць кожныя два тыдні або часцей у залежнасці ад выкарыстання і якасці паветра.
- Выключыце прыладу і адключыце яе ад разеткі.
- Locate the air filter panel on the back of the unit.
- Акуратна зніміце фільтр.
- Clean the filter with warm, soapy water or a vacuum cleaner. Rinse thoroughly and allow it to air dry completely before reinserting.

Figure 10: Demonstrates the process of removing the air filter from the rear of the air conditioner unit for cleaning or replacement.
7.2 Зліў вады
In Dehumidifier mode or high humidity conditions, the internal water tank may fill up. The unit will stop operating when the tank is full. Drain the water from the drainage port at the bottom rear of the unit.
8. Выпраўленне непаладак
| праблема | Магчымая прычына | Рашэнне |
|---|---|---|
| Прылада не ўключаецца | Няма электрычнасці; шнур харчавання не падключаны да разеткі; рэзервуар для вады поўны. | Check power outlet; Plug in power cord; Drain water tank. |
| Прылада неэфектыўна астуджаецца | Паветраны фільтр забруджаны; Выпускны шланг няправільна ўсталяваны; Пакой занадта вялікі; Дзверы/вокны адчыненыя. | Clean air filter; Ensure hose is sealed; Use in recommended room size (14-25 m²); Close doors/windows. |
| Гучны шум | Прылада не стаіць на роўнай паверхні; ёсць перашкода ў вентылятары. | Place on flat surface; Check for obstructions. |
| Праблемы з падключэннем да Wi-Fi | Няправільны пароль Wi-Fi; маршрутызатар занадта далёка; праблемы з праграмай. | Verify password; Move unit closer to router; Restart app/unit. |
9. Тэхнічныя характарыстыкі
| Асаблівасць | Спецыфікацыя |
|---|---|
| Нумар мадэлі | 64274_145198 |
| Магутнасць астуджэння | 9000 BTU / 2270 Watt |
| Ёмістасць абязводжвання | 24 літраў/дзень |
| Струмень паветра | Да 350 м³/г |
| Рэкамендаваны памер пакоя | 14-25 м² |
| Узровень шуму | 65 дБ |
| Хладагент | R290 (ECO-friendly) |
| тtage | 240 Вольт |
| Ватtage | 2600 ват |
| Памеры (Д х Ш х У) | 35.5 х 36.5 х 71.3 см |
| Матэрыял | АБС |
| Клас энергаэфектыўнасці | A |

Figure 11: The energy efficiency label for the CREATE SILKAIR CONNECT, indicating an A-class energy rating, 2.6 kW cooling capacity, and a noise level of 65 dB. More details can be found at eprel.ec.europa.eu/qr/1580267.
10. Гарантыя і падтрымка
For warranty information and technical support, please refer to the warranty card included with your product or visit the official CREATE webсайт. Захоўвайце чэк аб куплі як пацверджанне пакупкі.
вытворца: СТВАРЫЦЬ
Кантакты: Refer to CREATE's official support channels.