1. Уводзіны
The Gravity 4000.1D is a high-performance Class D monoblock ampзапал, прызначаны для аўтамабільных аўдыёсістэм. Гэты amplifier delivers 4000 Watts maximum power and is stable at 1 Ohm, 2 Ohm, and 4 Ohm loads, making it suitable for driving subwoofers. It features a digital design with a MOSFET power supply for efficient operation. This manual provides essential information for proper installation, operation, and maintenance of your ampзадымнік.
2. Тэхніка бяспекі
- Заўсёды адключайце адмоўны вывад акумулятара аўтамабіля перад пачаткам любой устаноўкі.
- Пераканайцеся, што ўся праводка правільна пракладзена і замацавана, каб пазбегнуць пашкоджанняў або кароткіх замыканняў.
- Use appropriate gauge power and ground wires as specified in the installation section.
- Усталюйце ampLifier у добра вентыляваным памяшканні, каб прадухіліць перагрэў.
- Пазбягайце мантажу amplifier in locations exposed to direct sunlight or excessive moisture.
- Калі вы не ўпэўненыя ў якіх-небудзь кроках усталёўкі, звярніцеся да прафесійнага ўсталёўшчыка аўтамабільнай аўдыёсістэмы.
3. Змесціва ўпакоўкі
Праверце наяўнасць усіх прадметаў у камплекце:
- Gravity 4000.1D Class D Car Ampзадымнік
- Пульт дыстанцыйнага кіравання басамі з кабелем
- Мантажнае абсталяванне (шрубы)
- Кіраўніцтва карыстальніка (гэты дакумент)
- SoundXtreme AP6 Bass Machine (Bundle Component)
4. Прадукт скончыўсяview
Азнаёмцеся з amplifier's layout and connections.

Малюнак 1: Верх view of the Gravity 4000.1D Class D Car Amplifier, showing the 'GRAVITY' logo and 'WARZONE' branding, along with the model number 'WZ 4000-1D'.
4.1 Input and Control Panel

Малюнак 2: Буйны план view з amplifier's input and control panel. This side features RCA input jacks, a remote bass knob port, and various adjustment controls.
- АБАРОНІЦЬ святлодыёд: Загараецца, калі ampLifier знаходзіцца ў рэжыме абароны.
- ДАСТАЎКА: Port for connecting the wired remote bass knob.
- УВАХОД (RCA): Audio signal input from your head unit or source.
- BRIDGE IN: Выкарыстоўваецца для злучэння некалькіх amplifiers (refer to advanced setup).
- УЗБЕГАЦЬ: Рэгулюе уваходную адчувальнасць ampзадымнік.
- ФНЧ (фільтр нізкіх частот): Adjusts the low-pass crossover frequency (40 Hz ~ 180 Hz).
- ДАГУКАВЫЯ: Adjusts the subsonic filter frequency (0 Hz ~ 50 Hz).
- BASS BOOST FREQ: Selects the center frequency for bass boost (30 Hz, 40 Hz, 60 Hz).
- УЗмацненне баса: Adjusts the level of bass boost (0 dB ~ 12 dB).
- Святлодыёд харчавання: Загараецца, калі amplifier уключаны.
4.2 Power and Speaker Terminal Panel

Малюнак 3: Буйны план view з amplifier's power and speaker terminal panel. This side includes connections for power, ground, remote turn-on, and speaker outputs.
- СПІКЕР: Output terminals for connecting your subwoofer(s).
- POWER (+12V): Connects to the positive terminal of the vehicle's battery.
- REM (дыстанцыйнае): Connects to the remote turn-on output of your head unit.
- GND (зямля): Connects to a solid chassis ground point in the vehicle.
5. Ўстаноўка
5.1 Мантаж Ampзадымнік
Выберыце сухое, добра вентыляванае і бяспечнае месца для мантажу. Забяспечце дастатковую цыркуляцыю паветра вакол amplifier to prevent overheating. The amplifier can be mounted horizontally or vertically. Use the provided mounting screws to secure the amplifier to a solid surface in your vehicle.
5.2 Правадныя злучэнні
Proper wiring is crucial for optimal performance and safety. Refer to Figure 3 for terminal locations.
- Падключэнне сілкавання (+12 В): Run a heavy-gauge power cable (e.g., 4-gauge or larger) directly from the vehicle's positive battery terminal to the amplifier's +12V terminal. Install an in-line fuse holder with an appropriate fuse (not included) within 18 inches (45 cm) of the battery.
- Зазямленне (GND): Пракладзеце тоўсты зазямляльны кабель (таго ж перасеку, што і сілавы кабель) ад ampПадключыце клему GND запальніка да чыстай неафарбаванай металічнай паверхні шасі аўтамабіля. Забяспечце добрае электрычнае злучэнне, саскрабшы фарбу або іржу. Кабель зазямлення павінен быць як мага карацейшым, у ідэале менш за 1 метр (3 футы).
- Remote Turn-On Connection (REM): Падключыце провад меншага калібра (напрыклад, 18-га калібра) ад amplifier's REM terminal to the remote turn-on output of your head unit. This wire tells the ampіндыкатар уключаецца, калі ваша галоўная прылада актыўная.
- Уваходнае падключэнне RCA: Connect RCA cables from the pre-out outputs of your head unit to the INPUT RCA jacks on the ampзадымнік.
- Падключэнне дынаміка: Connect your subwoofer(s) to the SPEAKER output terminals. Ensure correct polarity (+ to + and - to -). The amplifier is stable down to 1 Ohm. Consult your subwoofer's specifications for proper wiring configurations to achieve the desired impedance.
- Дыстанцыйная ручка баса: Plug the remote bass knob cable into the REMOTE port on the amplifier and mount the knob in a convenient location for adjustment.
6. Аперацыя
6.1 Першапачатковае ўключэнне
After all connections are made and verified, reconnect the vehicle's battery. Turn on your head unit. The POWER LED on the amplifier should illuminate. If the PROTECT LED illuminates, refer to the Troubleshooting section.
6.2 Рэгуляванне AmpНалады lifier
Adjust these settings carefully to optimize sound quality and prevent damage to your speakers.
- УЗБЕГАЦЬ: Start with the GAIN control at minimum. Play a familiar piece of music at a moderate volume on your head unit. Slowly increase the GAIN until you hear distortion, then back off slightly. This sets the ampУсталюйце ўваходную адчувальнасць налады ў адпаведнасці з выхадным сігналам вашай галаўной прылады.
- ФНЧ (фільтр нізкіх частот): Adjust the LPF to filter out frequencies above your desired subwoofer range. A common starting point is 80-100 Hz. This ensures only low frequencies are sent to your subwoofer.
- Дагукавы фільтр: This filter removes extremely low frequencies that your subwoofer cannot reproduce efficiently, preventing damage and improving sound quality. Set it slightly below your subwoofer's port tuning frequency or around 25-30 Hz for sealed enclosures.
- BASS BOOST FREQ & BASS BOOST: Use these controls to enhance bass output at a specific frequency. Start with Bass Boost at 0 dB and adjust only if needed. Excessive bass boost can cause distortion and damage.
6.3 Ручка дыстанцыйнага кіравання басамі

Figure 4: The wired remote bass knob, used for convenient adjustment of bass level from the driver's seat.
The remote bass knob allows you to adjust the subwoofer output level conveniently from your listening position. This control typically acts as a master volume for the subwoofer channel, allowing you to fine-tune bass levels without accessing the amplifier непасрэдна.
7. Тэхнічныя характарыстыкі
| Асаблівасць | Спецыфікацыя |
|---|---|
| мадэль | 4000.1D |
| Выходная магутнасць | 4000 Вт Макс |
| Клас | Клас Д |
| Стабільнасць | 1 Ohm, 2 Ohm, 4 Ohm Stable |
| Суадносіны сігнал/шум | > 70 дБ |
| АЧХ | 8 Гц ~ 180 Гц |
| THD | <0.2% |
| Узровень узмацнення баса | 0 ~ 12 дБ |
| LPF (фільтр нізкіх частот) | 40 Гц ~ 180 Гц |
| Дазвукавы фільтр | 0 ~ 50 Гц |
| Уваходы | High and Low Level Inputs |
| Памеры (Д×Ш×У) | 286 мм (11.3 цалі) × 211 мм (8.3 цалі) × 64.5 мм (2.5 цалі) |
| Колькасць каналаў | 1 (манаблок) |
| Тып мацавання | корпусная |
8. Выпраўленне непаладак
Калі ў вас узніклі праблемы з вашым amplifier, consult the following table:
| праблема | Магчымая прычына | Рашэнне |
|---|---|---|
| Amplifier does not turn on (POWER LED off) | Няма харчавання, няма зазямлення або няма дыстанцыйнага сігналу. Перагарэў засцерагальнік. | Check +12V, GND, and REM connections. Verify in-line fuse. |
| PROTECT LED illuminates | Short circuit in speaker wiring, impedance too low, overheating, or DC offset. | Check speaker wiring for shorts. Verify speaker impedance. Ensure proper ventilation. Allow amplifier астудзіць. |
| Няма выхаду гуку | No input signal, incorrect gain setting, or speaker wiring issue. | Check RCA input connections. Adjust GAIN. Verify speaker connections and polarity. |
| Скажоны гук | GAIN set too high, improper crossover settings, or damaged speakers. | Reduce GAIN. Adjust LPF and Subsonic filters. Inspect speakers for damage. |
| Engine noise/whine | Poor grounding, RCA cable routing, or power cable interference. | Ensure solid ground connection. Route RCA cables away from power cables. Consider a ground loop isolator. |
9. Тэхнічнае абслугоўванне
To ensure the longevity and optimal performance of your Gravity 4000.1D ampпадпітка:
- Трымайце ampачышчайце прыбор ад пылу і вільгаці. Для чысткі выкарыстоўвайце мяккую сухую тканіну.
- Пераканайцеся, што рэбры астуджэння не заблакіраваны, каб забяспечыць належны адвод цяпла.
- Перыядычна правярайце ўсе злучэнні правадоў на надзейнасць і наяўнасць карозіі.
- Пазбягайце разліву вадкасцей на ampзадымнік.
10. SoundXtreme AP6 Bass Machine (Bundle Component)
The Gravity 4000.1D amplifier may be bundled with a SoundXtreme AP6 Bass Machine. This component is designed to enhance bass response and provide additional control over low frequencies in your audio system.
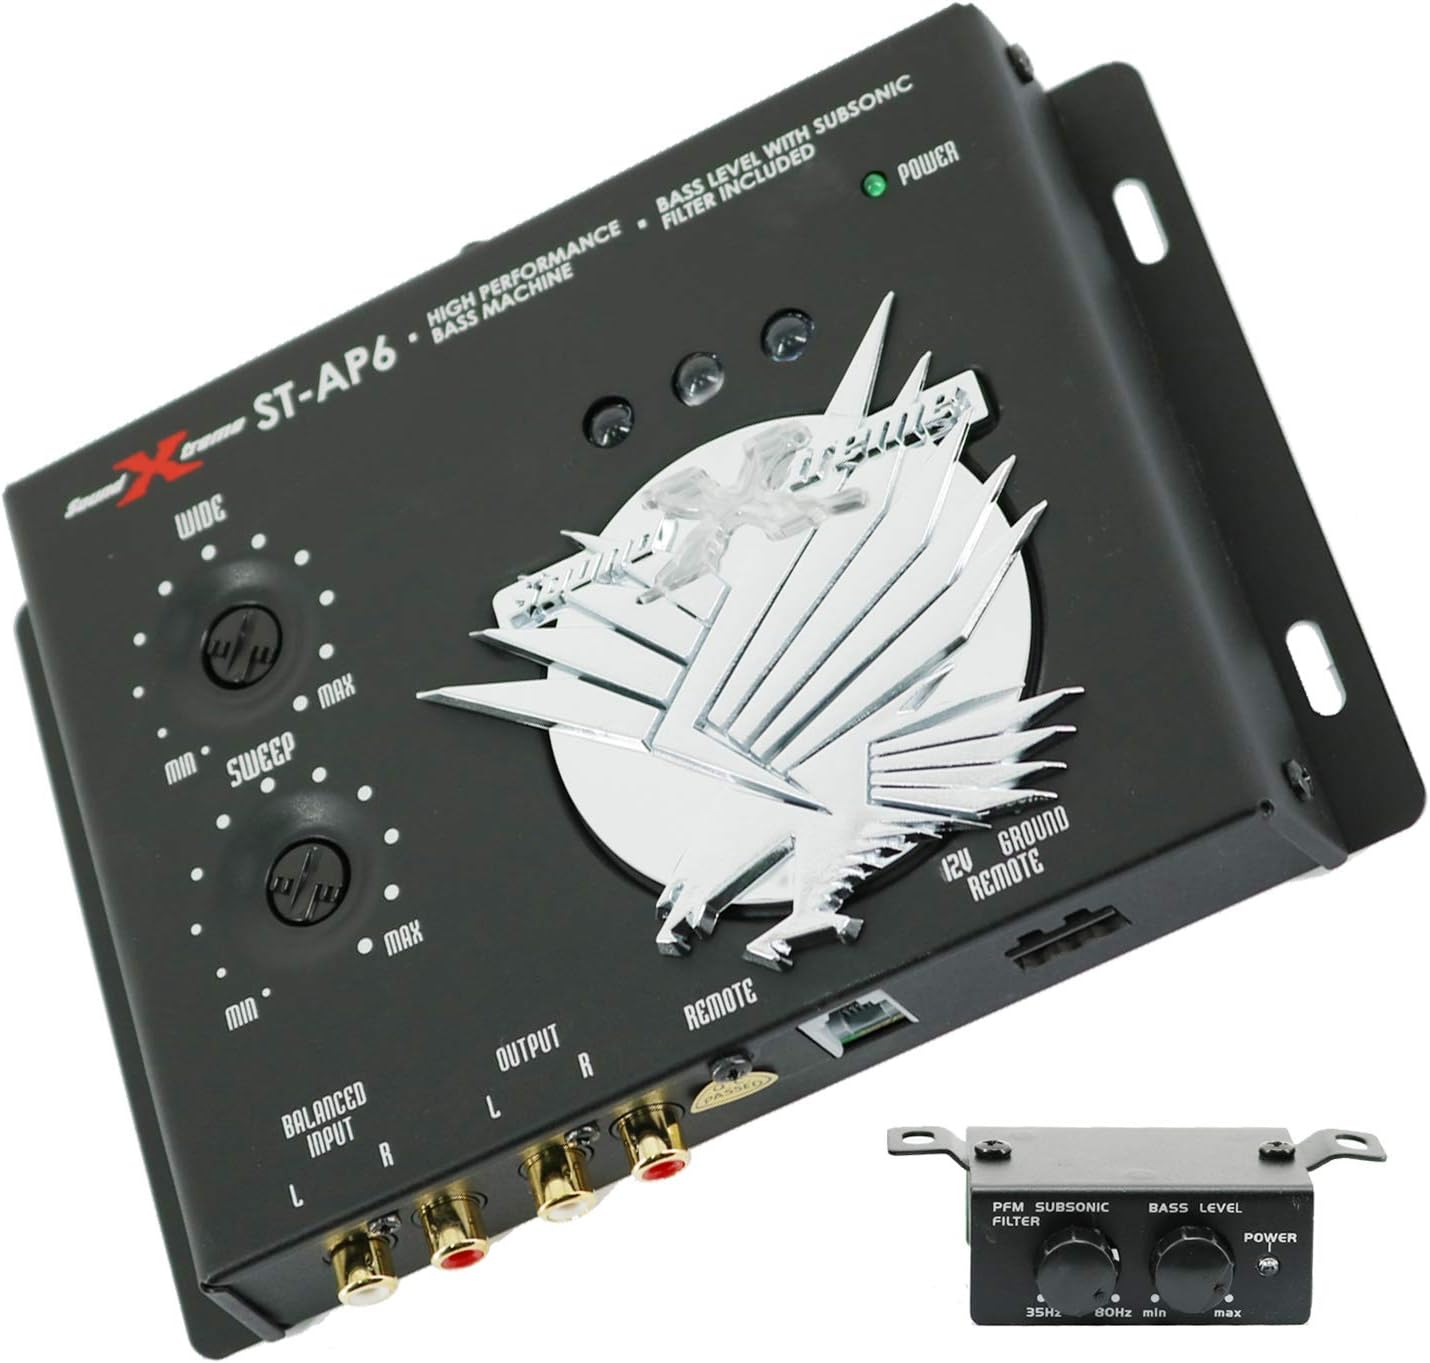
Figure 5: The SoundXtreme AP6 Bass Machine, a high-performance bass processor included in some bundles.
For detailed installation and operation instructions for the SoundXtreme AP6 Bass Machine, please refer to its dedicated user manual, as its functionality is separate from the Gravity 4000.1D ampзадымнік.
11. Гарантыя і падтрымка
For warranty information and technical support, please refer to the documentation provided with your purchase or contact Gravity customer service. Keep your proof of purchase for warranty claims.