CAMMHD C9
CAMMHD C9 Body Camera User Manual
Мадэль: C9
1. Уводзіны
This manual provides detailed instructions for the operation and maintenance of your CAMMHD C9 Body Camera. Please read this manual thoroughly before using the device to ensure proper function and to maximize its capabilities. The CAMMHD C9 is a compact and versatile body-worn camera designed for reliable audio and video recording in various environments, featuring 1296p resolution, IR night vision, and a 2.0-inch LCD for playback.
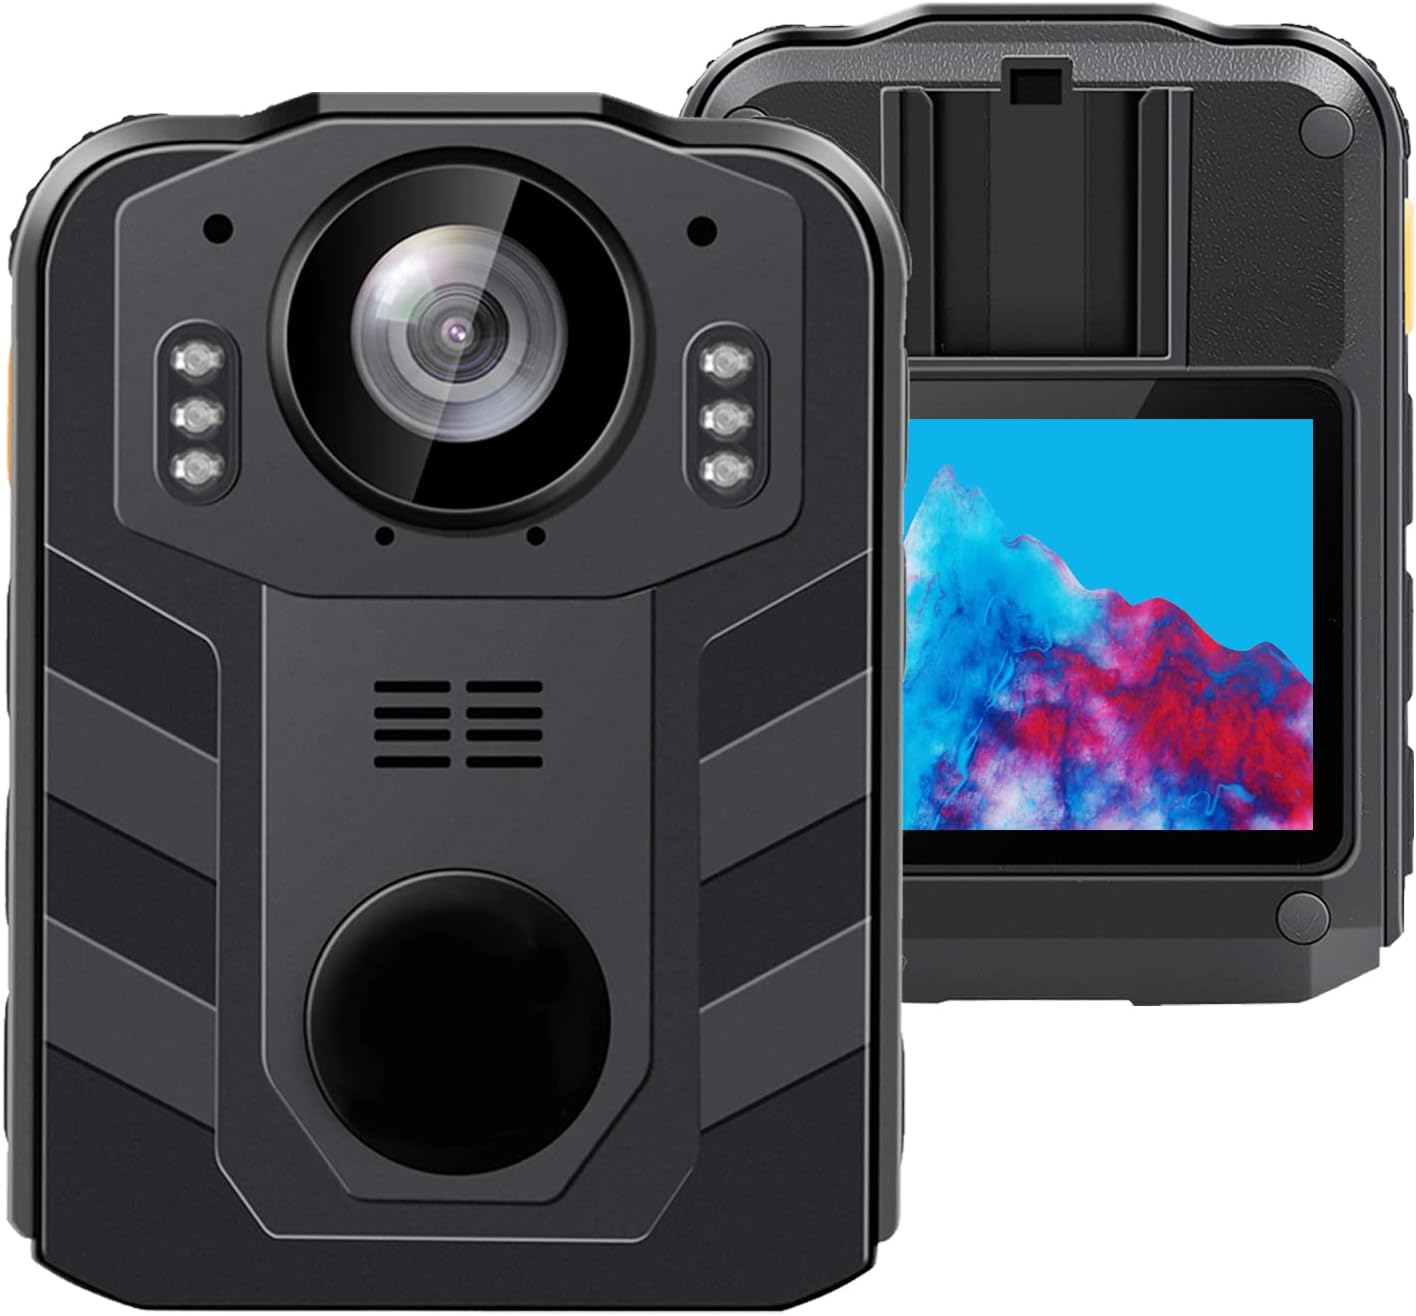
Малюнак 1.1: Пярэдняя і задняя часткі view of the CAMMHD C9 Body Camera.
2. Змесціва ўпакоўкі
Праверце, ці ёсць усе прадметы ў вашай упакоўцы:
- CAMMHD C9 Body Camera
- Кабель USB
- Кіраўніцтва карыстальніка (гэты дакумент)
3. Прадукт скончыўсяview
Азнаёмцеся з кампанентамі і элементамі кіравання камеры.
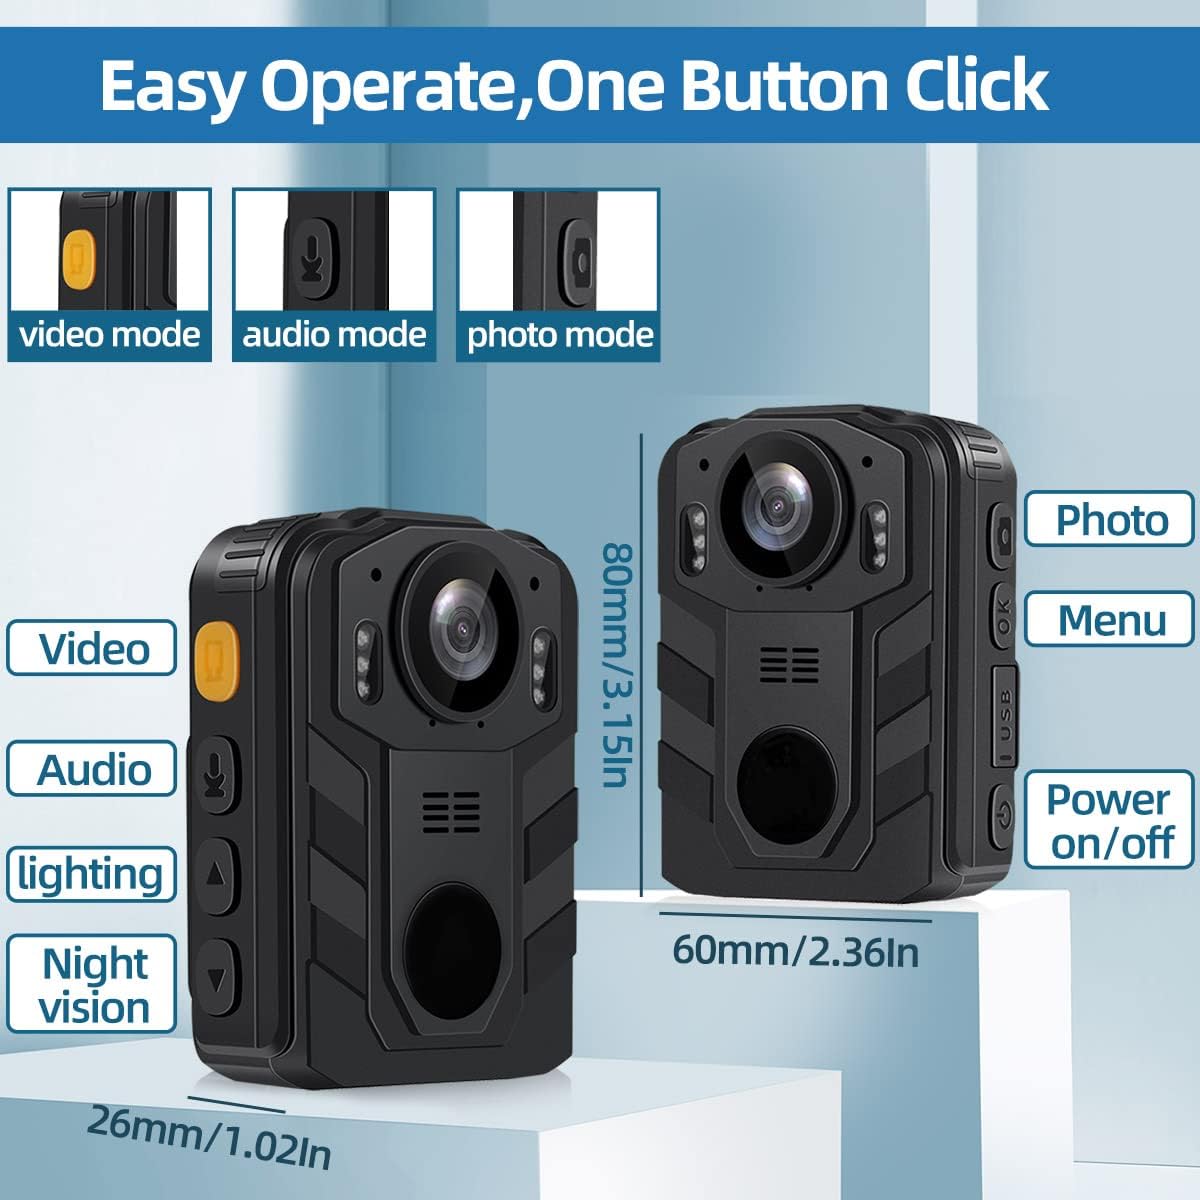
Image 3.1: CAMMHD C9 Body Camera with key features and dimensions highlighted.
3.1. Функцыі кнопак
- Кнопка ўключэння/выключэння: Націсніце і ўтрымлівайце, каб уключыць або выключыць прыладу.
- Кнопка відэа: Націсніце, каб пачаць/спыніць запіс відэа.
- Кнопка аўдыя: Press to start/stop audio-only recording.
- Кнопка фота: Націсніце, каб зрабіць фотаздымак.
- Menu/OK Button: Access the menu, confirm selections.
- Кнопкі навігацыі ўверх/уніз: Перамяшчайцеся па параметрах меню.
- Порт USB: Для зарадкі і перадачы дадзеных.
4. Настройка
4.1. Зарадка акумулятара
Before first use, fully charge the camera's internal 3000mAh battery. Connect the camera to a USB power adapter (not included) or a computer's USB port using the provided USB cable. The charging indicator light will show the charging status. A full charge typically takes approximately 5 hours and provides up to 8 hours of recording time.
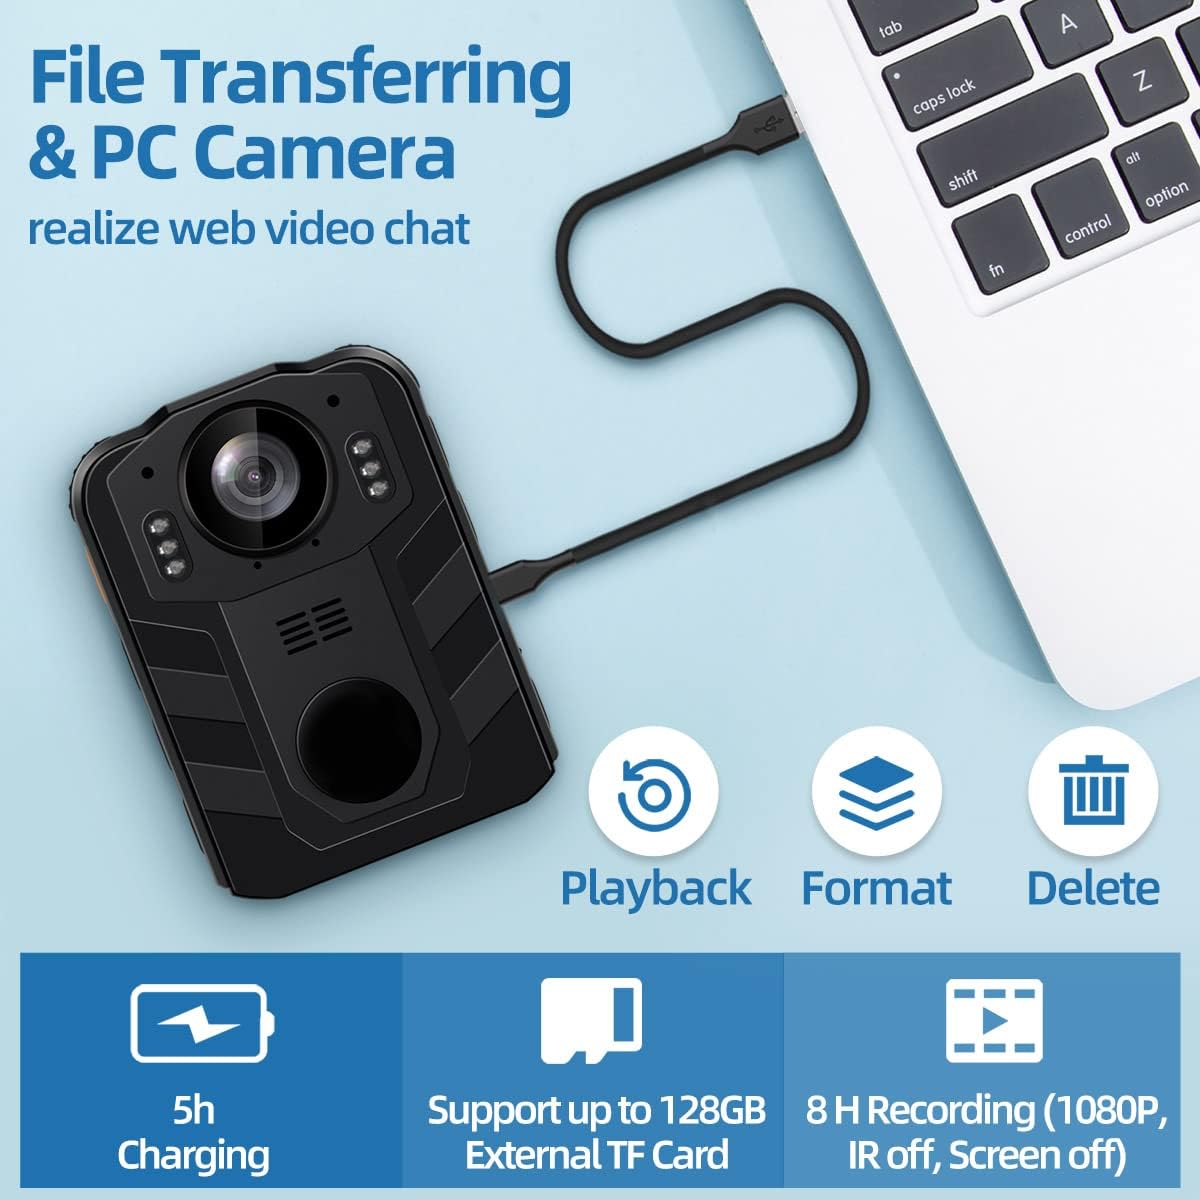
Image 4.1: Battery capacity and estimated usage/charging times.

Image 4.2: Methods for charging the camera and connecting to a computer.
4.2. Устаўка SD-карты
The CAMMHD C9 Body Camera supports external SD cards up to 512GB. To insert an SD card:
- Пераканайцеся, што камера выключана.
- Locate the SD card slot, usually on the side or bottom of the device.
- Gently insert the SD card with the metal contacts facing the correct direction until it clicks into place.
- Каб выняць карту, злёгку націсніце на яе, пакуль яна не выскочыць.
After inserting the SD card, you may need to select 'External card' in the camera's settings menu for storage. Refer to the video below for menu navigation exampлес.
Video 4.1: Demonstrates navigating the camera's menu, including selecting the SD card option for storage. This video shows the 'SD Card' option being highlighted and set to 'External card'.
5. Інструкцыя па эксплуатацыі
5.1. Уключэнне/выключэнне харчавання
- Каб уключыць: Націсніце і ўтрымлівайце кнопку харчавання, пакуль не падсвяціцца экран.
- Каб выключыць: Націсніце і ўтрымлівайце кнопку харчавання, пакуль прылада не выключыцца.
5.2. Запіс відэа
На галоўным экране націсніце Кнопка відэа once to start video recording. A recording indicator (e.g., a red dot or flashing icon) will appear on the screen. Press the Кнопка відэа again to stop recording. Videos are saved automatically.
5.3. Запіс аўдыё
На галоўным экране націсніце Кнопка аўдыя once to start audio-only recording. An audio recording indicator will be visible. Press the Кнопка аўдыя again to stop recording. Audio fileзахоўваюцца аўтаматычна.
5.4. Захоп фатаграфій
На галоўным экране націсніце Кнопка фота once to capture a still image. The screen may flash briefly to indicate a photo has been taken.
5.5. Night Vision (IR)
The camera features infrared (IR) night vision for recording in low-light conditions. The IR function can be set to automatic or manual activation via the camera's menu. When active, the camera will record in black and white.
Image 5.1: Illustrates the difference between day and night vision recording modes.
5.6. Навігацыя па меню
Націсніце Кнопка меню/ОК to access the camera's settings menu. Use the Кнопкі навігацыі ўверх/уніз to scroll through options. Press the Кнопка меню/ОК to select an option or confirm a setting. Press the Кнопка харчавання каб выйсці з меню.
6. Пашыраныя магчымасці
6.1. Цыкл запісу
The CAMMHD C9 supports loop recording. When enabled, the camera will continuously record. Once the memory card is full, the oldest files will be overwritten by new recordings. This ensures continuous operation without manual deletion of old files. The duration of each loop segment can typically be adjusted in the settings menu.
6.2. PC Camera Mode
The camera can function as a PC camera (webcam) when connected to a computer. Connect the camera to your computer using the USB cable. Select the 'PC Camera' option on the camera's screen if prompted. Your computer should recognize the device as a webкулачок.

Image 6.1: The camera connected to a laptop, illustrating file transfer and PC camera functionality.
6.3. File Трансфер
To transfer recorded videos, audio, and photos to a computer:
- Падключыце камеру да кампутара з дапамогай USB-кабеля, які ўваходзіць у камплект.
- Камера павінна адлюстроўвацца на вашым кампутары як здымны дыск.
- Адкрыйце дыск, каб атрымаць доступ і скапіяваць files.
Alternatively, you can remove the SD card from the camera and insert it into a card reader connected to your computer for direct file доступ.

Image 6.2: Two methods for transferring files: direct USB connection or using an SD card reader.
7. Тэхнічнае абслугоўванне
- Уборка: Для чысткі корпуса камеры выкарыстоўвайце мяккую сухую тканіну. Для аб'ектыва выкарыстоўвайце спецыяльную тканіну і раствор для чысткі аб'ектываў. Пазбягайце выкарыстання агрэсіўных хімічных рэчываў.
- захоўванне: Захоўвайце камеру ў прахалодным, сухім месцы, удалечыні ад прамых сонечных прамянёў і экстрэмальных тэмператур.
- Сыход за батарэяй: Для аптымальнага тэрміну службы батарэі пазбягайце частай поўнай разрадкі. Пры працяглым захоўванні зараджайце батарэю прыкладна да 50% кожныя некалькі месяцаў.
8. Выпраўленне непаладак
- Камера не ўключаецца: Пераканайцеся, што акумулятар зараджаны. Падключыце да крыніцы харчавання і паспрабуйце яшчэ раз.
- Немагчыма запісаць: Check if an SD card is inserted and properly formatted. Ensure there is sufficient storage space.
- Дрэнная якасць відэа: Ensure the lens is clean. Check recording resolution settings in the menu.
- Computer not recognizing camera: Try a different USB port or cable. Ensure the camera is in the correct mode (e.g., Mass Storage or PC Camera) if prompted.
9. Тэхнічныя характарыстыкі
| Асаблівасць | Спецыфікацыя |
|---|---|
| Марка | CAMMHD |
| Нумар мадэлі | C9 |
| Дазвол відэазахопу | 1296p |
| Фармат захопу відэа | MPEG 4 |
| Памер экрана | 2 цалі |
| Асаблівасці | Начное бачанне |
| Тэхналогія падлучэння | Wireless (Note: Product description mentions wireless, but typically refers to data transfer, not live streaming) |
| Тып аб'ектыва | Шырокі кут |
| Узровень воданепранікальнасці | Водатрывалы |
| акумулятар | 1 літый-іённы акумулятар (у камплекце), 3000 мАг |
| Вага прадмета | 1.03 фунта |
| Памеры прадукту | 2.24 х 0.98 х 3.15 цалі |
| Максімальная падтрымка захоўвання | 512GB (External TF Card) |
10. Гарантыя і падтрымка
For warranty information or technical support, please refer to the product packaging or contact CAMMHD customer service through the retailer where the product was purchased. Keep your purchase receipt as proof of purchase.
Ask a question about this manual
Ask about setup, troubleshooting, compatibility, parts, safety, or missing instructions. Manuals+ will review the question and use this page’s manual context to help answer it.