1. Уводзіны
This manual provides essential instructions for the safe and efficient operation of your PEKOKO LB100 Handheld Inkjet Printer. Please read this manual thoroughly before using the device to ensure proper functionality and to prevent damage.

Image 1.1: The PEKOKO LB100 Handheld Inkjet Printer. This image displays the printer's compact design with its integrated 4.3-inch LCD touch screen and ergonomic handle.
2. Змесціва ўпакоўкі
Праверце, ці ёсць у вашай упакоўцы ўсе пералічаныя ніжэй прадметы:
- PEKOKO Portable Handheld Mobile Inkjet Printer (1 unit)
- Original PEKOKO Ink Cartridge (Black) (1 unit)
- Датчыкі
- Блок харчавання (1 адзінка)
- USB Flash Disk (1 unit)
- Sheet Metal Positioner (1 unit)
- Roller Component (1 unit)
- Кіраўніцтва карыстальніка (1 адзінка)
- Packing Suitcase (1 unit)

Выява 2.1: Канецview of the PEKOKO LB100 Handheld Inkjet Printer package contents. This image shows the printer, aluminum alloy suitcase, ink cartridge, charger, manual, print plate, and touch pen.
3. Настройка
3.1. Усталёўка чарнільнага картрыджа
- Адкрыйце вечка картрыджа.
- Open the cartridge slot.
- Insert the ink cartridge firmly into the slot.
- Close the cartridge slot.
- Націсніце кнопку харчавання, каб запусціць прыладу.

Image 3.1: Visual guide for installing the ink cartridge into the PEKOKO LB100 printer. The image illustrates the five steps: opening the cover, opening the slot, inserting the cartridge, closing the slot, and powering on.
3.2. Initial Power On and Screen Calibration
Upon first use or if the touch screen responsiveness is an issue, calibration may be required. Refer to the troubleshooting section for detailed screen calibration steps.
4. Інструкцыя па эксплуатацыі
4.1. Basic Interface Navigation
The PEKOKO LB100 features a 4.3-inch LCD touch screen for intuitive operation. Use the provided touch pen or your finger to navigate menus and input data.
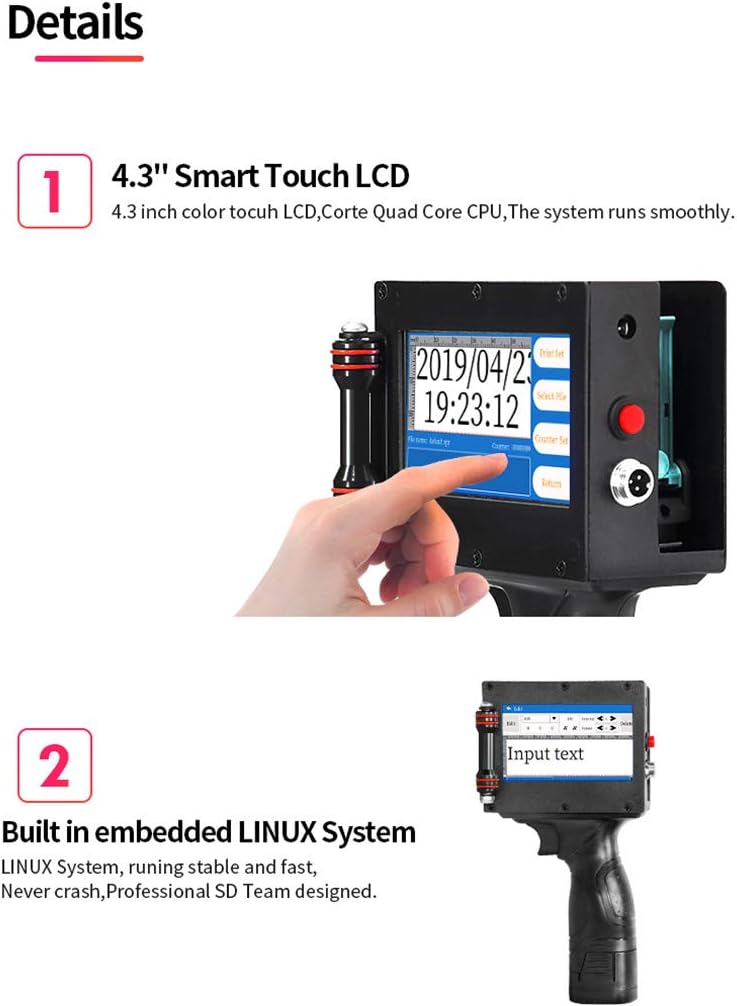
Малюнак 4.1: Крупны план view of the PEKOKO LB100's 4.3-inch smart touch LCD screen. The screen displays the current date and time, along with options for print settings, file selection, and counter settings.
4.2. Creating and Editing Print Content
The printer supports various content types including text, numbers, symbols, QR codes, barcodes, pictures, time, and date. You can create and edit content directly on the device.
- Увод тэксту: Select the 'Add' or 'Edit' option to input alphanumeric characters.
- Дата/час: The device can automatically generate and print current date and time.
- Barcodes/QR Codes: Generate standard barcodes and QR codes. The printer supports various formats.
- выявы: Import PNG, JPEG, or BMP format images via USB. The maximum resolution for printed pictures is 4800px by 150px.
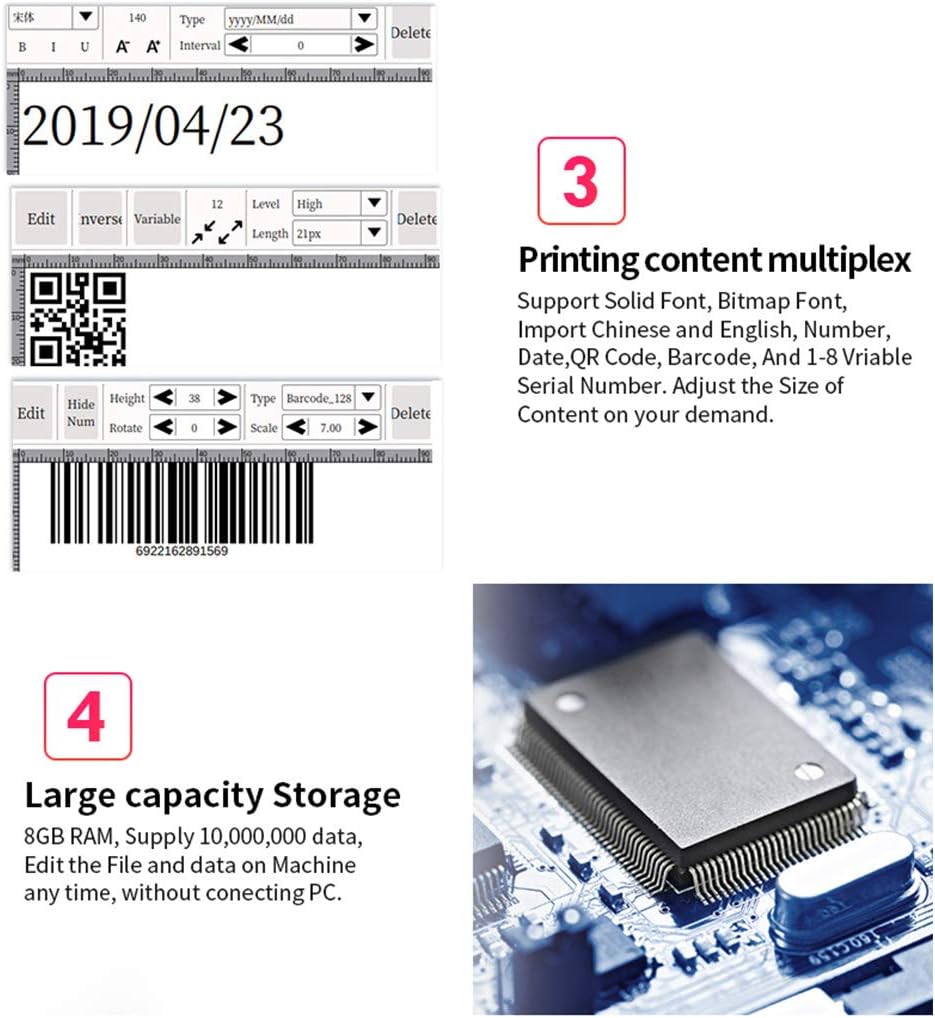
Малюнак 4.2: Прыкладamples of printing content multiplex on the PEKOKO LB100. This image shows the ability to print dates, QR codes, and barcodes, with options to adjust font, size, and other parameters.
4.3. Adjusting Print Settings
The printer supports 1 to 5 lines of printing. The maximum font height is 12.7mm, and the minimum is 2.5mm. The length of a single print is not limited.
4.4. Працэс друку
To print, ensure the desired content is displayed on the screen. Position the printer over the target surface and press the print trigger. The integrated roller component assists in smooth and consistent application.

Image 4.3: A user operating the PEKOKO LB100 handheld printer to print a QR code and date onto a wooden surface. This demonstrates the portable nature and ease of use for various applications.
The PEKOKO LB100 can be used in handheld mode or integrated with a conveyor system for online printing on production lines.

Image 4.4: The PEKOKO LB100 printer set up for both handheld use and integration with a conveyor belt system. This highlights its versatility for different production environments.
5. Тэхнічнае абслугоўванне
5.1. Ink Cartridge Care
To ensure optimal print quality and prevent clogging, regularly clean the ink cartridge nozzle. If the ink cartridge is not producing ink, follow these steps:
- Выключыце прынтэр.
- Выміце чарнільны картрыдж.
- Use a cotton swab dipped in a small amount of alcohol to gently wipe the nozzle.
- Wipe the nozzle with a dry paper towel.
- Reinstall the cartridge and test the printer.
Video 5.1: Instructions for cleaning the ink cartridge nozzle if it is not producing ink. This video demonstrates the step-by-step process of removing the cartridge, cleaning the nozzle with alcohol, and reinstalling it.
5.2. Агульнае захоўванне
When not in use, store the printer in its original packing suitcase in a cool, dry place to protect it from dust and physical damage. Ensure the ink cartridge is properly sealed or stored according to its specific instructions to prevent drying.
6. Выпраўленне непаладак
6.1. Ink Cartridge Not Producing Ink
If the printer is not producing ink, refer to the steps outlined in Section 5.1. Ink Cartridge Care, which details the cleaning process for the nozzle.
6.2. Screen Insensitivity
If the touch screen becomes unresponsive or inaccurate, it may require calibration. Follow these steps to recalibrate the screen:
- Turn on the power while long-pressing the screen.
- When the calibration symbol appears on the screen, click it one by one using the touch pen.
- Once all calibration points are clicked, the screen will be recalibrated.
- Захавайце налады.
Video 6.1: Guide for resolving screen insensitivity issues. This video demonstrates how to recalibrate the touch screen by long-pressing during power-on and tapping the calibration points.
6.3. General Printing Issues
- Размытыя адбіткі: Ensure the print head is clean and the surface is flat and stable during printing. Adjust print speed if necessary.
- Skipped Lines: This often indicates a partially clogged nozzle. Perform the ink cartridge cleaning procedure (Section 5.1).
- Ink Not Drying: Ensure you are using the correct quick-drying solvent ink. Allow adequate drying time for the specific material.
7. Тэхнічныя характарыстыкі
| Асаблівасць | Спецыфікацыя |
|---|---|
| Памеры прадукту | 5.1 Г х 12.7 Ш х 22.9 В сантыметраў |
| Тып кантролера | Android |
| Максімальны памер носьбіта | 8.5 х 11 цаляў |
| Друкаваныя СМІ | Fabric, Labels, Wood, Acrylic, Aluminum, Chinaware, Cloth, Paper, Plastic, Metal, Glass, Leather |
| Максімальнае разрозненне каляровага друку | 600 x 600 dpi |
| Максімальнае дазвол чорна-белай друку | 600 dpi |
| Тып дысплея | 4.3-цалевы сэнсарны LCD-экран |
| Аперацыйная сістэма | Linux |
| Ёмістасць памяці | 64 КБ |
| Памер усталяванай аператыўнай памяці | 8 ГБ |
| акумулятар | 1 Lithium Metal battery required (included), 2600mAh capacity, up to 10 hours after charge |
| Тэхналогія падлучэння | USB, Secure Digital Card |
| Вага прадмета | 1 кілаграм |
8. Гарантыя і падтрымка
8.1. Гарантыя на прадукт
All PEKOKO LB100 printers come with a 12-month after-sales service warranty. Additionally, the ink cartridge provides a replacement service if it prints less than 300 times.
8.2. Падтрымка кліентаў
For any questions, technical assistance, or warranty claims, please contact PEKOKO customer support through the Amazon platform. You can typically find a 'Ask a question' button on the product page or seller profile.

Image 8.1: Visual guide on how to contact PEKOKO customer support via Amazon. The image shows steps to navigate to the seller's page and use the 'Ask a question' feature.