1. Уводзіны
Thank you for choosing the FERM PDM1037s 13mm 1010W Drill. This instruction manual provides important information regarding the safe operation, setup, maintenance, and troubleshooting of your new power tool. Please read this manual thoroughly before using the drill and keep it for future reference.
The FERM PDM1037s is a robust corded electric rotary drill designed for various drilling tasks in wood, metal, and masonry. It features a powerful 1010W motor, a 13mm keyed chuck, adjustable speed, reverse rotation, and a hammer function for efficient performance.
2. Інструкцыі па тэхніцы бяспекі
ПАПЯРЭДЖАННЕ: Прачытайце ўсе папярэджанні па бяспецы, інструкцыі, ілюстрацыі і тэхнічныя характарыстыкі, якія дастаўляюцца з гэтым электраінструментам. Невыкананне ўсіх інструкцый, пералічаных ніжэй, можа прывесці да паразы электрычным токам, пажару і/або сур'ёзнай траўмы.
Агульныя папярэджанні па бяспецы электраінструментаў:
- Бяспека ў рабочай зоне: Падтрымлівайце чысціню і добрае асвятленне працоўнага месца. Захламленыя або цёмныя месцы могуць прывесці да няшчасных выпадкаў. Не выкарыстоўвайце электраінструменты ў выбуханебяспечных асяроддзях, напрыклад, у прысутнасці лёгкаўзгаральных вадкасцей, газаў або пылу.
- Электрабяспека: Штэпсельныя вілкі электраінструментаў павінны адпавядаць разетцы. Ніколі не мадыфікуйце вілку якім-небудзь чынам. Не выкарыстоўвайце перахаднікі з заземленымі электраінструментамі. Пазбягайце кантакту цела з заземленымі паверхнямі, такімі як трубы, радыятары, пліты і халадзільнікі.
- Асабістая бяспека: Always wear eye protection. Use hearing protection when operating noisy tools. Wear a dust mask if operations create dust. Dress properly; do not wear loose clothing or jewelry. Keep hair and clothing away from moving parts.
- Выкарыстанне электраінструмента і догляд за ім: Не перагружайце электраінструмент. Выкарыстоўвайце адпаведны электраінструмент для вашай задачы. Адключыце вілку ад крыніцы сілкавання перад тым, як рабіць якія-небудзь рэгуляванні, замяняць аксэсуары або захоўваць электраінструмент.
- Сэрвіс: Няхай ваш электраінструмент абслугоўваецца кваліфікаваным спецыялістам па рамонце з выкарыстаннем толькі ідэнтычных запасных частак. Гэта гарантуе бяспеку электраінструмента.
3. Кампаненты прадукту
The FERM PDM1037s drill consists of several key components for its operation. Familiarize yourself with these parts before use.
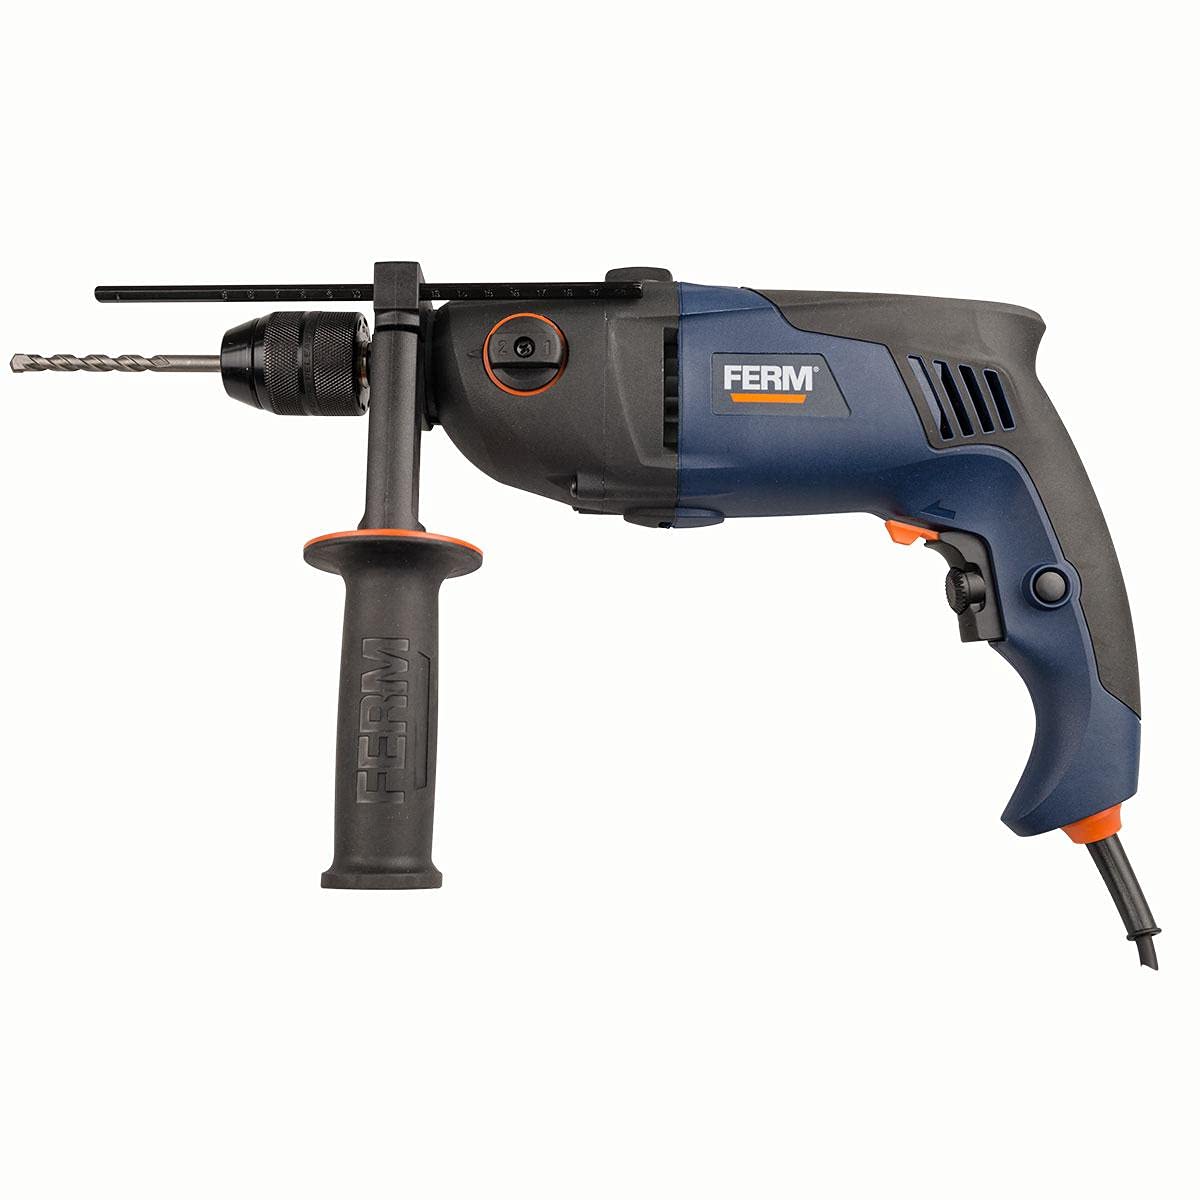
Малюнак 1: Скончанаview of the FERM PDM1037s drill. This image shows the main body of the drill, including the chuck, auxiliary handle, and power cord connection point.
- Чак: Holds the drill bits securely. This model uses a keyed chuck.
- Прыпынак глыбіні: Выкарыстоўваецца для ўстаноўкі патрэбнай глыбіні свідравання.
- Дапаможная ручка: Забяспечвае дадатковае счапленне і кантроль падчас працы.
- Пераключальнік рэжыму: For switching between rotary drilling and hammer drilling modes.
- Набор хуткасці кіравання: Adjusts the maximum rotational speed.
- Трыгерны пераключальнік: Актывуе дрыль.
- Кнопка блакавання: Для бесперапыннай працы без утрымання курка.
- Перамыкач наперад/назад: Змяняе кірунак кручэння.
- Шнур харчавання: Connects the drill to the electrical supply.
4. Тэхнічныя характарыстыкі
Below are the technical specifications for the FERM PDM1037s drill:
| Асаблівасць | Спецыфікацыя |
|---|---|
| Нумар мадэлі | FERM PDM1037s |
| Марка | ФЕРМ |
| Крыніца харчавання | Правадная электрычная |
| Максімальная магутнасць | 1010 ват |
| Тып патрона | Ключавы Чак |
| Памер патрона | 13 мм |
| Максімальная хуткасць кручэння | 3000 XNUMX абаротаў у хвіліну |
| Рэгуляваная хуткасць | так |
| функцыя рэверсу | так |
| Функцыя малатка | так |
| Функцыя адвёрткі | так |
| Вага прадмета | 11 грамаў |
| Колер | Шматколернасць |
| Патрабуюцца батарэі | няма |
| Дата першай даступнасці | 7 ліпеня 2021 г |
| ASIN | B098TZFVWC |
5. Настройка
5.1 Усталяванне дадатковай ручкі
The auxiliary handle provides better control and stability. Loosen the handle by twisting it counter-clockwise. Slide it over the chuck and position it to your desired angle. Tighten the handle by twisting it clockwise until secure.
5.2 Усталёўка абмежавальніка глыбіні
Insert the depth stop into the hole on the auxiliary handle. Adjust the depth stop to the desired drilling depth by sliding it in or out. Secure it by tightening the screw or lever on the auxiliary handle.
5.3 Устаўка і выманне свердзелаў
- Пераканайцеся, што дрыль адключана ад крыніцы харчавання.
- Use the chuck key to loosen the chuck jaws by turning it counter-clockwise.
- Устаўце свердзел цалкам у патрон, пераканаўшыся, што ён адцэнтраваны.
- Tighten the chuck jaws firmly using the chuck key by turning it clockwise. Ensure the bit is securely held.
- To remove, loosen the chuck jaws with the chuck key and pull out the bit.
6. Інструкцыя па эксплуатацыі
6.1 Падключэнне харчавання
Connect the power cord to a suitable electrical outlet. Ensure the voltage matches the drill's requirements.
6.2 Выбар рэжыму працы
Use the mode selector switch (typically located on the top or side of the drill) to choose between:
- Ратацыйнае свідраванне: For drilling in wood, metal, plastics, and ceramics.
- Ударнае свідраванне: For drilling in masonry, concrete, and stone.
6.3 Рэгуляванне хуткасці
The drill features an adjustable speed control dial. Rotate the dial to set the maximum speed for your application. Lower speeds are suitable for larger drill bits, softer materials, or screwdriving. Higher speeds are for smaller bits and harder materials.
6.4 Кручэнне наперад/назад
Use the forward/reverse switch (usually near the trigger) to select the direction of rotation. Forward rotation (clockwise) is for drilling and tightening screws. Reverse rotation (counter-clockwise) is for removing screws or freeing a jammed drill bit.
6.5 Starting and Stopping the Drill
- Пачаць: Press the trigger switch. The speed is variable depending on how far the trigger is pressed.
- Для бесперапыннай працы: Press the trigger switch fully and then press the lock-on button. Release the trigger.
- To Stop (from continuous operation): Press the trigger switch again and release it.
- To Stop (from momentary operation): Адпусціце трыгер.
6.6 Парады па свідраванні
- Always secure your workpiece to prevent it from moving.
- Раўнамерна цісніце. Не перашчыруйце.
- For deep holes, periodically withdraw the drill bit to clear chips and allow cooling.
- When drilling metal, use cutting oil to prolong bit life and improve cutting efficiency.
- When drilling masonry, ensure the hammer function is engaged and use appropriate masonry drill bits.
7. Тэхнічнае абслугоўванне
Regular maintenance ensures the longevity and safe operation of your FERM PDM1037s drill.
7.1 Ачыстка
- Always unplug the drill before cleaning.
- Каб пазбегнуць перагрэву, падтрымлівайце вентыляцыйныя адтуліны ў чысціні. Выкарыстоўвайце мяккую шчотку або сціснутае паветра для выдалення пылу і смецця.
- Працярыце корпус інструмента адamp тканіна. Не выкарыстоўвайце агрэсіўныя хімікаты або абразіўныя ачышчальнікі.
7.2 Вугальныя шчоткі
The motor is equipped with carbon brushes. If the drill experiences excessive sparking or reduced performance, the carbon brushes may need replacement. This should be performed by a qualified service technician.
7.3 Захоўванне
Store the drill in a dry, secure location out of reach of children. Protect it from moisture and direct sunlight.
8. Выпраўленне непаладак
У гэтым раздзеле разглядаюцца распаўсюджаныя праблемы, з якімі вы можаце сутыкнуцца пры выкарыстанні вашай дрылі.
| праблема | Магчымая прычына | Рашэнне |
|---|---|---|
| Дрыль не запускаецца | No power supply; Faulty power cord/plug; Faulty switch; Worn carbon brushes | Check power outlet and cord; Contact qualified service technician for switch or brush replacement. |
| Зніжэнне магутнасці/хуткасці | Зношаныя вугальныя шчоткі; перагрузка; няправільная ўстаноўка хуткасці | Replace carbon brushes (by technician); Reduce load; Adjust speed dial to higher setting. |
| Залішняе іскрэнне ад рухавіка | Зношаныя вугальныя шчоткі; брудны калектар | Have carbon brushes and commutator checked/replaced by a qualified service technician. |
| Заеданне свердзела | Incorrect bit for material; Excessive pressure; Material too hard | Use appropriate bit; Reduce pressure; Consider hammer function for masonry. |
9. Гарантыя і падтрымка
FERM products are manufactured to high-quality standards and are guaranteed against manufacturing defects for a period specified by local regulations from the date of purchase. This warranty does not cover damage caused by misuse, abuse, normal wear and tear, or unauthorized repairs.
For warranty claims, technical support, or service inquiries, please contact your local FERM dealer or authorized service center. Please have your proof of purchase and the product model number (PDM1037s) available when contacting support.
For more information, visit the official FERM webсайт: www.ferm.com