
iZEEKER GD850
iZEEKER 4K Dual Dash Cam User Manual
Мадэль: GD850
1. Уводзіны
The iZEEKER GD850 4K Dual Dash Cam is designed to provide comprehensive vehicle recording with advanced features for enhanced safety and convenience. This manual provides detailed instructions for setting up, operating, maintaining, and troubleshooting your dash cam.
Асноўныя характарыстыкі:
- Запіс 4K франтальнай і 1080P задняй відэакамер: Captures clear, high-resolution video from both front and rear perspectives.
- 3'' IPS Touch Screen: Offers intuitive and responsive control for easy navigation.
- Sony Starvis Sensor & WDR: Ensures superior night vision and balanced exposure in various lighting conditions.
- Built-in WiFi & GPS: Allows for easy video management via mobile app and accurate location/speed tracking.
- Цыклічны запіс і G-сенсор: Аўтаматычна перазапісвае стары footage and locks important video segments upon impact.
- Манітор паркоўкі: Забяспечвае відэаназіранне, калі аўтамабіль прыпаркаваны (патрабуецца камплект правадоў).

Figure 1.1: iZEEKER GD850 4K Dual Dash Cam and Rear Camera.
This image displays the primary components of the iZEEKER GD850 dash cam system, including the main front camera unit with its large display and the compact rear camera.
2. Кампаненты прадукту
Перад усталёўкай пераканайцеся, што ўсе кампаненты прысутнічаюць у камплекце:
- Main Dash Cam Unit (Front Camera)
- Задняя камера
- Power Cable with Integrated GPS Module
- Кабель для падлучэння камеры ззаду
- Mounting Options (Suction Cup Mount, Adhesive Mount)
- USB-прылада для чытання карт
- Кіраўніцтва карыстальніка
- Wiring Tools (e.g., pry tool)

Figure 2.1: Included Components of the GD850 Dash Cam System.
This image illustrates the various items included in the product package, such as the main dash cam, rear camera, GPS module, and a 64GB memory card with a USB card reader.
3. Настройка і ўстаноўка
3.1 Устаўка карты Micro SD
Insert a high-speed (Class 10 or higher) Micro SD card (up to 256GB, not included) into the designated slot on the dash cam. Ensure the card is inserted correctly until it clicks into place.
3.2 Mounting the Front Dash Cam
Абярыце падыходнае месца на лабавым шкле, пераважна за заднім шкломview люстэрка, каб не засланяць view. Clean the area thoroughly before applying the mount.
- Мацаванне на прысосцы: Моцна прыцісніце прысоску да лабавога шкла і павярніце рычаг, каб зафіксаваць яе.
- Клейкае мацаванне: Peel off the protective film from the adhesive pad and firmly press the mount onto the windshield for at least 30 seconds.

Figure 3.1: Strap-on Installation Method for the Dash Cam.
This image demonstrates the easy strap-on installation method, allowing the dash cam to be securely attached to the vehicle's rearview люстэрка.
3.3 Устаноўка задняй камеры
Mount the rear camera on the rear windshield or license plate area. Connect the rear camera to the main dash cam unit using the provided rear camera cable. Ensure the cable is routed neatly and securely.

Figure 3.2: Rear Camera with Guide Function and Waterproof Design.
This image highlights the rear camera's design, featuring a guide function for parking assistance and a waterproof construction for reliable performance in various weather conditions.
3.4 Падключэнне харчавання
Connect the power cable (with integrated GPS module) to the dash cam and plug the other end into your vehicle's 12V power outlet (cigarette lighter socket). Route the cable along the windshield trim to keep it tidy and out of the way.
4. Інструкцыя па эксплуатацыі
4.1 Асноўныя аперацыі
- Уключэнне/выключэнне харчавання: Відэарэгістратар аўтаматычна ўключыцца і пачне запіс, калі ваш аўтамабіль завядзецца. Ён выключыцца, калі аўтамабіль выключыцца.
- Кіраванне сэнсарным экранам: Use the 3-inch IPS touch screen to navigate menus, adjust settings, and review фуtage.
- Індыкатар запісу: A white light under the screen indicates that the camera is recording.
4.2 Функцыі запісу
- цыклічны запіс: The dash cam records video in continuous loops (e.g., 1, 3, or 5-minute segments). When the memory card is full, the oldest unlocked footage будзе перазапісаны.
- Экстраны запіс (G-сенсор): У выпадку раптоўнага ўдару або сутыкнення ўбудаваны G-сенсор аўтаматычна выявіць падзею і заблакуе бягучы відэасегмент, прадухіляючы яго перазапіс.
- Ручная экстраная запіс: Touch the triangle icon on the touchscreen to manually lock the current recording.

Figure 4.1: Front 4K Ultra HD and Rear 1080P Full HD Recording.
This image illustrates the high-definition recording capabilities of the dash cam, with the front camera capturing in 4K Ultra HD and the rear camera in 1080P Full HD.

Figure 4.2: 64GB TF Card and Loop Recording Feature.
This image explains the loop recording functionality, showing how the dash cam continuously records and manages storage using a 64GB TF card and an included card reader for easy file перадача.
4.3 Дадатковыя магчымасці
- Падключэнне Wi-Fi: Download the "Lucky Cam" or "OK cam" app on your smartphone (Android/iOS). Connect your phone to the dash cam's WiFi network to view жывы footagе, прайграванне запісаў і загрузка files directly to your device.
- Функцыянальнасць GPS: The integrated GPS module records your driving route, speed, and coordinates, which can be viewed using dedicated player software on a computer.
- Манітор паркоўкі: When enabled (requires a hardwire kit, sold separately), the dash cam will automatically power on and record a short video if a collision is detected while your vehicle is parked.
- Traffic Signal Detection: Supports recognition of traffic signals to enhance driving awareness.

Figure 4.3: Parking Monitor, Traffic Signal Detection, and GPS Features.
This image visually represents the advanced functionalities of the dash cam, including the parking monitor (requiring a hardwire kit), traffic signal detection for improved safety, and reliable GPS for location tracking.
4.4 Type-C Fast Charging
The dash cam utilizes a Type-C port for power, offering stable and efficient charging. This modern connection is reversible, preventing incorrect insertion.
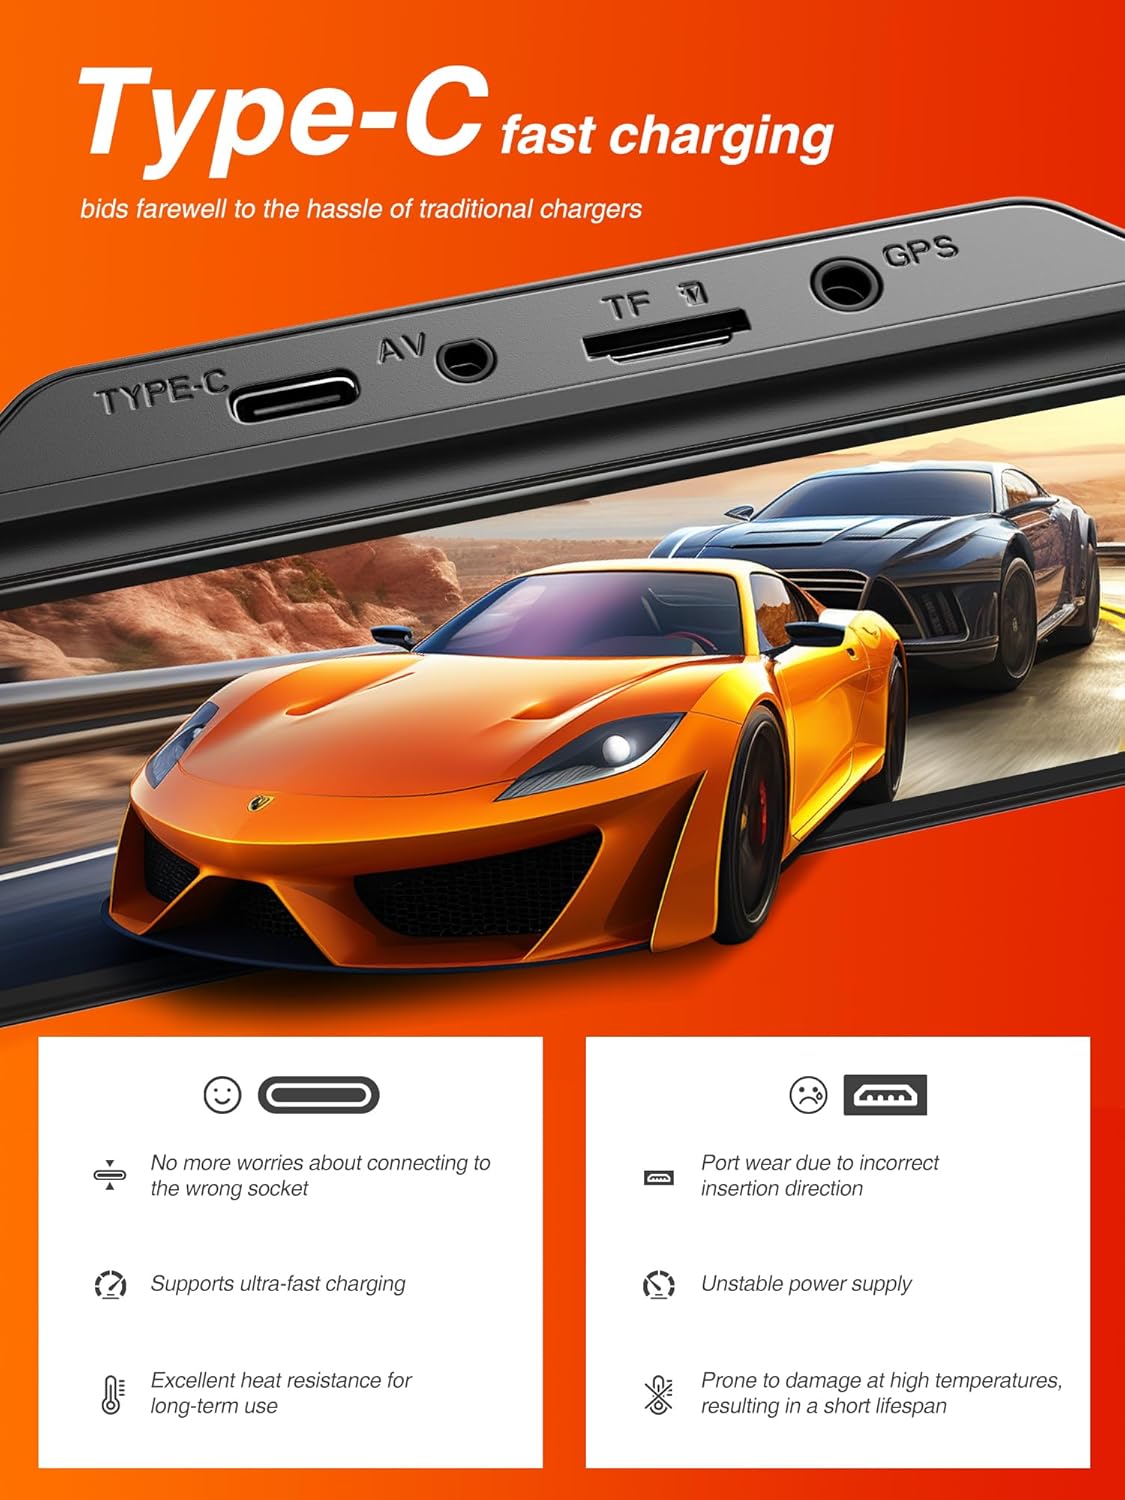
Figure 4.4: Type-C Fast Charging Port.
This image highlights the Type-C charging port on the dash cam, emphasizing its benefits such as ease of connection and support for ultra-fast charging.
5. Тэхнічнае абслугоўванне
5.1 Фарматаванне карты Micro SD
It is recommended to format the Micro SD card regularly (e.g., once a month) to ensure optimal performance and prevent data corruption. This can typically be done through the dash cam's settings menu.
5.2 Ачыстка прылады
Use a soft, dry cloth to clean the dash cam's screen and lenses. Avoid using abrasive cleaners or solvents that could damage the device.
5.3 Абнаўленне прашыўкі
Check the iZEEKER official website periodically for any available firmware updates. Updating the firmware can improve performance, add new features, or fix bugs.
6. Выпраўленне непаладак
If you encounter issues with your iZEEKER GD850 dash cam, refer to the following common problems and solutions:
| праблема | Магчымая прычына / рашэнне |
|---|---|
| Dash cam turns on/off randomly. |
|
| G-Sensor is too sensitive or not sensitive enough. |
|
| "SD Card Full" error or not recording. |
|
| Праблемы з падключэннем да Wi-Fi. |
|
| Videos not saving or missing segments. |
|
If the problem persists after trying these solutions, please contact iZEEKER customer support for further assistance.
7. Тэхнічныя характарыстыкі
| Асаблівасць | Дэталь |
|---|---|
| Марка | iZEEKER |
| Назва мадэлі | iZEEKER GD850 |
| Памеры прадукту | 3.53 х 2.54 х 1.31 цалі |
| Вага прадмета | 4.2 унцыі |
| Дазвол відэазахопу | Front: 4K, Rear: 1080P |
| Дысплей | 3'' IPS Touch Screen |
| Тэхналогія падлучэння | Wi-Fi |
| Асаблівасці | Loop Recording, Emergency Recording, GPS, Parking Monitor, Night Vision (Sony Starvis Sensor, WDR) |
| Тып мацавання | Клейкае мацаванне, мацаванне на прысосцы |
| Максімальная падтрымка SD-карт | 256 ГБ |
| Крыніца харчавання | 1 Lithium Ion battery required (internal), Vehicle 12V power outlet (external) |
| Колер | Чорны |
8. Гарантыя і падтрымка
8.1 Інфармацыя аб гарантыі
The iZEEKER GD850 Dash Cam comes with a Гарантыя 24 месяцаў from the date of purchase. This warranty covers manufacturing defects and ensures the product's quality and performance under normal use. Please retain your proof of purchase for warranty claims.
8.2 Падтрымка кліентаў
For technical assistance, troubleshooting, or warranty inquiries, please contact iZEEKER customer support:
- электронная пошта: support@izeeker.co
- вытворца: iZEEKER (Accion Innovations LLC)
- Адрас: 17928 Rowland St, City of Industry, CA 91748, USA

Figure 8.1: Warranty and Support Contact Details.
This image provides information regarding the 24-month warranty and the official contact email for customer support, along with the manufacturer's address.
Ask a question about this manual
Ask about setup, troubleshooting, compatibility, parts, safety, or missing instructions. Manuals+ will review the question and use this page’s manual context to help answer it.