BOMAKER Mini WiFi Projector 10''
Кіраўніцтва карыстальніка міні-праектара BOMAKER з Wi-Fi дыяганаллю 10 цаляў
Model: Mini WiFi Projector 10''
1. Уводзіны
This manual provides comprehensive instructions for the setup, operation, maintenance, and troubleshooting of your BOMAKER Mini WiFi Projector 10''. Please read this manual thoroughly before using the projector to ensure proper operation and to maximize its lifespan. Keep this manual for future reference.
The BOMAKER Mini WiFi Projector 10'' is a portable 720P HD LCD projector designed for home cinema, gaming, and various multimedia applications. It features WiFi connectivity for smartphone mirroring, multiple input options including HDMI, USB, and AV, and supports projection sizes up to 300 inches.
2. Важная інфармацыя па бяспецы
To prevent fire, electric shock, or injury, always observe the following safety precautions:
- Не блакуйце вентыляцыйныя адтуліны. Забяспечце дастатковую цыркуляцыю паветра вакол праектара.
- Не глядзіце непасрэдна ў аб'ектыў праектара, калі ён уключаны.amp уключаны. Яркае святло можа пашкодзіць вочы.
- Не падвяргайце праектар уздзеянню дажджу або вільгаці, каб пазбегнуць паражэння электрычным токам.
- Выкарыстоўвайце толькі адаптар сілкавання, які пастаўляецца з праектарам.
- Размесціце праектар на ўстойлівай роўнай паверхні.
- Адключайце праектар ад разеткі падчас навальніцы або калі ён не выкарыстоўваецца працяглы час.
- Не спрабуйце рамантаваць гэты выраб самастойна. Звяртайцеся па любыя тэхнічныя работы да кваліфікаванага персаналу.
3. Змесціва ўпакоўкі
Праверце, ці ўсе пералічаныя ніжэй прадметы ўваходзяць у вашу ўпакоўку:
- 1 x BOMAKER Mini WiFi Projector
- 1 х пульт дыстанцыйнага кіравання
- 1 х адаптар сілкавання
- 1 х кабель HDMI
- 1 х AV-кабель
- 1 х Кіраўніцтва карыстальніка
4. Прадукт скончыўсяview
Азнаёмцеся з рознымі часткамі і падключэннямі вашага праектара.

Малюнак 4.1: Фронт view of the BOMAKER Mini WiFi Projector. This image shows the projector's lens, focus ring, and keystone correction dial, with a smartphone wirelessly connected and displaying content on its screen, illustrating the WiFi mirroring capability.
4.1. Парты ўводу/вываду
The projector features a variety of ports for connecting different devices.

Малюнак 4.2: Тыл view of the projector displaying its connectivity options. From left to right, the ports include AV, USB, Audio Out, VGA, HDMI, and Micro SD card slot, allowing for versatile device connections.
- AV-порт: Connect to older devices using the included AV cable.
- Порт USB: Для падключэння USB-назапашвальнікаў для прайгравання медыяфайлаў files.
- Аўдыёвыхад: Падключыце знешнія дынамікі або навушнікі.
- Порт VGA: Connect to computers or laptops with a VGA output.
- Порт HDMI: Connect to devices like laptops, gaming consoles (PS4), TV sticks, etc.
- Слот для карты Micro SD: Insert a Micro SD card to play media files.
5. Настройка
5.1. размяшчэнне
Choose a suitable location for your projector. For optimal viewing, place the projector on a flat, stable surface or mount it. The optimal projection distance is between 8.2 and 11.2 feet (2.5 to 3.4 meters) for a screen size of 30 to 300 inches.
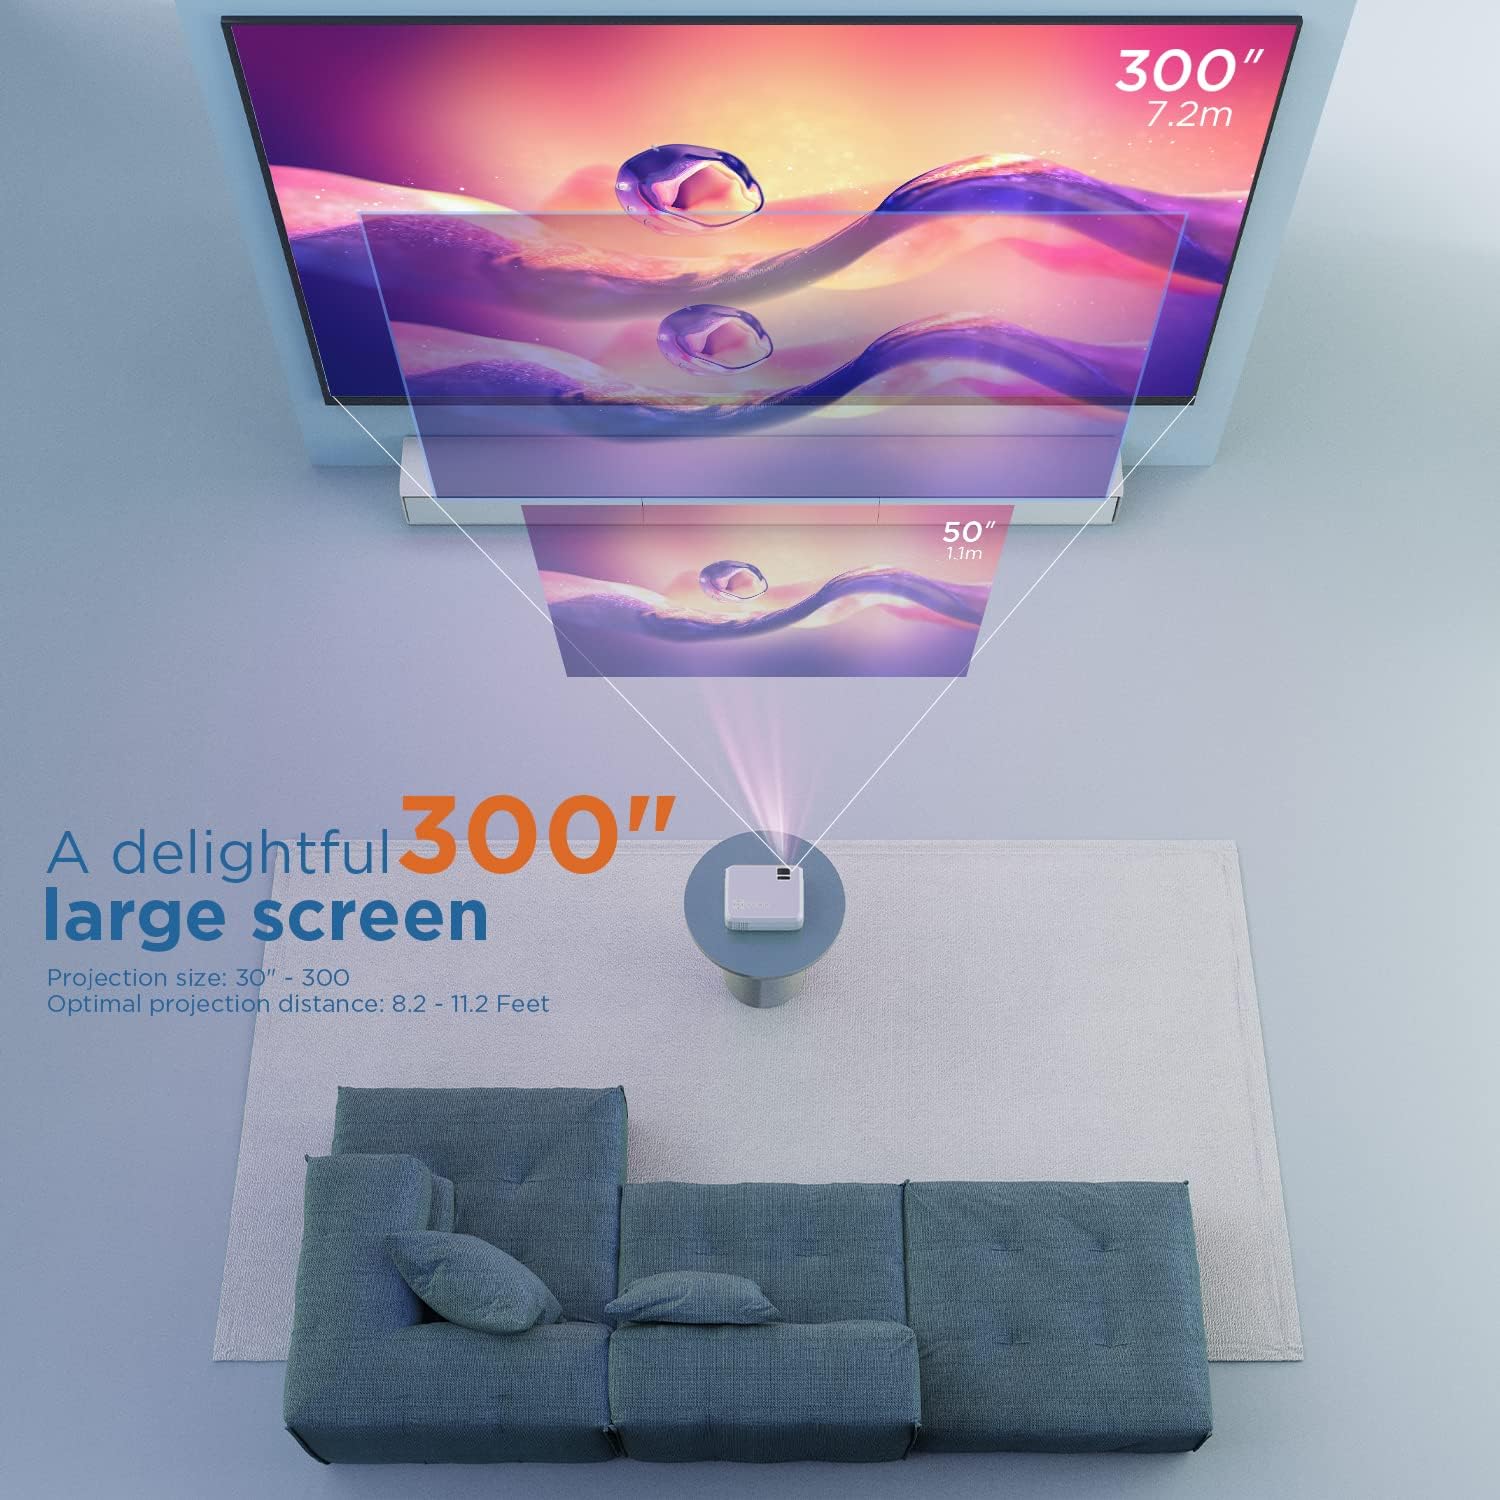
Малюнак 5.1: Illustration of projection distances and corresponding screen sizes. The image demonstrates how varying the distance between the projector and the screen affects the projected image size, from 50 inches (1.1m) to 300 inches (7.2m).
5.2. Падключэнне сілкавання
- Падключыце адаптар сілкавання да ўваходнага порта сілкавання праектара.
- Падключыце адаптар сілкавання да насценнай разеткі.
- Націсніце кнопку харчавання на праектары або пульце дыстанцыйнага кіравання, каб уключыць яго.
5.3. Фокус і карэкцыя трапецападобнага скажэння
- Фокус: Rotate the focus ring on the projector lens until the image is clear and sharp.
- Каменны камень: If the projected image appears trapezoidal, adjust the keystone correction dial (usually located near the lens) until the image is rectangular.
6. Інструкцыя па эксплуатацыі
6.1. Асноўная аперацыя
- Уключэнне/выключэнне харчавання: Націсніце кнопку харчавання на праектары або пульце дыстанцыйнага кіравання.
- Выбар крыніцы ўводу: Use the "Source" button on the remote or projector to select the desired input (HDMI, AV, USB, Micro SD, WiFi).
- Рэгуляванне гучнасці: Выкарыстоўвайце кнопкі гучнасці на пульце дыстанцыйнага кіравання.
6.2. Падключэнне прылад
The projector supports various connection methods:
6.2.1. Падключэнне HDMI
Connect your laptop, gaming console (PS4), TV stick (e.g., Roku, Fire TV), or other HDMI-enabled devices using an HDMI cable. Select "HDMI" as the input source.
6.2.2. USB/Micro SD Connection
Insert a USB drive or Micro SD card into the respective port. Select "USB" or "Micro SD" as the input source. The projector will display a menu to browse and play media files (photos, videos, music, text).
6.2.3. AV Connection
Use the included AV cable to connect to devices with AV output. Select "AV" as the input source.
6.2.4. WiFi Mirroring (Smartphone Connection)
The projector supports wireless screen mirroring from smartphones (iOS and Android).
- Select "WiFi" as the input source on the projector.
- Follow the on-screen instructions to connect your smartphone to the projector's WiFi network.
- Once connected, enable screen mirroring/casting feature on your smartphone (e.g., "Screen Mirroring" for iOS, "Smart View" or "Cast" for Android).
- Выберыце праектар са спісу даступных прылад.
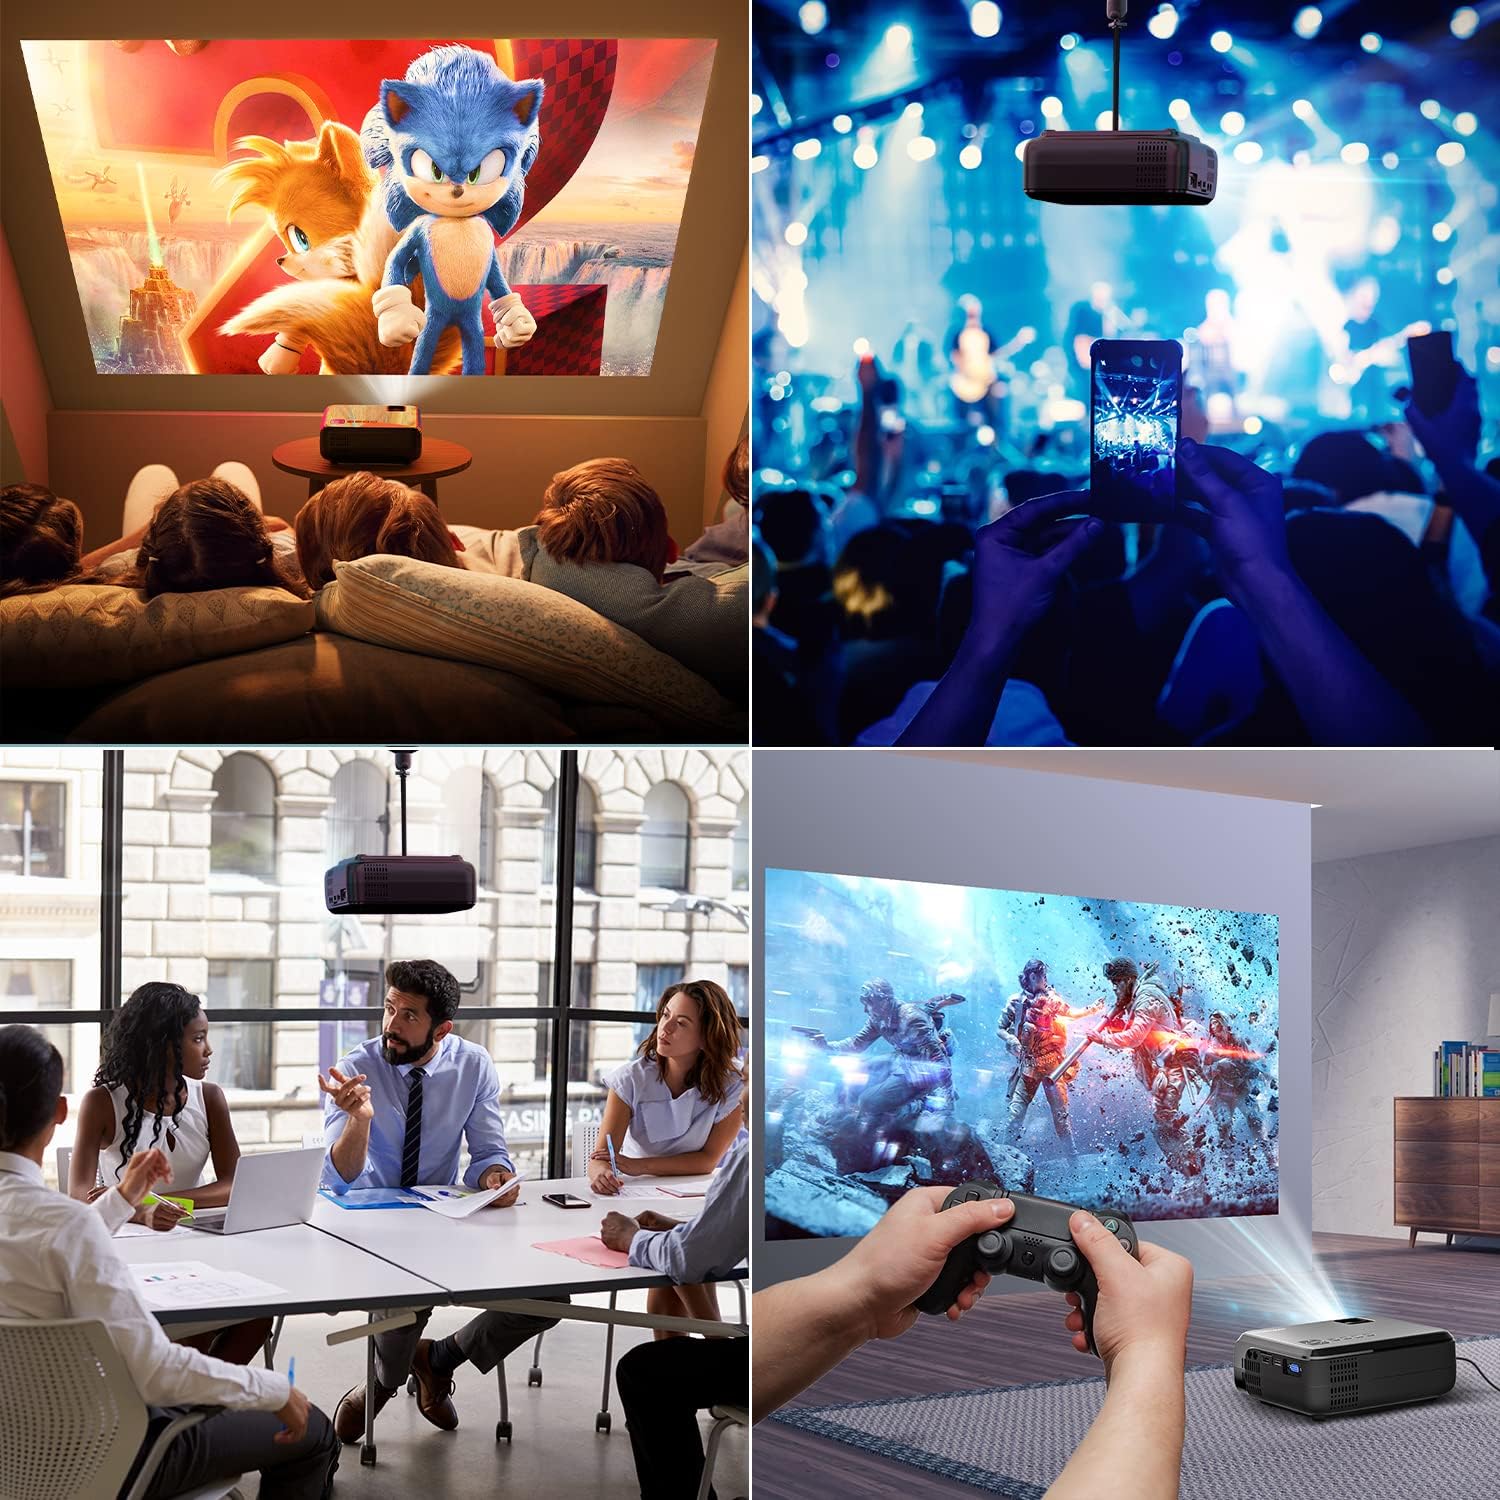
Малюнак 6.1: This image displays a collage of the projector in different environments: a family watching a movie, a person using a smartphone to control the projector at a concert, a business meeting with a presentation, and a person playing video games. It highlights the versatility of the BOMAKER Mini WiFi Projector for entertainment and professional use.
6.3. Visual Experience
The projector delivers a native 720P HD resolution, ensuring clear and detailed images. It supports 1080P decoding and features a high brightness output for vibrant visuals.
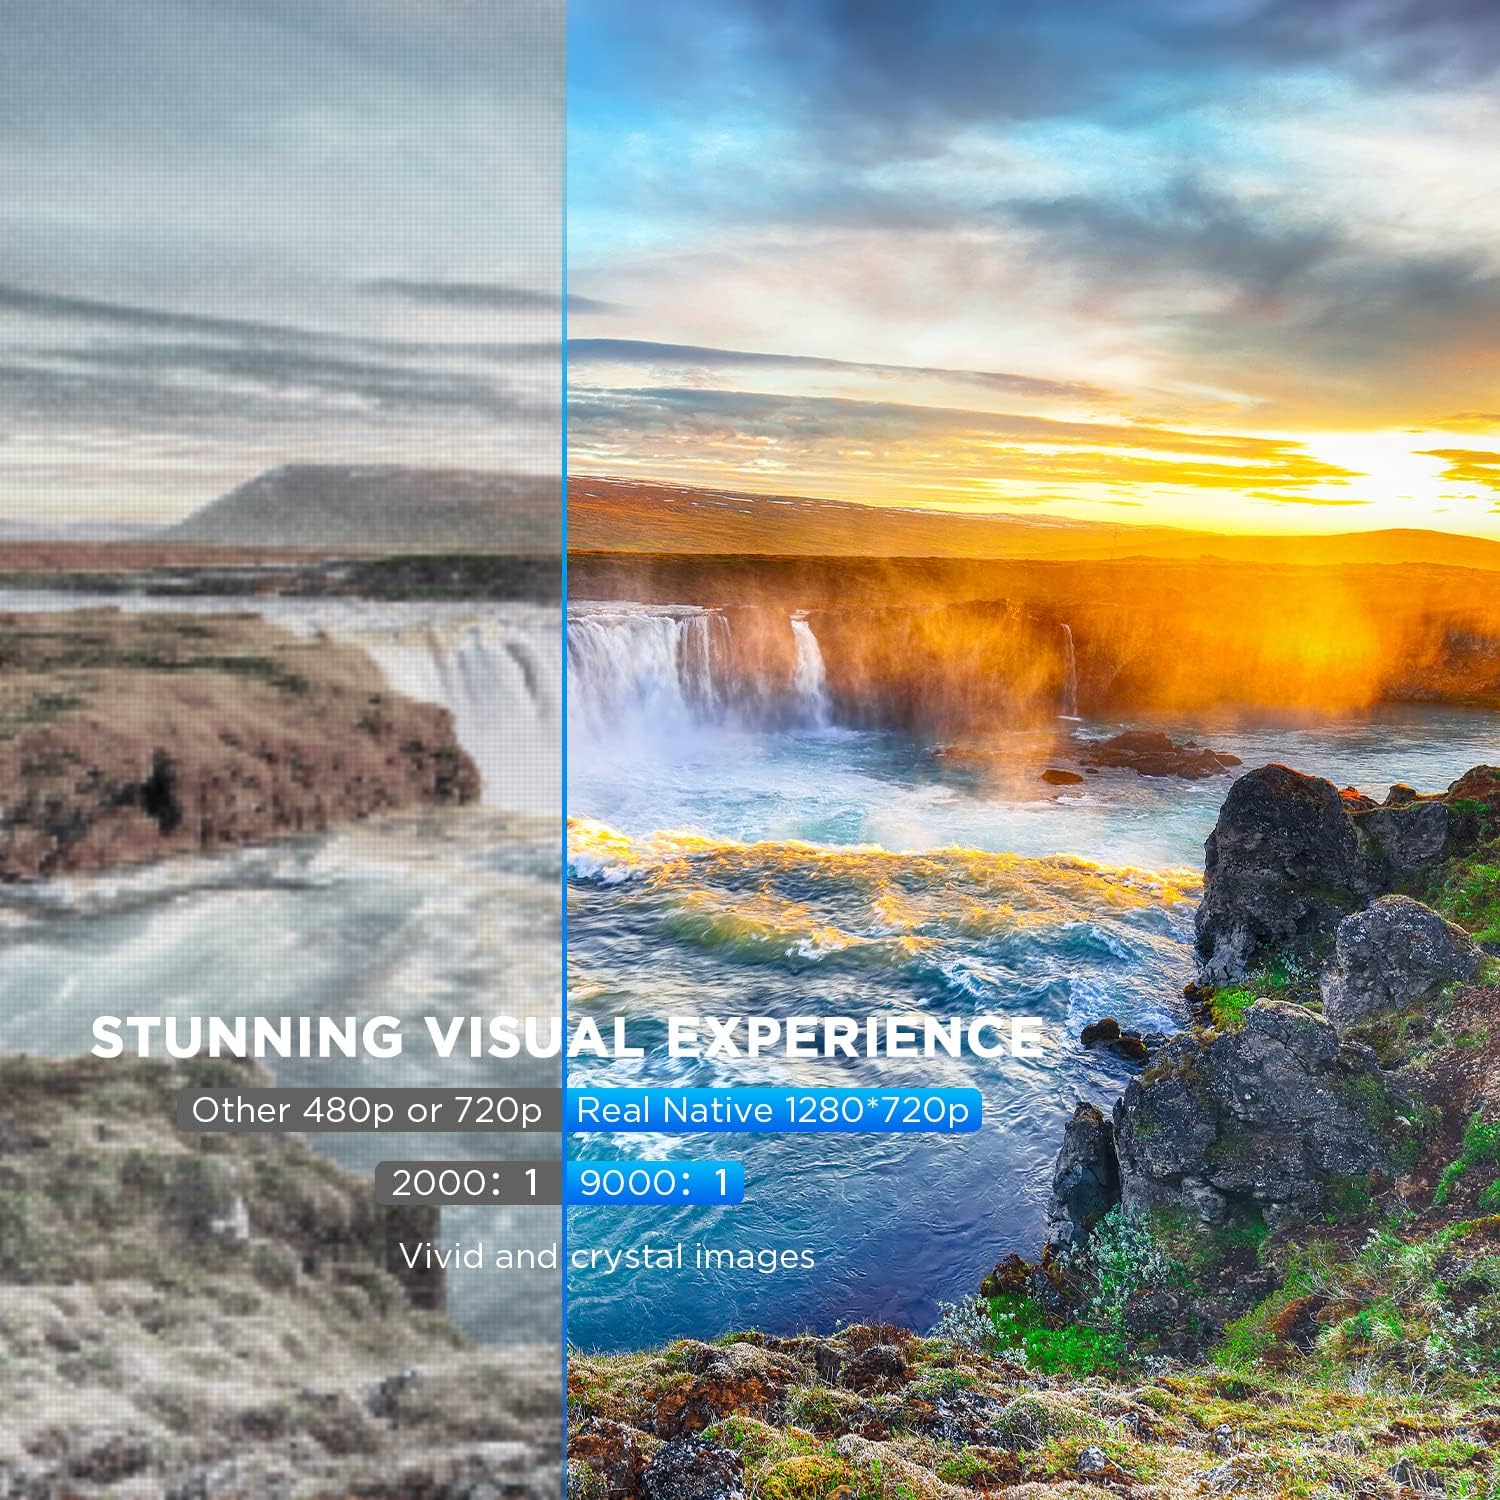
Малюнак 6.2: A side-by-side comparison demonstrating the difference between standard 480p/720p projection and the projector's real native 1280x720p resolution. The native resolution side shows significantly sharper details and richer colors in a landscape image, emphasizing the "Stunning Visual Experience" and "Vivid and crystal images".

Малюнак 6.3: This image illustrates the projector's "Crystal Clear Picture with Ultra-low Latency" feature, showing a vibrant, high-definition projection of a car racing scene on a large screen in a living room setting. The text highlights upgraded lens settings for a new visual experience with latency less than 30ms.
7. Тэхнічнае абслугоўванне
7.1. Ачыстка аб'ектыва
Use a soft, lint-free cloth specifically designed for cleaning optical lenses. Do not use abrasive cleaners or solvents. Gently wipe the lens to remove dust or smudges.
7.2. Ачыстка корпуса праектара
Wipe the projector's exterior with a soft, dry cloth. For stubborn dirt, a slightly damp cloth can be used, followed by a dry cloth. Ensure no liquid enters the ventilation openings.
7.3. Захоўванне
When not in use, store the projector in a cool, dry place, away from direct sunlight and extreme temperatures. Cover the lens with its cap to protect it from dust.
8. Выпраўленне непаладак
Калі ў вас узніклі праблемы з праектарам, звярніцеся да наступных распаўсюджаных праблем і рашэнняў:
| праблема | Магчымая прычына | Рашэнне |
|---|---|---|
| Няма выявы на экране | Power cable not connected; incorrect input source; device not powered on. | Праверце падключэнне да сілкавання; выберыце правільную крыніцу ўваходнага сігналу; пераканайцеся, што падключаная прылада ўключана. |
| Відарыс размыты | Фокус не адрэгуляваны; праектар занадта блізка/далёка ад экрана. | Adjust the focus ring; reposition the projector. |
| Выява мае трапецападобную форму | Keystone correction not adjusted. | Адрэгулюйце дыск карэкцыі трапецападобнага скажэння. |
| Няма гуку | Volume too low; external speakers not connected; audio settings on source device. | Increase volume; connect external speakers if needed; check audio output settings on source device. |
| WiFi mirroring issues | Incorrect WiFi connection; smartphone mirroring feature not activated. | Ensure correct WiFi network is selected; activate screen mirroring on your smartphone. |
9. Тэхнічныя характарыстыкі
| Асаблівасць | Дэталь |
|---|---|
| Марка | БОМАКЕР |
| Нумар мадэлі | Mini WiFi Projector 10'' |
| Дазвол дысплея | Native 1280 x 720 (Supports 1080P decoding) |
| Тып дысплея | ВК |
| Тэхналогія падлучэння | HDMI, Wi-Fi |
| Сумяшчальныя прылады | Smartphone, TV Stick, PS4, Laptop, USB Drive, Micro SD Card |
| Памеры прадукту | 22L x 17l x 9H centimeters |
| Формаў-фактар | Партатыўны |
| Рэкамендуемае выкарыстанне | Хатні кінатэатр, гульні |
| Колер | Белы |
10. Гарантыя і падтрымка
For warranty information or technical support, please refer to the documentation included with your purchase or contact BOMAKER customer service. Details regarding specific warranty periods and support channels are typically provided on the manufacturer's official webна сайце або ўнутры ўпакоўкі прадукту.
Ask a question about this manual
Ask about setup, troubleshooting, compatibility, parts, safety, or missing instructions. Manuals+ will review the question and use this page’s manual context to help answer it.