Уводзіны
This manual provides detailed instructions for the setup, operation, and maintenance of your Dcorn DMR-07 7-inch HDMI Digital Microscope. Designed for a wide range of applications, from coin inspection to circuit board repair, this microscope offers up to 1300X magnification and a 16MP camera for clear, detailed viewing. Please read this manual thoroughly before using the device to ensure proper functionality and longevity.
Змест пакета
Праверце, ці ўсе пералічаныя ніжэй прадметы ўваходзяць у вашу ўпакоўку:
- 7-inch LCD Display Microscope
- Металічная база
- Металічная падстаўка
- 3 Guidebooks (e.g., A Guide to Coin Collection, How to Solder)
- Бесправадны пульт дыстанцыйнага кіравання
- Кабель HDMI
- 32GB TF карта
- Светлавы бар'ер
- Падарункавая скрынка
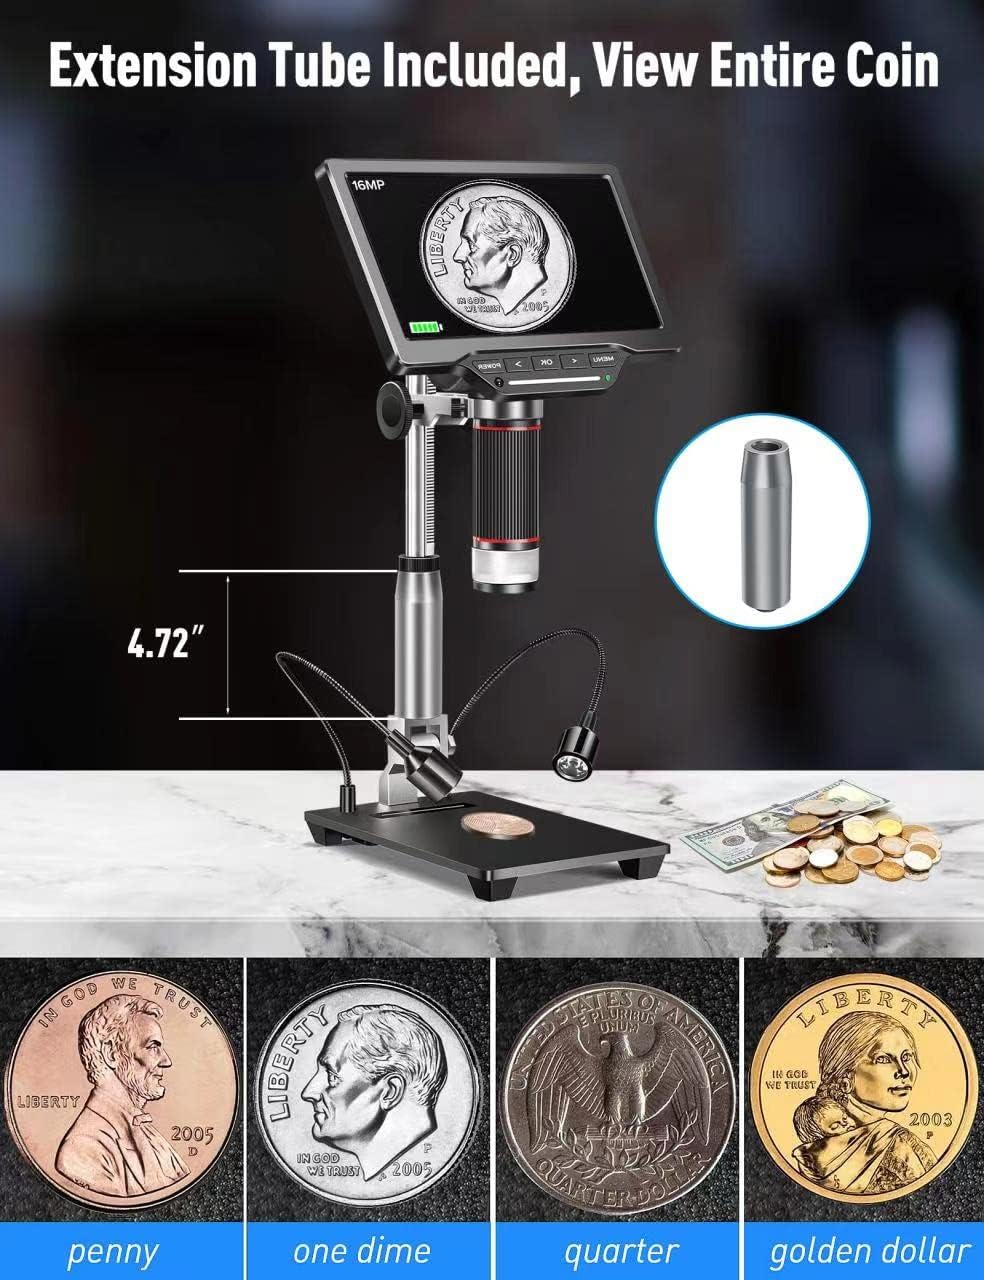
- Extension Tube (4.7 inches)
- Зарадная прылада
- Кіраўніцтва карыстальніка (гэты дакумент)

Настройка
1. Assembling the Stand and Microscope
- Attach the metal stand to the metal base. Secure it firmly using the provided knob.
- Mount the microscope unit onto the adjustable bracket on the metal stand. Ensure it is securely fastened.
- If extended working distance is required, insert the 4.7-inch extension tube between the microscope lens and the main body. This allows for a wider field of view, ideal for observing entire coins.
2. Connecting External LED Lights
The two external LED lights provide additional illumination for your specimens. Connect the Type-C end of the light cables to the USB output ports on the microscope base.
3. Уключэнне
Connect the power adapter to the microscope and a power outlet. Press the 'POWER' button on the microscope to turn it on. The 7-inch LCD display will illuminate.
4. Video: How to Install
Відэа 1: A step-by-step guide demonstrating the physical assembly of the Dcorn DMR-07 Digital Microscope, including attaching the stand, microscope unit, and optional extension tube.
Інструкцыя па эксплуатацыі
1. Базавы Viewінг і факусіроўка
- Place the specimen on the observation platform.
- Adjust the height of the microscope unit using the knob on the stand until the specimen appears on the screen.
- Rotate the focus wheel on the microscope body to achieve a clear and sharp image.

2. Рэгуляванне святлодыёдных лямпаў
The microscope features built-in LEDs and two adjustable side lights. The side lights are controlled via touch-sensitive areas on the base.
- Built-in LEDs: These provide primary illumination.
- Side Lights: Touch the designated areas on the base to turn the side lights on/off and adjust their brightness. These are useful for reducing glare and enhancing contrast on reflective surfaces.
3. Video: 10 LEDs - Touch Control
Відэа 2: Demonstration of the touch-controlled 10 LED lighting system on the Dcorn DMR-07 Digital Microscope.
4. Захоп фота і відэа
The microscope supports capturing still images and recording video footage directly to the included 32GB TF card.
- Use the 'OK' button on the microscope or the corresponding button on the wireless remote control to capture a photo or start/stop video recording.
- Navigate through the menu using the arrow buttons to select photo/video mode and adjust settings like resolution.


5. Connecting to PC and TV
The microscope offers HDMI and USB output for viewing on larger screens.
- Выхад HDMI: Connect the provided HDMI cable from the microscope's HD port to an HDMI input on a TV or monitor. This provides a direct, high-quality display.
- Выхад USB: Connect the provided USB cable from the microscope's USB port to a computer. The microscope can function as a UVC (USB Video Class) device, allowing you to view the live feed using standard camera software on your computer (Windows/Mac compatible).

6. Video: How to Connect to a PC
Відэа 3: A guide demonstrating how to connect the Dcorn DMR-07 Digital Microscope to a PC and view жывы канал.
Тэхнічнае абслугоўванне
- Ачыстка аб'ектыва: Use the provided cleaning cloth or a soft, lint-free cloth to gently wipe the lens. For stubborn smudges, use a lens cleaning solution designed for optical devices.
- Ачыстка экрана: Wipe the LCD screen with a soft, dry cloth. Avoid using abrasive cleaners or solvents.
- Агульны догляд: Keep the microscope in a clean, dry environment. Avoid exposing it to extreme temperatures, humidity, or direct sunlight. When not in use, store it in its original packaging or a protective case.
Ліквідацыю непаладак
- Няма харчавання: Ensure the power adapter is securely connected to both the microscope and a working power outlet. Check if the power button is pressed.
- Размытая выява: Adjust the focus wheel on the microscope body. Ensure the specimen is within the working distance of the lens. Clean the lens if necessary.
- No Image on External Display (HDMI/USB): Verify that the cables are correctly connected. For USB connection, ensure appropriate camera software is running on your computer and the microscope is selected as the input device.
- Святло не працуе: Check the connections of the external LED lights to the base. For touch-controlled lights, ensure you are touching the correct activation area.
- Cannot Capture Photos/Videos: Ensure the 32GB TF card is properly inserted and has sufficient free space. Check the menu settings to confirm the correct mode is selected.
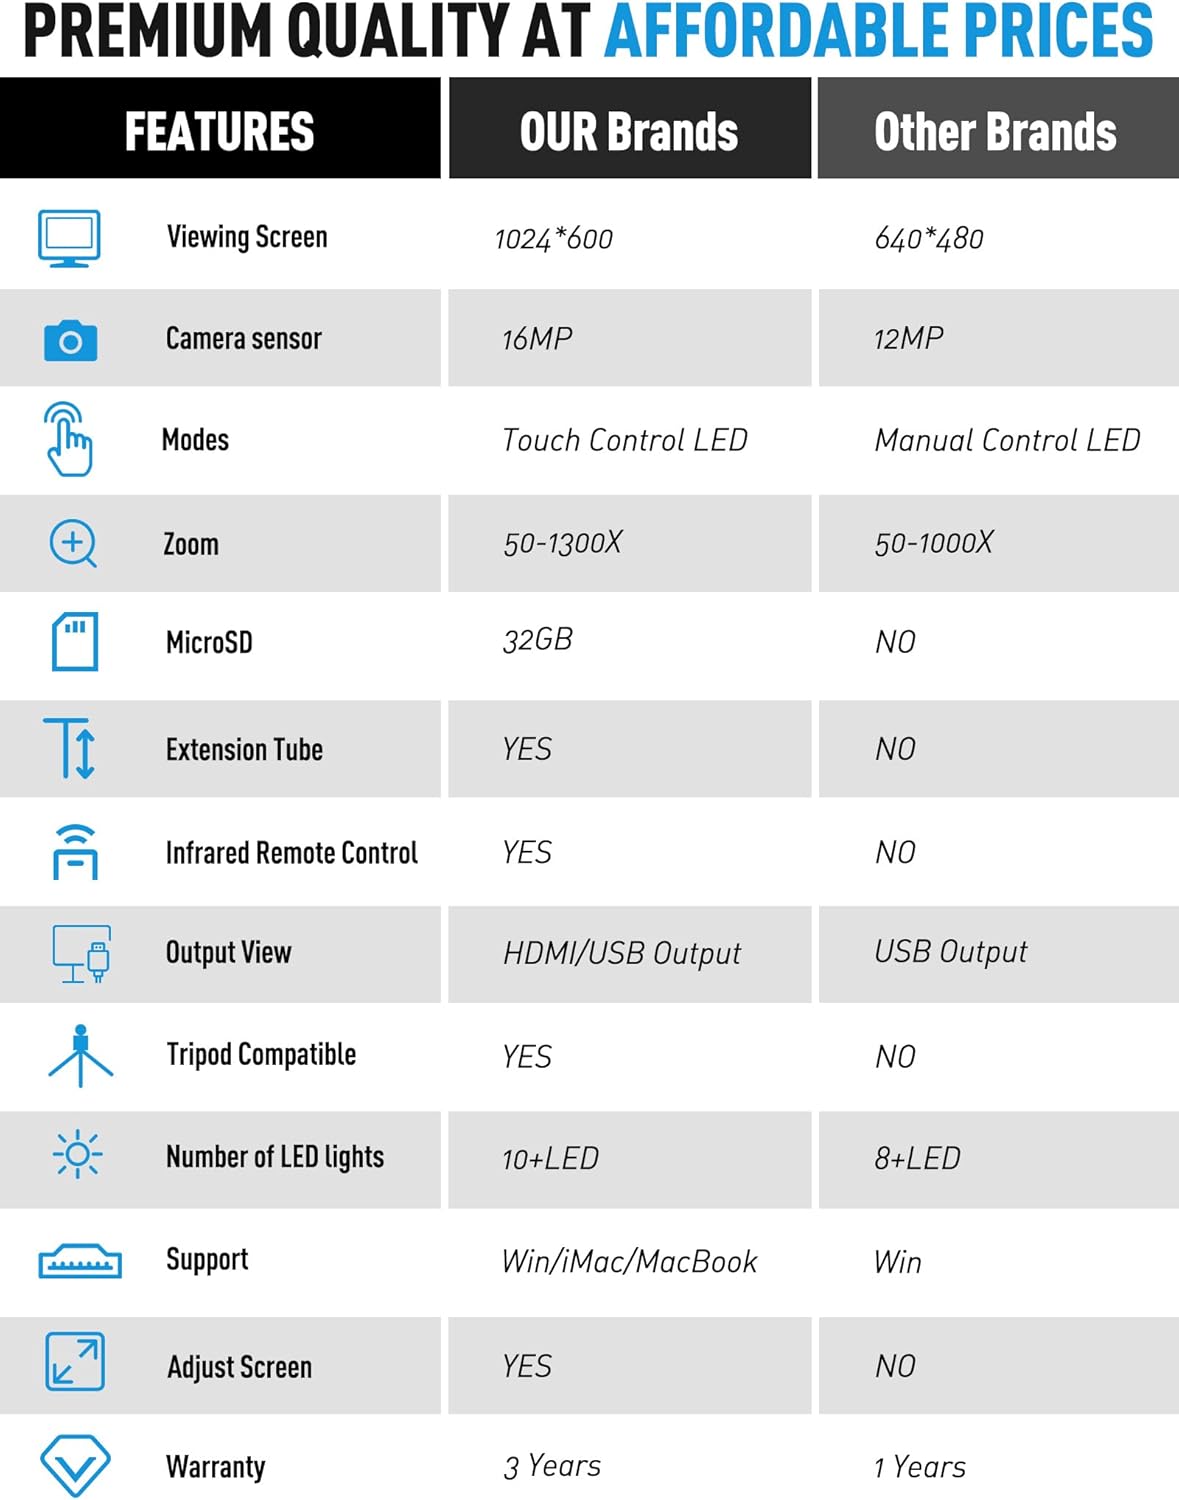
Тэхнічныя характарыстыкі
| Асаблівасць | Спецыфікацыя |
|---|---|
| мадэль | ДМР-07 |
| Памер дысплея | 7-цалевы ВК-экран |
| Датчык камеры | 16 МП |
| Павелічэнне | Да 1300X |
| Крыніца святла | LED (Built-in & Touch Control Side Lights) |
| Выхад | HDMI, USB |
| Захоўванне | MicroSD (32GB TF card included) |
| Падаўжальная трубка | 4.7-inch included |
| Пульт дыстанцыйнага кіравання | Wireless Infrared Remote Control |
| Сумяшчальныя прылады | Laptop, Personal Computer, Television |
| Падтрымка аперацыйнай сістэмы | Windows, Mac |
| Колер | Серабро |
| Вага прадмета | 4.46 фунта |
| Памеры ўпакоўкі | 11.18 х 10.94 х 3.86 цалі |
Інфармацыя аб гарантыі
The Dcorn DMR-07 Digital Microscope comes with a Гарантыя 3 год з даты пакупкі. Гэтая гарантыя распаўсюджваецца на вытворчыя дэфекты і гарантуе, што прадукт адпавядае зададзеным стандартам прадукцыйнасці. Калі ласка, захавайце пацвярджэнне пакупкі для прэтэнзій па гарантыі.
Падтрымка кліентаў
For any questions, technical assistance, or support regarding your Dcorn DMR-07 Digital Microscope, please contact our customer support team:
электронная пошта: support@dcornus.com