1. Уводзіны
Thank you for choosing the ATTACK SHARK X2 Wireless Gaming Mouse. This manual provides detailed instructions for setting up, operating, and maintaining your mouse to ensure optimal performance. The X2 mouse features a transparent shell, 3-mode connectivity (2.4GHz wireless, Bluetooth 5.0, USB-C wired), adjustable DPI, 3D RGB lighting, and a rechargeable battery.

Image 1.1: The ATTACK SHARK X2 Wireless Gaming Mouse, showcasing its transparent design and vibrant RGB lighting. A USB receiver is also visible.
2. Прадукт скончыўсяview
2.1 Змест пакета
- ATTACK SHARK X2 Wireless Gaming Mouse
- Зарадны кабель USB-C
- 2.4GHz USB Receiver (stored in the mouse)
- Кіраўніцтва карыстальніка
2.2 Кампаненты мышы

Малюнак 2.1: Ніжняя частка view of the X2 mouse, highlighting the USB receiver slot, mode switch, and light effect switch.
- Кнопка левай кнопкі
- Пстрыкніце правай кнопкай мышы
- Кола пракруткі (also functions as a button)
- Кнопка DPI (below scroll wheel)
- Кнопка "Наперад". (левы бок)
- Кнопка "Назад". (левы бок)
- Пераключальнік рэжыму (bottom of mouse: OFF / 2.4G / Bluetooth)
- Пераключальнік светлавых эфектаў (bottom of mouse)
- Слот USB-прыёмніка (bottom of mouse)
- Порт для зарадкі USB-C (front of mouse)
3. Налада і падключэнне
3.1 Зарадка мышы
The X2 mouse features an 800mAh rechargeable battery. Before first use, or when the battery is low, connect the mouse using the provided USB-C cable.
- Connect the USB-C end of the cable to the mouse's charging port.
- Падключыце канец USB-A да крыніцы харчавання (напрыклад, USB-порт кампутара, насценны USB-адаптар).
- Поўная зарадка звычайна займае каля 4 гадзін.
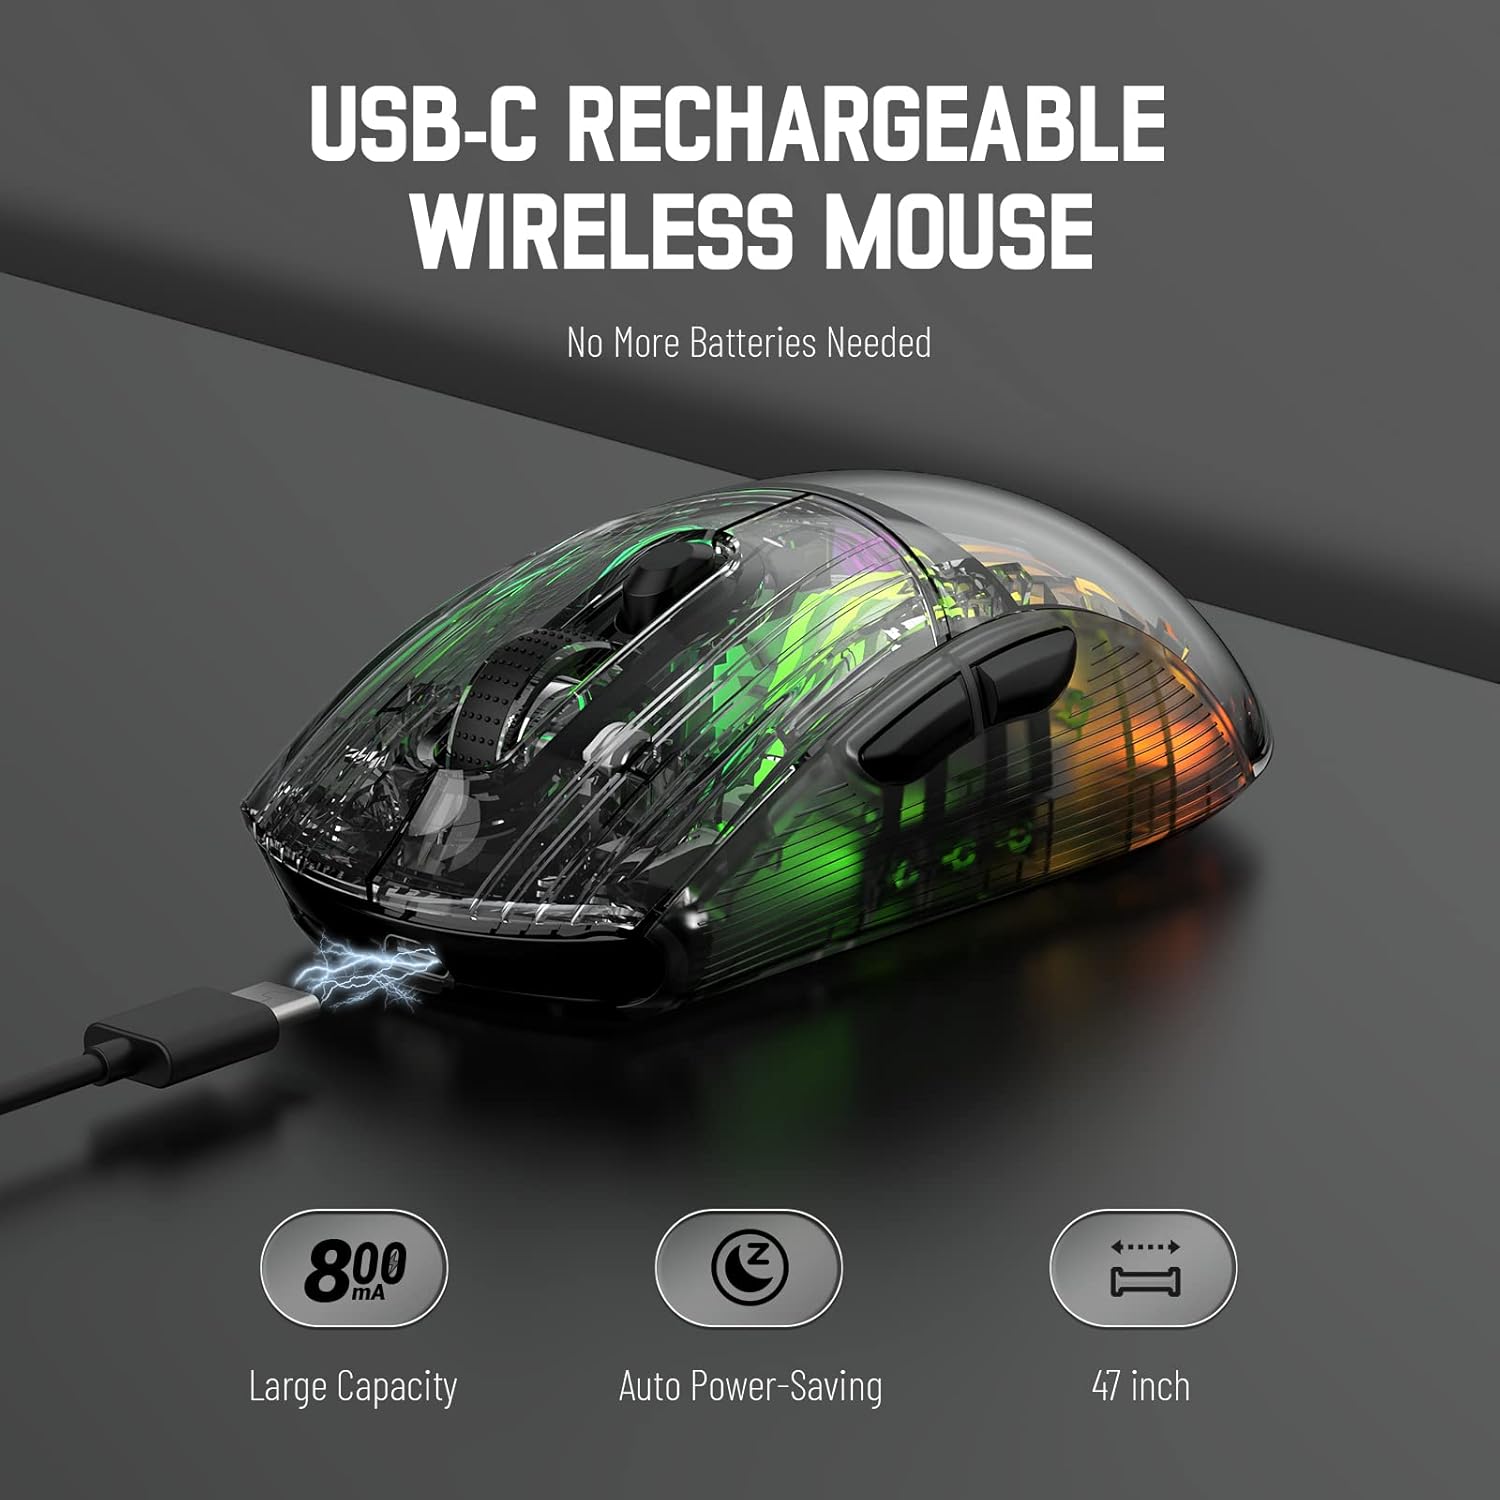
Image 3.1: The X2 mouse connected via its USB-C cable, illustrating the charging process.
3.2 Бесправадное злучэнне 2.4 ГГц
For a stable and responsive wireless connection, use the 2.4GHz USB receiver.
- Locate the USB receiver stored in the slot on the bottom of the mouse.
- Push the mode switch on the bottom of the mouse to the "2.4G" position.
- Падключыце USB-прыёмнік да даступнага USB-порта на вашым кампутары або прыладзе.
- The computer should automatically detect and install the necessary drivers. The mouse is ready for use once installation is complete (typically plug-and-play).
- If the mouse is unresponsive, try plugging the receiver into a different USB port.
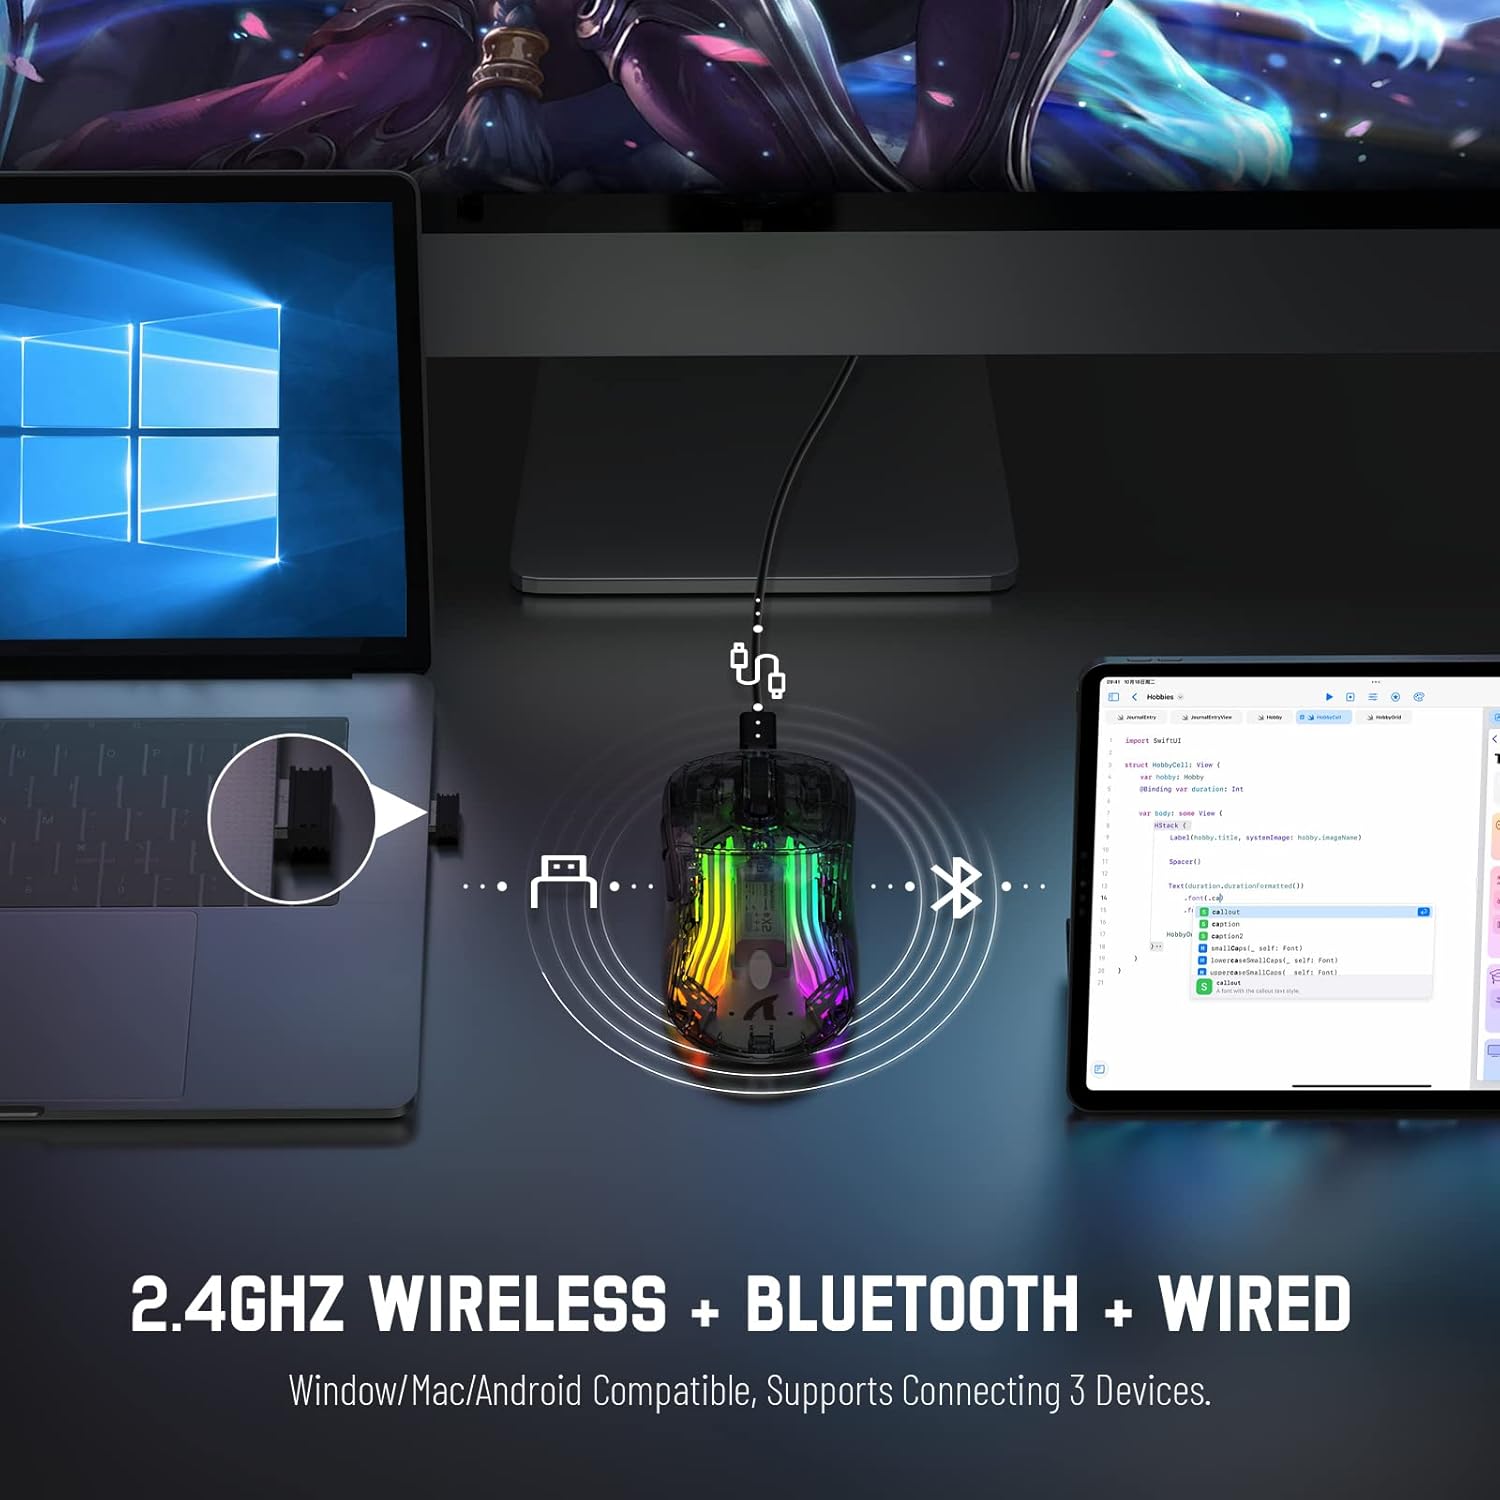
Image 3.2: Illustration of the 2.4GHz wireless connection, showing the USB receiver plugged into a laptop.
3.3 Bluetooth 5.0 Падключэнне
Connect your X2 mouse via Bluetooth for devices that support it, such as laptops, tablets, or smartphones.
- Push the mode switch on the bottom of the mouse to the "Bluetooth" position.
- Націсніце і ўтрымлівайце Кнопка левай кнопкі + Кнопка колы пракруткі + Пстрыкніце правай кнопкай мышы simultaneously for approximately 3-4 seconds. The blue light on the mouse will flash rapidly, indicating it is in pairing mode.
- On your device, navigate to Bluetooth settings and enable Bluetooth.
- Пошук available devices. Select "X2 Mouse" from the list to connect.
- Once connected, the blue light will stop flashing and remain solid or turn off, depending on the lighting mode.
3.4 Правадное падключэнне USB-C
For a direct and reliable connection, use the USB-C cable in wired mode.
- Connect the USB-C end of the cable to the mouse's charging port.
- Connect the USB-A end to an available USB port on your computer or device.
- The mouse will function immediately as a wired mouse (plug-and-play).
4. Інструкцыя па эксплуатацыі
4.1 Рэгуляванне DPI
The mouse features 5 adjustable DPI levels to suit various tasks and gaming preferences. The game chip used is PixArt 3212.
- Націсніце Кнопка DPI (located below the scroll wheel) to cycle through the available DPI settings.
- Available DPI levels: 800 / 1200 / 1400 / 2000 / 2400.
4.2 Кіраванне RGB-падсветкай
The X2 mouse features 3D RGB lighting with 11 different light colors and various effects.
- Націсніце Пераключальнік светлавых эфектаў (located on the bottom of the mouse) to cycle through the different RGB lighting modes and colors.

Image 4.1: The X2 mouse displaying its 3D RGB lighting, complementing a gaming setup.
4.3 Кіраванне харчаваннем
The mouse is designed with auto power-saving features to conserve battery life.
- The mouse will enter a sleep mode after a period of inactivity.
- Каб абудзіць мыш, проста перасуньце яе або націсніце любую кнопку.
- When the battery is low, the mouse's indicator light may flash red.
4.4 Бясшумныя клікі
The X2 mouse features silent click buttons, reducing noise during use.

Малюнак 4.2: Бакавы прафесіяналfile of the X2 mouse, emphasizing its ergonomic shape and silent click functionality.
5. Тэхнічнае абслугоўванне
5.1 Ачыстка
- Disconnect the mouse from your device before cleaning.
- Выкарыстоўвайце мяккую, сухую тканіну без ворса, каб праціраць паверхню мышы.
- Для ўстойлівага бруду злёгку ачысціцеampпрацярыце тканіну вадой або мяккім ачышчальным растворам. Пазбягайце агрэсіўных хімічных рэчываў.
- Не дапускайце траплення вадкасцей унутр мышы.
5.2 Захоўванне
- Захоўвайце мыш у прахалодным, сухім месцы, удалечыні ад прамых сонечных прамянёў і экстрэмальных тэмператур.
- When not in use, ensure the mode switch is set to "OFF" to conserve battery life.
- Keep the USB receiver stored in its designated slot on the bottom of the mouse to prevent loss.
6. Выпраўленне непаладак
6.1 Мыш не рэагуе
- Праверце акумулятар: Ensure the mouse is charged. Connect it via USB-C cable to charge.
- Праверце перамыкач рэжымаў: Verify the mode switch on the bottom of the mouse is set to the correct connection mode (2.4G, Bluetooth, or OFF for wired).
- Падключэнне 2.4 ГГц: Пераканайцеся, што USB-прыёмнік надзейна падключаны да спраўнага USB-порта. Паспрабуйце іншы USB-порт.
- Злучэнне Bluetooth: Re-enter pairing mode (Left + Scroll + Right buttons for 3-4 seconds) and re-pair with your device. Ensure Bluetooth is enabled on your device.
- Правадное злучэнне: Ensure the USB-C cable is securely connected to both the mouse and the device.
6.2 Перарывістае падключэнне
- Адлегласць: Ensure the mouse is within the effective range (up to 50ft for 2.4GHz).
- Перашкоды: Move the mouse and receiver away from other wireless devices or large metal objects that may cause interference.
- Узровень батарэі: Low battery can affect connection stability. Charge the mouse.
6.3 RGB-падсветка не працуе
- Check Light Switch: Press the Light Effect Switch on the bottom of the mouse to cycle through modes or turn lights on.
- Узровень батарэі: Ensure the mouse has sufficient charge, as low battery might disable lighting to conserve power.
7. Тэхнічныя характарыстыкі
| Асаблівасць | Спецыфікацыя |
|---|---|
| мадэль | X2 |
| Сувязь | Бесправадная сувязь 2.4 ГГц, Bluetooth 5.0, правадны USB-C |
| Ўзроўні DPI | 800 / 1200 / 1400 / 2000 / 2400 (PixArt 3212 Chip) |
| Гузікі | 7 (Left, Right, Scroll Wheel, DPI, Forward, Backward, Light Effect Switch) |
| Асвятленне | 3D RGB Lighting (11 light colors) |
| акумулятар | 800mAh Акумулятарная |
| Час зарадкі | Прыбл. 4 гадзіны |
| Працоўны дыяпазон | Up to 50ft (2.4GHz) |
| Сумяшчальнасць | Windows 7/8/10/XP, Vista 7/8, Mac OS, Linux (PC, Laptop, Tablet, PS4, PS5, Xbox One) |
| Вага прадмета | 6.4 унцыі |
| Памеры | 6.89 х 4.61 х 1.81 цалі (упакоўка) |
8. Гарантыя і падтрымка
ATTACK SHARK products are designed and manufactured to high-quality standards. For warranty information or technical support, please refer to the warranty card included with your product or contact the seller directly through your purchase platform. Please retain your proof of purchase for any warranty claims.
For further assistance, please visit the official ATTACK SHARK store on Amazon: ATTACK SHARK Store