1. Важная інфармацыя па бяспецы
Please read all instructions carefully before installation and use. Failure to follow these instructions may result in personal injury or property damage. Retain this manual for future reference.
- Заўсёды перакрывайце асноўную падачу вады перад пачаткам любых сантэхнічных работ.
- Карыстайцеся адпаведнымі сродкамі індывідуальнай абароны, у тым ліку ахоўнымі акулярамі і пальчаткамі.
- Пераканайцеся, што ўсе злучэнні надзейныя і герметычныя, каб пазбегнуць уцечак.
- Калі вы не ўпэўненыя ў якім-небудзь этапе працэсу ўстаноўкі, звярніцеся да кваліфікаванага сантэхніка.
- Adhere to all local plumbing and building codes.
- Do not use abrasive cleaners or harsh chemicals on the finish, as this may cause damage.
2. Кампаненты прадукту
Перад пачаткам усталёўкі пераканайцеся, што ўсе кампаненты наяўныя і не пашкоджаныя.
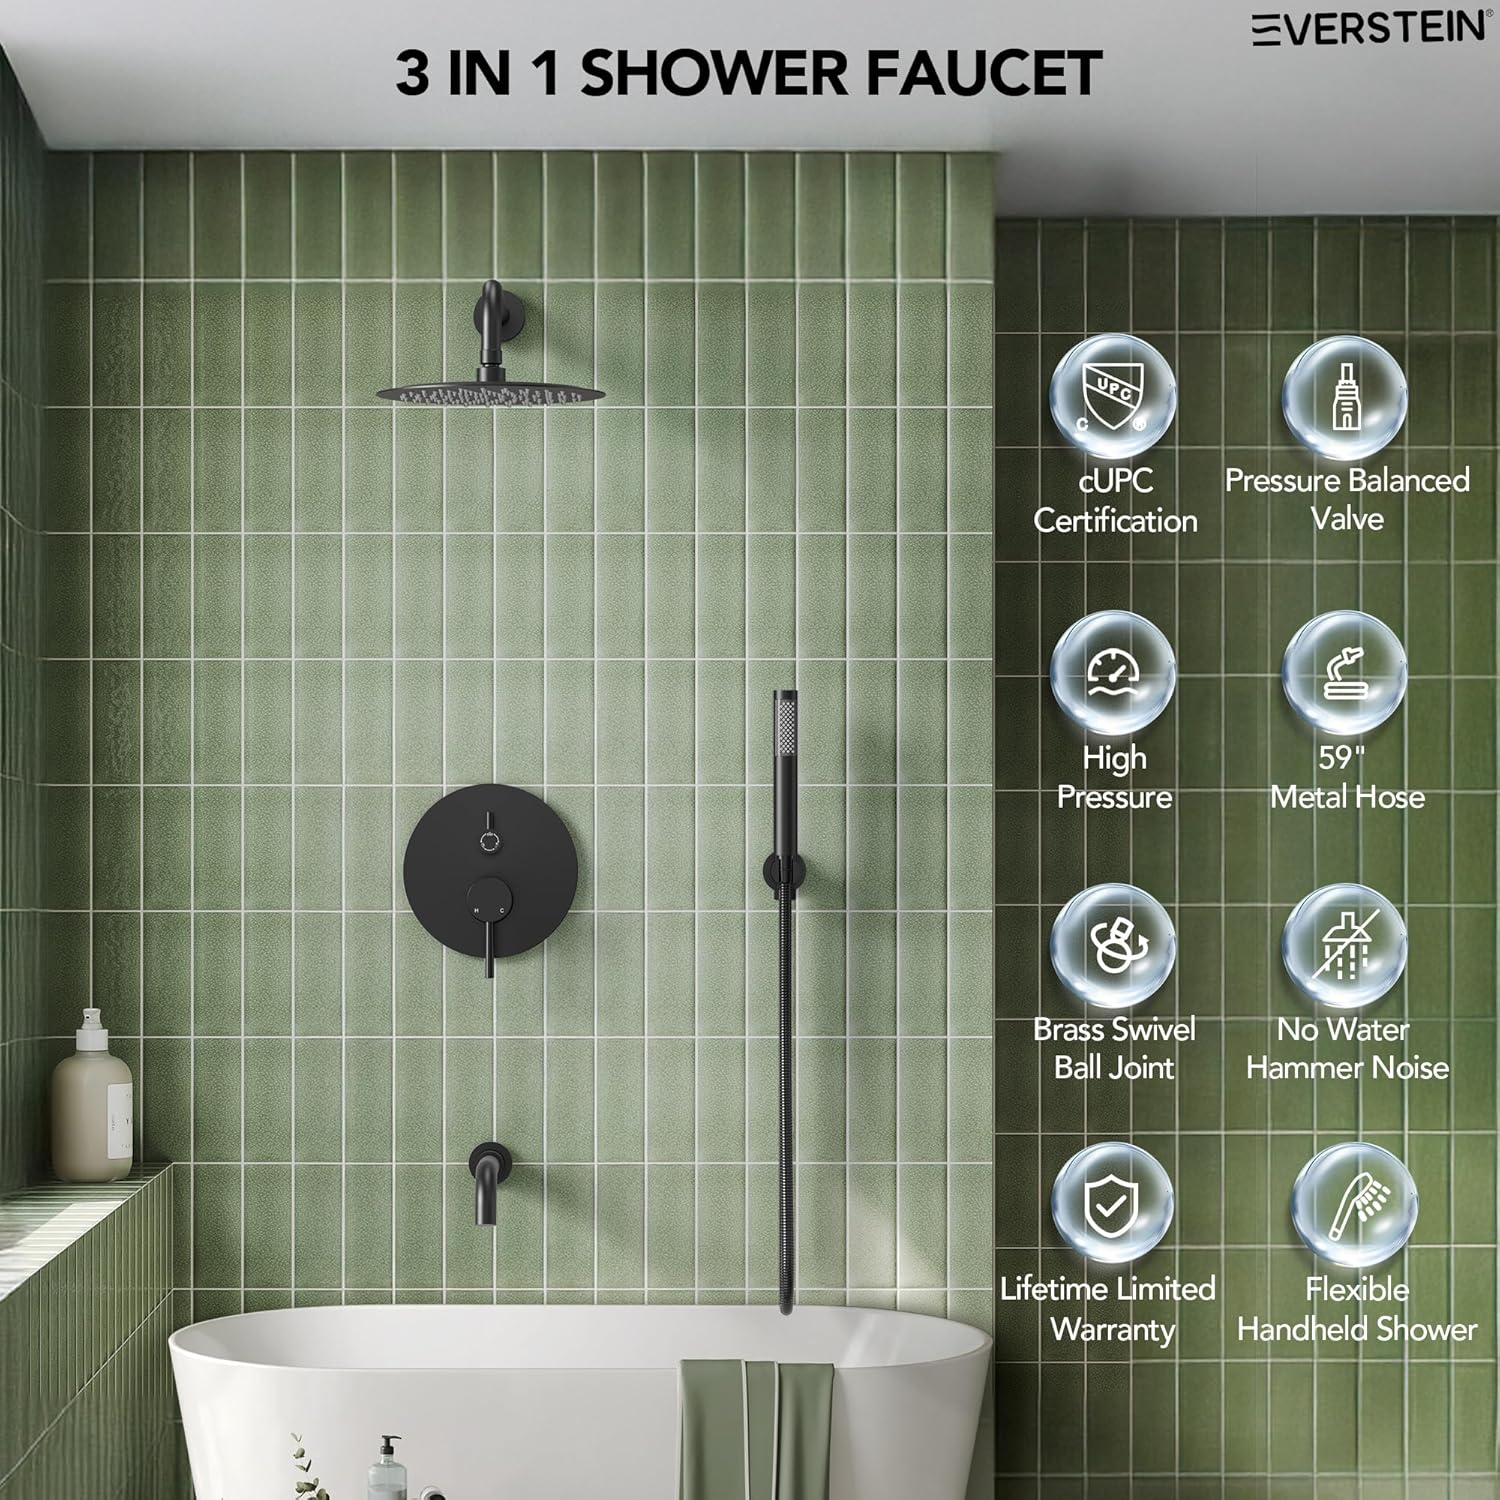
Малюнак 2.1: Закончанаview of the EVERSTEIN M6612BI-10BL Shower System components, including the 10-inch rain shower head, handheld sprayer, tub spout, and control valve.
- 10-inch Round Rainfall Shower Head
- Handheld Sprayer with 59-inch Stretchable Metal Hose
- Носік для ванны
- Pressure-Balanced Mixer Valve Body
- душ Arm
- Handheld Shower Holder
- Mounting Hardware (screws, anchors, gaskets)
- Кіраўніцтва па эксплуатацыі

Figure 2.2: Detailed dimensions of the shower head, shower arm, control trim, handheld shower, and tub spout.
3. Тэхнічныя характарыстыкі
| Марка | ЭВЕРШТЭЙН |
| Нумар мадэлі | M6612BI-10BL |
| Колер | Матавы чорны |
| Матэрыял | Латунь, нержавеючая сталь |
| Тып аздаблення | Матава-чорнае пакрыццё |
| Колькасць ручак | 1 |
| Тып мацавання | Насценнае мацаванне |
| Хуткасць патоку | 2.5 GPM |
| Максімальны ціск | 60 PSI |
| Вага прадмета | 10.5 фунта |
| Памер галавы | 10 цаляў |
4. Інструкцыя па ўстаноўцы
Before starting, ensure the main water supply is turned off. This manual provides general guidance; professional installation is recommended.
4.1. Відэакіраўніцтва па ўсталёўцы
Video 4.1: Official installation guide for the EVERSTEIN Shower Tub Faucet. This video demonstrates the step-by-step process for installing the valve, trim, and various shower components.
4.2. Valve & Trim Installation
- Падрыхтуйце сцяну: Ensure the wall framing is ready for the valve body. The valve should be positioned at a height of 43 5/8" - 51 3/16" (1100-1300mm) from the floor for the main control.
- Падключэнне вадаправодаў: Connect the hot water inlet (left) and cold water inlet (right) to the valve body. The rainfall shower outlet is at the top, handheld shower outlet on the right, and tub spout outlet at the bottom. Standard connections are 1/2-14 NPT for USA/Canada and G1/2" for Europe.
- Змыўныя трубы: Before connecting to the valve, flush the inlet pipes for at least two minutes to remove any debris and prevent blockage.
- Secure Valve Body: Mount the valve body securely to the wall framing. Ensure the built-in lever is properly balanced. Make marks for drilling anchors.
- Выпрабаванне ціску: After connecting all pipes, perform a pressure test. Flush the outlet pipes for one minute to check for appropriate water pressure.
- Тэст на ўцечку: Insert plugs for a water test. Ensure there is no leakage at any joint.
- Укладка пліткі: When cutting tiles, ensure the size of the cut does not exceed the dimensions of the trim. The embedded box should be cut flush with the tile surface.
- Усталяваць абрэзку: Remove the plastic protective case from the valve. Install the decorative trim plate and secure it.

Figure 4.1: Diagram illustrating the recommended pipe replacement and connections for the rainfall shower, handheld shower, and tub spout.

Малюнак 4.2: падрабязна view of the pressure balancing valve, showing hot water inlet, cold water inlet, rainfall shower outlet, handheld shower outlet, tub spout outlet, brass body, and ceramic valve core.
4.3. Rainfall Shower Installation
- Prepare Shower Arm: Ensure the distance from the tiled surface to the brass fitting is 7/8" (22mm). Wrap Teflon tape around the threads of the shower arm for at least 12 turns to prevent leaks.
- Усталюйце кранштэйн для душа: Install the cover to the shower arm, then screw the shower arm clockwise into the wall fitting until secure.
- Усталюйце душавую лейку: Insert a gasket into the shower head connection. Connect the 10-inch rainfall shower head to the shower arm.

Figure 4.3: The wall-mounted shower arm, ready for installation.
4.4. Handheld Shower Installation
- Падрыхтуйце трымальнік: Ensure the distance from the tiled surface to the brass fitting is 3/4" (20mm). Use an Allen key to remove the brass piece from the handheld shower holder by turning it counterclockwise.
- Install Brass Fitting: Wrap Teflon tape around the brass fitting for at least 12 turns. Mount the brass fitting into the wall.
- Прымацаваць трымальнік: Use the Allen key to turn clockwise and connect the shower bracket to the brass parts.
- Connect Hose and Sprayer: Insert a gasket into the hose connection. Connect the 59-inch metal hose to the handheld shower holder and then to the handheld sprayer.

Figure 4.4: The stainless steel handheld shower, ready for connection.

Figure 4.5: The 59-inch stretchable metal hose for the handheld shower.
4.5. Tub Spout Installation
- Prepare Spout: Ensure the distance from the tiled surface to the brass fitting is 7/8" (21mm). Wrap Teflon tape around the threads of the tub spout for at least 12 turns to prevent leaks.
- Усталяваць выліў: Install the cover to the tub spout, then screw the tub spout clockwise into the wall fitting until secure.

Figure 4.6: The brass tub spout, designed for efficient water flow.
5. Інструкцыя па эксплуатацыі
The EVERSTEIN M6612BI-10BL shower system features a single handle for temperature control and a diverter for selecting water outlets.

Figure 5.1: The shower mixer valve control, showing the main handle for temperature and flow, and the diverter knob for selecting shower functions.
- Кантроль тэмпературы: The main handle controls both water flow and temperature. Rotate the handle counter-clockwise for hot water and clockwise for cold water. Push the handle in or pull it out to adjust water flow.
- Функцыя перамыкача: The smaller knob above the main handle is the diverter.
- Turn to the top position to activate the rainfall shower head.
- Turn to the middle position to activate the handheld sprayer.
- Turn to the bottom position to activate the tub spout.
- Pressure-Balanced Valve: The integrated pressure-balanced valve maintains a consistent water temperature, preventing sudden changes due to fluctuations in hot or cold water pressure.
6. Тэхнічнае абслугоўванне
Рэгулярная чыстка і абслугоўванне забяспечаць даўгавечнасць і аптымальную працу вашай душавой сістэмы.
- Ачыстка аздаблення: Пачысціце матавае чорнае пакрыццё мяккай губкайamp cloth and mild soap. Avoid abrasive cleaners, harsh chemicals, or scouring pads, as these can damage the finish. Rinse thoroughly and dry with a soft cloth to prevent water spots.
- Cleaning Shower Head Nozzles: The silicone nozzles on the rainfall shower head and handheld sprayer are designed for easy cleaning. Simply rub the nozzles with your finger or a soft brush to dislodge any mineral deposits (calcium buildup). This helps maintain consistent water flow.
- Праверце ўцечкі: Periodically inspect all connections for any signs of leakage. Tighten connections if necessary, but do not overtighten.
7. Выпраўленне непаладак
Звярніцеся да наступнай табліцы, каб азнаёміцца з распаўсюджанымі праблемамі і іх магчымымі рашэннямі.
| праблема | Магчымая прычына | Рашэнне |
|---|---|---|
| Нізкі ціск вады | Clogged nozzles, debris in pipes, low household water pressure. | Clean shower head/handheld nozzles. Flush water lines (refer to installation). Check main water supply pressure. |
| Уцечкі вады | Loose connections, worn gaskets, improper Teflon tape application. | Ensure all connections are tight. Replace worn gaskets. Reapply Teflon tape correctly. |
| Нестабільная тэмпература вады | Pressure-balanced valve malfunction, issues with hot/cold water supply. | Verify hot and cold water supply. If problem persists, contact customer service or a qualified plumber. |
| Дывертар пераключаецца няправільна | Debris in diverter mechanism, internal component issue. | Ensure diverter knob is fully engaged in each position. If stuck or not functioning, contact customer service. |
8. Гарантыя і падтрымка
The EVERSTEIN M6612BI-10BL Shower System is backed by a Пажыццёвая гарантыя, which includes free parts replacement.
For technical support, warranty claims, or any questions regarding your product, please contact EVERSTEIN customer service. Our technical support team is available 24/7 to assist you.
Кантактная інфармацыя: Please refer to the contact details provided on the EVERSTEIN official website or your purchase documentation for the most up-to-date support information.
Вы таксама можаце наведаць в EVERSTEIN Store on Amazon каб атрымаць дадатковую інфармацыю пра прадукт і рэсурсы падтрымкі.