NUFEBS B0C4FH9QSS
NUFEBS Security Camera System User Manual
Model: B0C4FH9QSS
1. Уводзіны
This manual provides detailed instructions for the installation, operation, and maintenance of your NUFEBS Security Camera System. Please read this manual thoroughly before using the product to ensure proper functionality and safety. Keep this manual for future reference.
2. Змесціва ўпакоўкі
Праверце, ці ўсе пералічаныя ніжэй прадметы ўваходзяць у камплект. Калі якія-небудзь прадметы адсутнічаюць або пашкоджаныя, звярніцеся ў службу падтрымкі кліентаў.
- 1 x 10-inch LCD Monitor/NVR
- 4 x 3MP Outdoor PTZ Cameras
- 1 х адаптар харчавання для NVR
- 4 х адаптара харчавання для камер
- 1 х USB-мыш
- 1 х Ethernet кабель
- Мантажныя шрубы і дзюбелі
- Кіраўніцтва карыстальніка (гэты дакумент)
3. Прадукт скончыўсяview
3.1 Кампаненты сістэмы

Малюнак 3.1: Закончанаview of the NUFEBS Security Camera System, showing the 10-inch LCD monitor and four outdoor PTZ cameras.
The NUFEBS Security Camera System includes a central 10-inch LCD monitor which acts as the Network Video Recorder (NVR), and four wireless 3MP outdoor cameras. The system is designed for easy setup and remote access.

Figure 3.2: The smart home security camera system provides wireless coverage around your property.
3.3 Асноўныя магчымасці
- 3 Мп высокай выразнасці: Provides clear 2K resolution video for detailed monitoring.
- 10-цалевы ВК-манітор: Інтэграваны дысплей для жывога эфіру viewing and playback without an external monitor.
- Бесправаднае падключэнне: Cameras connect wirelessly to the NVR for flexible placement.
- 355° PTZ Control: Pan, Tilt, and Zoom functionality allows for wide area coverage and remote adjustment.
- Двухбаковы аўдыё: Built-in microphone and speaker for communication through the cameras.
- Каляровы начны бачанне: Enhanced night vision capabilities to capture full-color images in low-light conditions.
- Выяўленне руху і абвесткі: Receive instant notifications upon detecting motion.
- Кругласутачны цыклічны запіс: Continuous recording with automatic overwriting of old footage.
- Воданепранікальнасць IP65: Cameras are designed to withstand various outdoor weather conditions.
- Аддалены доступ: View жывы і запісаны footage from smartphones or tablets via the dedicated app.
4. Кіраўніцтва па наладцы
4.1 Пачатковая налада
- Power On the NVR: Connect the NVR (10-inch LCD monitor) to a power outlet using its dedicated power adapter. The system will boot up automatically.
- Power On the Cameras: Connect each camera to a power outlet using its respective power adapter. Ensure the cameras are within range of the NVR's wireless signal.
- Аўтаматычнае спалучэнне: The cameras are pre-paired with the NVR from the factory. Once powered on, they should automatically connect and display video on the NVR screen. If a camera does not connect, refer to the "Troubleshooting" section for manual pairing instructions.
- Падключыце мыш: Plug the included USB mouse into one of the USB ports on the NVR for easier navigation of the system interface.

Figure 4.1: Illustration of the plug-and-play setup, showing cameras connected to power outlets and automatically pairing with the NVR.
4.2 Усталёўка камеры
Choose suitable locations for your cameras, ensuring they have a clear line of sight to the area you wish to monitor and are within wireless range of the NVR. Avoid placing cameras where direct sunlight or strong light sources will shine into the lens.
- Адзначыць кропкі свідравання: Use the camera's mounting base as a template to mark the drilling points on the wall or ceiling.
- Свідраваць адтуліны: Drill holes at the marked points and insert the provided wall plugs if mounting on masonry.
- Бяспечная камера: Align the camera base with the drilled holes and secure it using the provided screws.
- Наладзіць кут: Аслабце рэгулявальныя шрубы на корпусе камеры, каб усталяваць патрэбнае viewпад вуглом, затым зацягніце іх, каб зафіксаваць камеру.
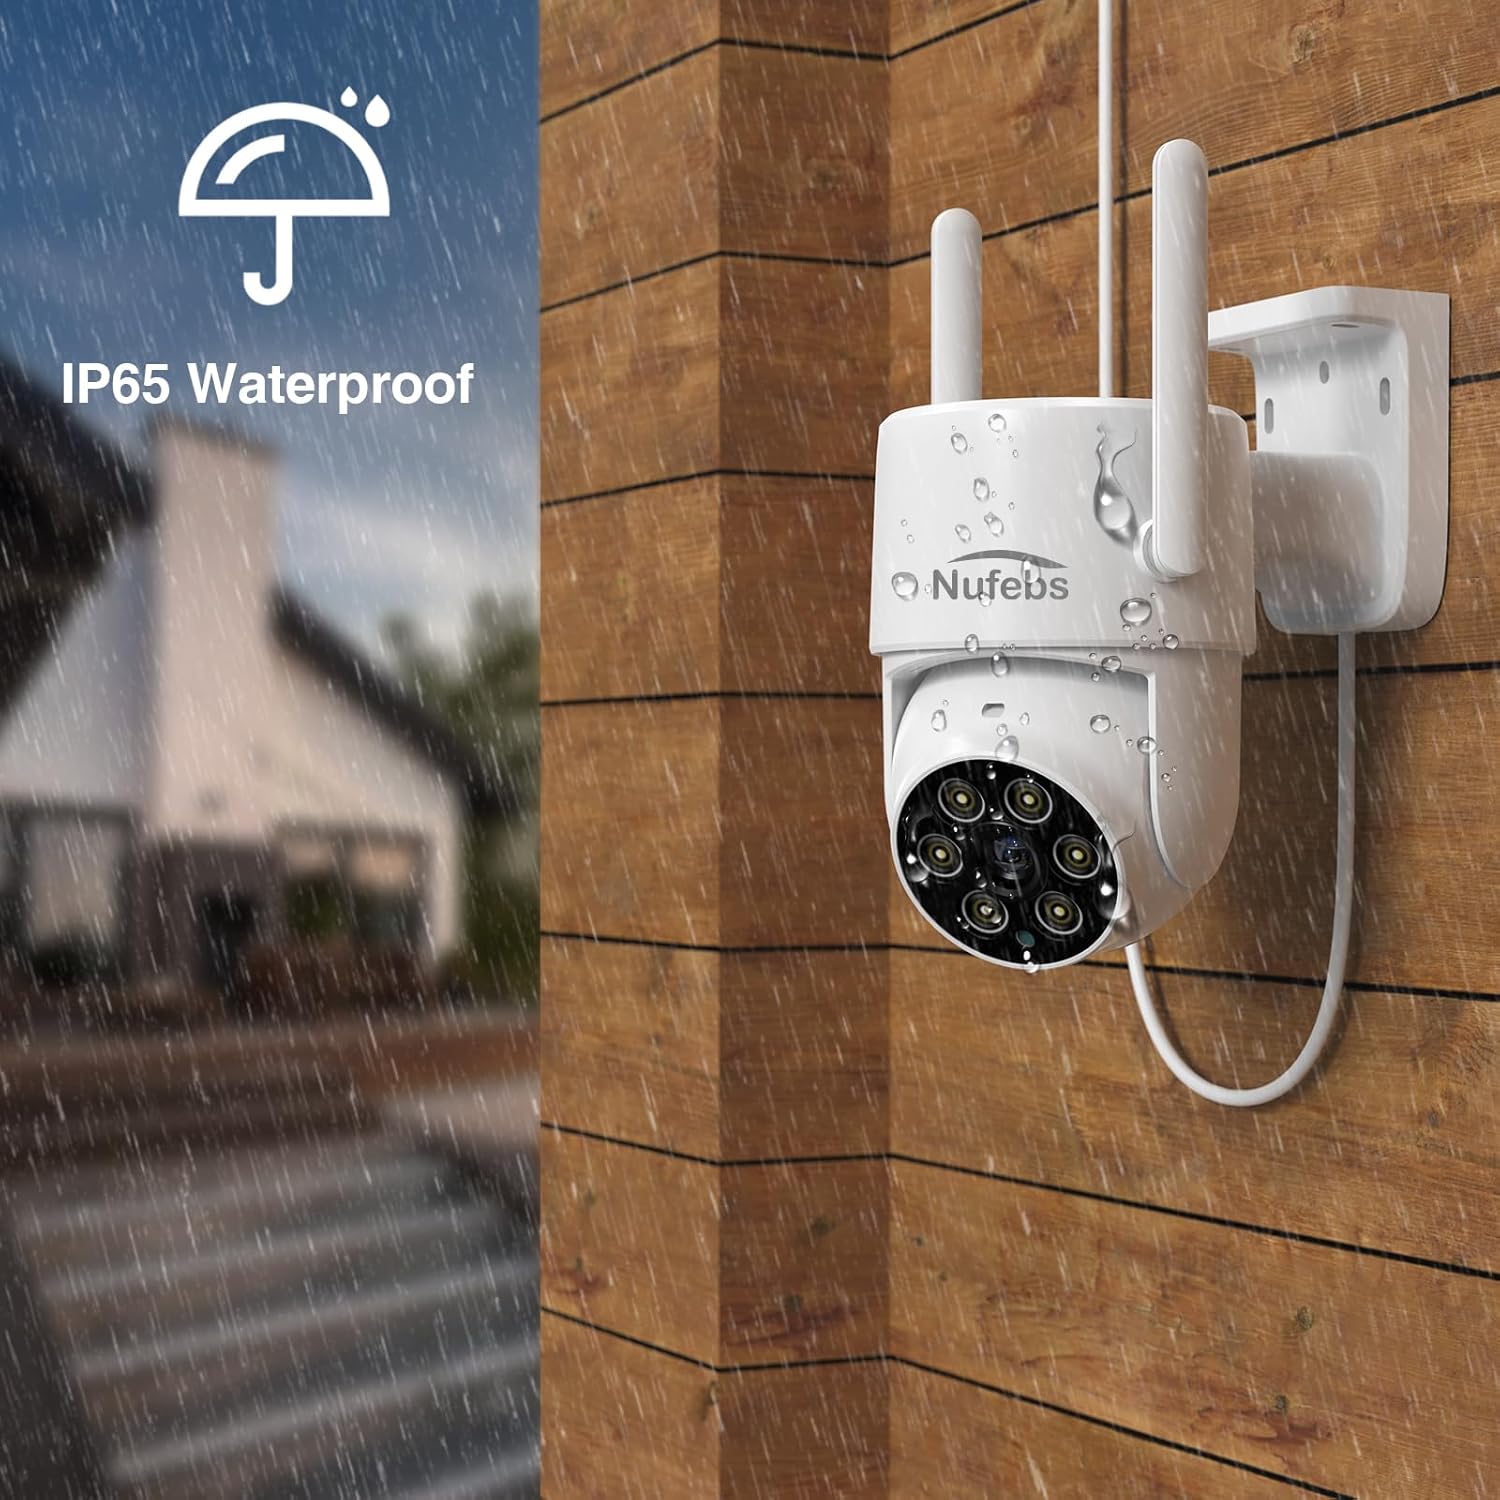
Figure 4.2: An outdoor camera demonstrating its IP65 waterproof design, suitable for various weather conditions.
4.3 Сеткавае падключэнне для аддаленага доступу
Каб уключыць дыстанцыйнае viewing via the mobile app, the NVR needs to be connected to your home network.
- Wired Connection (Recommended): Connect one end of the Ethernet cable to the LAN port on the NVR and the other end to an available LAN port on your router.
- Wireless Connection (NVR): On the NVR interface, navigate to Network Settings. Select your Wi-Fi network and enter the password.
4.4 Mobile App Setup (Tris Home)
- Спампаваць прыкладанне: Пошук "Tris Home" in the App Store (iOS) or Google Play Store (Android) and download the application.
- Зарэгістраваць уліковы запіс: Open the app and follow the prompts to register a new account.
- Дадаць прыладу: Tap the "+" icon or "Add Device" option in the app. Scan the QR code displayed on the NVR's screen (usually found in System Information or Network Settings) or manually enter the device ID.
- View Жывая стужка: Пасля дадання вы можаце view the live feed from your cameras and access various settings remotely.

Figure 4.3: The Tris Home app enables remote access to your security system from various devices, including smartphones, tablets, and computers.
5. Інструкцыя па эксплуатацыі
5.1 У прамым эфіры View і прайграванне
- жыць View: The NVR's 10-inch screen automatically displays the live feed from all connected cameras. You can switch between single-camera view і шматкамерны view з дапамогай экранных элементаў кіравання або мышы.
- Прайграванне: Right-click on the NVR screen to access the main menu. Select "Playback" to review запісана footage. You can filter by date, time, and camera.

Figure 5.1: The 24/7 loop recording feature allows continuous monitoring and easy review of past events through a timeline interface.
5.2 Кіраванне PTZ
The 355° PTZ (Pan-Tilt-Zoom) functionality allows you to adjust the camera's viewвугал дыстанцыйна.
- On NVR: У прамым эфіры view, click on a camera channel to select it. Use the PTZ controls (arrows, zoom in/out) displayed on the screen or accessible via the right-click menu.
- Праз мабільнае прыкладанне: У прамым эфіры view of a specific camera, swipe on the screen or use the dedicated PTZ controls to pan, tilt, or zoom.

Figure 5.2: The 355° pan and 90° tilt capabilities of the camera, controllable via the mobile application for comprehensive area coverage.
5.3 Двухбаковае аўдыё
The built-in microphone and speaker allow for real-time communication.
- Актываваць: In the mobile app's live view, tap the microphone icon to speak. Tap again to end.
- Слухай: Ensure the speaker icon is enabled in the app to hear audio from the camera's location.

Figure 5.3: The clear two-way audio feature allows for direct communication through the camera, useful for interacting with visitors or delivery personnel.
5.4 Рэжымы начнога бачання
The camera supports multiple night vision modes for optimal visibility in low light.
- Інфрачырвоны рэжым: Standard black and white night vision using IR LEDs.
- Поўнакаляровы рэжым: Utilizes built-in spotlights to provide full-color video even in complete darkness.
- Інтэлектуальны рэжым: Stays in infrared mode and switches to full color only when motion is detected, illuminating the area.

Figure 5.4: Comparison of the three night vision modes: Infrared for discreet monitoring, Full Color for detailed visibility, and Intelligent Mode for motion-activated color illumination.
5.5 Выяўленне руху і абвесткі
Configure motion detection settings to receive alerts and trigger recording.
- Налады доступу: On the NVR, right-click and navigate to "System Setup" > "Alarm" or "Motion Detection".
- Уключыць выяўленне руху: Select the desired camera channel and enable motion detection.
- Адрэгуляваць адчувальнасць: Set the sensitivity level to minimize false alarms.
- Set Recording Schedule: Configure the NVR to record when motion is detected.
- Апавяшчэнні праграмы: Ensure push notifications are enabled in the Tris Home app settings to receive alerts on your mobile device.

Figure 5.5: The camera's auto-tracking and color night vision features work together to illuminate and follow detected motion in low-light conditions.
6. Тэхнічнае абслугоўванне
- Чыстыя лінзы: Перыядычна чысціце аб'ектывы камеры мяккай сурвэткайamp тканінай, каб забяспечыць выразную якасць выявы. Пазбягайце абразіўных ачышчальнікаў.
- Праверце злучэнні: Ensure all power adapters and cables are securely connected and free from damage.
- Абнаўленні прашыўкі: Праверце вытворцы website or the Tris Home app for available firmware updates to ensure optimal performance and security.
- Кіраванне сховішчам: The NVR supports 24/7 loop recording. If you wish to save specific footage, back it up to an external USB drive.
- Экалагічныя меркаванні: While cameras are IP65 waterproof, avoid direct high-pressure water jets. Ensure proper ventilation for the NVR.
7. Выпраўленне непаладак
7.1 No Image from Camera
- Праверце магутнасць: Ensure the camera is properly powered on and its power adapter is connected to a working outlet.
- Праверце бесправадны сігнал: Verify the camera is within the NVR's wireless range. Obstacles like thick walls can weaken the signal.
- Re-pair Camera: If the camera was previously working, try manually re-pairing it with the NVR. On the NVR, go to "Video Manage" or "IPC Channel Config", select an empty channel or the problematic camera, and initiate pairing. Press the reset/pair button on the camera (refer to camera diagram for location).
- Перазапуск прылад: Power cycle both the camera and the NVR.
7.2 Праблемы з аддаленым доступам
- NVR Network Connection: Ensure the NVR is connected to your router via Ethernet or Wi-Fi and has internet access. Check the network status on the NVR.
- Налады маршрутызатара: Verify that your router's firewall is not blocking the NVR's connection.
- Падключэнне да праграмы: Ensure your mobile device has a stable internet connection (Wi-Fi or cellular data).
- Версія прыкладання: Update the Tris Home app to the latest version.
- Device ID/QR Code: Double-check that you have entered the correct device ID or scanned the correct QR code when adding the NVR to the app.
7.3 Нізкая якасць выявы
- Чысты аб'ектыў: Dust or smudges on the camera lens can degrade image quality. Clean it gently.
- Умовы асвятлення: Ensure there are no strong light sources directly facing the camera, which can cause glare or overexposure.
- Налады дазволу: Check the camera's resolution settings on the NVR or app to ensure it's set to 3MP (2K).
- Прапускная здольнасць сеткі: Insufficient network bandwidth can cause choppy or low-quality video streams, especially for remote viewінж.
7.4 Motion Detection False Alarms
- Адрэгуляваць адчувальнасць: Lower the motion detection sensitivity in the NVR settings or app.
- Set Detection Zones: Configure specific detection zones to exclude areas with frequent irrelevant motion (e.g., trees swaying, busy roads).
- Фактары навакольнага асяроддзя: Consider if strong winds, rain, or insects are triggering false alarms.
8. Тэхнічныя характарыстыкі
| Асаблівасць | Апісанне |
|---|---|
| Марка | NUFEBS |
| мадэль | B0C4FH9QSS |
| Тэхналогія падлучэння | Бесправадная сувязь |
| Дазвол відэазахопу | 3MP (2K), 1080p, 720p |
| Асаблівасці | Motion Sensor, Night Vision (Color, Infrared, Intelligent), PTZ, Two-Way Audio |
| Колькасць каналаў | 4 |
| Ёмістасць памяці | 128 ГБ |
| Аперацыйная сістэма (праграма) | Android (Compatible with iOS via Tris Home app) |
| Рэкамендуемае выкарыстанне | На адкрытым паветры |
| Сумяшчальныя прылады | Смартфоны, планшэты |
| Рэйтынг воданепранікальнасці | IP65 |
| Памеры ўпакоўкі | 13.19 х 12.64 х 7.4 цалі |
| Вага прадмета | 6.91 фунта |
9. Гарантыя і падтрымка
For warranty information and technical support, please refer to the contact details provided on the product packaging or the official NUFEBS website. Please have your model number (B0C4FH9QSS) ready when contacting support.
Для атрымання дадатковай дапамогі вы таксама можаце звярнуцца да старонка прадукту на Amazon for updated information or frequently asked questions.