Makerbase Monster8 V2
Makerbase MKS Monster8 V2 32-Bit Control Board User Manual
мадэль: Monster8 V2 | Брэнд: Makebase
1. Прадукт скончыўсяview
The Makerbase MKS Monster8 V2 is an advanced 32-bit control board designed for large 3D printers, offering extensive compatibility and robust features. It is an upgraded version of the MKS Monster8 V1, featuring significant improvements in protection and functionality. This board is suitable for DIY enthusiasts and professionals seeking flexible and powerful control over their 3D printing projects.
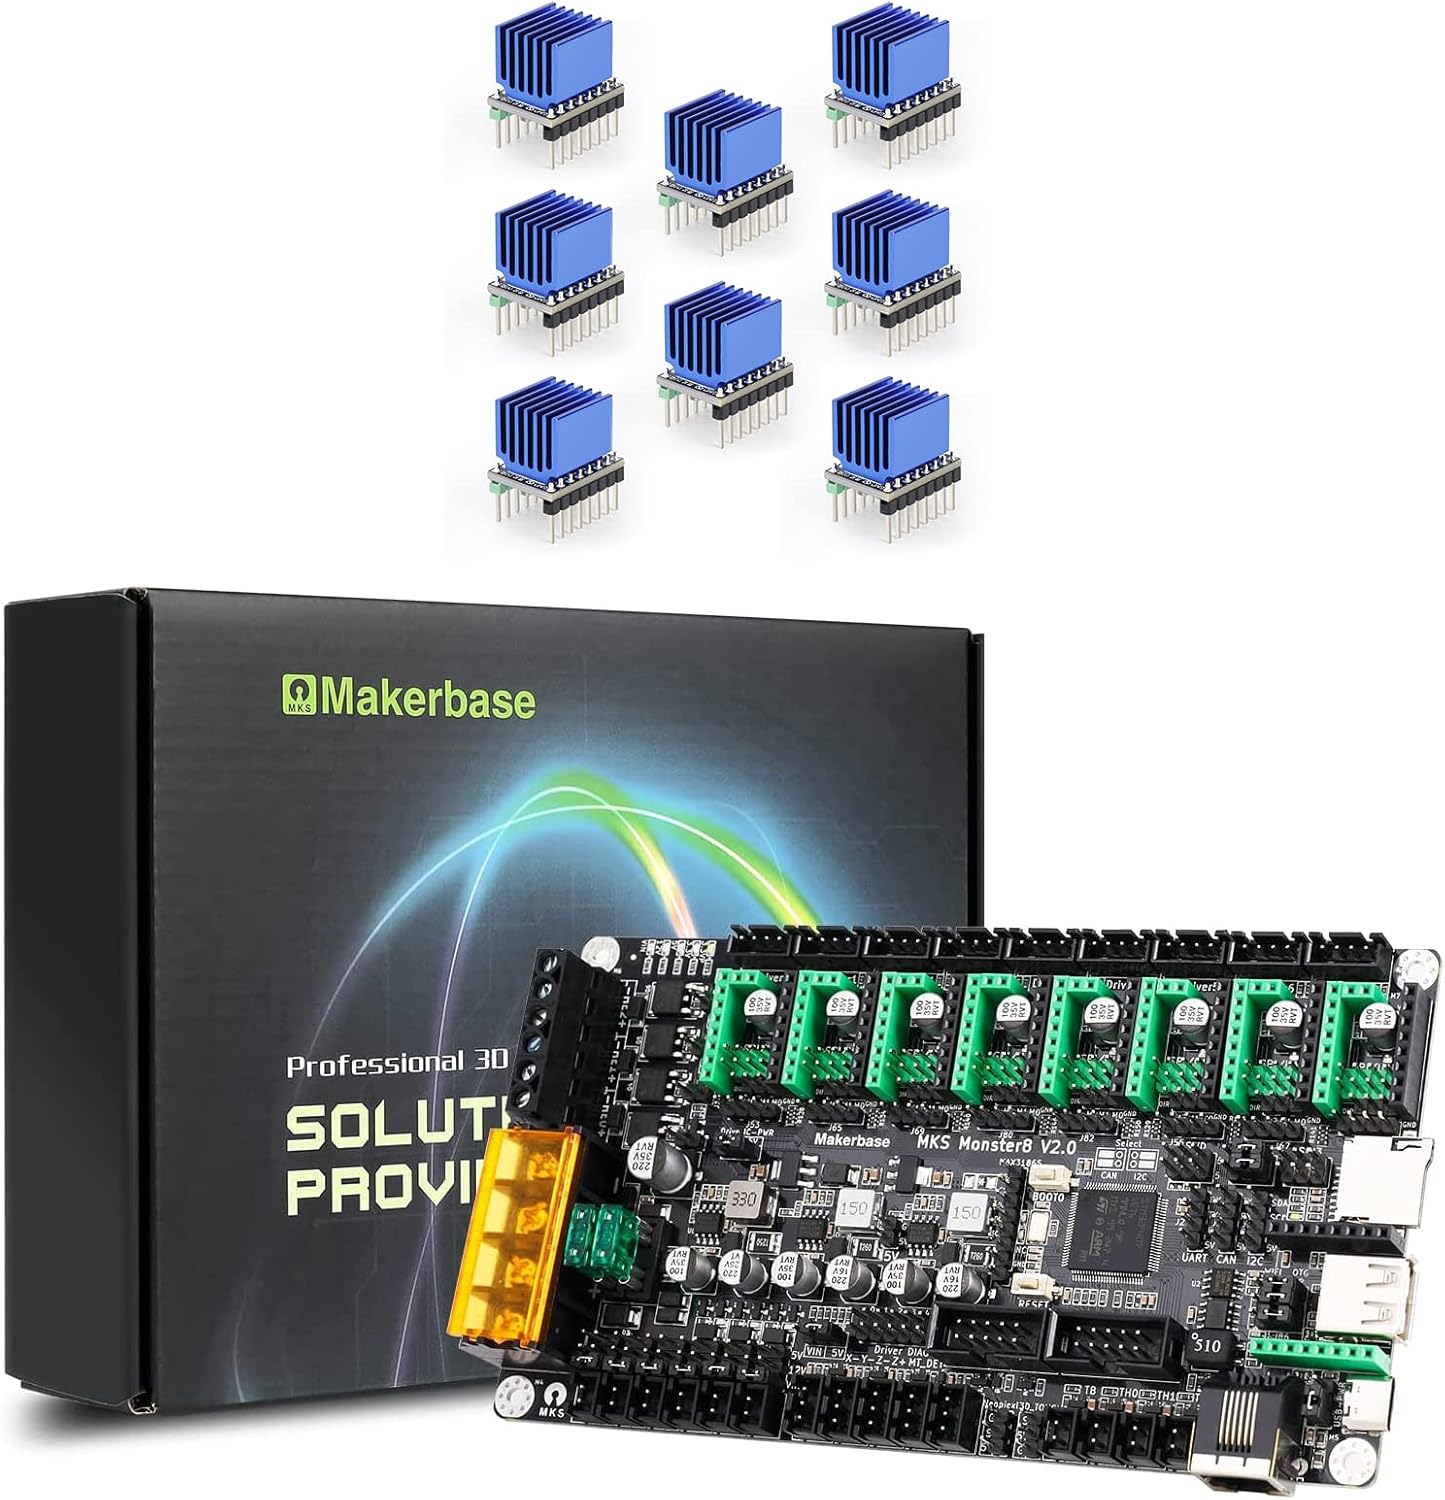
Figure 1: Makerbase MKS Monster8 V2 Control Board with included TMC2209 drivers.
2. Асноўныя магчымасці
- Высокапрадукцыйны мікракантролер: Equipped with STM32F407VET6 microcontroller, operating at 168MHz with 512KB Flash and 192KB RAM.
- 8 Stepper Drivers: Features 8 stepper driver slots and 9 motor interfaces (Driver0, 1, 2-1, 2-2, 3, 4, 5, 6, 7), supporting various motor drives including A4988, DRV8825, LV8729, TMC2208, TMC2209, TMC2225, and TMC2226.
- Сумяшчальнасць прашыўкі: Supports both Marlin 2.0.x and Klipper firmware. Klipper requires an external host like Raspberry Pi or MKS PI.
- Падтрымка дысплея: Compatible with a wide range of LCD displays (LCD2004, LCD12864, MKS MINI12864 V1.0, MKS MINI12864 V3.0) and touch screens (MKS TFT24, MKS TFT28, MKS TFT32, MKS TFT35, MKS H43) via EXP1 and EXP2 interfaces.
- Палепшаная абарона: Includes a TVS power supply anti-reverse and spike protection chip, plug-in fuses, and Schottky diodes for MOS drive, endstop, and temperature measurement circuits.
- Back EMF Protection: Designed with a protection circuit to mitigate damage from back electromotive force generated by stepper motors.
- Raspberry Pi Power Output: Provides a stable DC5.1V/3A power supply specifically for Raspberry Pi, preventing "Currently Throttled" errors.
- Extensive Expansion: Features 6 endstop supports with power selection, 3D TOUCH (PA8) interface, DFU mode button, driver power selection (5V or 3.3V), TMC UART and SPI modes, SENSORLESS_HOMING function (Diag0-5), integrated SPI communication micro SD card, reserved SPI signal UDISK, and virtual USB device.
- CAN шына: Built-in CAN transceiver and interface for advanced communication.
- Cooling & Power: Includes 3 PWM fan headers and 3 power output headers.
- WiFi Module Slot: Dedicated slot for Robin WiFi module.
- MAX31865 Interface: Supports MAX31865 temperature measurement interface.

Figure 2: The MKS Monster8 V2 board supports 8 stepper drivers and 9 motor interfaces for versatile configurations.

Figure 3: The high-performance STM32F407VET6 main control chip ensures efficient operation.

Figure 4: Intensive interfaces for DIY, including 3 PWM fan headers and 3 power output headers.
3. Настройка і ўстаноўка
3.1 Ўстаноўка драйвера
The MKS Monster8 V2 supports various stepper motor drivers. Ensure correct orientation and secure seating when installing drivers into the dedicated slots.

Figure 5: Proper insertion of stepper motor drivers into the mainboard.

Figure 6: Heatsinks are crucial for excellent heat dissipation from the drivers.

Figure 7: Detailed dimensions and electrical specifications for the stepper motor drivers.

Figure 8: Microstep setting configurations for TMC2209 drivers.
3.2 Firmware Installation
The MKS Monster8 V2 supports Marlin 2.0.x and Klipper firmware. For optimal performance and compatibility, it is recommended to update the firmware from the official Makerbase GitHub repository. A Klipper host, such as a Raspberry Pi or MKS PI, is required for Klipper firmware.
For detailed instructions and firmware files, visit the Makerbase MKS-Monster8 GitHub page.
3.3 Падключэнне сілкавання
The motherboard is equipped with a TVS power supply anti-reverse and spike protection chip to prevent damage from incorrect power connections. If the positive and negative poles of the power supply are reversed, the motherboard will not function. Always double-check wiring before powering on.
Video 1: Demonstration of the power supply anti-reverse protection. The video shows that if the power supply is connected in reverse, the board will not power on, preventing damage. It also shows how to correctly connect the power supply.
The Monster8 V2 also provides a dedicated DC5.1V/3A power output for Raspberry Pi. This ensures a stable power supply, preventing common "Currently Throttled" errors that can occur with unstable power to the Raspberry Pi.

Figure 9: The dedicated DC5.1V/3A power supply for Raspberry Pi ensures stable operation and prevents throttling issues.
4. Інструкцыя па эксплуатацыі
Once the board is correctly installed and firmware is loaded, you can begin operating your 3D printer. The board supports U disk printing, allowing for convenient file transfer and printing.
4.1 Дысплей і кіраванне
Connect your preferred LCD or touch screen display to the EXP1/EXP2 interfaces. These displays provide a user interface for controlling printer movements, monitoring temperatures, and managing print jobs.
4.2 Дадатковыя магчымасці
Utilize the DFU mode button for firmware flashing. Configure driver power selection (5V or 3.3V) and set up TMC UART and SPI modes for advanced stepper motor control. The SENSORLESS_HOMING function can be configured using the Diag0-5 pins.

Figure 10: The board supports various driver modes including UART, SPI, and Normal STEP/DIR for flexible control.
5. Maintenance and Protection
The MKS Monster8 V2 is built with several protective features to ensure longevity and reliability.
5.1 Fuse Protection
The board includes plug-in fuses that provide overcurrent protection, safeguarding the motherboard wiring effectively.

Figure 11: Plug-in fuses are added to the motherboard for enhanced protection.
5.2 Back EMF Protection
A dedicated protection circuit is integrated to handle back electromotive force (EMF) generated by stepper motors, significantly reducing potential damage to the motor drivers. This is particularly important when the print head is manually moved or encounters resistance.
Video 2: Demonstration of back EMF protection. The video shows a Voron printer's print head being moved manually, generating back EMF, and the board's protection circuit preventing damage, allowing normal operation after power-on.
5.3 Абарона ад электрастатычнага разраду
The motherboard's MOS drive circuit and temperature measurement circuit are protected by Schottky diodes to reduce damage from external static electricity spikes to the input/output (IO) pins.
Video 3: Anti-static test of the motherboard. The video demonstrates applying 4kV static electricity to the heating head interface and temperature measurement interface, showing the board continues to function normally due to its robust protection.
6. Выпраўленне непаладак
6.1 Power-On Issues
If the motherboard does not power on, first check if the power supply wiring is reversed. Correcting the polarity should resolve the issue. Refer to Video 1 in the Setup section for a visual guide.
6.2 Raspberry Pi "Currently Throttled" Error
This error typically indicates an unstable or insufficient power supply to the Raspberry Pi. The MKS Monster8 V2 provides a dedicated 5.1V/3A output to prevent this. Ensure your Raspberry Pi is powered directly from this interface on the Monster8 V2 board.
6.3 PL08N Leveling Sensor Signal Pin Burnout
The PL08N leveling sensor signal interface is protected by Schottky diodes with a withstand voltage of 40V. This design ensures that the signal pin of the chip will not be burned out due to sensor issues or voltagе шыпы.
Video 4: Demonstration of PL08N leveling sensor signal pin protection. The video shows a 24V input applied to the PL08N signal pin, confirming that the board remains functional and the pin is not damaged, thanks to the integrated protection.
7. Тэхнічныя характарыстыкі
| Кампанент/Функцыя | Дэталь |
|---|---|
| MCU | STM32F407VET6 (168MHz, 512KB Flash, 192KB RAM) |
| Драйверы крокавых рухавікоў | 8 Stepper Driver Slots, 9 Motor Interfaces (Driver0,1,2-1,2-2,3,4,5,6,7) |
| Сумяшчальнасць драйвераў | A4988, DRV8825, LV8729, TMC2208, TMC2209, TMC2225, TMC2226 |
| Падтрымка прашыўкі | Marlin 2.0.x, Klipper (requires Raspberry Pi/MKS PI host) |
| Дысплейныя інтэрфейсы | EXP1, EXP2 (for LCD2004, LCD12864, MKS MINI12864 V1.0/V3.0), MKS TFT24/28/32/35, MKS H43 |
| Endstop Support | 6 Endstops with Power Select (X-,X+,Y-,Y+,Z-,Z+), 3D TOUCH (PA8) |
| Рэжымы драйвера | TMC UART, SPI Mode, SENSORLESS_HOMING (Diag0-5) |
| Абарона харчавання | TVS Anti-reverse & Spike Protection, Plug-in Fuses, Schottky Diodes (MOS, Endstop, Temp) |
| Raspberry Pi Power | Independent DC5.1V/3A output |
| CAN аўтобус | Built-in CAN transceiver and interface |
| Інтэрфейс датчыка тэмпературы | MAX31865 |
| Слот для модуля Wi-Fi | Yes (for Robin WiFi module) |
| Іншыя інтэрфейсы | Integrated SPI communication micro SD card, reserved SPI signal UDISK, virtual USB device |

Figure 12: Detailed layout of the MKS Monster8 V2 board highlighting various components and interfaces.
8. Падтрымка і рэсурсы
For further assistance, firmware updates, and community support, please refer to the following resources:
- GitHub: https://github.com/makerbase-mks (Official Makerbase GitHub for firmware and documentation)
- YouTube: https://www.youtube.com/@makerbaseteam4217 (Official Makerbase YouTube channel for tutorials and guides)
- Facebook: https://www.facebook.com/Makerbase.mks/ (Connect with the Makerbase community)
Звязаныя дакументы - Monster8 V2
 |
Makerbase Product Manual: XRIVE, MKS ESP32, MKS Gen_L, and More Find installation instructions and setup files for Makerbase electronic components including XRIVE, MKS ESP32 FOC V1/V2, MKS Gen_L, MKS CANable, MKS VESC, and MKS SERVO42C via provided links. |
 |
Кіраўніцтва карыстальніка MKS Monster8 V2 - Кантролер 3D-прынтара Makerbase Падрабязнае кіраўніцтва карыстальніка для матчынай платы 3D-прынтара Makerbase MKS Monster8 V2. Ахоплівае апаратны інтэрфейс, падключэнне, канфігурацыю прашыўкі (Marlin, Klipper), усталёўку і ліквідацыю непаладак. |
 |
Кіраўніцтва карыстальніка MKS Monster8 V2: Кіраўніцтва па канфігурацыі абсталявання і прашыўкі Падрабязнае кіраўніцтва карыстальніка для матчынай платы 3D-прынтара MKS Monster8 V2, якое ахоплівае апаратны інтэрфейс, канфігурацыю прашыўкі (Marlin і Klipper), усталёўку і ліквідацыю непаладак. |
 |
Кіраўніцтва карыстальніка MKS DLC32 - Makerbase Падрабязнае кіраўніцтва карыстальніка для платы кантролера Makerbase MKS DLC32, якое ахоплівае апаратны інтэрфейс, абнаўленні прашыўкі і рэжымы кіравання 3D-прынтарамі і станкамі з ЧПУ. |
 |
MKS ROBIN Motherboard Manual - Makerbase Comprehensive manual for the MKS ROBIN motherboard, detailing features, parameters, port instructions, firmware updates, and system connection diagrams for 3D printer manufacturers. |
 |
Кіраўніцтва карыстальніка MKS DLC32 V2: характарыстыкі, падключэнні і характарыстыкі Падрабязнае тэхнічнае кіраўніцтва па плате кіравання гравіравальнага станка з ЧПУ Makerbase MKS DLC32 V2. Падрабязная інфармацыя пра ўваход харчавання, USB, карту TF, налады прывада рухавіка, падключэнні лазера і шпіндзеля, канцавы ўпор, зонд, інтэрфейсы I2C і зумера, уключаючы схемы падключэння і спецыфікацыі. |
Ask a question about this manual
Ask about setup, troubleshooting, compatibility, parts, safety, or missing instructions. Manuals+ will review the question and use this page’s manual context to help answer it.