1. Уводзіны
Thank you for choosing the Crivit Auriol Radio-Controlled Projection Alarm Clock. This device combines a precise radio-controlled clock with a clear LCD display, dual alarms, and a convenient projection feature. This manual will guide you through the setup, operation, and maintenance of your new alarm clock.

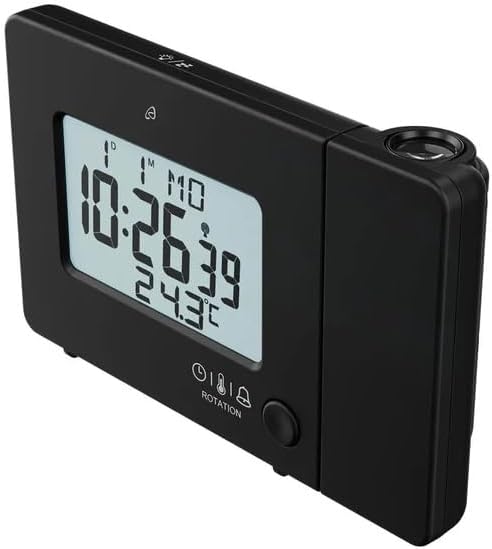
Фронт view of the alarm clock displaying time, date, and temperature.
2. Інструкцыі па тэхніцы бяспекі
- Уважліва прачытайце ўсе інструкцыі перад выкарыстаннем і захавайце іх для выкарыстання ў будучыні.
- Не падвяргайце прыладу ўздзеянню экстрэмальных тэмператур, прамых сонечных прамянёў або высокай вільготнасці.
- Не кідайце прыладу і не падвяргайце яе моцным ударам.
- Не спрабуйце разбіраць або рамантаваць прыладу самастойна. Звярніцеся да кваліфікаванага абслугоўваючага персаналу.
- Трымайце батарэйкі ў месцах, недаступных для дзяцей. Утылізуйце выкарыстаныя батарэйкі ў адпаведнасці з мясцовымі правіламі.
- Use only the provided AC adapter or one with identical specifications.
3. Змесціва ўпакоўкі
Калі ласка, праверце ўпакоўку на наяўнасць наступных прадметаў:
- Crivit Auriol Radio-Controlled Projection Alarm Clock (Model 373928)
- Адаптар пераменнага току
- Batteries (pre-installed or separate)
- Кіраўніцтва карыстальніка (гэты дакумент)

Included AC power adapter.
4. Асаблівасці прадукту
- Радыёкіраваны час: Automatic time synchronization for precise timekeeping.
- Функцыя праекцыі: Projects time, alarm times, or ambient temperature onto a wall or ceiling.
- Pivoting Projection Arm: Adjustable projection angle with easy focus adjustment.
- ВК-дысплей: Clear screen showing time, day, month, week number/day of the week, and indoor temperature.
- Падвойныя будзільнікі: Two independent alarm settings with snooze function.
- Датчык дотыку: Activates short-term projection and screen backlight.
- Параметры харчавання: Operates via AC adapter or batteries.
- Порт для зарадкі USB-A: Convenient 5V, 800mA output for charging external devices.
- Рэгуляваная яркасць: Customizable display brightness.
5. Ідэнтыфікацыя кампанентаў
Фронт View:
Фронт view з ВК-дысплеем.
- ВК-дысплей: Shows time, date, temperature, alarm status, and radio control signal.
- Плошча сэнсарнага датчыка: Located above the display, for temporary backlight and projection.
- Projection Indicator: Icon indicating projection is active.
- Індыкатары трывогі: Icons for Alarm 1 and Alarm 2.
- Кнопка павароту: Adjusts projection orientation.
Збоку View (Projection Arm):
Збоку view with projection arm extended.
- Праекцыйная рука: Pivots to direct the projection.
- Фокуснае кола: Рэгулюе выразнасць праецыраванага малюнка.
- Праекцыйны аб'ектыў: Emits the time/temperature display.
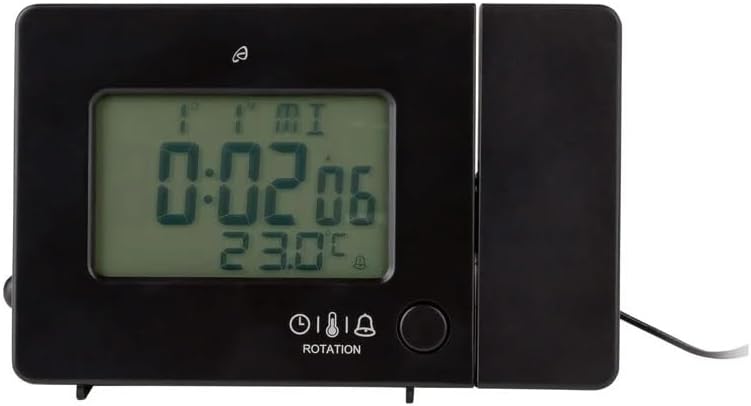
Тыл View:

Тыл view with control buttons and ports.
- -/WEEK Button: Decreases values, sets week display.
- +/ZONE Button: Increases values, sets time zone.
- Кнопка °C/°F: Toggles temperature unit.
- LANG Button: Selects display language for day of the week.
- Кнопка 12/24: Toggles 12/24 hour format.
- Кнопка MODE: Cycles through settings modes (Time, Alarm 1, Alarm 2).
- Кнопка SET: Enters setting mode for current display.
- Кнопка скіду: Resets the device to factory defaults (use a pointed object).
- Батарэйны адсек: For backup batteries.
- Порт DC IN: Для падключэння адаптара пераменнага току.
- Выхадны порт USB-A: Для зарадкі знешніх прылад.
6. Настройка
6.1. Уключэнне
The alarm clock can be powered by either the included AC adapter or batteries for backup.
- Ўстаноўка батарэі: Open the battery compartment on the rear of the unit. Insert the included batteries, observing the correct polarity (+/-). Batteries primarily serve as backup in case of power outage.
- Падключэнне адаптара пераменнага току: Connect the small plug of the AC adapter into the DC IN port on the back of the alarm clock. Plug the AC adapter into a standard wall outlet. The display will light up.
Alarm clock connected to power.
6.2. Initial Setup and Radio Control Synchronization
Upon first power-up or after a reset, the clock will automatically attempt to synchronize with the radio-controlled time signal (DCF77). This process can take several minutes to an hour, depending on your location and signal strength. During synchronization, a radio tower icon will flash on the display.
- Place the clock near a window for better signal reception.
- Пазбягайце размяшчэння яго побач з электроннымі прыладамі, якія могуць выклікаць перашкоды.
- Once synchronized, the radio tower icon will appear solid on the display.
If the radio signal is not received, you may need to set the time manually (see Section 7.1).
6.3. Basic Settings (if not automatically set or for adjustment)
Націсніце НАБОР button to enter setting mode. Use the -/WEEK і +/ZONE buttons to adjust values, and НАБОР для пацверджання і пераходу да наступнай налады.
- Часавы пояс: Adjust if you are not in the standard time zone for the radio signal.
- 12/24-гадзінны фармат: Націсніце 12/24 button to toggle between 12-hour (with AM/PM) and 24-hour formats.
- Адзінка вымярэння тэмпературы: Націсніце ° C / ° F кнопка для пераключэння паміж градусамі Цэльсія і Фарэнгейтам.
- Мова адлюстравання: Націсніце МОВА button to select the language for the day of the week display (5 languages available).
7. Інструкцыя па эксплуатацыі
7.1. Ўстаноўка часу ўручную
If the radio-controlled time signal is weak or unavailable, you can set the time manually:
- Націсніце і ўтрымлівайце НАБОР кнопку, пакуль не пачнуць міргаць лічбы гадзін.
- Выкарыстоўвайце -/WEEK і +/ZONE кнопкі для рэгулявання гадзіны.
- Прэса НАБОР to confirm and move to minutes, then year, month, and day.
- Прэса НАБОР again to exit manual time setting.
7.2. Налада будзільнікаў (Будзільнік 1 і Будзільнік 2)
Гадзіннік мае два незалежныя будзільнікі.
- Націсніце РЭЖЫМ button once to display Alarm 1 time, or twice for Alarm 2 time. The corresponding alarm icon (e.g., A1) will flash.
- Пакуль адлюстроўваецца час будзільніка, націсніце і ўтрымлівайце НАБОР кнопку, пакуль не пачнуць міргаць лічбы гадзін.
- Выкарыстоўвайце -/WEEK і +/ZONE кнопкі для рэгулявання гадзіны.
- Прэса НАБОР для пацверджання і пераходу да хвілін. Адрэгулюйце хвіліны з дапамогай -/WEEK і +/ZONE.
- Прэса НАБОР яшчэ раз, каб пацвердзіць і выйсці з налады будзільніка.
- Каб уключыць/выключыць будзільнік, націсніце кнопку РЭЖЫМ button to display the desired alarm, then press the +/ZONE button. The alarm icon (bell) will appear/disappear on the display.
7.3. Функцыя паўтору будзільніка
When an alarm sounds, touch the Сенсарная вобласць датчыка або націсніце SNOOZE / LIGHT button (if available, otherwise use the touch sensor) to activate the snooze function. The alarm will pause for approximately 5 minutes and then sound again. To stop the alarm completely, press any other button.
7.4. Projection Function
The alarm clock can project the time, alarm times, or ambient temperature onto a wall or ceiling.
- Activate Projection: The projection is continuously active when powered by the AC adapter. If running on batteries, touch the Сенсарная вобласць датчыка for short-term projection.
- Адрэгулюйце кут праекцыі: Pivot the projection arm to direct the image to your desired location.
- Адрэгуляваць фокус: Выкарыстоўвайце Фокуснае кола on the projection arm to sharpen the projected image.
- Change Projected Content: Націсніце РЭЖЫМ button repeatedly to cycle through projecting Time, Alarm 1, Alarm 2, or Temperature.
- Павярнуць праекцыю: Націсніце РАКАЦЫЯ button to rotate the projected image by 90-degree increments (4 orientations available).

Time projected onto a surface.
7.5. Падсвятленне дысплея
When powered by the AC adapter, the display backlight is continuously on. When running on batteries, touch the Сенсарная вобласць датчыка to activate the backlight for a few seconds.
7.6. USB Charging Output
The USB-A port on the back of the unit provides a 5V, 800mA output for charging small electronic devices like smartphones or tablets. Connect your device's USB charging cable to this port.
8. Тэхнічнае абслугоўванне
- Уборка: Працірайце прыладу мяккай сухой тканінай. Не выкарыстоўвайце абразіўныя ачышчальнікі або растваральнікі.
- Замена батарэі: If using batteries for backup, replace them annually or when the display becomes dim during power outages. Ensure correct polarity.
- захоўванне: Калі прылада захоўваецца працяглы час, выміце батарэйкі, каб прадухіліць уцечку.
9. Выпраўленне непаладак
| праблема | Магчымая прычына | Рашэнне |
|---|---|---|
| Дысплей пусты або цьмяны. | No power, dead batteries, or AC adapter not connected. | Ensure AC adapter is securely connected. Replace batteries if using for backup. |
| Radio-controlled time not synchronizing. | Weak signal, interference, or incorrect time zone. | Move the clock to a window or open area. Avoid electronic devices. Manually set time if necessary. Check time zone setting. |
| Projection is blurry. | Фокус не адрэгуляваны. | Адрэгулюйце Фокуснае кола on the projection arm. |
| Сігналізацыя не гучыць. | Сігналізацыя не ўключана або настроена няправільна. | Ensure the alarm icon is visible on the display. Recheck alarm time settings. |
| Зарадка ад USB не працуе. | Device not properly connected, or device requires more power than 800mA. | Ensure the USB cable is securely connected. Check if your device's charging requirements exceed 5V/800mA. |
10. Тэхнічныя характарыстыкі

Памеры вырабу.
- Нумар мадэлі: 373928
- Памеры (Д х Ш х У): 15 x 3.81 x 9.5 cm (approx. 15l x 9.5H centimeters)
- матэрыял: Пластыкавыя
- Тып дысплея: Лічбавы ВК
- Крыніца харчавання: AC Adapter (included) or Batteries (included)
- Выхад USB: 5 В, 800 мА
- Асаблівасці: Adjustable brightness, Snooze, Projection, Radio-controlled time
- Тып руху: Кварц
- Тып мацавання: Стальніца
- Выкарыстанне ў памяшканні/на вуліцы: У памяшканні
11. Гарантыя і падтрымка
This Crivit Auriol Projection Alarm Clock comes with a standard manufacturer's warranty. Please refer to the warranty card included in your package or contact your retailer for specific warranty terms and conditions.
For technical support or inquiries, please contact the customer service department of your retailer or the Crivit support line as indicated on the product packaging or official webсайт.