
1. Уводзіны
This manual provides detailed instructions for the installation, operation, and maintenance of your OLONETO 100A Solar Charge Controller. This device is designed to manage power flow from your solar panel to your battery bank and DC loads, ensuring efficient charging and protection for your battery system. It supports 12V, 24V, 36V, and 48V battery systems with automatic voltagідэнтыфікацыя.
Note: This controller utilizes a combination of MPPT and PWM charging technologies. It is not a 100% true MPPT controller.
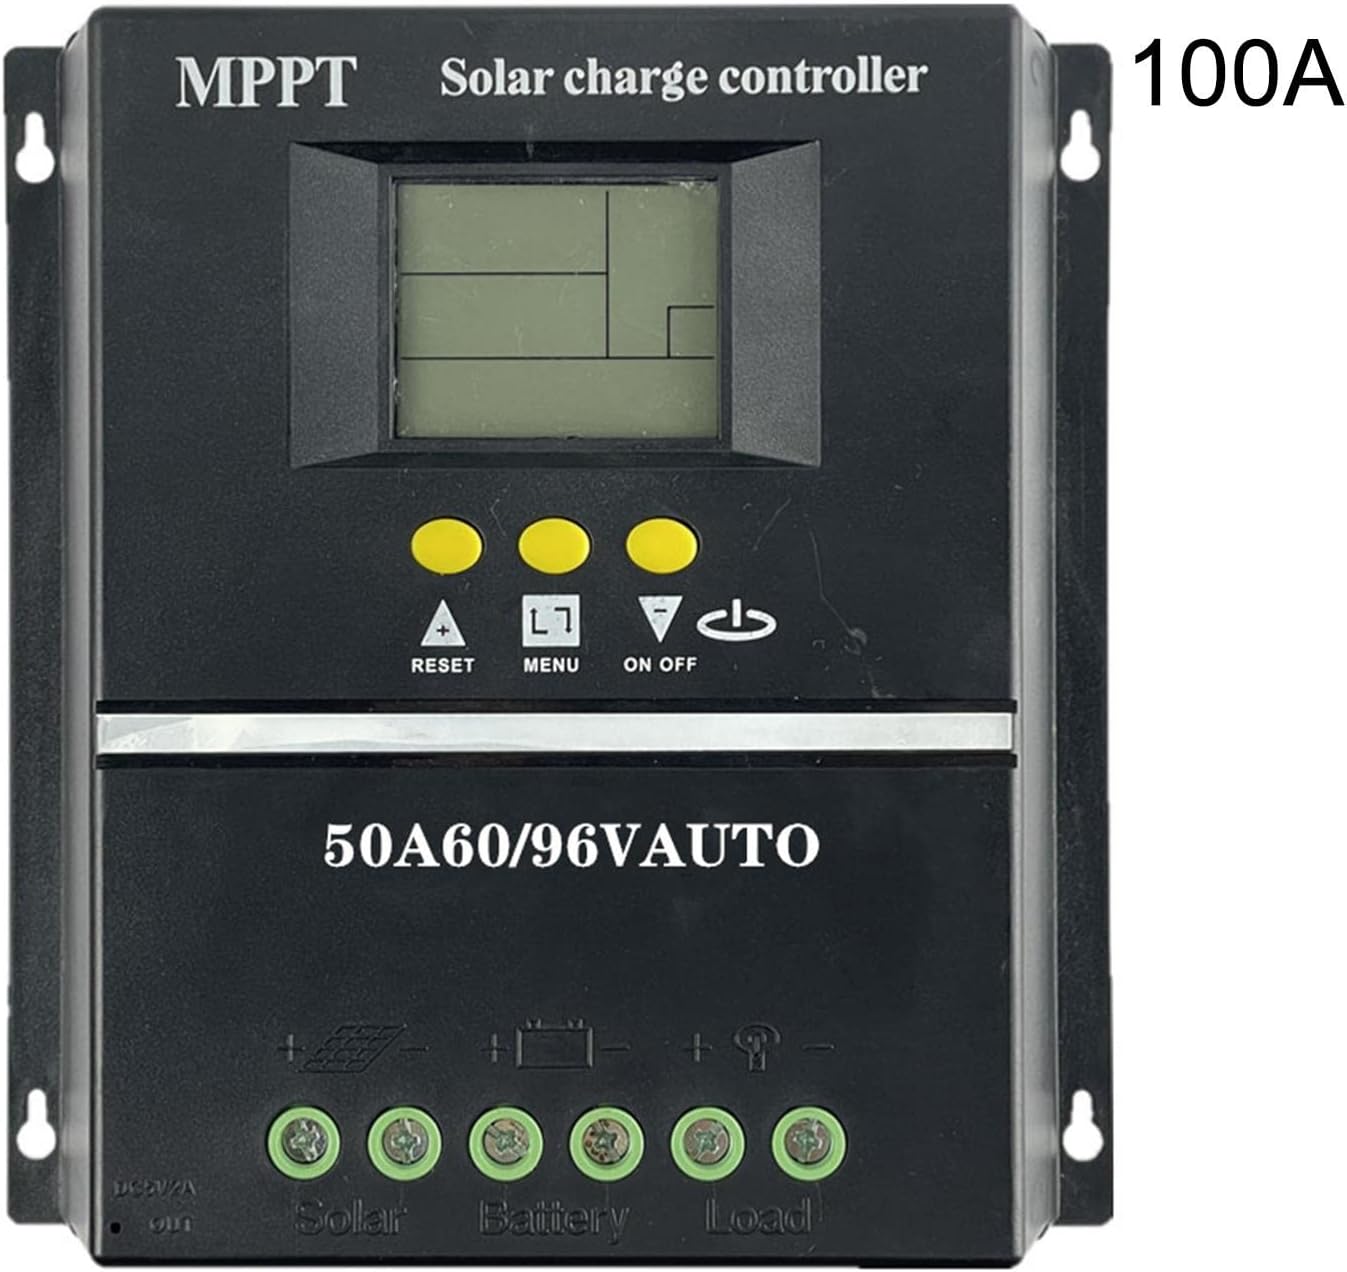
Малюнак 1: Спераду view of the OLONETO 100A Solar Charge Controller, showing the LCD display, control buttons, and connection terminals. The "100A" rating is visible on the top right.
2. Інструкцыі па тэхніцы бяспекі
- Ensure all connections are tight and correct to prevent damage to the controller or other components.
- Always connect the battery to the controller першы, and then connect the solar panel. Disconnect in the reverse order: solar panel first, then battery. Failure to follow this sequence may damage the controller.
- Пераканайцеся, што аб'ём батарэіtage is sufficient for the controller to recognize the system voltage (e.g., >10V for 12V battery, >20V for 24V battery, >30V for 36V battery, >40V for 48V battery).
- Усталюйце кантролер у добра вентыляваным памяшканні, удалечыні ад прамых сонечных прамянёў, высокіх тэмператур і вільгаці.
- Do not attempt to repair or modify the controller yourself. Contact qualified personnel for service.
3. Асаблівасці прадукту
The OLONETO Solar Charge Controller offers several key features for efficient solar power management:
- Аўтаматычны Voltage Ідэнтыфікацыя: Automatically detects 12V, 24V, 36V, or 48V battery systems.
- ВК-дысплей: Provides real-time information on battery status, charging parameters, and load status.
- Двайны выхад USB: Convenient 5V output for charging mobile phones and other USB devices.
- Рэгуляваныя параметры: Allows users to customize charging and discharge settings.
- Smart Charge Management: Optimizes battery charging to prolong battery life.
- Ахова навакольнага асяроддзя: Designed with green environmental protection principles.
- Аўтаматычная факусоўка з адсочваннем MPPT: High charging efficiency with non-stop detection during charging and bidirectional focusing tracking.

Figure 2: Diagram illustrating key features of the solar charge controller, including LCD display for battery power supply voltage, smart charge capabilities, 5V USB output, adjustable parameters, and green environmental protection.

Figure 3: Image highlighting the automatic focusing MPPT tracking feature, which ensures high charging efficiency and continuous detection during the charging process.
4. Настройка і ўстаноўка
4.1 Паслядоўнасць падключэння
- Падключыце акумулятар: Падключыце акумулятар да клем кантролера. Забяспечце правільную палярнасць (+ да + і - да -). Кантролер аўтаматычна вызначыць узровень зараду акумулятара.tage.
- Падключыце сонечную панэль: Connect the solar panel to the controller's solar panel terminals. Ensure correct polarity.
- Падключыце нагрузку пастаяннага току (неабавязкова): Падключыце нагрузкі пастаяннага току да клем нагрузкі кантролера. Забяспечце правільную палярнасць.
Important: Always follow this connection order: Battery → Solar Panel → Load. To disconnect, follow the reverse order: Load → Solar Panel → Battery.
4.2 Recommended Solar Panel Voltage
- Для 12В battery systems: Use a solar panel with approximately 18В выхад.
- Для 24В battery systems: Use a solar panel with approximately 30-37В выхад.
- Для 36В battery systems: Use a solar panel with approximately 45-55В выхад.
- Для 48В battery systems: Use a solar panel with approximately 60-72В выхад.
4.3 Электронныя схемы

Figure 4: Basic wiring diagram showing connections for the solar panel, battery, and DC loads to the controller. Ensure positive (+) and negative (-) terminals are correctly matched.

Figure 5: Detailed wiring diagram illustrating connections for the solar panel, battery, DC load, and the integrated USB output for charging external devices.
5. Інструкцыя па эксплуатацыі
5.1 Пачатковае ўключэнне і адлюстраванне
Once the battery is connected, the controller's LCD display will power on, showing current system parameters. The controller automatically identifies the battery voltage (12 В, 24 В, 36 В або 48 В).
5.2 Функцыі кнопак
- ▲ (Up/Reset): Used to increase values during setting, or as a reset function.
- МЕНЮ: Used to navigate through display screens and enter/exit setting modes.
- ▼ (Down/On/Off): Used to decrease values during setting, or to toggle the DC load on/off.
5.3 Зарадка Voltage Налады
To adjust charging parameters:
- After connecting the battery, ensure the clock is set and saved (see 5.4 Clock Setting).
- Націсніце і ўтрымлівайце кнопку "▲" button for 3-5 seconds. The screen will display "L**V" (floating charging voltagе).
- Выкарыстоўвайце "▼" button to adjust the floating charging voltage.
- Briefly press "▲" again. The screen will display "H**V" (boost charging voltagе).
- Выкарыстоўвайце "▼" button to adjust the boost charging voltage.
- Briefly press "▲" again. The screen will display "F**V" (low-voltage адсячэнне выпtage for DC load).
- Выкарыстоўвайце "▼" button to adjust the low-voltage адсячэнне выпtage.
- After making all desired adjustments, press and hold the "▲" button for 3-5 seconds to save the settings and exit.
5.4 Налада гадзінніка
To set the internal clock:
- Пераканайцеся, што акумулятар падключаны.
- Націсніце кнопку "▲"ці"▼" buttons to navigate to the clock setting interface.
- Выкарыстоўвайце "▲" і "▼" buttons to adjust the time.
- Briefly press the "MENU" button (represented as "□" in some descriptions) to save the clock setting.
5.5 Load Protection Voltage Даведка
The following are typical battery charging voltages for different system voltages:
- Пры выкарыстанні а 12В battery, the battery charging voltage is typically 13.7В.
- Пры выкарыстанні а 24В battery, the battery charging voltage is typically 27.4В.
- Пры выкарыстанні а 36В battery, the battery charging voltage is typically 41.1В.
- Пры выкарыстанні а 48В battery, the battery charging voltage is typically 54.8В.
6. Тэхнічнае абслугоўванне
- Рэгулярны агляд: Перыядычна правярайце ўсе злучэнні правадоў на надзейнасць і наяўнасць карозіі.
- Чысціня: Трымайце кантролер чыстым і без пылу і смецця. Выкарыстоўвайце для чысткі сухую тканіну.
- Вентыляцыя: Ensure the installation area remains well-ventilated to prevent overheating.
- Зарад батарэі: Сачыце за станам і ёмістасцю акумулятараtage regularly to ensure optimal system performance.
7. Выпраўленне непаладак
| праблема | Магчымая прычына | Рашэнне |
|---|---|---|
| Дысплей кантролера выключаны. | Акумулятар не падключаны або зарад батарэіtagе занадта нізка. | Connect battery or ensure battery voltage is above minimum threshold (e.g., >10V for 12V system). |
| No charging from solar panel. | Solar panel not connected, incorrect polarity, or insufficient sunlight. | Check solar panel connections and polarity. Ensure adequate sunlight. |
| тtage identification error. | Акумулятар абtage was too low when connected initially. | Пераканайцеся, што батарэя voltage is above the minimum threshold before connecting to the controller. Disconnect and reconnect the battery. |
| DC load not working. | Load is off, incorrect wiring, or battery voltage is below low-voltagе адсячэнне. | Check load connection and polarity. Press the "▼" button to toggle load. Check battery voltage and adjust low-voltage cut-off if necessary. |
8. Тэхнічныя характарыстыкі
| Параметр | Каштоўнасць |
|---|---|
| мадэль | 100А |
| Марка | OLONETO |
| Сістэма Voltage | Аўтаматычны 12В/24В/36В/48В |
| Тэхналогія зарадкі | MPPT/PWM Hybrid |
| USB выхад | Dual USB, 5V |
| Вага прадмета | 200 грам |
| Памеры (прыбл.) | 190 мм (7.48 цалі) x 180 мм (7.08 цалі) |

Figure 6: Physical dimensions of the solar charge controller, showing approximate measurements of 190mm (7.48 inches) in width and 180mm (7.08 inches) in height.
9. Гарантыя і падтрымка
Каб атрымаць інфармацыю аб гарантыі і тэхнічнай падтрымцы, звярніцеся да дакументацыі, якая пастаўляецца з пакупкай, або звярніцеся да прадаўца. Захоўвайце пацвярджэнне пакупкі для любых гарантыйных прэтэнзій.