Прадукт скончаныview
The ViaBecs Android 13 Car Stereo is designed to enhance your driving experience with advanced features and seamless integration. This unit features a 10.2-inch QLED HD touch screen, powerful hardware, and comprehensive connectivity options.

Image: ViaBecs Android 13 Car Stereo displaying the Apple CarPlay interface.
Важная інфармацыя па бяспецы
- Professional installation is highly recommended to ensure proper function and avoid damage to your vehicle.
- Always disconnect the vehicle's battery before beginning installation to prevent electrical shorts or injury.
- Не карыстайцеся прыладай такім чынам, каб гэта адцягвала вас ад кіравання. Заўсёды надавайце прыярытэт бяспецы дарожнага руху.
- Ensure all wiring is properly insulated and secured to prevent interference or damage.
Змест пакета
Праверце, ці ўсе пералічаныя ніжэй прадметы ўваходзяць у вашу ўпакоўку:
- 1 x Apple Play Car Stereo
- 1 x Plug and Play Harness
- 1 х радыёадаптар
- 1 х RCA аўдыякабель
- 1 x Camera and WiFi Port Cable
- 1 x Extra Microphone
- 1 х GPS антэна
- 1 х 4G антэна
- 2 х USB-кабель
- 1 х Кіраўніцтва карыстальніка
Тэхнічныя характарыстыкі
System & Performance
- сістэма: Android 13
- Працэсар: Built-in UIS7862 Octa-core (2 x Cortex-A75 + 6 x Cortex-A55 @ 2.0 GHz)
- Аператыўная памяць: 6 ГБ
- ПЗУ: 128 ГБ
- Bluetooth: 5.0
- Дысплей: 10.2 inch IPS Screen, 1280 x 720 resolution
- Аўдыё Ampпадпітка: TDA7851
- Максімальная выхадная магутнасць: 50W х 4
Агульныя характарыстыкі
- Digital Media Receiver with AM/FM Tuner (RDS)
- Handsfree Bluetooth audio calling and streaming
- Сумяшчальны з Apple CarPlay (бесправадная сувязь)
- Compatible with Android Auto (Wired and Wireless)
- Падтрымка кіравання на рулі (SWC)
- Built-in DSP with 48-Band Parametric Equalizer and Time Correction
- Support WiFi / 4G internet (SIM card slot included)
Audio/Video & Expansion
- Аўдыё фарматы: MP3, ACC, FLAC, WAV, M4A, MP2, ARM, OGG
- Фарматы відэа: MP4, 3GP, AVI, DVIX, FLV, MKV
- Уваходы: 2 USB Ports, 2 AUX Ports, 1 Rear View Camera Harness, External MIC Port, 1 SIM card slot
- Выхады: 3-канальны прэamp outputs (2 front AUX, 1 subwoofer), 1 video output
Кіраўніцтва па ўстаноўцы
This unit is designed for plug-and-play installation in Toyota Highlander models from 2014-2019. It supports original features like the reverse camera, JBL Amplifier, steering wheel controls, USB & AUX inputs, parking sensors, and a 360-degree camera.
1. Падрыхтоўка да ўстаноўкі
- Пераканайцеся, што транспартны сродак выключаны, а акумулятар адключаны.
- Gather necessary tools: trim removal tools (often included), 10mm socket wrench, screwdriver.
- Protect your dashboard and screen with a soft cloth or foam during the process.
2. Remove Existing Radio Unit
Carefully remove the dashboard trim pieces surrounding the factory radio. Use trim removal tools to avoid scratching or damaging the plastic. Disconnect all wiring harnesses from the back of the factory radio and remove the unit.
Video: Detailed guide on removing the OEM radio and installing a new head unit.
3. Connect New Car Stereo
Connect the provided plug-and-play harness to your vehicle's existing wiring. Match the connectors carefully. Attach the GPS antenna, 4G antenna, and external microphone to the new head unit. Route the microphone cable to a suitable location (e.g., near the steering column or headliner) for optimal voice pickup.

Image: Comparison showing the factory radio before and the new Android 13 unit after installation in a Toyota Highlander.
Video: General instructions on how to connect a car stereo, including wiring harnesses.
4. Install Reverse Camera (Optional)
If installing an aftermarket reverse camera, connect its video output to the designated input on the head unit. Route the camera's power and video cables neatly through the vehicle's interior to the rear.
Video: Demonstration of connecting a car reversing camera cable.
5. Reassemble Dashboard
Carefully place the new head unit into the dashboard opening, ensuring all cables are tucked away and not pinched. Reattach the trim pieces, pressing firmly until they click into place. Reconnect the vehicle's battery.
Інструкцыя па эксплуатацыі
1. Пачатковае ўключэнне і налада
- After installation, turn on your vehicle's ignition. The head unit should power on automatically.
- Выконвайце падказкі на экране для пачатковай налады, у тым ліку выбару мовы і часавага пояса.
- Connect to a Wi-Fi network via your phone's hotspot or a dedicated SIM card for full functionality.

Image: The main interface of the Android 13 Car Stereo, showing various application icons.
2. Інтэграцыя са смартфонамі (CarPlay і Android Auto)
The head unit supports both Wireless Apple CarPlay and Wired/Wireless Android Auto. Connect your smartphone to access navigation, music, calls, and other apps directly on the car stereo screen.
- Бесправадны CarPlay: Ensure Bluetooth and Wi-Fi are enabled on your iPhone. Pair your iPhone with the head unit via Bluetooth, then follow the on-screen prompts to activate CarPlay.
- Android Auto: For wired connection, connect your Android phone via a USB cable. For wireless, ensure Bluetooth and Wi-Fi are enabled on your Android phone, pair via Bluetooth, and follow the prompts.
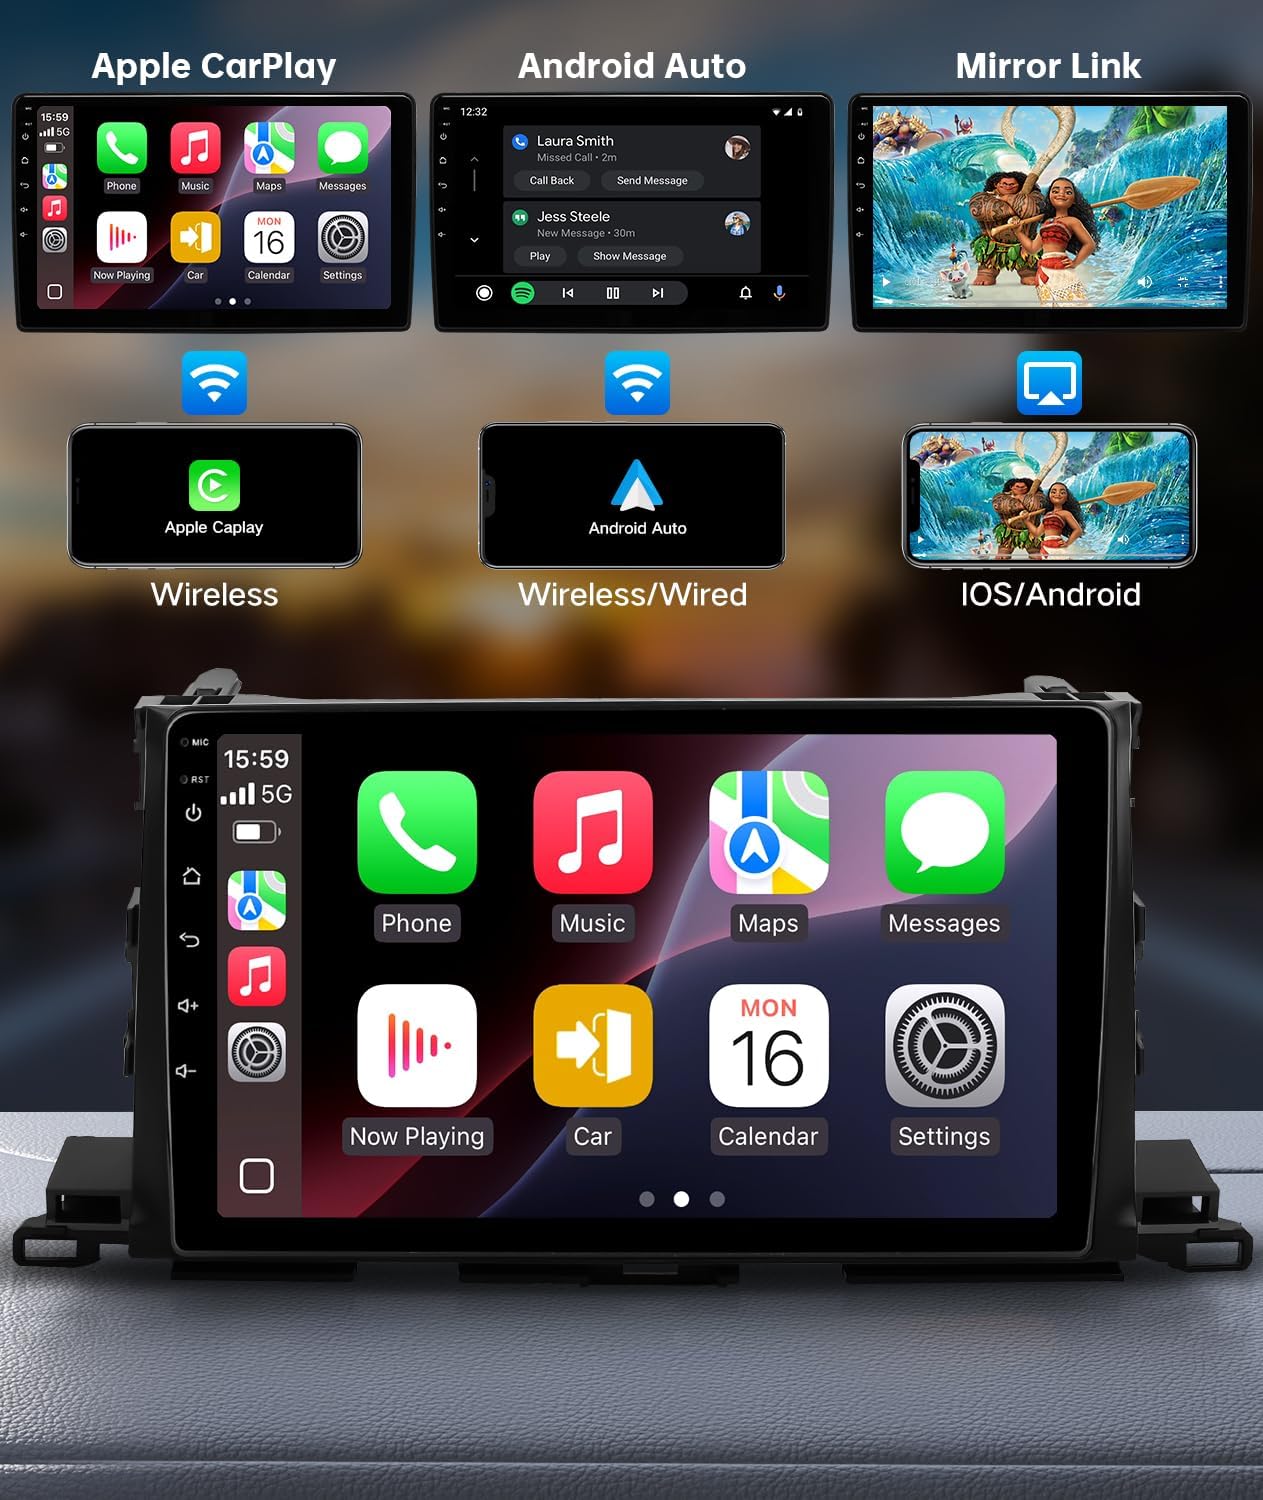
Image: Demonstrates the user interfaces for Apple CarPlay, Android Auto, and Mirror Link functionalities.
Відэа: Скончанаview of the Android Car Radio and CarPlay features, including the T10S-CA model.
3. Audio and Sound Customization
The built-in DSP (Digital Sound Processor) allows for extensive audio customization. Access the Equalizer settings to adjust sound profiles, bass, and other audio parameters.
- Эквалайзер: Navigate to the audio settings to find the 48-band parametric equalizer. Adjust frequencies to match your audio preferences.
- Bass Boost & Filters: Fine-tune bass levels and apply front/rear bass filters for enhanced sound.
- Аб'ёмны гук: Activate surround sound features for an immersive audio experience.

Image: The DSP equalizer interface and options for connecting to WiFi or 4G internet.
4. Элементы кіравання на рулі
The head unit supports seamless integration with your vehicle's steering wheel controls. This allows you to manage audio playback, calls, and other functions without taking your hands off the wheel, enhancing safety and convenience.
- Access the Steering Wheel Control settings in the system menu.
- Follow the on-screen instructions to map your vehicle's steering wheel buttons to the desired functions on the head unit.
Тэхнічнае абслугоўванне
- Ачыстка экрана: Use a soft, lint-free cloth to clean the touch screen. Avoid abrasive cleaners or harsh chemicals.
- Абнаўленні праграмнага забеспячэння: Periodically check for software updates via the system settings. Updates can improve performance and add new features.
- Кабельнае кіраванне: Ensure all cables are securely connected and not exposed to prevent damage or interference.
Ліквідацыю непаладак
- Прылада не ўключаецца: Check all power connections and ensure the vehicle's battery is properly connected. Verify the fuse for the radio.
- Няма гуку: Check speaker connections, amplifier settings (if applicable), and ensure the volume is not muted or too low. Verify audio output settings.
- CarPlay/Android Auto не падключаецца: Ensure Bluetooth and Wi-Fi are enabled on your phone and the head unit. Try restarting both devices. For wired connections, try a different USB cable.
- Экран не рэагуе: Perform a soft reset of the unit (refer to the device's specific reset procedure). If the issue persists, check for software updates.
- Дрэнная якасць мікрафона: Ensure the external microphone is properly connected and positioned optimally for voice pickup.

Image: The ultra-clear external microphone designed for clear call sound.
Гарантыя і падтрымка
The ViaBecs Android 13 Car Stereo comes with a 12-month warranty and professional technical support. For any questions or assistance, please contact ViaBecs customer service via the email provided on your After-sales card. We are committed to promptly addressing your inquiries and ensuring your satisfaction.