
1. Уводзіны
This manual provides detailed instructions for the safe installation, operation, and maintenance of your Living District Rohan 36-inch 6-Light Transitional Metal Chandelier. Please read all instructions carefully before beginning installation and retain this manual for future reference.
The Rohan chandelier features a satin gold finish and is designed to enhance various indoor spaces such as living rooms, dining rooms, and foyers. It accommodates six E12 candelabra-style bulbs (not included) and offers dimmable functionality.
2. Інфармацыя па бяспецы
WARNING: RISK OF ELECTRIC SHOCK. Ensure power is turned off at the main circuit breaker before installation or servicing.
- Always consult a qualified electrician for installation if you are unsure about the wiring process.
- This fixture is intended for indoor, dry location use only. Do not expose to moisture or water.
- Выкарыстоўвайце толькі лямпачкі з цокалем E12. Не перавышайце максімальную магутнасць.tage 40 Вт на лямпачку.
- Пераканайцеся, што ўсе злучэнні надзейныя і належным чынам ізаляваны.
- Do not hang anything from the fixture.
- Keep flammable materials away from the light bulbs.
3. Змесціва ўпакоўкі
Carefully unpack all components and inspect for any damage. Keep all packaging materials until you are satisfied with the product.
- Chandelier Frame (with 6 arms)
- 60-inch Matching Finish Chain
- Навес
- Камплект мантажнага абсталявання
- Кіраўніцтва па эксплуатацыі
Note: Light bulbs are not included and must be purchased separately.

Image 3.1: Complete Chandelier Fixture
4. Настройка і ўстаноўка
Follow these steps for proper installation. It is recommended to have two people for installation due to the size of the fixture.
4.1 Перад устаноўкай
- Выключыце харчаванне: Locate the circuit breaker that supplies power to the installation location and turn it off.
- Падрыхтуйце мантажную паверхню: Ensure the junction box is securely mounted and capable of supporting the chandelier's weight.
- Determine hanging height: The chandelier offers an adjustable hanging height from a minimum of 27 inches to a maximum of 81 inches. Adjust the 60-inch chain length as needed to achieve your desired height.

Image 4.1: Chandelier Chain and Rod Connection
4.2 Мантаж свяцільні
- Прымацуеце мантажны кранштэйн да размеркавальнай скрынкі з дапамогай шруб, якія ўваходзяць у камплект.
- Thread the electrical wires through the center of the chain and the canopy.
- Connect the chain to the chandelier's top rod and the mounting loop on the canopy.
- Праводка: Connect the fixture's wires to the house wires according to standard electrical codes (black to black, white to white, ground to ground). Use wire nuts to secure connections.
- Carefully push the wired connections into the junction box.
- Secure the canopy to the mounting bracket, ensuring it sits flush against the ceiling. The canopy dimensions are 1.5"H x 5.2"W x 5.2"D.
This chandelier can be installed on sloped ceilings, providing flexibility for various room designs.

Image 4.2: Chandelier Central Hub Detail
4.3 Bulb Installation
- Once the fixture is securely mounted and wired, screw six E12 base bulbs (not included) into the sockets.
- Ensure bulbs are fully seated but do not overtighten.
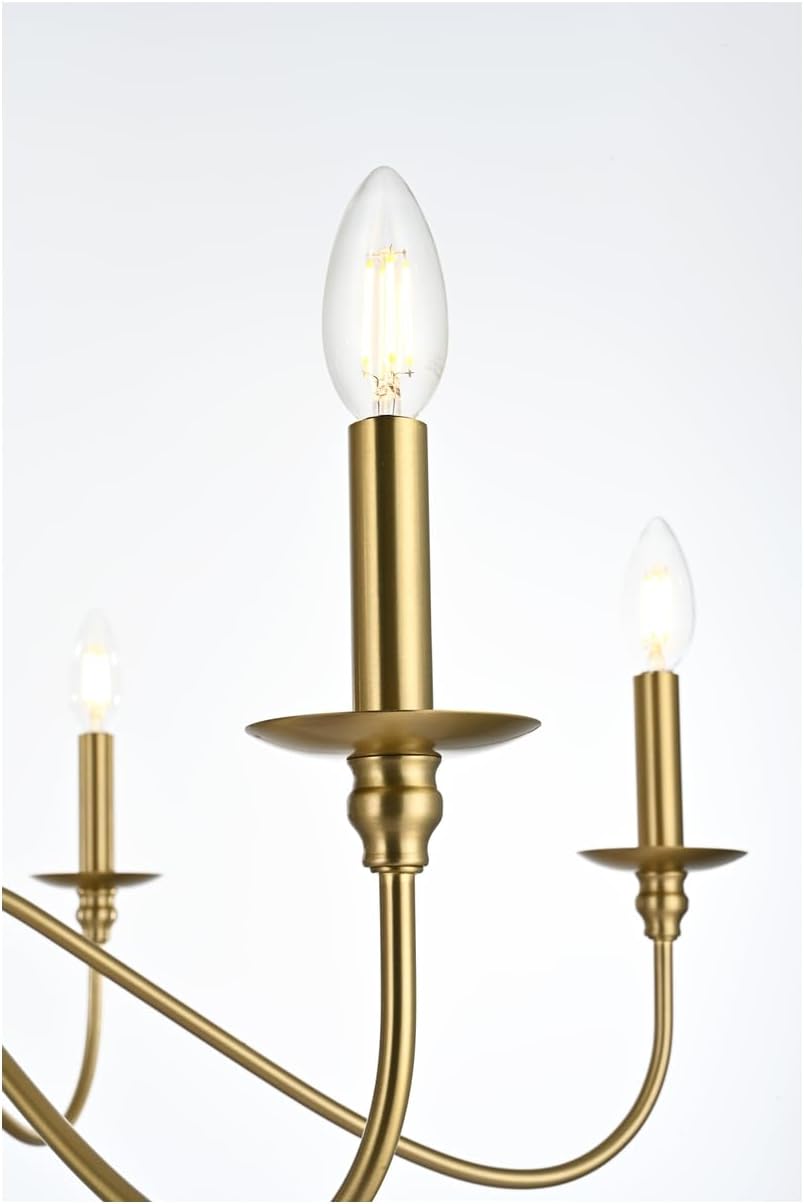
Image 4.3: Bulb Socket Detail
5. Інструкцыя па эксплуатацыі
After installation is complete and power is restored, your chandelier is ready for use.
- Уключэнне/выключэнне харчавання: Operate the chandelier using a standard wall switch.
- Функцыя рэгулявання яркасці: This chandelier is fully dimmable. To utilize this feature, ensure you are using dimmable E12 bulbs and have a compatible dimmer switch installed (sold separately).
- Кірунак святла: The light is directed upwards, providing ambient illumination.
6. Тэхнічнае абслугоўванне
Рэгулярны догляд дапаможа захаваць знешні выгляд і функцыянальнасць вашай люстры.
- Уборка: Адключыце сілкаванне перад чысткай. Працярыце прыбор мяккай сухой тканінай. Не выкарыстоўвайце абразіўныя ачышчальнікі або растваральнікі, бо яны могуць пашкодзіць пакрыццё.
- Замена лямпачкі: Ensure power is off and bulbs have cooled before replacing. Screw in new E12 bulbs, ensuring they do not exceed 40W each.
- агляд: Periodically check all connections and hanging components for tightness and wear.
7. Выпраўленне непаладак
Калі ў вас узніклі праблемы з люстрай, звярніцеся да наступных распаўсюджаных праблем і рашэнняў:
| праблема | Магчымая прычына | Рашэнне |
|---|---|---|
| Не гарыць святло | No power to fixture; Loose wiring; Faulty bulb; Faulty switch | Check circuit breaker; Verify wire connections; Replace bulb; Test switch |
| Мігцяць агні | Loose bulb; Incorrect bulb type for dimmer; Loose wiring | Tighten bulb; Ensure dimmable bulbs are used with dimmer; Check wiring connections |
| Гук гудзення | Несумяшчальны рэгулятар яркасці святла; няспраўная праводка | Replace dimmer with a compatible one; Check wiring connections |
Калі праблема не знікне пасля спробы гэтых рашэнняў, звярніцеся ў службу падтрымкі кліентаў або да кваліфікаванага электрыка.
8. Тэхнічныя характарыстыкі
| Асаблівасць | Дэталь |
|---|---|
| Нумар мадэлі | LD5006D36SG |
| Марка | Living District |
| Матэрыял | Метал (жалеза) |
| Скончыць | Атласнае золата |
| Памеры (прыстасаванне) | 36" Ш х 36" Г х 19" В |
| Памеры навеса | 5.2" Ш х 5.2" Г х 1.5" В |
| Рэгуляваная вышыня падвескі | ад 27 да 81 цаляў |
| Даўжыня ланцуга | 60" |
| Даўжыня провада | 79" |
| Колькасць агнёў | 6 |
| Падстава лямпачкі | E12 (кандэлябр) |
| Макс Ватtage (на лямпачку) | 40 Вт |
| тtage | 110 В - 125 В |
| Зацямняецца | Так (з сумяшчальнымі лямпачкамі і рэгулятарам яркасці) |
| Рэйтынг месцазнаходжання | Сухое размяшчэнне |
| Вага прадукту | 6 lbs (fixture only) / 16 ounces (item weight from spec, likely package weight) |
| UPC | 196683014950 |
9. Гарантыя і падтрымка
This Living District Rohan Chandelier comes with a 1-гадовая абмежаваная гарантыя з дня пакупкі. Гэтая гарантыя распаўсюджваецца на дэфекты матэрыялаў і вырабу пры звычайным выкарыстанні.
For warranty claims, technical assistance, or missing parts, please contact Living District customer support. Refer to your purchase documentation or the Living District webсайт для атрымання актуальнай кантактнай інфармацыі.
Калі ласка, захавайце пацвярджэнне пакупкі для пацверджання гарантыі.