Geek Smart L7
Geek Smart L7 Robot Vacuum and Mop User Manual
Мадэль: L7
1. Уводзіны
Thank you for choosing the Geek Smart L7 Robot Vacuum and Mop. This device is designed to provide efficient and thorough cleaning for your home, combining powerful vacuuming with intelligent mopping capabilities. Featuring advanced LDS navigation, Wi-Fi connectivity, and smart app control, the L7 ensures a customized cleaning experience for various floor types, including carpets and hard floors.
This manual provides essential information for the safe operation, setup, maintenance, and troubleshooting of your robot vacuum. Please read it carefully before use and retain it for future reference.
2. Інструкцыі па тэхніцы бяспекі
To reduce the risk of injury or damage, read and follow all safety precautions when setting up, using, and maintaining your robot vacuum.
- Гэтым прыборам могуць карыстацца дзеці ва ўзросце ад 8 гадоў і асобы з паніжанымі фізічнымі, сэнсарнымі або разумовымі здольнасцямі або з адсутнасцю вопыту і ведаў, калі яны знаходзяцца пад наглядам або атрымалі інструкцыі адносна бяспечнага выкарыстання прыбора і разумеюць звязаныя з гэтым небяспекі .
- За дзецьмі трэба сачыць, каб яны не гулялі з прыборам.
- Чыстка і абслугоўванне карыстальнікам не павінны праводзіцца дзецьмі без нагляду.
- Выкарыстоўвайце толькі арыгінальны адаптар сілкавання, прадастаўлены вытворцам.
- Не выкарыстоўвайце робата ў месцах з адкрытым агнём або лёгкаўзгаральнымі матэрыяламі.
- Трымайце валасы, свабодную вопратку, пальцы і ўсе часткі цела далей ад адтулін і рухомых частак.
- Do not operate the robot in rooms where an infant or child is sleeping.
- Не выкарыстоўвайце робата для збору буйнога смецця, вадкасцей або падпаленых прадметаў.
- Ensure the robot is placed on a stable surface and cannot fall from high places.
- Turn off the robot and unplug the charging dock before cleaning or maintenance.
3. Змесціва ўпакоўкі
Пры распакаванні пераканайцеся, што ўсе кампаненты наяўныя і знаходзяцца ў добрым стане.
- Geek Smart L7 Robot Vacuum and Mop
- Док-станцыя для зарадкі
- Адаптар сілкавання
- Бакавыя шчоткі (2 пары)
- Галоўная шчотка
- Dust Bin (680ML)
- 2-in-1 Water Tank & Dust Bin (350ML water tank & 260ML dust bin)
- Швабры (2)
- High-Efficiency Filter (pre-installed in dust bin)
- Інструмент для ачысткі
- Кіраўніцтва карыстальніка
4. Прадукт скончыўсяview
Кампаненты робата-пыласоса

Image: The Geek Smart L7 Robot Vacuum, showcasing its top view with control buttons, LDS sensor, and accompanying accessories like the charging dock and replacement filters.
- LDS Navigation Sensor: Located on top, for precise mapping and navigation.
- Кнопкі кіравання: Power/Clean, Home/Recharge.
- Пярэдні бампер: Выяўляе перашкоды.
- Бакавыя шчоткі: Змятайце смецце ў галоўную сцежку шчоткі.
- Асноўная шчотка: Збірае бруд і смецце.
- Вядучыя колы: Дазваляюць рухацца па розных паверхнях.
- Кантакты для зарадкі: Падключыцеся да зараднай док-станцыі.
- Пыласборнік / Рэзервуар для вады: Removable compartments for dust collection and water for mopping.
Док-станцыя для зарадкі
The charging dock provides power to recharge the robot's battery. It should be placed in an open area with sufficient clearance.
5. Настройка
5.1 Размяшчэнне зараднай док-станцыі
- Размясціце зарадную док-станцыю каля сцяны на адкрытай прасторы.
- Пераканайцеся, што па абодва бакі ад док-станцыі ёсць не менш за 0.5 метра (1.6 фута) вольнай прасторы, а спераду — 1.5 метра (4.9 фута).
- Падключыце адаптар сілкавання да зараднай станцыі і ўстаўце яго ў разетку.
- Ensure the power indicator on the charging dock illuminates.
5.2 Першапачатковая зарадка
- Змесціце робата на зарадную док-станцыю, пераканаўшыся, што кантакты зарадкі супадаюць.
- The robot will automatically begin charging. Allow it to fully charge before its first use (approximately 4-5 hours).
5.3 Падключэнне і адлюстраванне праграм

Image: The Geek Smart L7 Robot Vacuum actively scanning its environment using LDS navigation to create a detailed map, with digital map representations floating above it.
- Download the Geek Smart app from your mobile device's app store (available for iOS and Android).
- Зарэгіструйце ўліковы запіс і ўвайдзіце ў сістэму.
- Follow the in-app instructions to add your L7 robot vacuum. This typically involves connecting to the robot's Wi-Fi hotspot and then connecting the robot to your home Wi-Fi network.
- Once connected, initiate a full cleaning cycle. The robot will use its LDS navigation to create an accurate map of your home. This map will be saved in the app for future use, allowing for features like selective room cleaning and setting no-go zones. The robot can save up to 5 different maps.
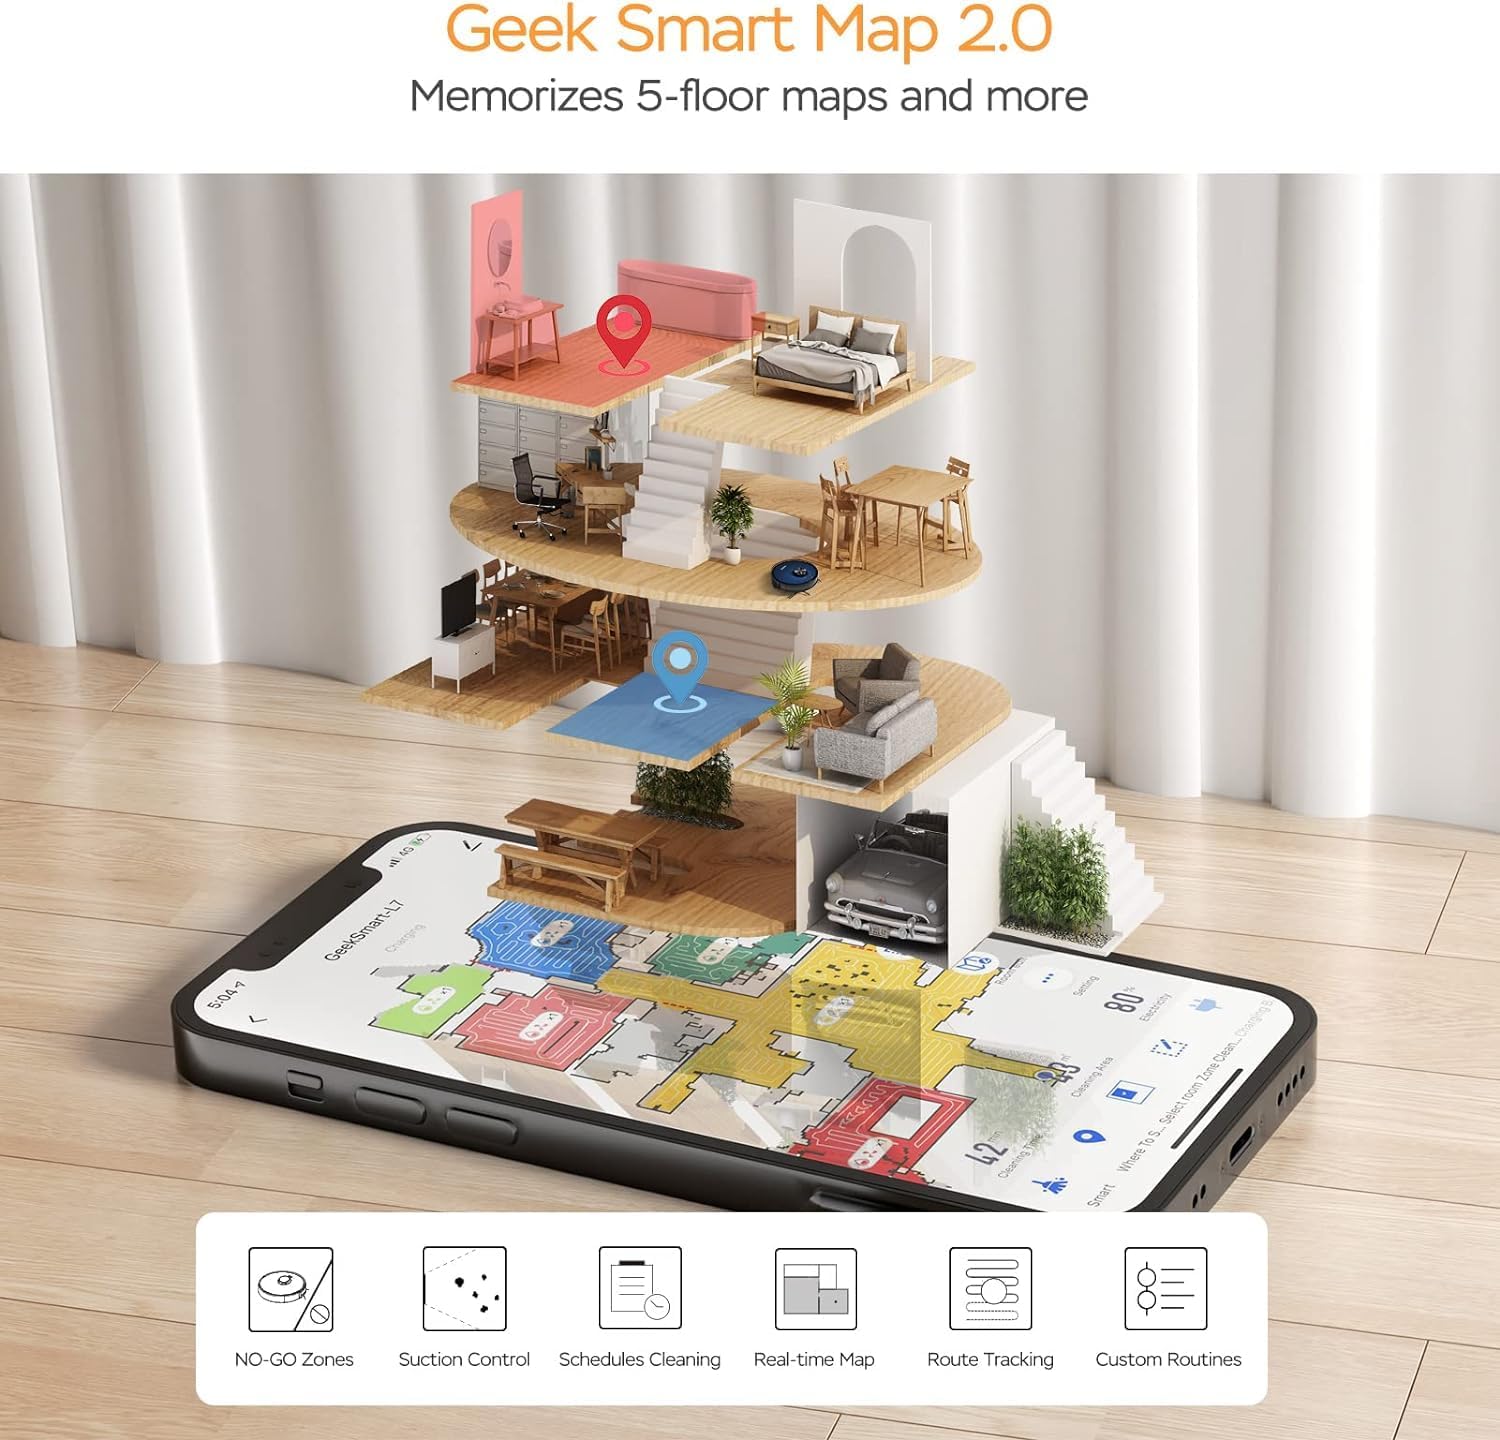
Image: A smartphone screen displaying the Geek Smart app interface, showing a color-coded floor plan map with various cleaning zones and controls.
6. Інструкцыя па эксплуатацыі
6.1 Запуск і спыненне ўборкі
- Пачаць ачыстку: Press the Power/Clean button on the robot or tap "Start Cleaning" in the app. The robot will begin a full cleaning cycle.
- Прыпыніць уборку: Press the Power/Clean button during operation or tap "Pause" in the app.
- Рэзюмэ ўборкі: Press the Power/Clean button again or tap "Resume" in the app.
- Вяртанне ў док: Press the Home/Recharge button on the robot or tap "Recharge" in the app. The robot will return to its charging dock.
6.2 Рэжымы ачысткі
The L7 offers various cleaning modes to suit different needs.

Image: The Geek Smart L7 Robot Vacuum demonstrating its 2-in-1 sweeping and mopping capabilities on a hard floor, with debris being swept and a damp mop trail visible.
- Аўтаматычная ачыстка: The robot intelligently plans its cleaning path using LDS navigation.
- пыласосіць: Utilizes up to 2700Pa suction power to clean dirt and debris from various surfaces.
- Мыццё мыцця: Attach the mop cloth and fill the 2-in-1 water tank. The electronic water tank allows for adjustable water output.
- Пыласос і швабра (адначасова): The robot can vacuum and mop simultaneously when the 2-in-1 tank is installed.
- Рэжым павышэння ўзроўню дывана: The robot automatically increases suction power when it detects carpeted areas for deeper cleaning.

Image: The Geek Smart L7 Robot Vacuum actively cleaning a hard floor, with a visual representation of its powerful 2700Pa suction lifting debris.

Image: The Geek Smart L7 Robot Vacuum transitioning from a hard floor to a carpet, illustrating its Carpet Boost Mode with enhanced suction indicated by glowing lines.

Image: The Geek Smart L7 Robot Vacuum positioned on a floor split between marble and wood, illustrating its integrated mopping system and adjustable water output for different surfaces.
6.3 Функцыі кіравання праграмамі
The Geek Smart app unlocks advanced cleaning customization.
- Выбарчая ўборка нумароў: Choose specific rooms or areas on the map for cleaning.
- No-Go Zones / No-Mop Zones: Draw virtual boundaries on the map to prevent the robot from entering certain areas or mopping carpets.
- Invisible Walls: Create virtual walls to restrict the robot's movement.
- Планаванне: Set cleaning schedules for automatic operation at desired times.
- Рэгуляванне магутнасці ўсмоктвання: Manually adjust the suction level.
- Water Output Adjustment: Control the water flow for mopping.

Image: The Geek Smart L7 Robot Vacuum operating quietly (65dB) in a living room, demonstrating its low noise level suitable for homes with sleeping individuals or pets.
7. Тэхнічнае абслугоўванне
Regular maintenance ensures optimal performance and extends the lifespan of your robot vacuum. Always turn off the robot and unplug the charging dock before performing any maintenance.
7.1 Апаражненне пылазборніка
- Націсніце кнопку вызвалення пылазборніка і выцягніце яго.
- Open the dust bin cover and empty the contents into a trash can.
- Clean the filter and dust bin with the provided cleaning tool or a soft brush.
- Зноў усталюйце кантэйнер для смецця.
7.2 Cleaning the 2-in-1 Water Tank & Dust Bin
- Remove the 2-in-1 tank from the robot.
- Empty any remaining water from the water tank compartment.
- Апусцеце адсек для пылу і ачысціце фільтр.
- Rinse the water tank compartment with clean water. Do not immerse the entire tank in water, especially the electronic components.
- Allow all parts to air dry completely before reassembling and reinstalling.
7.3 Чыстка галоўнай шчоткі
- Flip the robot over and press the release tabs to remove the main brush cover.
- Выміце асноўную шчотку.
- Use the cleaning tool to remove hair and debris tangled around the brush and its bearings.
- Зноў усталюйце галоўную шчотку і вечка.
7.4 Чыстка бакавых шчотак
- Акуратна пацягніце бакавыя шчоткі ўверх, каб зняць іх.
- Remove any hair or debris. If brushes are bent, soak them in warm water for a few minutes to reshape.
- Press the brushes back into place until they click.
7.5 Ачыстка датчыкаў і зарадных кантактаў
- Use a clean, dry cloth to wipe the cliff sensors (located on the bottom of the robot), wall sensors (on the side), and the charging contacts on both the robot and the charging dock.
- Ensure the LDS sensor on top is also clean and free of obstructions.
8. Выпраўленне непаладак
If you encounter issues with your robot vacuum, refer to the following table for common problems and solutions.
| праблема | Магчымая прычына | Рашэнне |
|---|---|---|
| Робат не ўключаецца | Нізкі зарад батарэі; Выключальнік харчавання | Place robot on charging dock; Ensure power switch is on. |
| Робат не можа зараджацца | Зарадныя кантакты забруджаныя; зарадная док-станцыя не працуе | Clean charging contacts on robot and dock; Ensure dock is plugged in. |
| Робат часта захрасае | Перашкоды на падлозе; датчыкі перападу абрыву забруджаныя | Clear cables and small objects; Clean cliff sensors. |
| Дрэнная прадукцыйнасць ачысткі | Пылазборнік поўны; шчоткі заблыталіся; фільтр забіты | Ачысціце пылазборнік; ачысціце асноўную і бакавыя шчоткі; ачысціце або заменіце фільтр. |
| Функцыя мыцця падлогі не працуе | Water tank empty; Mop cloth dry; Water outlet clogged | Fill water tank; Moisten mop cloth; Clean water outlet. |
| Праблемы з падключэннем праграмы | Incorrect Wi-Fi password; Router too far; Robot offline | Verify Wi-Fi credentials; Move robot closer to router; Restart robot and router. |
9. Тэхнічныя характарыстыкі
| Асаблівасць | Спецыфікацыя |
|---|---|
| Марка | Geek Smart |
| Назва мадэлі | L7 |
| Тып навігацыі | 360° лідарны агляд |
| Максімальная магутнасць ўсмоктвання | 2700 Па |
| Ёмістасць батарэі | 2600 мАг |
| Максімальны час выканання | 130 хвілін |
| Ёмістасць пылазборніка | 680 мл |
| Water Tank Capacity (2-in-1) | 350 мл |
| Узровень шуму | Sub-65 dB |
| Памеры прадукту | 12.59 см Д х 12.59 см Ш х 3.74 см В |
| Вага прадмета | 13.39 фунта |
| Сумяшчальныя прылады | Amazon Echo |
| UPC | 764773837187 |
10. Гарантыя і падтрымка
Geek Smart products are manufactured to the highest quality standards. For warranty information, technical support, or customer service inquiries, please refer to the contact information provided on the product packaging or visit the official Geek Smart webсайт.
Калі ласка, захавайце доказы пакупкі для прэтэнзій па гарантыі.