1. Уводзіны і большview
This manual provides essential instructions for the safe and efficient use of your Maxcom MM135L Basic Mobile Phone. The MM135L is designed for straightforward communication, featuring a user-friendly interface, large keys, and a 1.77-inch screen. It supports 2G networks and includes dual SIM capability, an SOS button for emergencies, and convenient USB-C charging. Please read this manual thoroughly before operating the device.
2. Змесціва ўпакоўкі
Праверце наяўнасць усіх прадметаў у камплекце:
- Maxcom MM135L Mobile Phone
- Battery (Lithium-Ion, 600 mAh)
- Кабель USB
- Выцягвальнік латка для SIM-карты
- Кіраўніцтва карыстальніка (гэты дакумент)
3. Схема прылады
Familiarize yourself with the physical components of your Maxcom MM135L phone.
Малюнак 3.1: Задняя частка view of the Maxcom MM135L phone, showing the blue textured back cover, Maxcom logo, and speaker grille at the top.

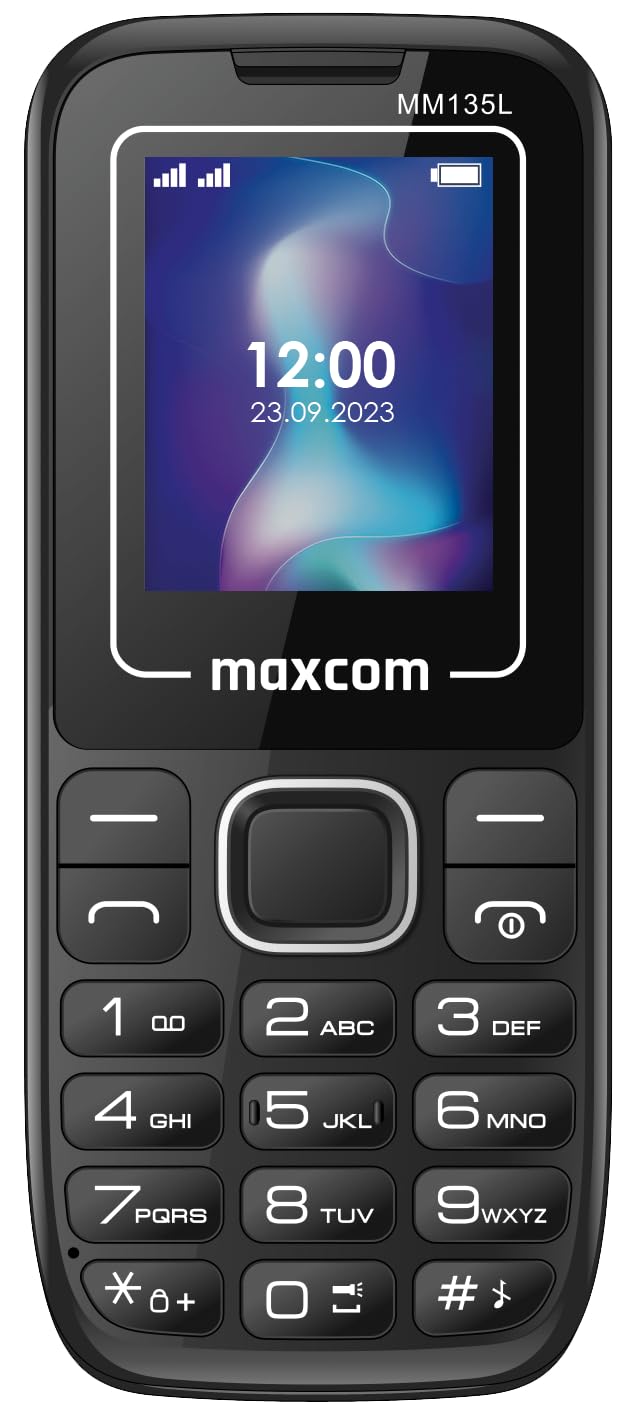
Малюнак 3.2: Спераду view of the Maxcom MM135L phone, displaying the screen, large numeric keypad, and call/end buttons.

Figure 3.3: Bottom edge of the phone, featuring the USB-C charging port and a 3.5mm headphone jack.

Figure 3.4: Top edge of the phone, highlighting the integrated flashlight.
Ключавыя кампаненты:
- Экран дысплея: 1.77-inch LCD for clear text and call information.
- Лічбавая клавіятура: Large, tactile buttons for easy dialing and texting.
- Call/End Buttons: Dedicated buttons for managing calls.
- Клавішы навігацыі: Для навігацыі па меню.
- Кнопка SOS: Located on the rear for emergency calls (refer to Figure 3.1).
- Ліхтарык: Integrated at the top of the device (refer to Figure 3.4).
- Порт USB-C: For charging the device (refer to Figure 3.3).
- Раз'ём для навушнікаў: 3.5mm port for audio accessories (refer to Figure 3.3).
4. Настройка
4.1 Устаноўка батарэі
- Акуратна зніміце заднюю крышку тэлефона.
- Сумясціце кантакты батарэі з клемамі ўнутры батарэйнага адсека.
- Gently press the battery into place.
- Устаўце заднюю крышку на месца, пераканаўшыся, што яна надзейна зашчоўкне.
4.2 Усталёўка SIM -карты
The Maxcom MM135L supports dual SIM cards.
- With the phone powered off and the back cover removed, locate the SIM card slots.
- Insert your SIM card(s) into the designated slot(s) with the gold contacts facing down, following the orientation indicated on the phone.
- Ensure the SIM card(s) are fully seated.
- Replace the back cover and battery.
4.3 Зарадка тэлефона
The phone uses a USB-C port for charging.
- Connect the USB-C cable to the charging port at the bottom of the phone (refer to Figure 3.3).
- Падключыце другі канец USB-кабеля да сумяшчальнага адаптара харчавання USB або USB-порта кампутара.
- Індыкатар батарэі на экране будзе паказваць стан зарадкі.
- Адключыце зарадная прылада, як толькі акумулятар будзе цалкам зараджаны.
Заўвага: For optimal battery life, fully charge the phone before first use.
5. Інструкцыя па эксплуатацыі
5.1 Уключэнне/выключэнне сілкавання
- Каб уключыць: Націсніце і ўтрымлівайце Call/Power кнопку, пакуль не загарыцца экран.
- Каб выключыць: Націсніце і ўтрымлівайце Канец/Улада button until the power off options appear, then confirm.
5.2 Здзяйсненне і прыём выклікаў
- Каб зрабіць званок: Увядзіце нумар тэлефона з дапамогай клавіятуры і націсніце клавішу Тэлефануйце кнопка.
- Каб адказаць на званок: Націсніце Тэлефануйце кнопку, калі тэлефануе тэлефон.
- Каб завяршыць выклік: Націсніце Канец кнопка.
5.3 Адпраўка і атрыманне паведамленняў
- Перайдзіце ў меню «Паведамленні» з дапамогай клавіш навігацыі.
- Select "Create New Message" to compose an SMS.
- Увядзіце нумар атрымальніка і ваша паведамленне, а затым адпраўце.
- Атрыманыя паведамленні будуць адлюстроўвацца ў «Уваходных».
5.4 Using the SOS Button
The SOS button is located on the rear of the phone. It is designed for emergency situations.
- Для актывацыі: Press and hold the SOS button for several seconds.
- The phone will automatically sound an alarm and send emergency SMS messages to pre-set contacts.
- It will then automatically call the saved emergency contacts in a loop until a call is answered.
- Ensure emergency contacts are properly configured in the phone settings.
5.5 Функцыя ліхтарыка
The built-in flashlight can be activated for convenience.
- Refer to the phone's specific settings or a dedicated side button for flashlight activation. Typically, a long press on a designated key or a side switch controls it.
6. Тэхнічнае абслугоўванне
- Уборка: Выкарыстоўвайце мяккую сухую тканіну для чысткі паверхні тэлефона. Пазбягайце вадкіх ачышчальнікаў.
- Сыход за батарэяй: Do not expose the battery to extreme temperatures. Avoid fully discharging the battery frequently.
- захоўванне: Захоўвайце тэлефон у прахалодным, сухім месцы, калі ён не выкарыстоўваецца працяглы час.
- Воданепранікальнасць: Гэты тэлефон не воданепранікальны. Пазбягайце кантакту з вадкасцямі.
7. Выпраўленне непаладак
| праблема | Магчымае рашэнне |
|---|---|
| Тэлефон не ўключаецца. | Пераканайцеся, што акумулятар правільна ўсталяваны і зараджаны. Падключыце зарадную прыладу і паспрабуйце яшчэ раз. |
| Нельга рабіць або прымаць званкі. | Праверце, ці правільна ўстаўлена і актывавана SIM-карта. Праверце ўзровень сігналу сеткі. Звярніцеся да пастаўшчыка паслуг, калі праблемы не знікнуць. |
| Акумулятар не зараджаецца. | Ensure the USB-C cable and charger are securely connected and functional. Try a different charging cable or adapter. |
| Не працуе кнопка SOS. | Verify that emergency contacts are saved in the phone's settings. Ensure the phone has network coverage. |
| Дрэнная якасць званка. | Move to an area with better network reception. Check the speaker and microphone for obstructions. |
8. Тэхнічныя характарыстыкі
| Асаблівасць | Дэталь |
|---|---|
| Назва мадэлі | MM135L |
| Памер экрана | 1.77 цалі |
| Тып дысплея | ВК |
| дазвол | 128 х 160 |
| Сотавая тэхналогія | 2G |
| Падтрымка SIM | Дзве SIM |
| Тып батарэі | Літый-іённы |
| Ёмістасць батарэі | 600 мАг |
| Порт для зарадкі | USB-C |
| Памеры (Д х Ш х У) | 7 х 14 х 3.5 см |
| Вага | 60 г |
| Асаблівасці | SOS Button, Flashlight, Expandable Memory, Fast Charging Support |
9. Гарантыя і падтрымка
For warranty information, technical support, or service inquiries, please refer to the warranty card included with your product or contact Maxcom customer service directly. Keep your proof of purchase for warranty claims.