1. Уводзіны
Thank you for choosing the HUANUO Dual Monitor Mount, Model HNDS16B. This monitor mount is designed to enhance your workspace by providing flexible and ergonomic positioning for two monitors. It supports screens from 13 to 32 inches, with each arm holding up to 19.8 lbs. The mount features full motion flexibility, including tilt, swivel, and rotation, allowing you to customize your viewing experience for maximum comfort and productivity.
2. Інфармацыя па бяспецы
Калі ласка, прачытайце і зразумейце ўсе інструкцыі перад устаноўкай і выкарыстаннем. Невыкананне гэтых інструкцый можа прывесці да траўмаў або пашкоджання маёмасці. Захоўвайце гэтую інструкцыю для далейшага выкарыстання.
- Ensure your desk meets the thickness requirements for the chosen mounting method (C-clamp або ўтулка).
- Verify that your monitors comply with the specified size (13-32 inches), weight (4.4-19.8 lbs per arm), and VESA patterns (75x75mm or 100x100mm).
- Не перацягвайце шрубы, бо гэта можа прывесці да пашкоджанняў.
- Трымайце дзяцей далей ад вырабу падчас зборкі.
- If any parts are missing or defective, contact customer support immediately.
3. Змесціва ўпакоўкі
The HUANUO Dual Monitor Mount (HNDS16B) package includes all necessary hardware for assembly and installation. Please ensure all components are present before beginning installation.
4. Тэхнічныя характарыстыкі
| Асаблівасць | Спецыфікацыя |
|---|---|
| Нумар мадэлі | HNDS16B |
| Сумяшчальнасць памераў манітора | 13 - 32 цалі |
| Грузападымальнасць (на руку) | 4.4 - 19.8 фунта |
| Сумяшчальнасць VESA | 75х75 мм, 100х100 мм |
| Max Height Adjustment | 20.87 inches (from desktop to center of VESA plate) |
| Тып руху | Tilt (+90°/-35°), Swivel (180°), Rotation (360°) |
| C-Clamp Таўшчыня працоўнага стала | 0.39 - 3.15 цалі |
| Grommet Mount Desk Thickness | 0.39 - 3.35 цалі |
| Дыяметр адтуліны для люверса | 0.43 - 0.87 цалі |
| Матэрыял | Легаваная сталь |
5. Усталёўка (Усталёўка)
Follow these steps to install your HUANUO Dual Monitor Mount:
5.1 Праверкі перад устаноўкай
Before installation, ensure your monitors and desk are compatible:
- Сумяшчальнасць манітора: Check your monitor's size, weight, and VESA mounting holes (75x75mm or 100x100mm). If your monitor lacks VESA holes, a VESA adapter (sold separately) may be required.
- Desk Compatibility: Ensure your desk thickness is within the specified range for either C-clamp or grommet mounting. Also, check for any obstructing beams or panels under the desk.


5.2 Варыянты мантажу
The mount offers two installation methods:
- C-Clamp Мацаванне: Attaches to the edge of your desk. Suitable for desk thicknesses between 0.39" and 3.15".
- Мацаванне люверса: Installs through an existing hole in your desk. Suitable for desk thicknesses between 0.39" and 3.35" and hole diameters between 0.43" and 0.87".

5.3 Пакрокавая ўстаноўка
Refer to the included quick start guide for detailed assembly steps. The general process involves:
- Assemble the base and pole onto your desk using either the C-clamp or grommet method.
- Attach the monitor arms to the pole.
- Secure the VESA plates to the back of your monitors.
- Slide the monitors onto the arms.
6. Эксплуатацыя (карэкціроўкі)
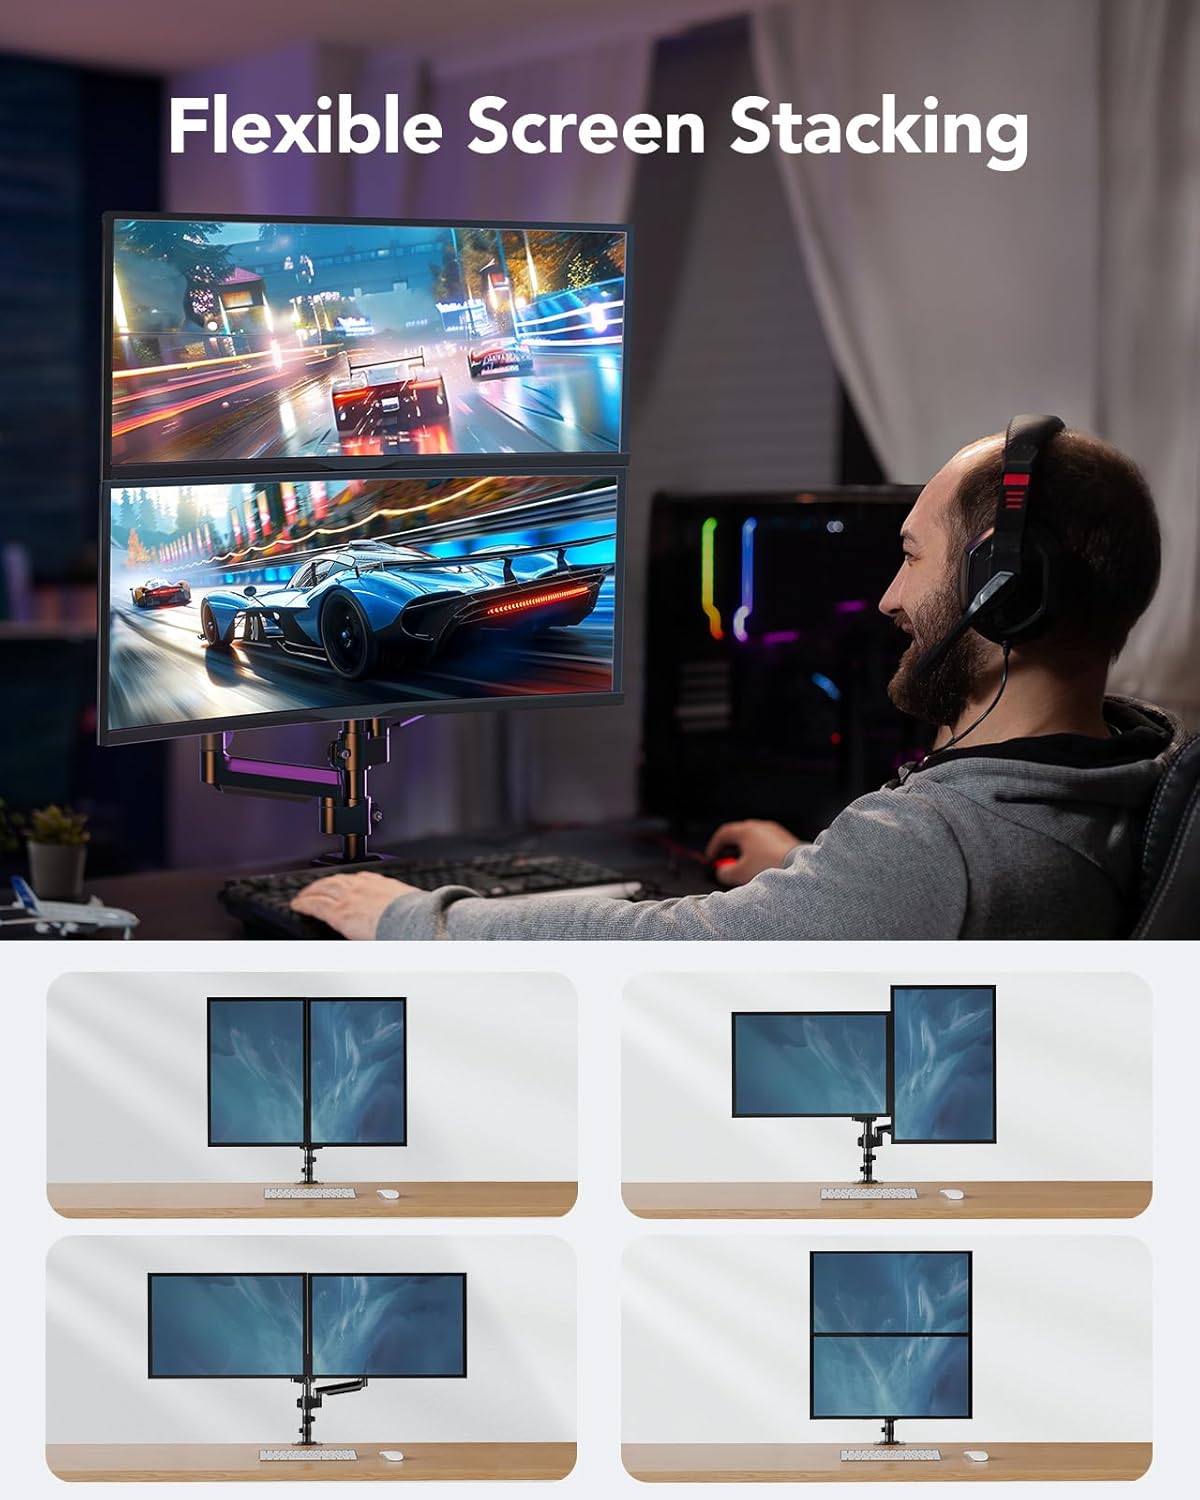
The HUANUO Dual Monitor Mount offers extensive adjustability for an optimal viewвопыту.
6.1 Monitor Positioning
You can adjust your monitors in various ways:
- Рэгуляванне вышыні: The 13-inch tall column allows you to raise the center of your screens up to 20.87 inches above the desktop.
- Нахіл: Adjust the screen tilt from +90° to -35° to reduce glare and find your preferred angle.
- Паваротны: Swivel your monitors 180° for easy screen sharing or collaborative work.
- Кручэнне: Rotate your monitors 360° to switch between landscape and portrait modes.


6.2 Gas Spring Tension Adjustment
The gas spring tension needs to be adjusted to match the weight of your monitors. This ensures the arms hold their position stably.
- If the monitor rises up on its own, turn the adjustment bolt clockwise to decrease tension.
- If the monitor falls down, turn the adjustment bolt counter-clockwise to increase tension.
7. Тэхнічнае абслугоўванне
Regular maintenance helps ensure the longevity and optimal performance of your monitor mount.
- Праверце злучэнні: Periodically inspect all screws and bolts to ensure they are securely tightened.
- Уборка: Працярыце мацаванне мяккай губкайamp тканінай. Пазбягайце абразіўных ачышчальнікаў або растваральнікаў.
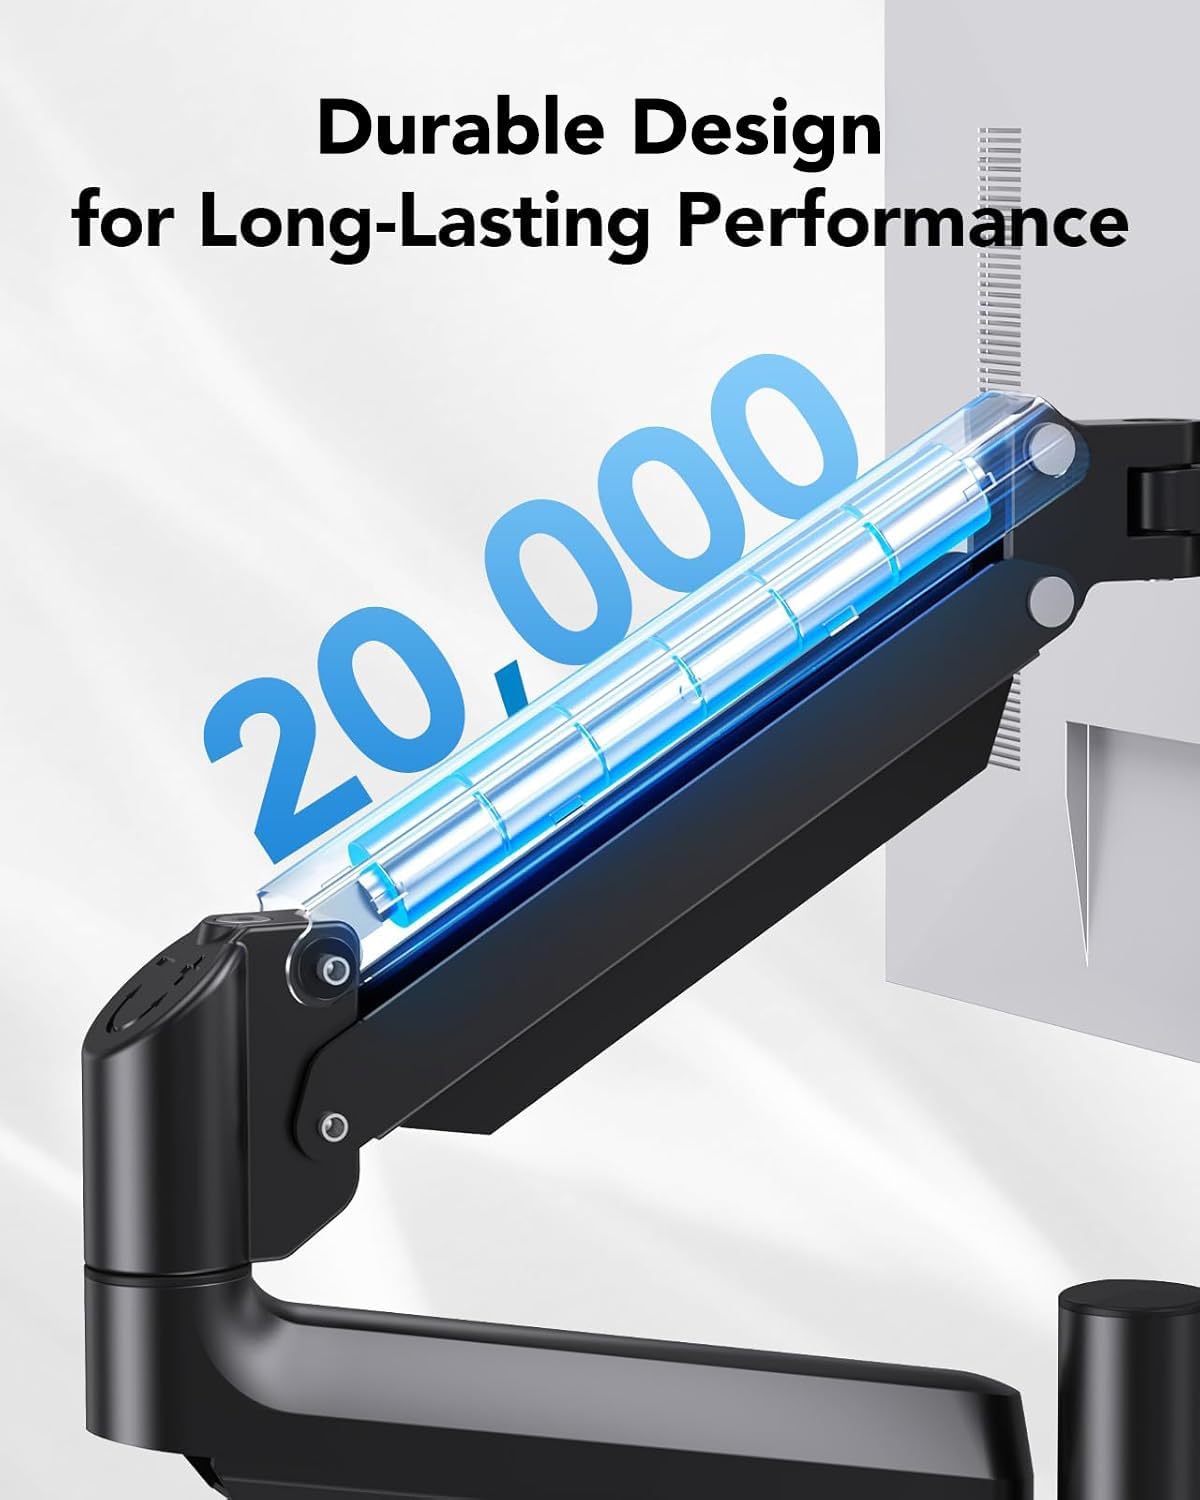
- Трываласць: The arms of this monitor mount have been tested to withstand 20,000 motion cycles, ensuring long-lasting performance.
8. Выпраўленне непаладак
If you encounter issues with your monitor mount, refer to the following common solutions:
- Monitor is dropping or rising: Adjust the gas spring tension as described in Section 6.2. Use the provided Allen key to turn the bolt counter-clockwise to increase tension (for monitors falling) or clockwise to decrease tension (for monitors rising).
- Monitor tilt head is loose/dropping: Use the Allen key to adjust the tilt screw on the VESA plate to secure the monitor's tilt angle.
- Мацаванне нестабільнае: Пераканайцеся, што C-clamp or grommet mount is securely tightened to the desk. Verify that your desk meets the compatibility requirements.
9. Кіраванне кабелем
The monitor mount includes integrated cable management features to help keep your workspace tidy and organized. Route your cables through the designated clips or channels on the arms and pole to maintain a clean aesthetic and prevent cable clutter.

10. Гарантыя і падтрымка
For warranty information or technical assistance, please refer to the product packaging or contact HUANUO customer support directly. Our support team is available to help with any questions or concerns you may have regarding your monitor mount.