1. Уводзіны
Thank you for choosing the Primo Touch Compact Tabletop Water Dispenser. This manual provides essential information for the safe and efficient operation of your new appliance. Please read these instructions thoroughly before installation and use, and retain them for future reference.
2. Інфармацыя па бяспецы
- Always connect the dispenser to a grounded electrical outlet.
- Do not immerse the dispenser, power cord, or plug in water or other liquids.
- Трымайце дыспенсер далей ад прамых сонечных прамянёў і крыніц цяпла.
- Забяспечце належную вентыляцыю вакол прылады.
- Адключыце дазатар ад сеткі перад чысткай або любым тэхнічным абслугоўваннем.
- Гэтая прылада не прызначана для выкарыстання асобамі з абмежаванымі фізічнымі, сэнсарнымі або разумовымі здольнасцямі, а таксама асобамі, якія не маюць досведу і ведаў, за выключэннем выпадкаў, калі яны знаходзяцца пад наглядам або прайшлі інструкцыі па выкарыстанні прылады з боку асобы, адказнай за іх бяспеку.
- За дзецьмі трэба сачыць, каб яны не гулялі з прыборам.
- Hot water can cause severe burns. Exercise caution when dispensing hot water.
3. Прадукт скончыўсяview
The Primo Touch Compact Tabletop Water Dispenser provides convenient access to cold, hot, and ambient temperature water. It features an intuitive control panel and a compact design suitable for various environments.

Малюнак 1: Спераду view of the Primo Touch Compact Tabletop Water Dispenser.
Панэль кіравання
The control panel allows you to select your desired water temperature. An LED display indicates the status of the water cooling and heating functions.

Малюнак 2: падрабязна view of the control panel with temperature selection icons.
4. Настройка
- Распакаванне: Асцярожна выміце дазатар з упакоўкі. Праверце на наяўнасць пашкоджанняў.
- Размяшчэнне: Place the dispenser on a flat, stable, and level surface. Ensure there is adequate space around the unit for ventilation (at least 10 cm from walls). Avoid placing it in direct sunlight or near heat sources.
- Падключэнне сілкавання: Пераканайцеся, што дазатар адключаны ад сеткі.
- Усталёўка бутэлькі з вадой: Remove the protective seal from a standard 3 or 5-gallon (11 or 19-liter) water bottle. Invert the bottle and carefully place it onto the support collar on top of the dispenser. Push down firmly until the bottle is seated and water begins to flow into the dispenser's reservoir. The anti-leak system ensures a secure fit.
- Пачатковая грунтоўка: Before plugging in, dispense water from both the cold and hot taps until water flows steadily. This removes air from the system.
- Падключыць: Падключыце дыспенсер да заземленай электрычнай разеткі.
5. Інструкцыя па эксплуатацыі
The dispenser is designed for easy operation, providing cold, hot, and ambient water with a simple touch.
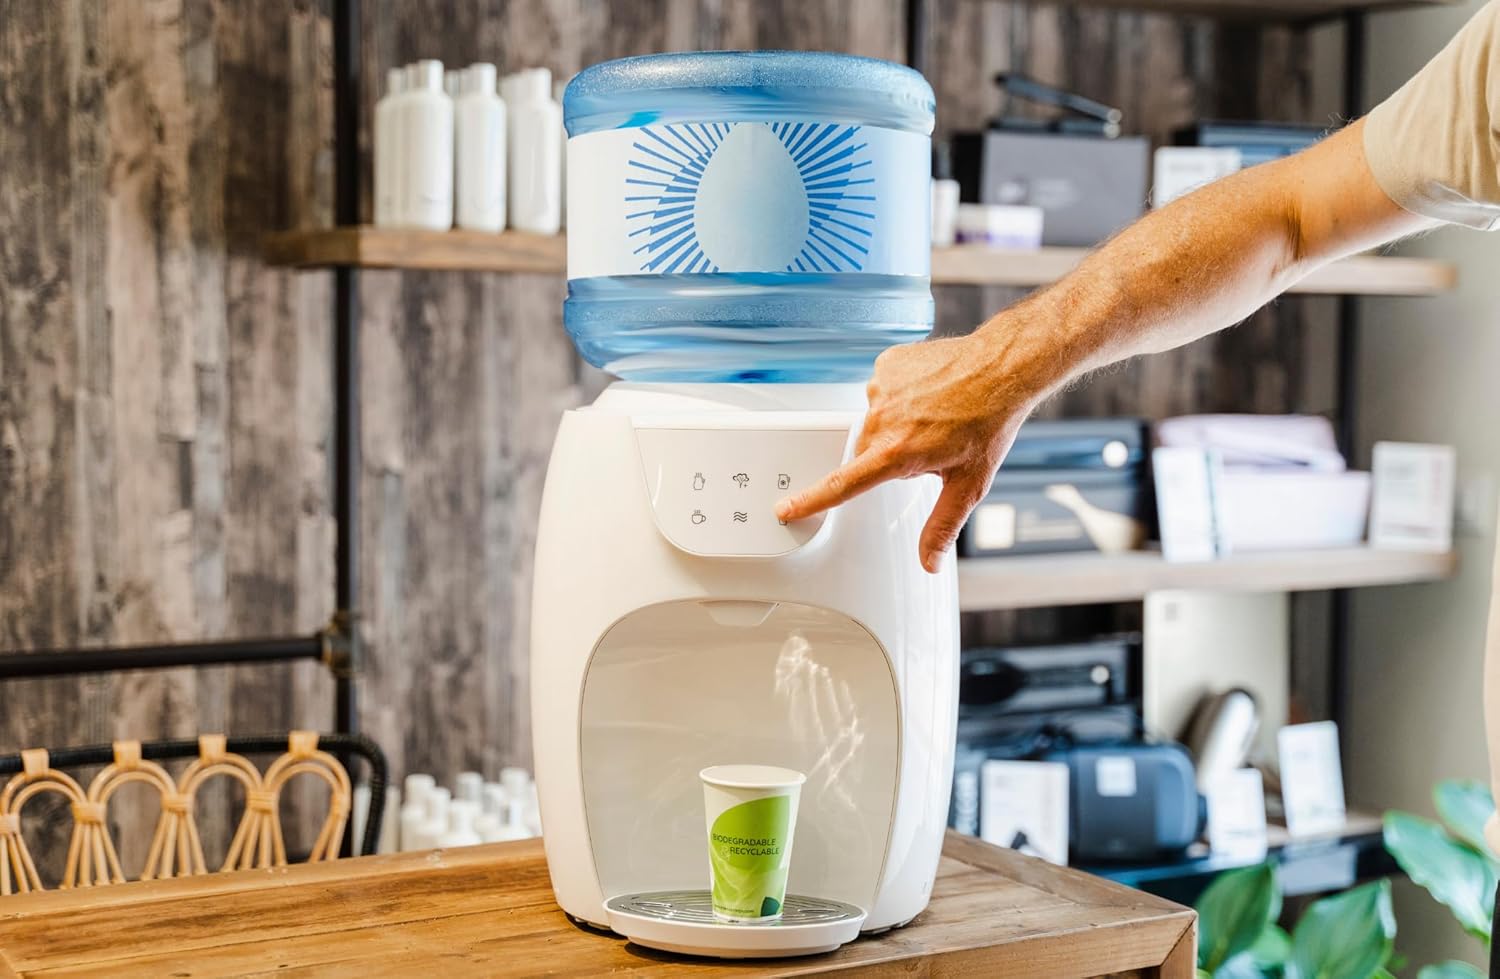
Figure 3: Dispensing water from the unit.
- Уключэнне: Once plugged in, the dispenser will begin cooling and heating water. The LED display will indicate when the cold water has reached its optimal cooling temperature (approximately 5°C) and when the hot water has reached its optimal heating temperature (approximately 95°C).
- Выдача халоднай вады: Place your cup under the cold water tap. Press the cold water button (typically indicated by a snowflake icon). Release the button to stop dispensing.
- Падача гарачай вады: Place your cup under the hot water tap. Press the hot water button (typically indicated by a teacup or steam icon). Caution: Hot water can cause burns. Адпусціце кнопку, каб спыніць раздачу.
- Dispensing Ambient Water: Place your cup under the ambient water tap. Press the ambient water button (typically indicated by a wave icon). Release the button to stop dispensing.
6. Тэхнічнае абслугоўванне і ачыстка
Regular cleaning ensures optimal performance and hygiene of your water dispenser.
- Знешняя ачыстка: Працярыце вонкавыя паверхні мяккай, damp тканіна. Не выкарыстоўвайце абразіўныя ачышчальнікі або растваральнікі.
- Паддон для капель: The drip tray should be emptied and cleaned regularly to prevent overflow and bacterial growth. Remove the tray, wash it with mild soap and water, rinse thoroughly, and dry before replacing.
- Water Reservoir (Internal): For thorough cleaning, it is recommended to periodically sanitize the internal water reservoirs. Consult the manufacturer's website or customer support for detailed sanitization procedures, which may involve specific cleaning solutions. Always unplug the unit and drain all water before attempting internal cleaning.
- Замена бутэлькі з вадой: When the water bottle is empty, lift it off the dispenser. Place a new, full water bottle onto the dispenser as described in the Setup section.
7. Выпраўленне непаладак
If you encounter issues with your dispenser, refer to the following common problems and solutions:
| праблема | Магчымая прычына | Рашэнне |
|---|---|---|
| Няма падачы вады | Empty water bottle; Airlock in system; Dispenser unplugged. | Replace water bottle; Prime the system by dispensing from all taps; Check power connection. |
| Вада недастаткова халодная/гарачая | Dispenser recently plugged in; Ventilation blocked; Heating/cooling element malfunction. | Allow 1-2 hours for water to reach temperature; Ensure proper ventilation; Contact customer support if problem persists. |
| Уцечка вады | Water bottle not seated correctly; Damaged water bottle; Internal leak. | Re-seat water bottle firmly; Check bottle for cracks; Unplug and contact customer support. |
| Незвычайны шум | Normal operation (compressor); Unit not level. | Some noise is normal during cooling/heating cycles; Ensure dispenser is on a level surface. |
8. Тэхнічныя характарыстыкі
| Асаблівасць | Дэталь |
|---|---|
| Нумар мадэлі | HC03-ARI |
| Памеры прадукту | 37.3 х 30.8 х 37.6 см |
| Колер | Белы |
| Матэрыял | Пластыкавыя |
| Тып ўстаноўкі | Стальніца |
| Месцазнаходжанне доступу да вады | З верхняй загрузкай |
| Колькасць налад | 5 (Hot, Cold, Ambient, Hot for cooking, Cold jug - based on image interpretation) |
| Тэмпература гарачай вады | Да 95°C |
| Тэмпература халоднай вады | Down to 5°C |
| Крыніца харчавання | Правадная электрычная |
9. Гарантыя і падтрымка
For warranty information or technical support, please refer to the documentation included with your purchase or visit the official Primo webсайт. Захоўвайце пацвярджэнне пакупкі для прэтэнзій па гарантыі.