Уводзіны
This manual provides detailed instructions for the safe installation, operation, and maintenance of your KCO Lighting Model L1141-B 3-Light Globe Cluster Pendant Light. Please read this manual thoroughly before beginning installation and retain it for future reference.
Прадукт скончаныview
The KCO Lighting Model L1141-B is a modern 3-light pendant fixture featuring white globe glass shades and a matte black finish. It is designed to provide ambient lighting in various indoor settings.
Асноўныя характарыстыкі:
- 3 white globe glass shades with a matte black canopy and lamp цела.
- Adjustable hanging cord length (up to 59.1 inches) for customizable arrangement.
- Compatible with E26 base bulbs (110-220V, max 60W per bulb).
- Suitable for various ceiling types, including sloped, vaulted, and flat ceilings.
- Dimmable when used with dimmable bulbs and a compatible dimmer switch (not included).
Што ў скрынцы:
- Pendant Light Fixture (Canopy, Lamp Body, 3 Glass Shades)
- 3 E26 Bulbs
- Мантажнае абсталяванне
- Кіраўніцтва па эксплуатацыі
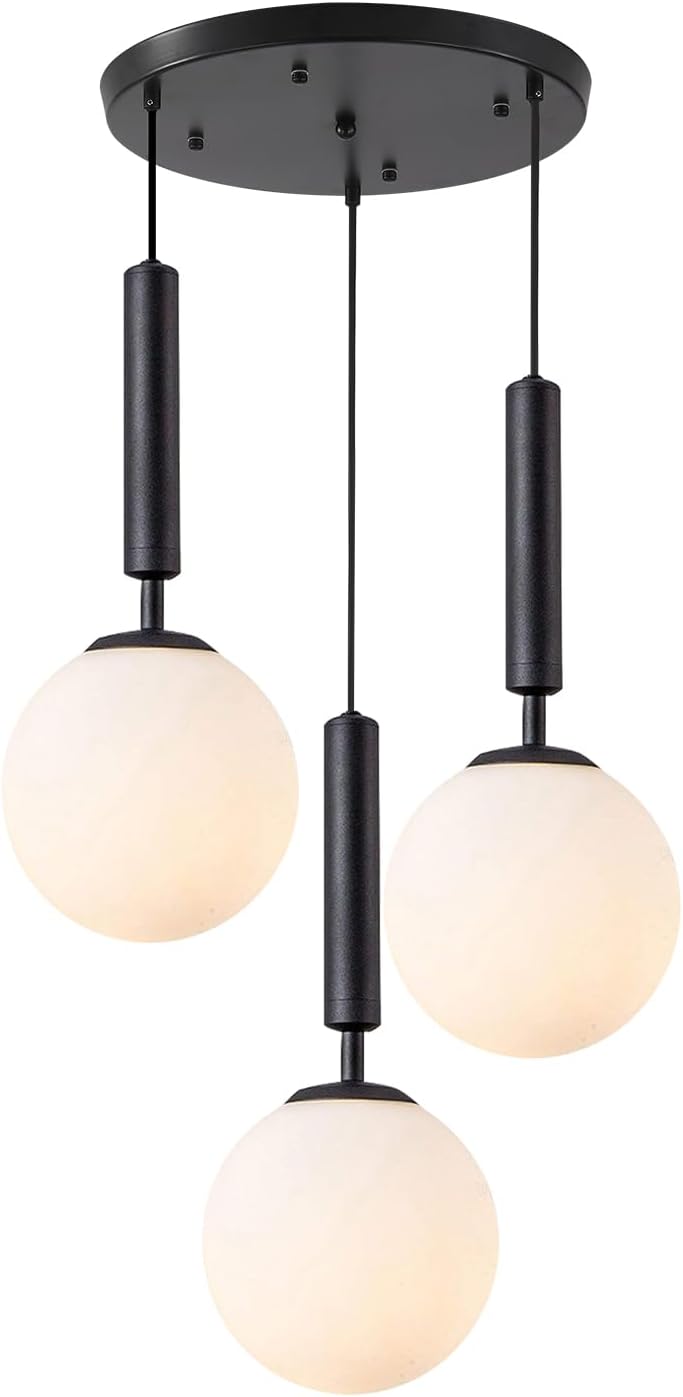
Figure 1: KCO Lighting 3-Light Globe Cluster Pendant Light, showing the three white globe shades and black finish.
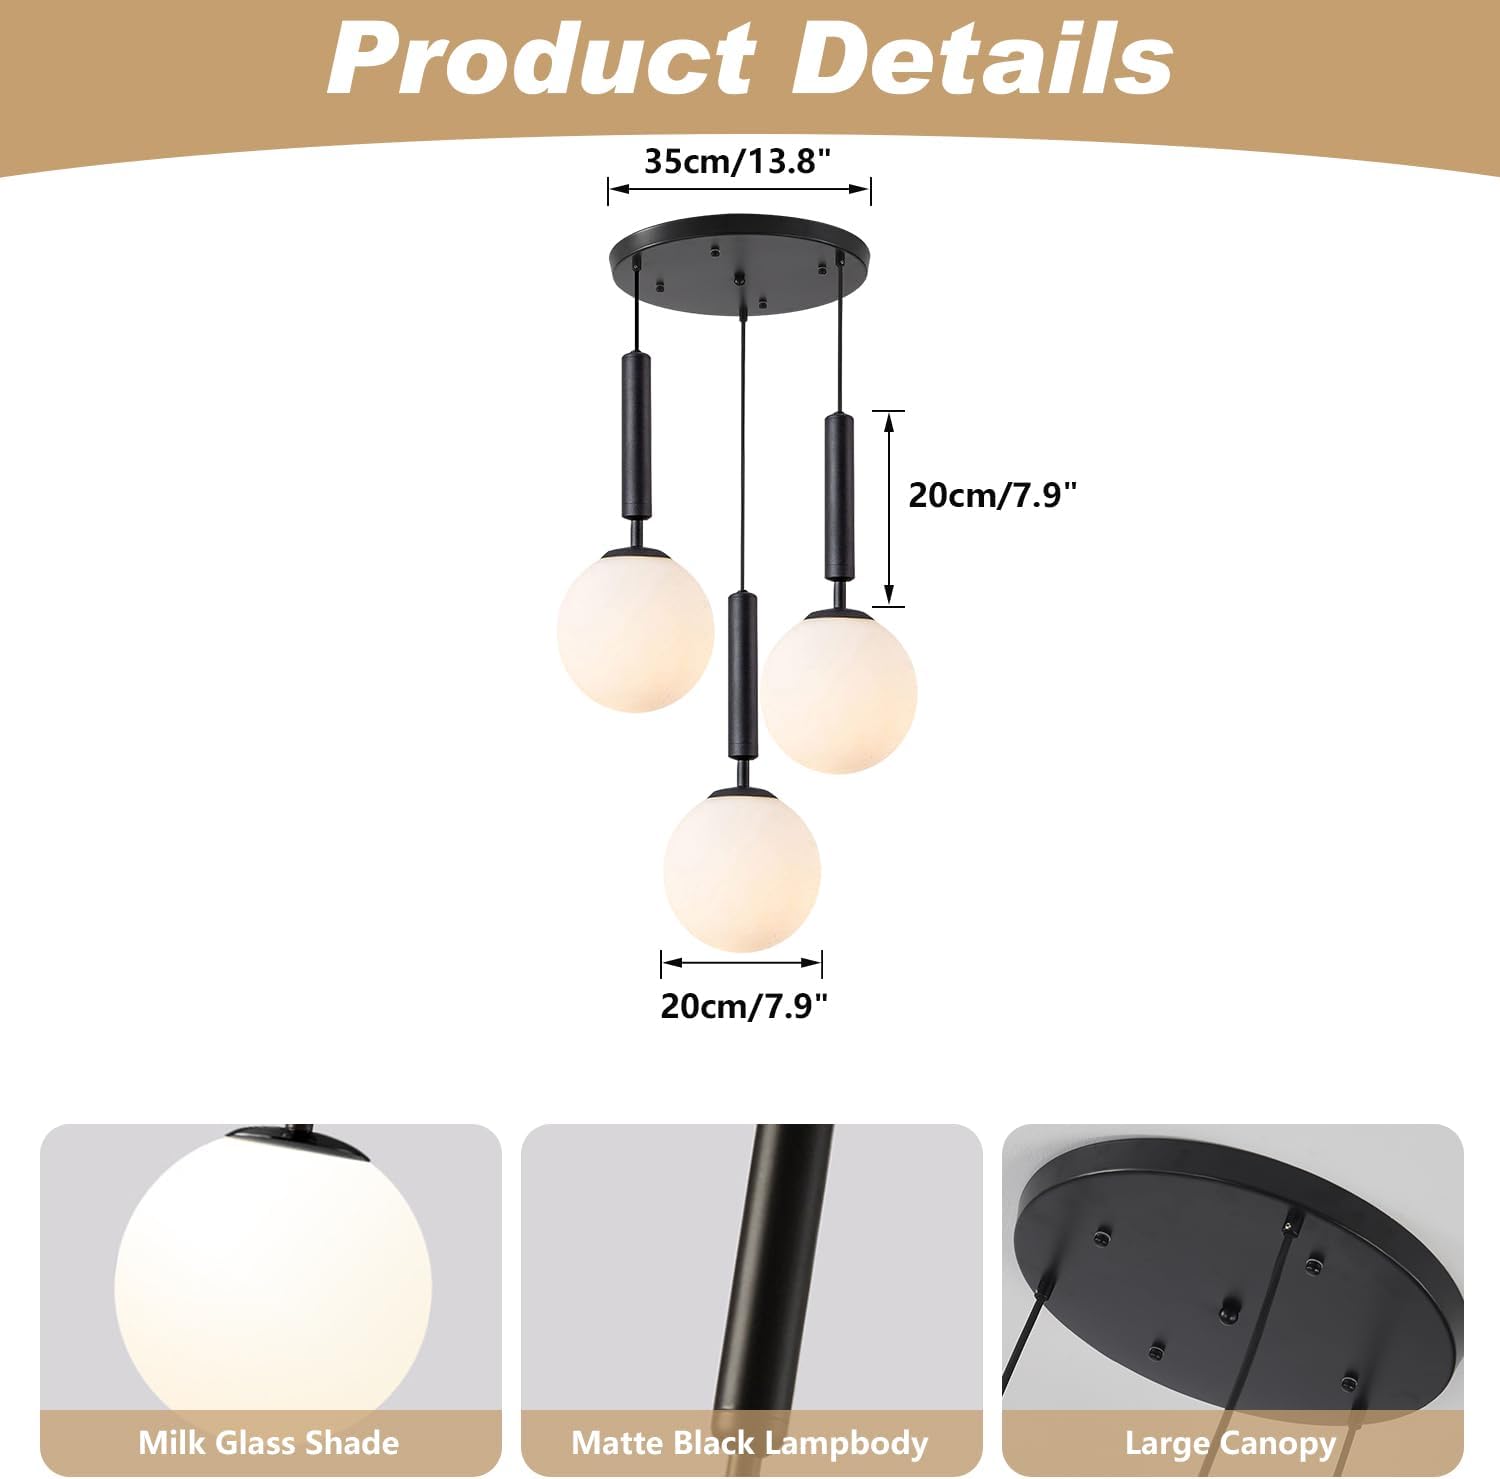
Figure 2: Product details including dimensions (canopy diameter 13.8 inches, globe diameter 7.9 inches) and key components: milk glass shade, matte black lamp body, and large canopy.
Тэхнічныя характарыстыкі
| Атрыбут | Дэталь |
|---|---|
| Марка | KCO |
| Назва мадэлі | L1141-B |
| Колер | Black-3-Light |
| Матэрыял | Шкло, жалеза |
| стыль | Farmhouse / Modern |
| Бланк свяцільні | Кулон |
| Памеры прадукту | 15"L x 15"W x 16.5"H (overall) |
| Дыяметр глобуса | 7.9 цалі (20 см) |
| Дыяметр потолочной пліты | 13.8 цалі (35 см) |
| Hanging Cord Length | 59.1 inches (150cm), adjustable |
| Крыніца харчавання | Правадная электрычная |
| тtage | 110-220 Вольт |
| Тып крыніцы святла | LED (Bulbs included) |
| Падстава лямпачкі | E26 |
| Ватtage | 7 Вт (на лямпачку) |
| Яркасць | 1500 lumen (total) |
| Каляровая тэмпература | 3000 кельвінаў (цёплы белы) |
| Выкарыстанне ў памяшканні/на вуліцы | У памяшканні |
| Патрабуецца зборка | так |
Інфармацыя па бяспецы
WARNING: Risk of Electric Shock. Disconnect power at the fuse box or circuit breaker before installing or servicing.
- Уважліва прачытайце ўсе інструкцыі перад устаноўкай.
- Ensure the electrical supply is turned off at the main circuit breaker or fuse box before installation.
- All electrical connections must be in accordance with local codes, ordinances, or the National Electric Code (NEC). Consult a qualified electrician if you are unsure about wiring.
- Выкарыстоўвайце толькі вызначаны тып лямпачкі і магутнасцьtagе. Перавышэнне максімальнай магутнасціtagгэта можа прывесці да перагрэву і пашкоджання прыбора.
- Не ўстанаўлівайце гэтую прыладу ў вільготных абоamp месцах. Прызначана толькі для выкарыстання ў памяшканнях.
- Асцярожна звяртайцеся са шклянымі кампанентамі, каб пазбегнуць іх разбіцця.
- Пераканайцеся, што прыстасаванне надзейна замацавана да канструкцыйнага элемента столі.
Настройка і ўстаноўка
Неабходныя інструменты (не ўключаны):
- Выкрутка для галоўкі Філіпс
- Выкрутка з плоскай галоўкай
- Сродкі для зачысткі правадоў
- Электрычная стужка
- Лесвіца
- Ахоўныя акуляры
Этапы ўстаноўкі:
- Выключыць харчаванне: Перад пачаткам працы пераканайцеся, што электрычнасць ланцуга адключана на галоўным электрычным шчыце, каб пазбегнуць паражэння электрычным токам.
- Падрыхтуйце мантажную пласціну: Прымацуйце мантажную пласціну да размеркавальнай скрынкі ў столі з дапамогай прадугледжаных шруб. Пераканайцеся, што яна надзейна замацавана.
- Адрэгулюйце даўжыню шнура: The pendant cords are adjustable. Determine the desired hanging height for each globe. Loosen the set screw on the canopy where the cord enters, adjust the cord to the desired length, and then tighten the set screw to secure it. Repeat for all three cords.
- Зрабіце электрычныя злучэнні:
- Connect the fixture's ground wire (usually bare copper or green) to the house ground wire.
- Connect the fixture's neutral wire (usually white) to the house neutral wire (white).
- Connect the fixture's hot wire (usually black) to the house hot wire (black).
- Замацуйце ўсе злучэнні дроцянымі гайкамі і абматайце ізаляцыйнай стужкай для дадатковай бяспекі.
- Усталюйце навес: Carefully push the canopy up to the ceiling, aligning the mounting holes with the screws on the mounting plate. Secure the canopy with the decorative nuts or screws provided.
- Усталюйце шкляныя шторы: Carefully attach each milk glass globe shade to its respective lamp body. Ensure they are securely threaded or fastened according to the design.
- Усталяваць лямпы: Screw the provided E26 bulbs into the sockets. Do not overtighten.
- Аднавіць сілу: Once installation is complete and all components are secure, restore power at the main electrical panel.
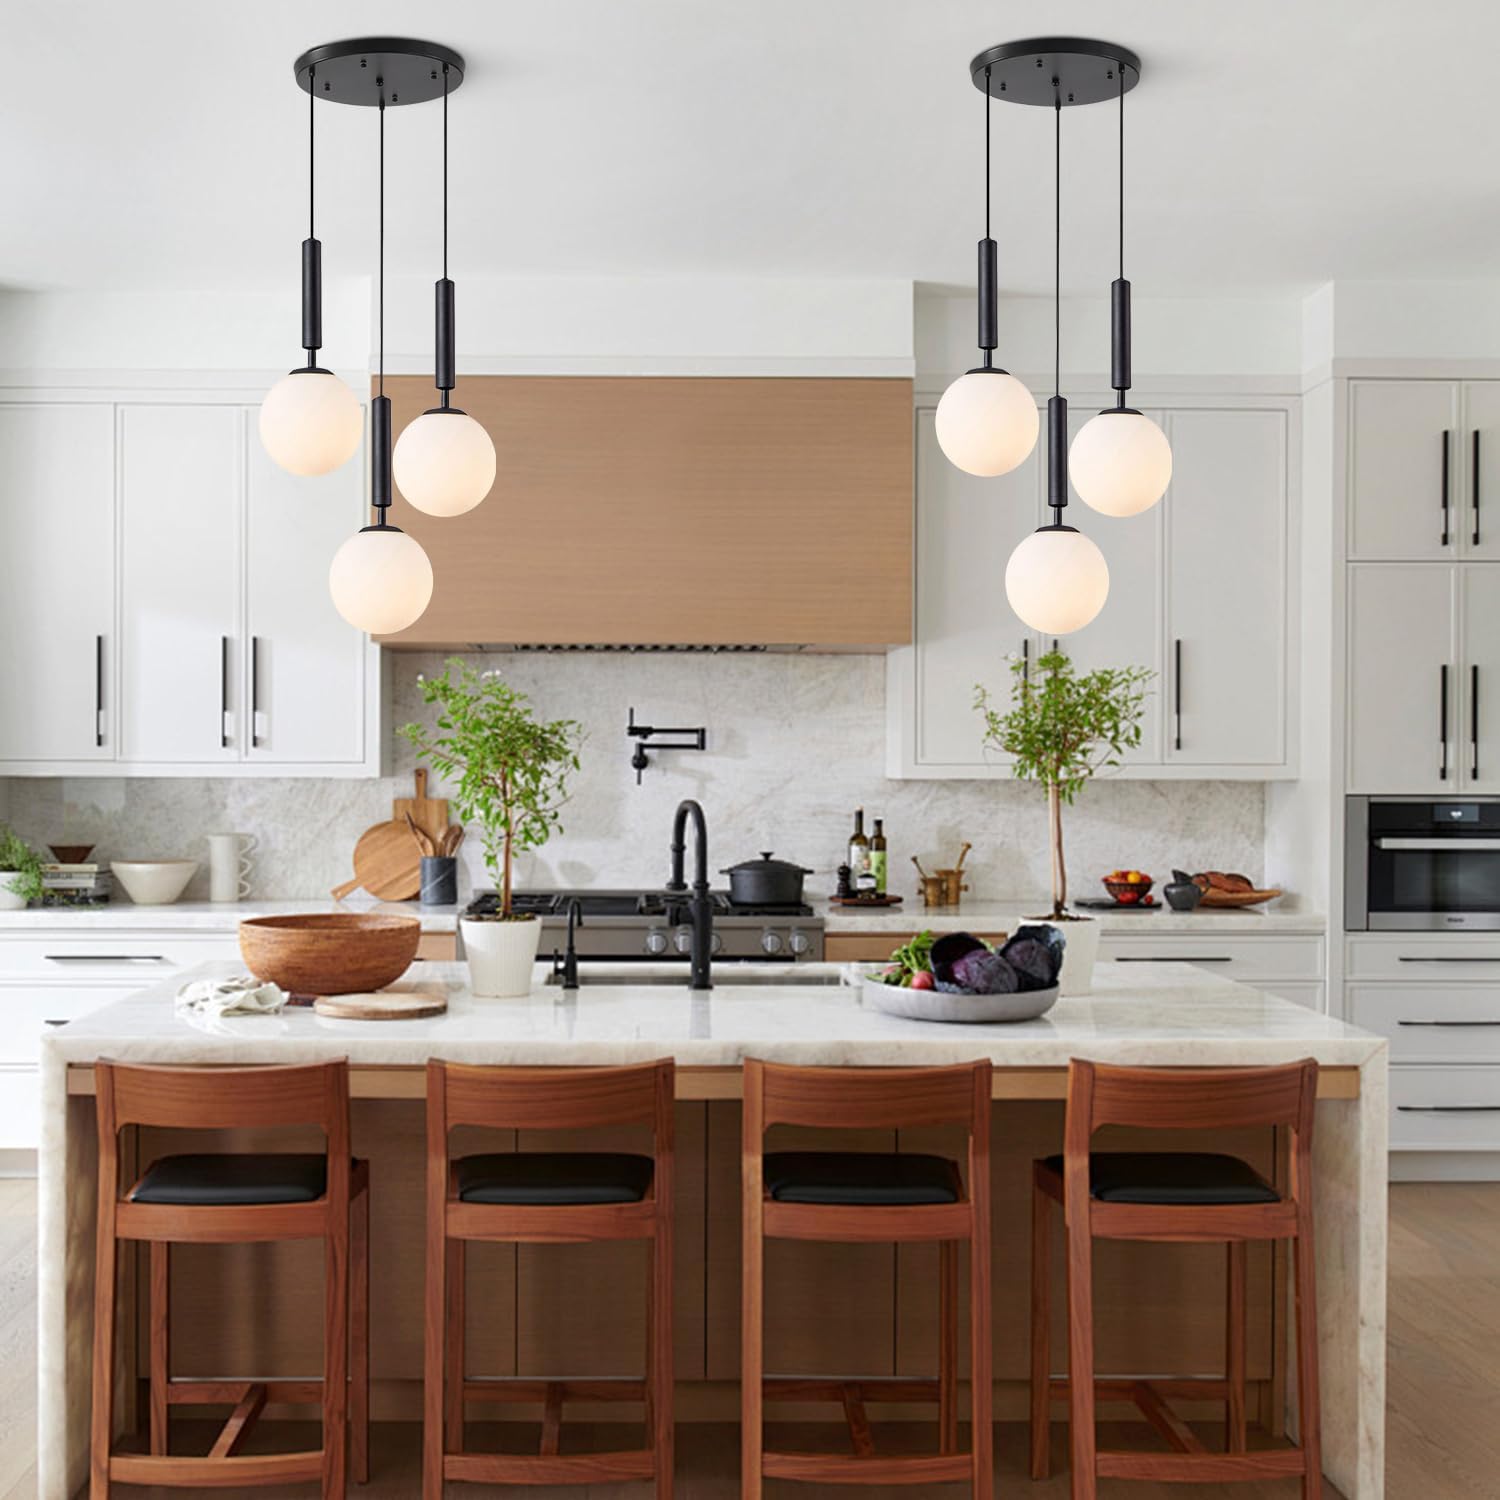
Малюнак 3: Выпample installation of the pendant light over a kitchen island, demonstrating adjustable cord lengths.
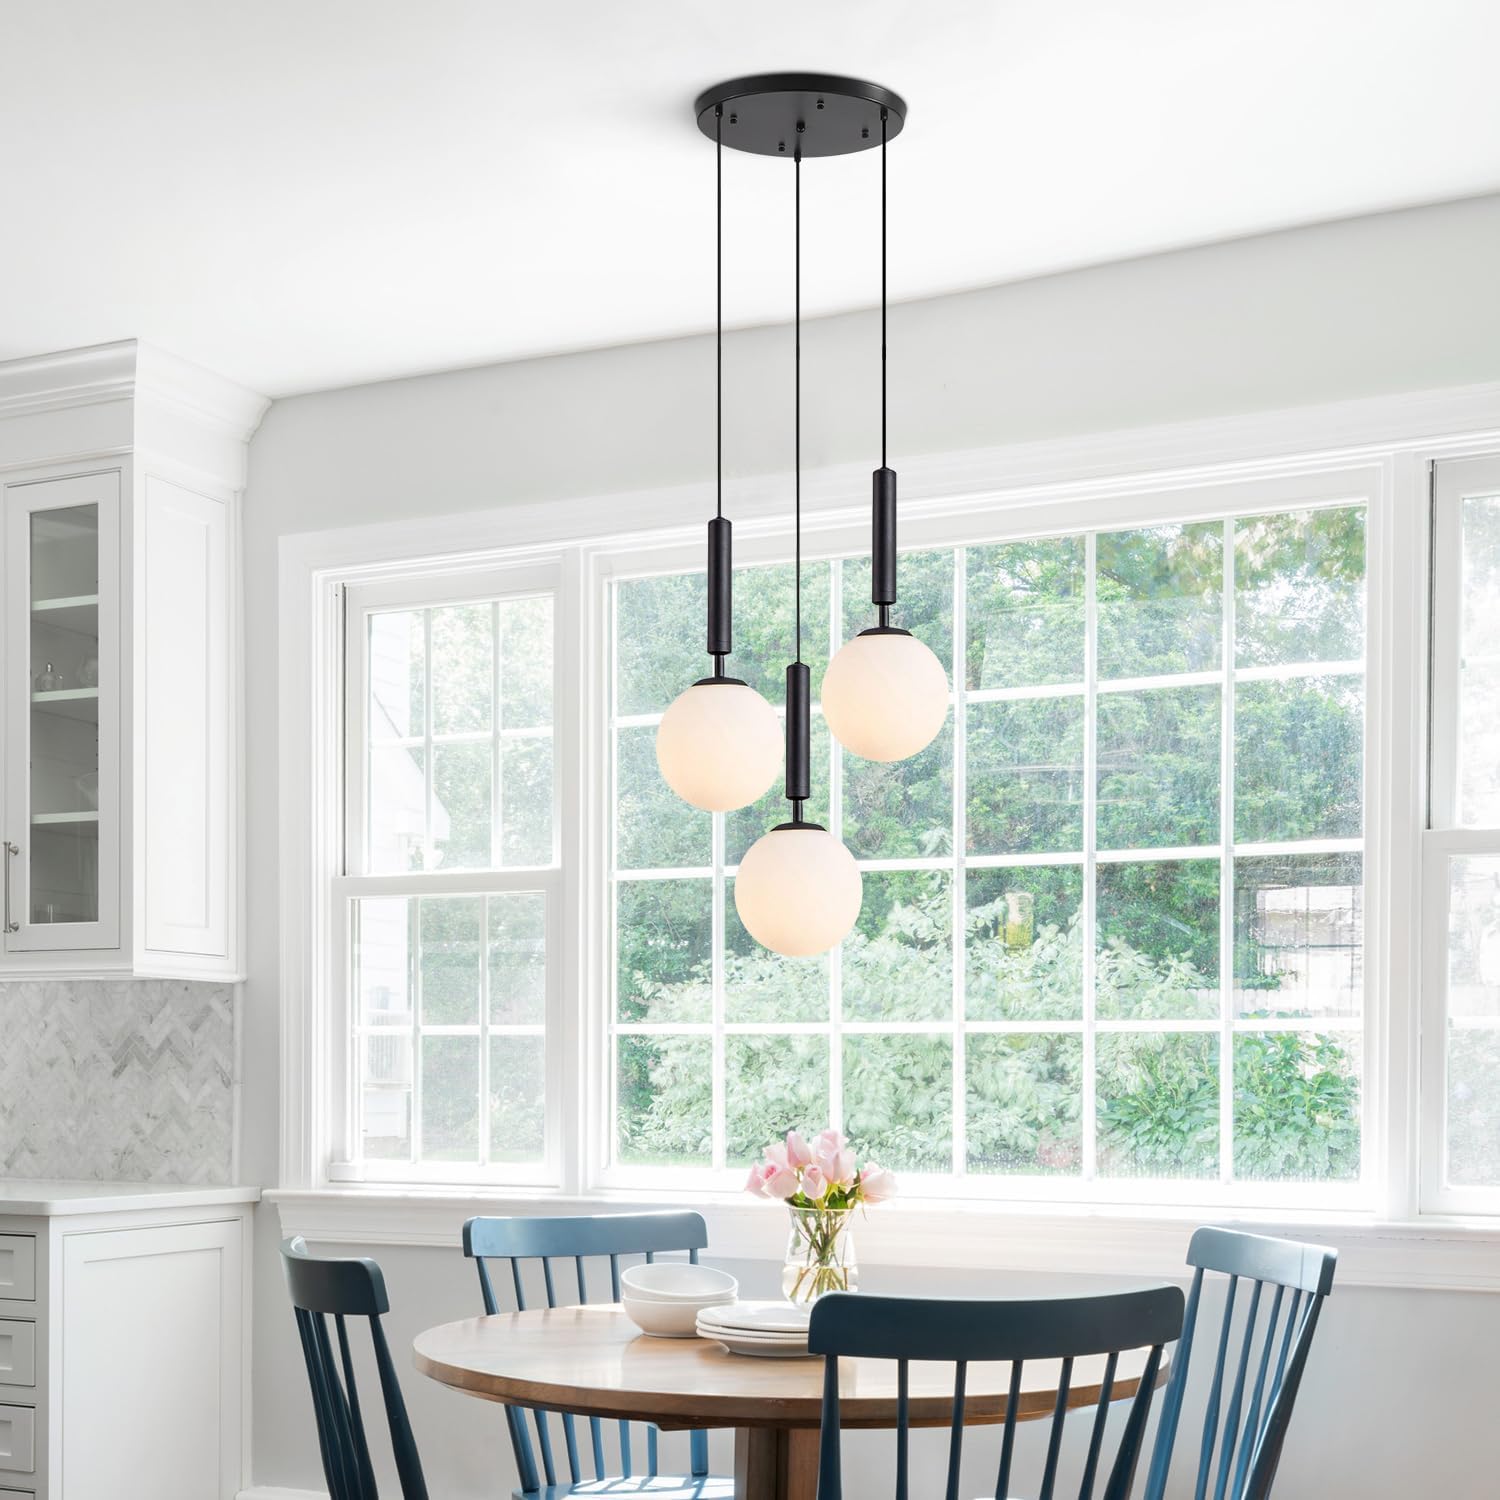
Малюнак 4: Выпample installation of the pendant light over a dining table, showcasing its versatility in different room settings.
Інструкцыя па эксплуатацыі
This pendant light operates like a standard ceiling fixture. Once installed and wired correctly, it can be controlled via a wall switch.
- Уключэнне/выключэнне: Use the wall switch connected to the fixture to turn the lights on or off.
- Функцыя зацямнення: The fixture itself is not dimmable. However, if you wish to use a dimming function, you must install dimmable E26 LED bulbs and a compatible dimmer switch (both sold separately). Follow the manufacturer's instructions for the dimmer switch and bulbs.
Тэхнічнае абслугоўванне
Уборка:
- Перад чысткай заўсёды адключайце сілкаванне.
- Працярыце прыбор мяккай сухой тканінай.
- Do not use abrasive cleaners, solvents, or polishes as they may damage the finish or glass.
- For glass shades, a mild glass cleaner can be used, applied to a cloth first, not directly to the shade.
Замена лямпачкі:
- Ensure power is disconnected before replacing bulbs.
- Дайце лямпачкам цалкам астыць, перш чым дакранацца да іх.
- Unscrew the old bulb counter-clockwise.
- Screw in a new E26 base bulb, ensuring it does not exceed the maximum wattage 60 Вт на лямпачку.
Ліквідацыю непаладак
| праблема | Магчымая прычына | Рашэнне |
|---|---|---|
| Святло не ўключаецца. |
|
|
| Мільгае святло. |
|
|
| Glass shade is cracked or damaged. | Shipping damage or accidental impact. | Contact KCO Lighting customer service for a replacement. |
Гарантыя і падтрымка
KCO Lighting offers a Гарантыя 3 год for this product. If you encounter any quality issues, or receive broken, damaged, or cracked globe glass lampshades, please contact KCO Lighting customer service.
For professional after-sales service or if you require a longer hanging cord replacement or are missing a light bulb, please contact KCO Lighting directly via your order number. They aim to provide solutions within 24 hours.
Каб атрымаць дадатковую дапамогу, наведайце KCO Lighting Store on Amazon.