1. Уводзіны
Thank you for choosing the LAMA 4K UHD 75MP Digital Camera, Model LM249A. This camera is designed to capture high-quality photos and videos with ease, featuring a 75-megapixel sensor, 4K Ultra HD video recording, 18X digital zoom, autofocus, anti-shake technology, and a convenient 180° flip screen. This manual provides detailed instructions to help you get started and make the most of your new camera.
2. Прадукт скончыўсяview
Familiarize yourself with the main components and controls of your LAMA digital camera.

Малюнак 2.1: Спераду view of the LAMA 4K UHD 75MP Digital Camera, showing the lens and flash.

Малюнак 2.2: Закончанаview of the camera's key features including 64MP resolution, 4K video, 18X zoom, autofocus, and fill light.
2.1 Кампаненты камеры
- Аб'ектыў: Captures images and videos. Features 18X digital zoom.
- ВК-экран: 3.0-inch display for viewing, menu navigation, and playback. It can flip 180 degrees for selfies.
- Кнопка засаўкі: Press halfway to focus, fully to capture a photo or start/stop video recording.
- Кнопка харчавання: Уключае або выключае камеру.
- Дыск рэжымаў: Selects different shooting modes (e.g., Photo, Video, Timed).
- Zoom Lever (T/W): Adjusts the digital zoom (Telephoto/Wide).
- Navigation Buttons (OK, Up, Down, Left, Right): Выкарыстоўваецца для навігацыі па меню і карэкціроўкі налад.
- Кнопка меню: Доступ да налад камеры.
- Кнопка DISP: Changes display information on the LCD screen.
- Убудаваная запаўняльная лямпа: Забяспечвае дадатковае асвятленне ў цёмных умовах.
- Батарэйны адсек: Змяшчае акумулятарную батарэю.
- Слот для карты памяці: For inserting a Micro SD (TF) card.
- Порт USB-C: For charging and data transfer to a computer.
3. Настройка
3.1 Устаўка акумулятара і карты памяці
Before using the camera, ensure the battery is charged and a memory card is inserted.
- Адкрыйце вокладку: Slide to open the battery/memory card compartment cover located on the side or bottom of the camera.
- Устаўце батарэю: Insert the provided battery into the battery compartment, ensuring the correct orientation.
- Устаўце карту памяці: Gently pull out the "USB/TF" silicone cover. Insert a Micro SD (TF) card (up to 64GB supported) into the memory card slot until it clicks into place. Ensure the card is facing the correct direction.
- Закрыць вокладку: Надзейна зачыніце вечка аддзялення.

Figure 3.1: Visual guide for installing the battery and Micro SD card into the camera.
3.2 Зарадка акумулятара
Connect the camera to a power source using the provided Type-C USB cable. The charging indicator will illuminate. Once fully charged, the indicator will change or turn off.
4. Асноўная аперацыя
4.1 Уключэнне/выключэнне
Націсніце і ўтрымлівайце кнопку харчавання, каб уключыць або выключыць камеру.
4.2 Фотаздымка
- Выберыце рэжым фота: Turn the mode dial to the photo icon.
- Зрабіце кадр: Use the LCD screen to compose your image.
- Аўтафокус: Press the shutter button halfway down. The camera will automatically focus. A green frame indicates successful focus.
- Зрабіць фота: Націсніце кнопку спуску засаўкі цалкам, каб зрабіць здымак.
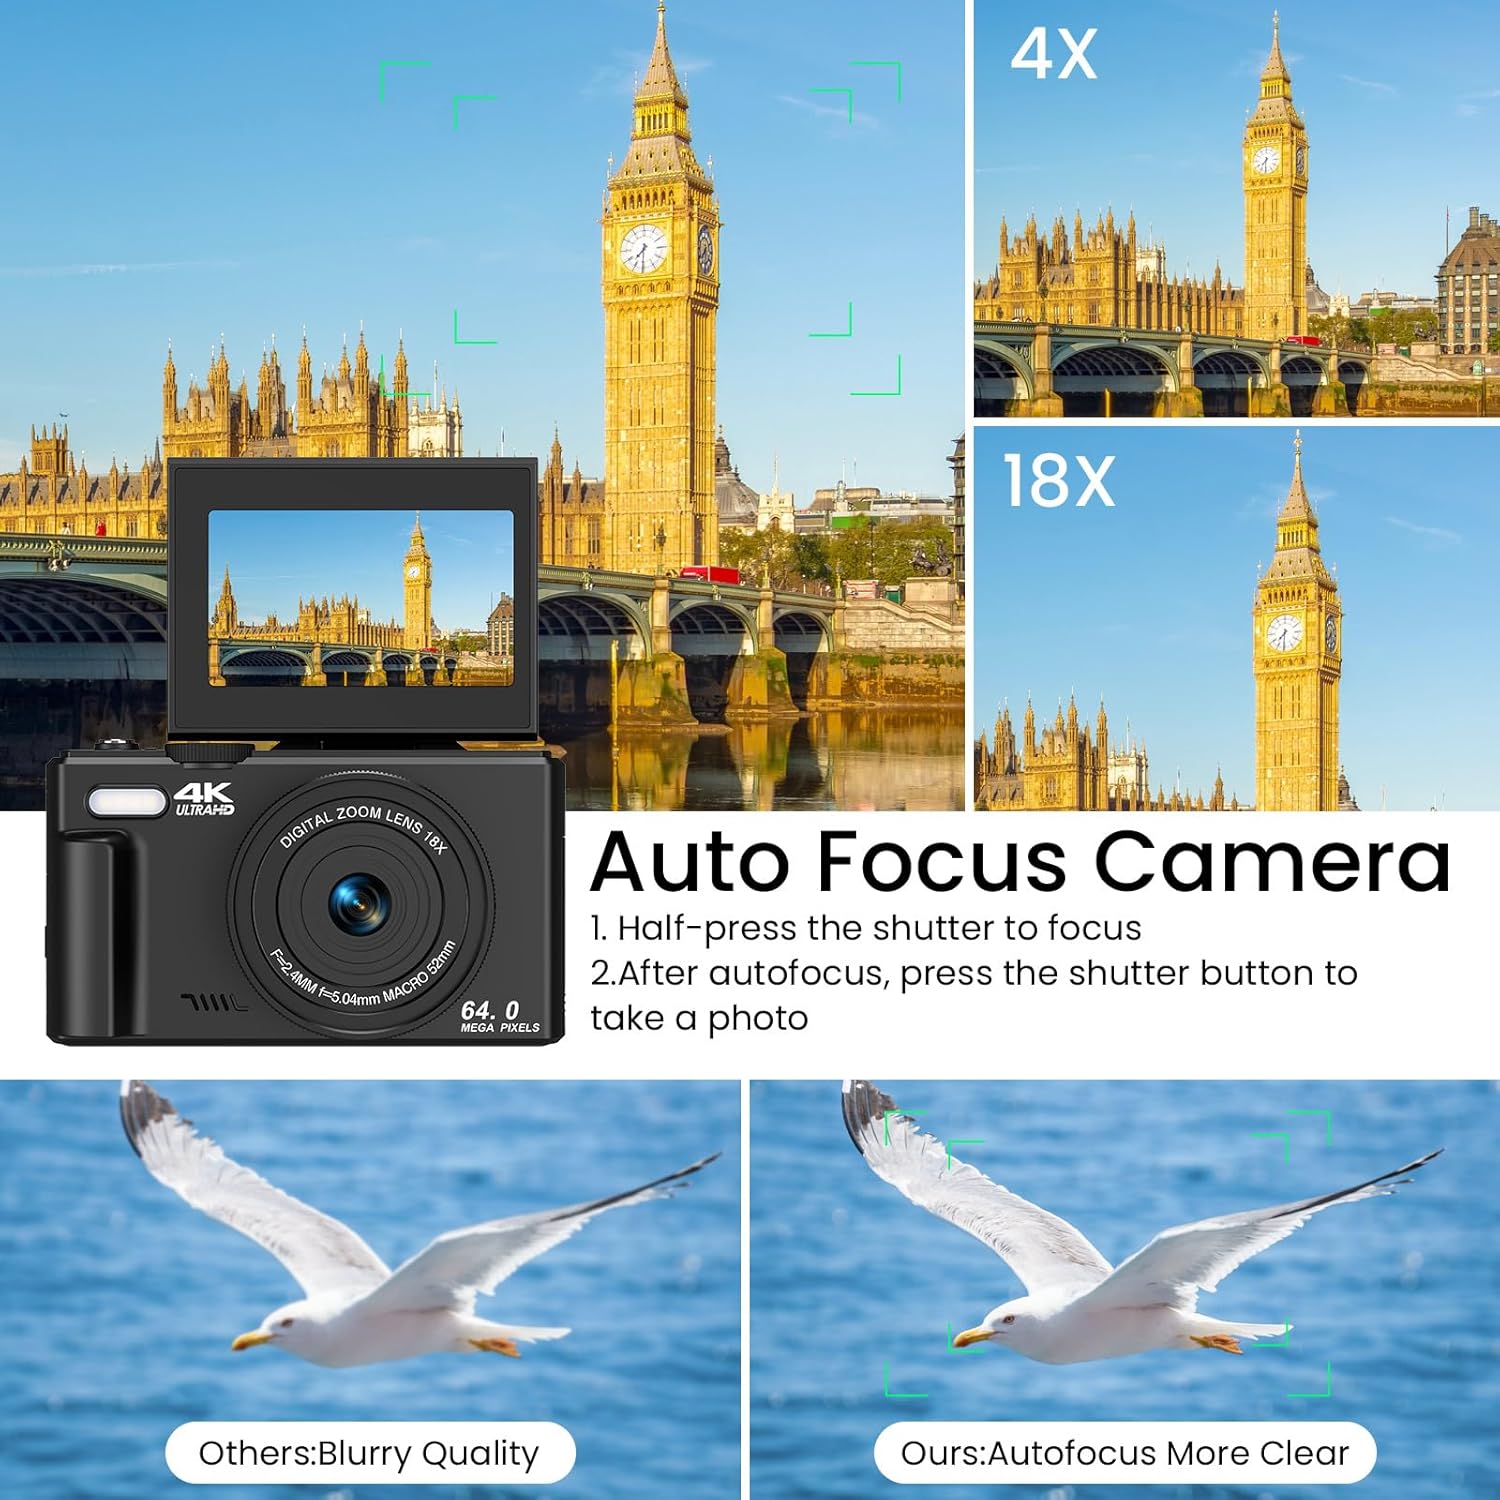
Figure 4.1: Illustration of the autofocus function, showing how to achieve clear images.
4.3 Запіс відэа
- Выберыце рэжым відэа: Turn the mode dial to the video icon.
- Пачаць запіс: Press the shutter button to begin recording. A red indicator on the screen will show recording is active.
- Спыніць запіс: Націсніце кнопку спуску затвора яшчэ раз, каб спыніць запіс.
4.4 Выкарыстанне маштабавання
Use the T (Telephoto) and W (Wide) buttons on the zoom lever to adjust the 18X digital zoom. Press T to zoom in and W to zoom out.

Figure 4.2: Demonstration of the 18X digital zoom capability, showing different levels of magnification.
4.5 Функцыя "Анты-трасенне".
The camera features an anti-shake function to help reduce blur in photos and videos, especially when shooting handheld or in motion. This feature is automatically enabled.

Figure 4.3: Comparison showing the effectiveness of the anti-shake feature in capturing clear action shots.
5. Пашыраныя магчымасці
5.1 180° Flip Screen
The LCD screen can be flipped 180 degrees, allowing you to easily frame yourself for selfies and vlogging. Simply pull the screen up and rotate it forward.
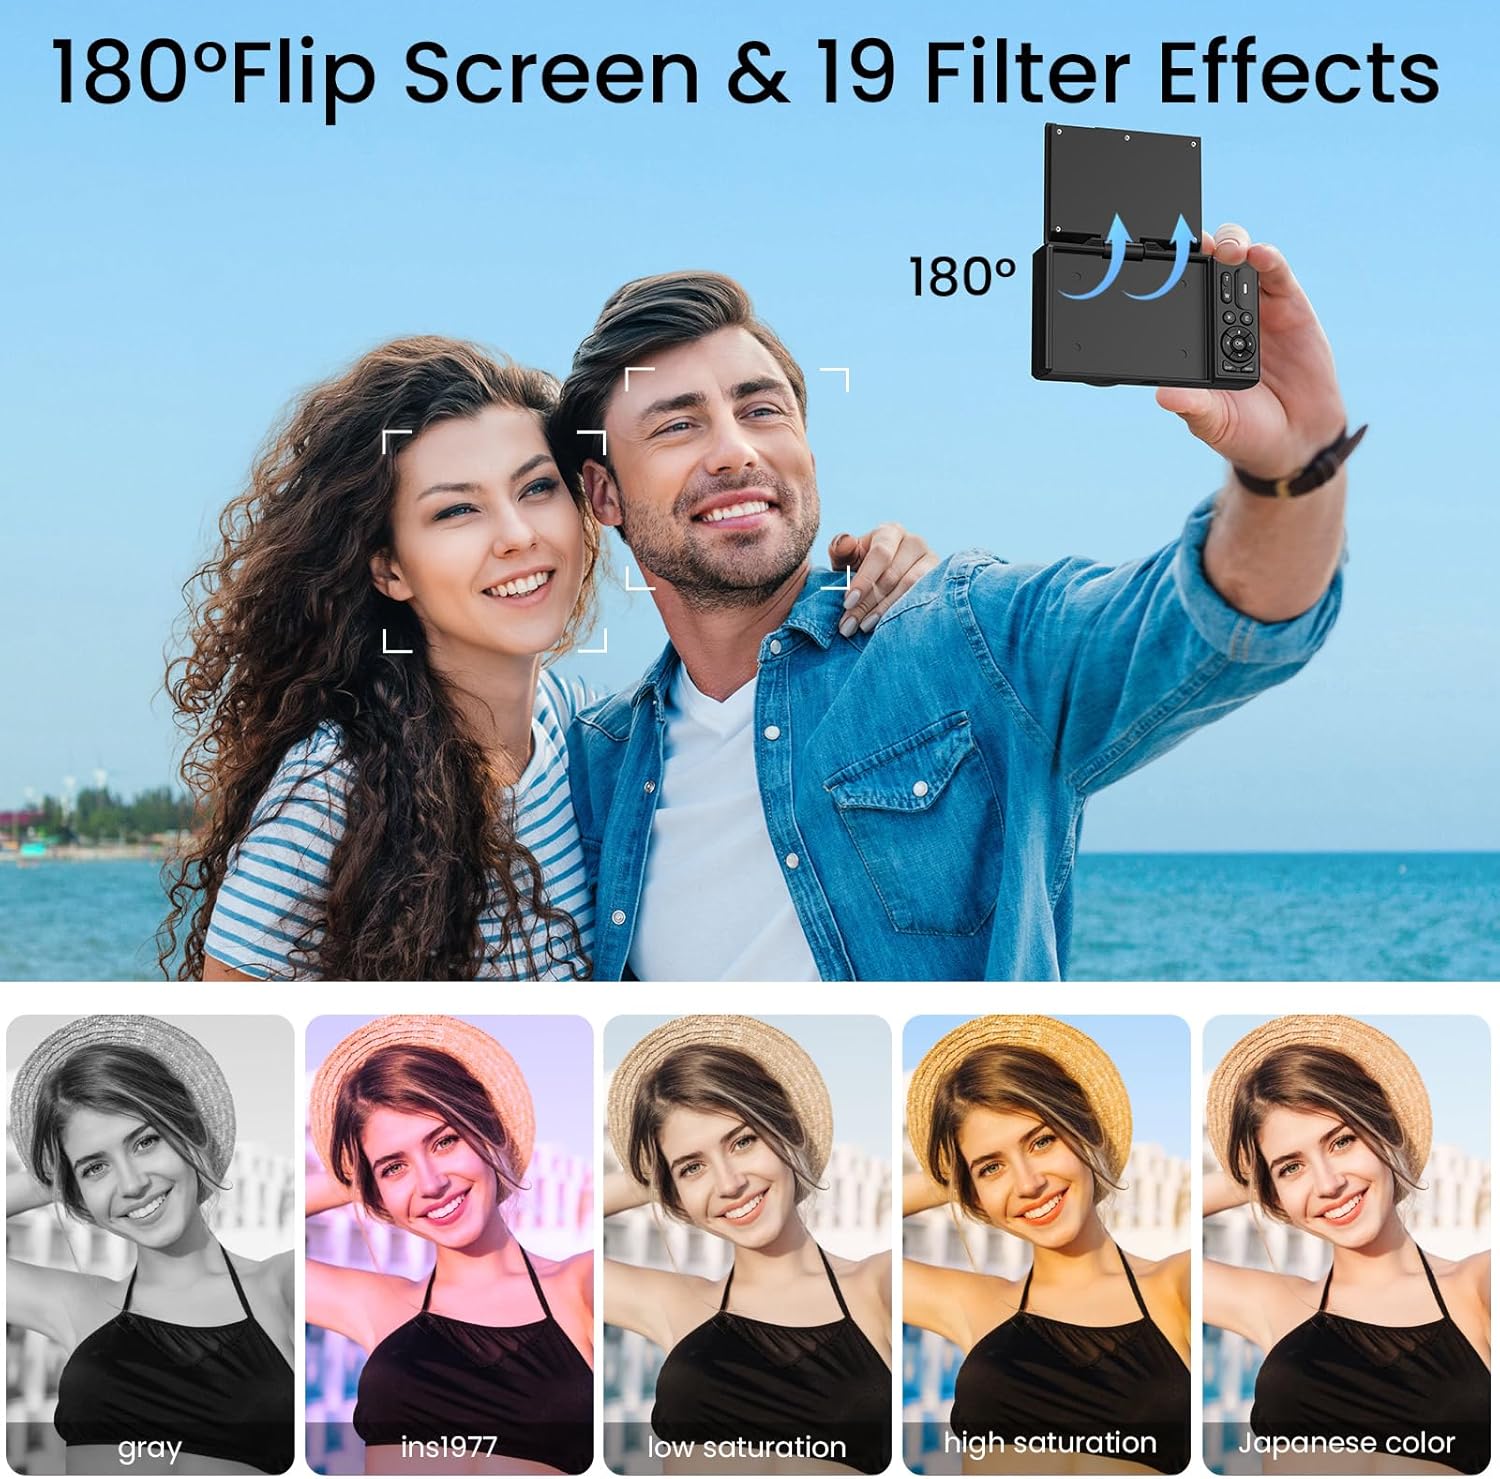
Figure 5.1: The camera's 180° flip screen, ideal for self-portraits and vlogging.

Figure 5.2: The flip screen in action, making it convenient for selfies and group shots.
5.2 Built-in Fill Light
Activate the built-in fill light to brighten your subjects in dimly lit environments, ensuring clearer photos and videos.

Figure 5.3: The camera's built-in fill light, enhancing visibility in low-light conditions.

Figure 5.4: Before and after comparison demonstrating the effectiveness of the fill light.
5.3 Special Shooting Modes and Effects
Your camera offers various modes and effects to enhance your creativity:
- Timed Shooting: Set a timer (2s, 5s, 10s, 15s, 30s) for self-portraits or group photos.
- Рэжым серыйнай здымкі: Capture a rapid sequence of photos for action shots.
- Slowly Shooting: Запісвайце відэа ў запаволеным рэжыме.
- Lapse Effects: Create time-lapse videos by compressing time.
- Распазнаванне твараў і захоп усмешак: Automatically detects faces and captures smiles.
- Beauty Function: Enhances facial features for more flattering portraits.
- 19 Filter Effects: Apply various artistic filters (e.g., Gray, Ins1977, Low Saturation, High Saturation, Japanese Color) to your photos.

Малюнак 5.5: Закончанаview of creative shooting modes available on the camera.

Малюнак 5.6: Выпamples of the 19 built-in filter effects that can be applied to photos.

Figure 5.7: The Beauty Effect and Smile Face Detection features for enhanced portraits.
5.4 WiFi Transfer
Transfer photos and videos wirelessly to your smartphone or computer using the camera's built-in Wi-Fi function. Refer to the camera's on-screen menu for specific instructions on connecting to a Wi-Fi network and transferring files.
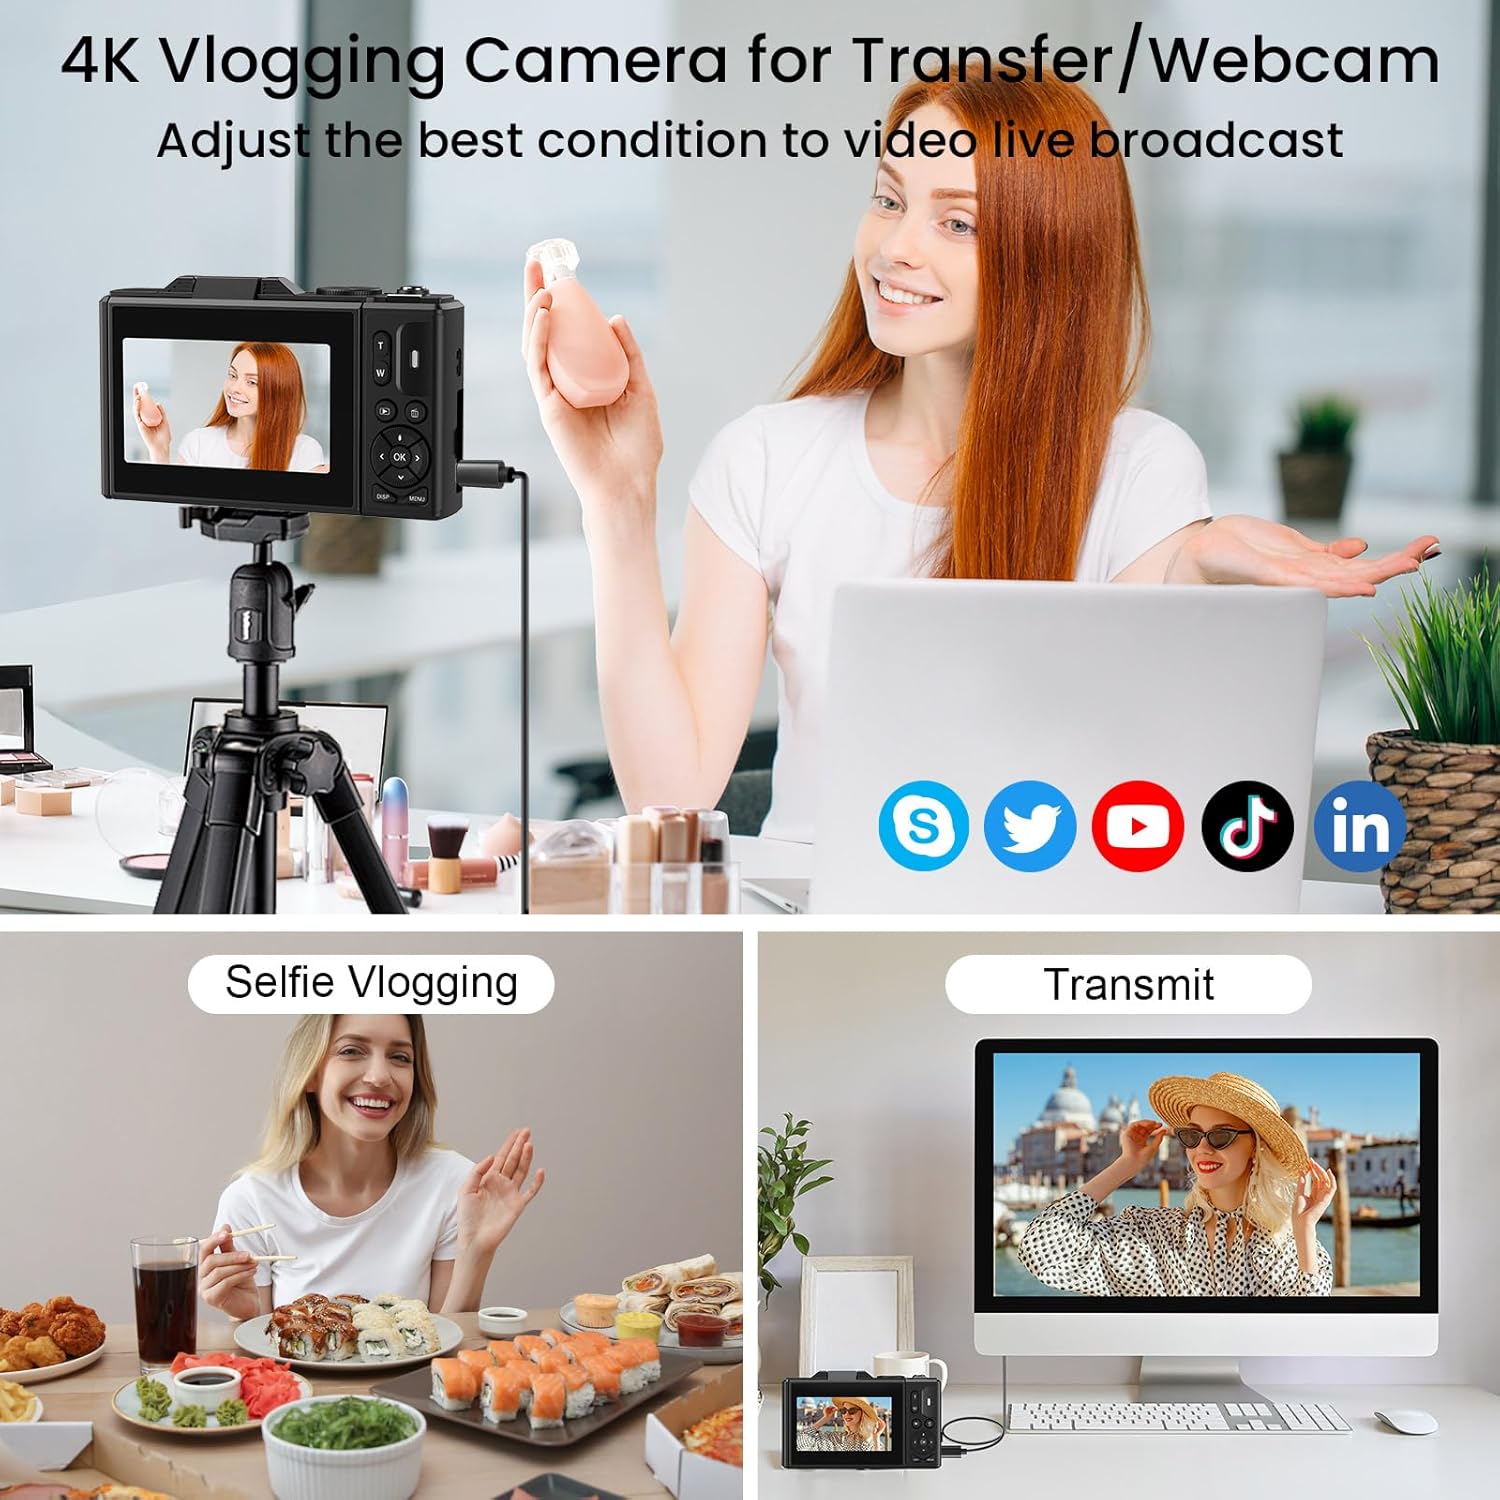
Figure 5.8: The camera supports WiFi transfer for easy sharing of content.

Figure 5.9: Visual representation of wireless file transfer from camera to smartphone.
5.5 WebФункцыянальнасць камеры
Connect your LAMA camera to a computer via the USB-C cable to use it as a webcam for video calls or live streaming. Select the "Webcam" option on the camera's screen when prompted after connecting.

Figure 5.10: The camera can be used as a webcam for video conferencing or streaming.
5.6 Афіцыйныя відэа пра прадукт
Watch these official videos for a visual guide on using your LAMA 4K UHD Digital Camera.
Відэа 5.1: Оверview of the LAMA 4K UHD 64MP Digital Camera's features and functions.
Video 5.2: A demonstration of the LAMA 4K Digital Camera's capabilities in various scenarios.
6. Тэхнічнае абслугоўванне
- Уборка: Для чысткі корпуса камеры выкарыстоўвайце мяккую сухую тканіну. Для аб'ектыва выкарыстоўвайце спецыяльную тканіну і раствор для чысткі аб'ектываў. Пазбягайце выкарыстання агрэсіўных хімічных рэчываў.
- захоўванне: Захоўвайце камеру ў прахалодным, сухім месцы, удалечыні ад прамых сонечных прамянёў і экстрэмальных тэмператур. Выміце акумулятар, калі захоўваеце яе працяглы час.
- Сыход за батарэяй: Fully charge the battery before first use. Avoid overcharging or completely draining the battery.
- Карта памяці: Regularly back up your photos and videos to a computer or external storage device. Format the memory card periodically within the camera to maintain optimal performance.
7. Выпраўленне непаладак
| праблема | Магчымае рашэнне |
|---|---|
| Камера не ўключаецца. | Ensure the battery is fully charged and correctly inserted. Try charging the camera for at least 30 minutes. |
| Нельга рабіць фота/запісваць відэа. | Check if a memory card is inserted and has sufficient free space. Ensure the mode dial is set to the correct mode (Photo/Video). |
| Выявы размытыя. | Ensure the autofocus has locked onto the subject (green frame). Check for smudges on the lens and clean if necessary. Ensure sufficient lighting. |
| Wi-Fi transfer not working. | Ensure Wi-Fi is enabled on both the camera and your smart device. Follow the specific connection instructions in the camera's menu. |
| Камера завісае або перастае рэагаваць. | Выміце батарэю, пачакайце некалькі секунд і зноў устаўце яе, каб выканаць мяккі скід. |
8. Тэхнічныя характарыстыкі
| Асаблівасць | Дэталь |
|---|---|
| Назва мадэлі | LM249A |
| Дазвол фотадатчыка | 75 МП (эфектыўнае разрозненне для фота) |
| Дазвол відэа | 4K UHD |
| Лічбавы зум | 18X |
| Памер экрана | 3.0 inches (Tilting LCD) |
| Стабілізацыя выявы | Digital (Anti-Shake) |
| Сувязь | Wi-Fi, USB-C |
| Носьбіты інфармацыі | Micro SD (TF) Card, up to 64GB |
| Тып батарэі | Літый-палімерны |
| Асаблівасці | 180° Flip Screen, Built-in Fill Light, Autofocus, Face Detection, Smile Capture, Timed Shooting, Burst Mode, Slow Motion, Time-Lapse, 19 Filter Effects, WebФункцыя камеры |
| Вага прадмета | 8.8 унцыі |
9. Гарантыя і падтрымка
The LAMA 4K UHD 75MP Digital Camera comes with a 1-year warranty from the date of purchase. For technical support, warranty claims, or any questions regarding your product, please contact LAMA customer service through the retailer's platform or visit the official LAMA brand store online. Please retain your proof of purchase for warranty validation.
10. Аксэсуары, якія ўваходзяць у камплект
The following items are included with your LAMA 4K UHD 75MP Digital Camera:
- LAMA 4K UHD 75MP Digital Camera Body
- 64GB Micro SD (TF) Card
- 2 х акумулятарныя батарэі
- Cap аб'ектыў
- USB-кабель тыпу C
- Шнурок
- Сумка для захоўвання
- Кіраўніцтва карыстальніка (гэты дакумент)

Figure 10.1: All accessories included with the camera package.