
1. Уводзіны
This manual provides essential instructions for the safe and effective operation, setup, and maintenance of your VEVOR 8-in-1 Heat Press Machine, Model 1215GB2. This versatile machine is designed for heat transfer applications on various items, including T-shirts, hats, mugs, and plates. Please read this manual thoroughly before initial use and retain it for future reference.

Image 1.1: VEVOR 8-in-1 Heat Press Machine with a T-shirt.
2. Інструкцыі па тэхніцы бяспекі
- Заўсёды падключайце прыладу да заземленай разеткі з належным напружаннемtage.
- Keep hands and body parts away from the heating elements during operation to prevent burns. The heating plate reaches high temperatures.
- Пераканайцеся, што машына размешчана на ўстойлівай, цеплаўстойлівай паверхні.
- Не выкарыстоўвайце машыну ў вільготным абоamp умовы.
- Unplug the machine from the power source when not in use or before cleaning and maintenance.
- Never leave the machine unattended while it is powered on or heating.
- Трымайце дзяцей і хатніх жывёл далей ад машыны падчас працы.
- Use appropriate heat-resistant gloves when handling hot items or machine parts.
3. Прадукт скончыўсяview
The VEVOR 8-in-1 Heat Press Machine is a versatile heat transfer solution featuring a 12x15 inch main platen and multiple interchangeable attachments for various items.
Асноўныя характарыстыкі:
- Dual-Tube Heating Technology: Ensures rapid and even heat distribution across the entire platen, improving transfer quality.
- Функцыянальнасць 8-у-1: Includes attachments for T-shirts (12x15 inch), hats (6x3 inch), 30oz tumbler press, and two plate presses (8 inch and 10 inch).
- 360° Swing-Away Design: Allows the heating element to be safely moved aside, providing a clear workspace and reducing the risk of burns.
- Pull-Out Drawer: Facilitates easy placement and removal of items, enhancing safety and operational convenience.
- Лічбавая панэль кіравання: Precise digital display for temperature (32-480°F / 0-250°C) and time (0-999 seconds) settings, with switchable °C/°F modes.
- Рэгуляваны ціск: A knob allows for easy adjustment of pressure based on the thickness of the material being pressed.
- Teflon Coating: The heating plate features a non-stick Teflon coating for easy cleaning and to prevent scorching.
- Аўтаматычнае адключэнне: The machine automatically shuts off after 30 minutes of inactivity for safety.
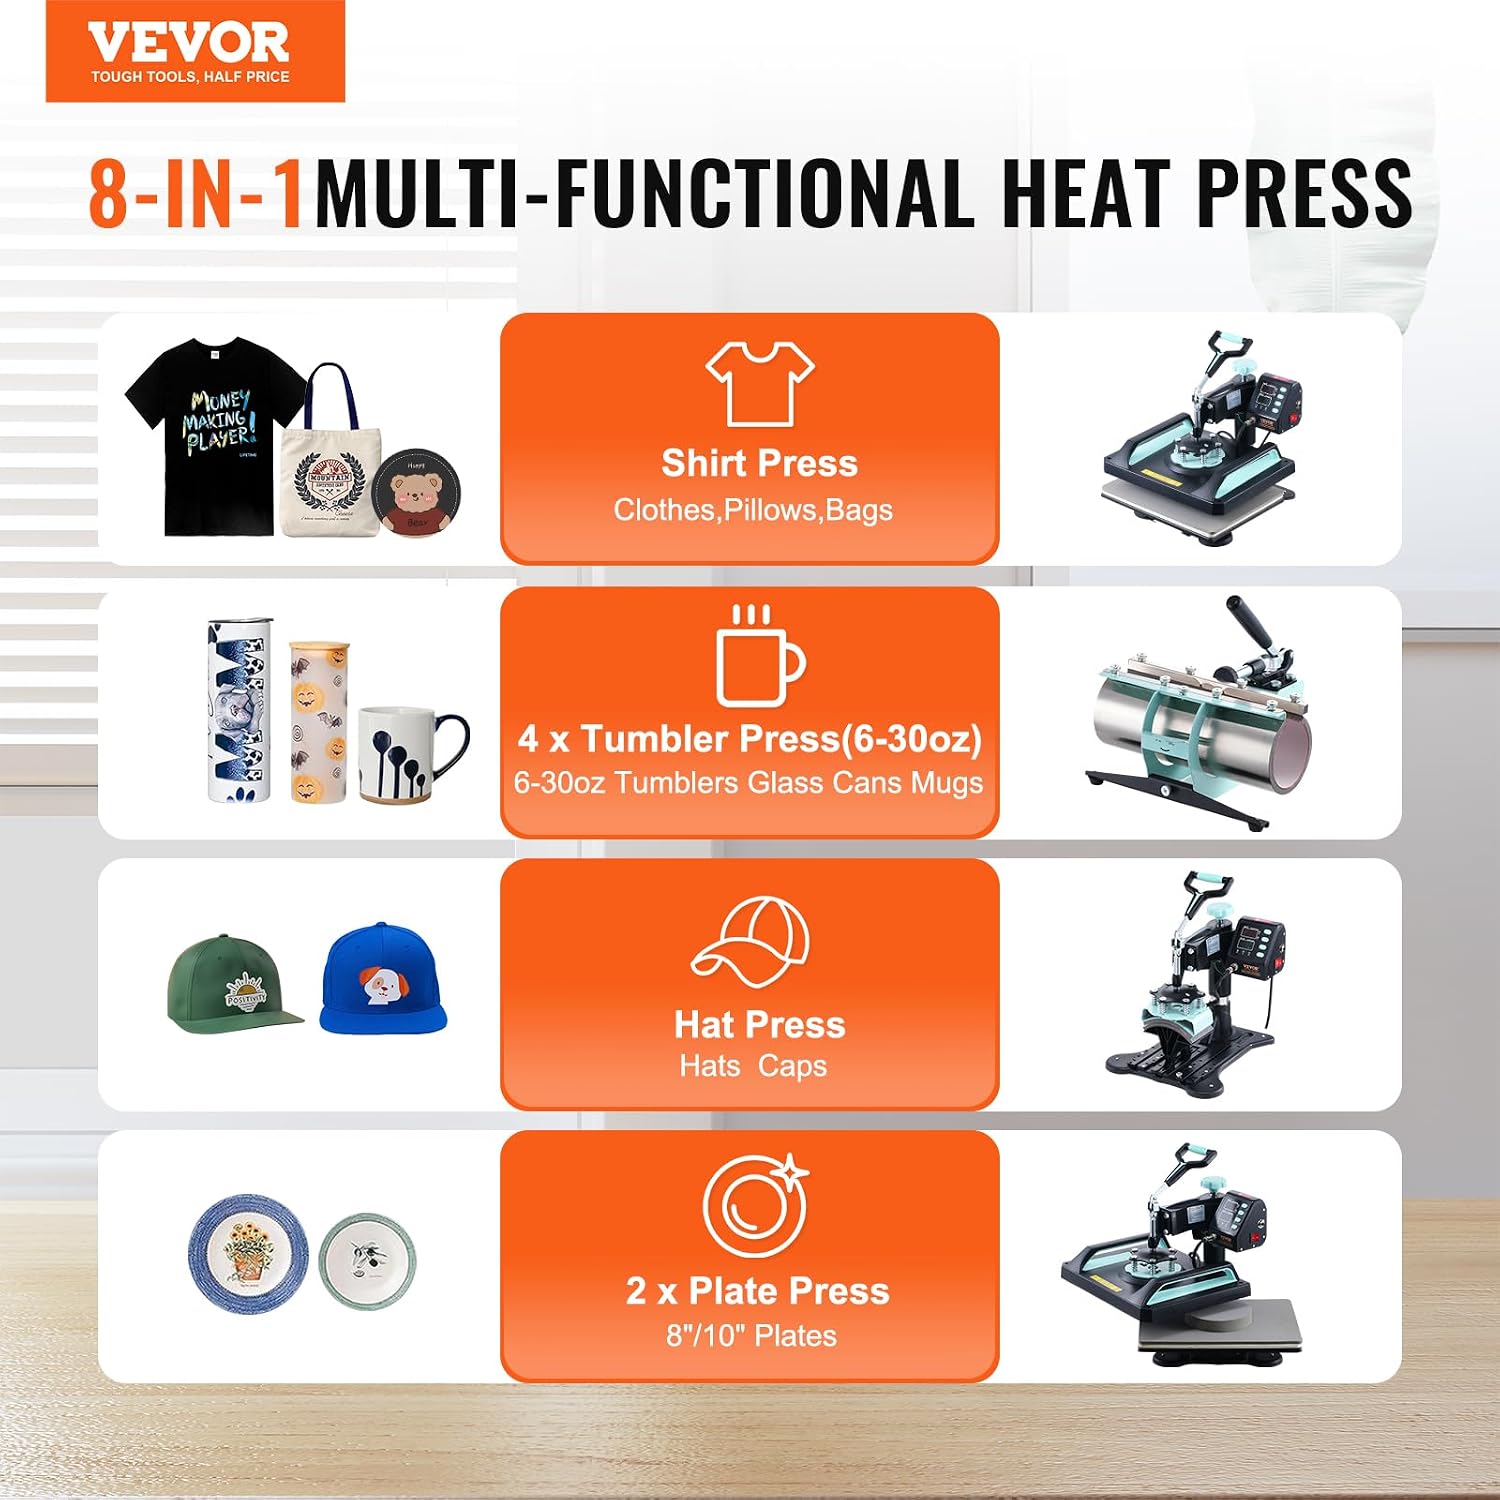
Выява 3.1: Канецview of the 8-in-1 multifunctional heat press capabilities.

Image 3.2: Illustration of Dual-Tube Heating technology for even heat.
4. Настройка
4.1 Распакоўка і зборка
- Акуратна дастаньце ўсе кампаненты з упакоўкі.
- Place the main heat press unit on a sturdy, level, and heat-resistant surface.
- Attach any necessary handles or accessories as per the included quick-start guide. Ensure all screws are tightened securely.
- Падключыце шнур харчавання да прылады, а затым да заземленай электрычнай разеткі.
4.2 Прымацаванне аксесуараў
To change attachments (e.g., from T-shirt platen to hat press or mug press):
- Ensure the machine is unplugged and completely cool.
- Loosen the securing screws or clamps holding the current attachment.
- Carefully remove the attachment.
- Align the desired attachment with the mounting points and secure it firmly with the screws or clamps.
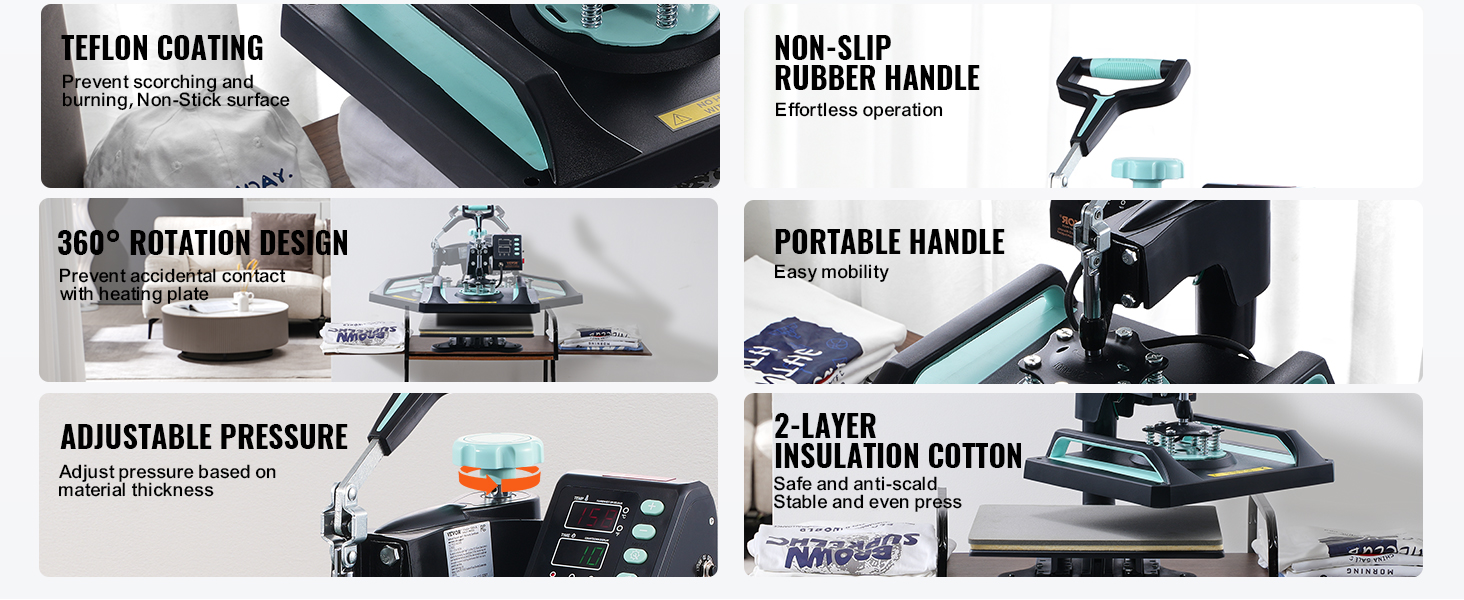
Image 4.1: General assembly of the heat press base.
Video 4.1: Official VEVOR video demonstrating the heat press machine and its features.
5. Інструкцыя па эксплуатацыі
5.1 Уключэнне і пачатковыя налады
- Падключыце машыну да заземленай разеткі.
- Flip the red power switch to the 'ON' position. The digital display will illuminate.
- Press the 'SET' button to enter temperature setting mode. Use the 'Up' and 'Down' arrows to adjust the desired temperature. Press 'SET' again to confirm.
- Press 'SET' again to enter time setting mode. Use the 'Up' and 'Down' arrows to adjust the desired time in seconds. Press 'SET' again to confirm.
- The machine will begin heating to the set temperature. An alarm will sound when the target temperature is reached.
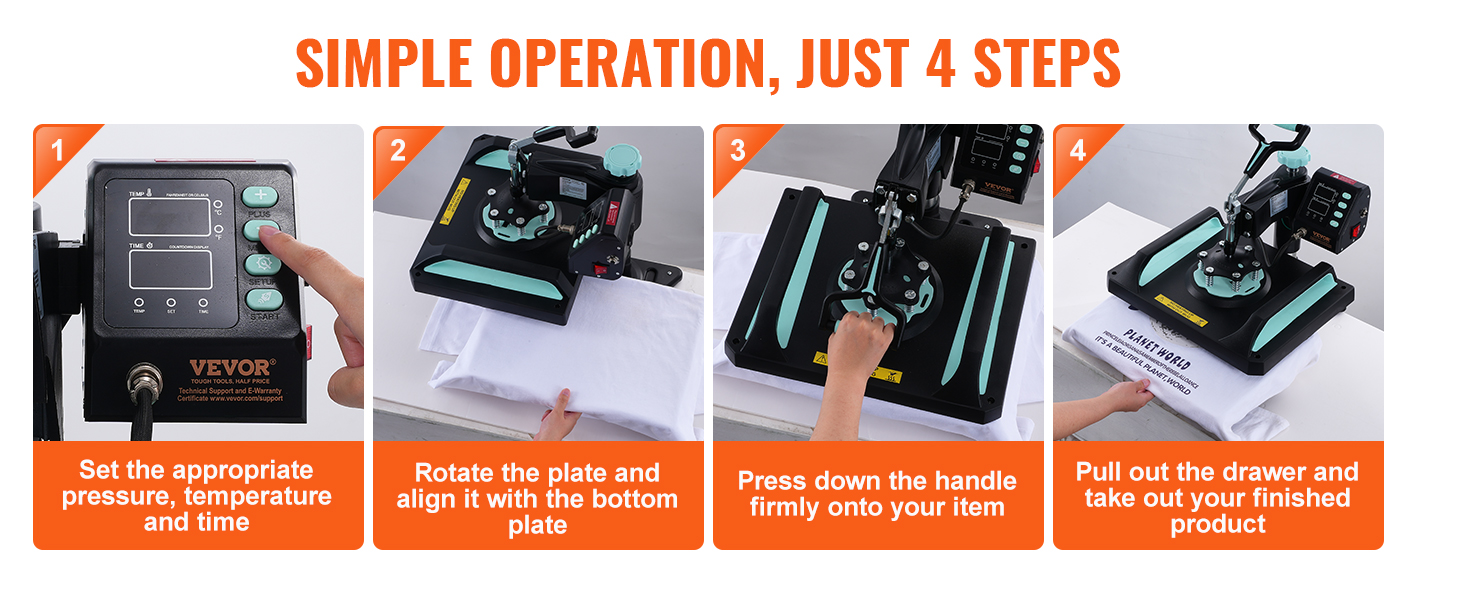
Image 5.1: Digital control panel for setting temperature and time.
Video 5.1: Official VEVOR video demonstrating the multi-functional heat press, including tumbler pressing.
5.2 Рэгуляванне ціску
The pressure knob located on top of the heating element allows you to adjust the downward force. Turn clockwise for more pressure and counter-clockwise for less pressure. Test the pressure on a scrap material before pressing your final item.
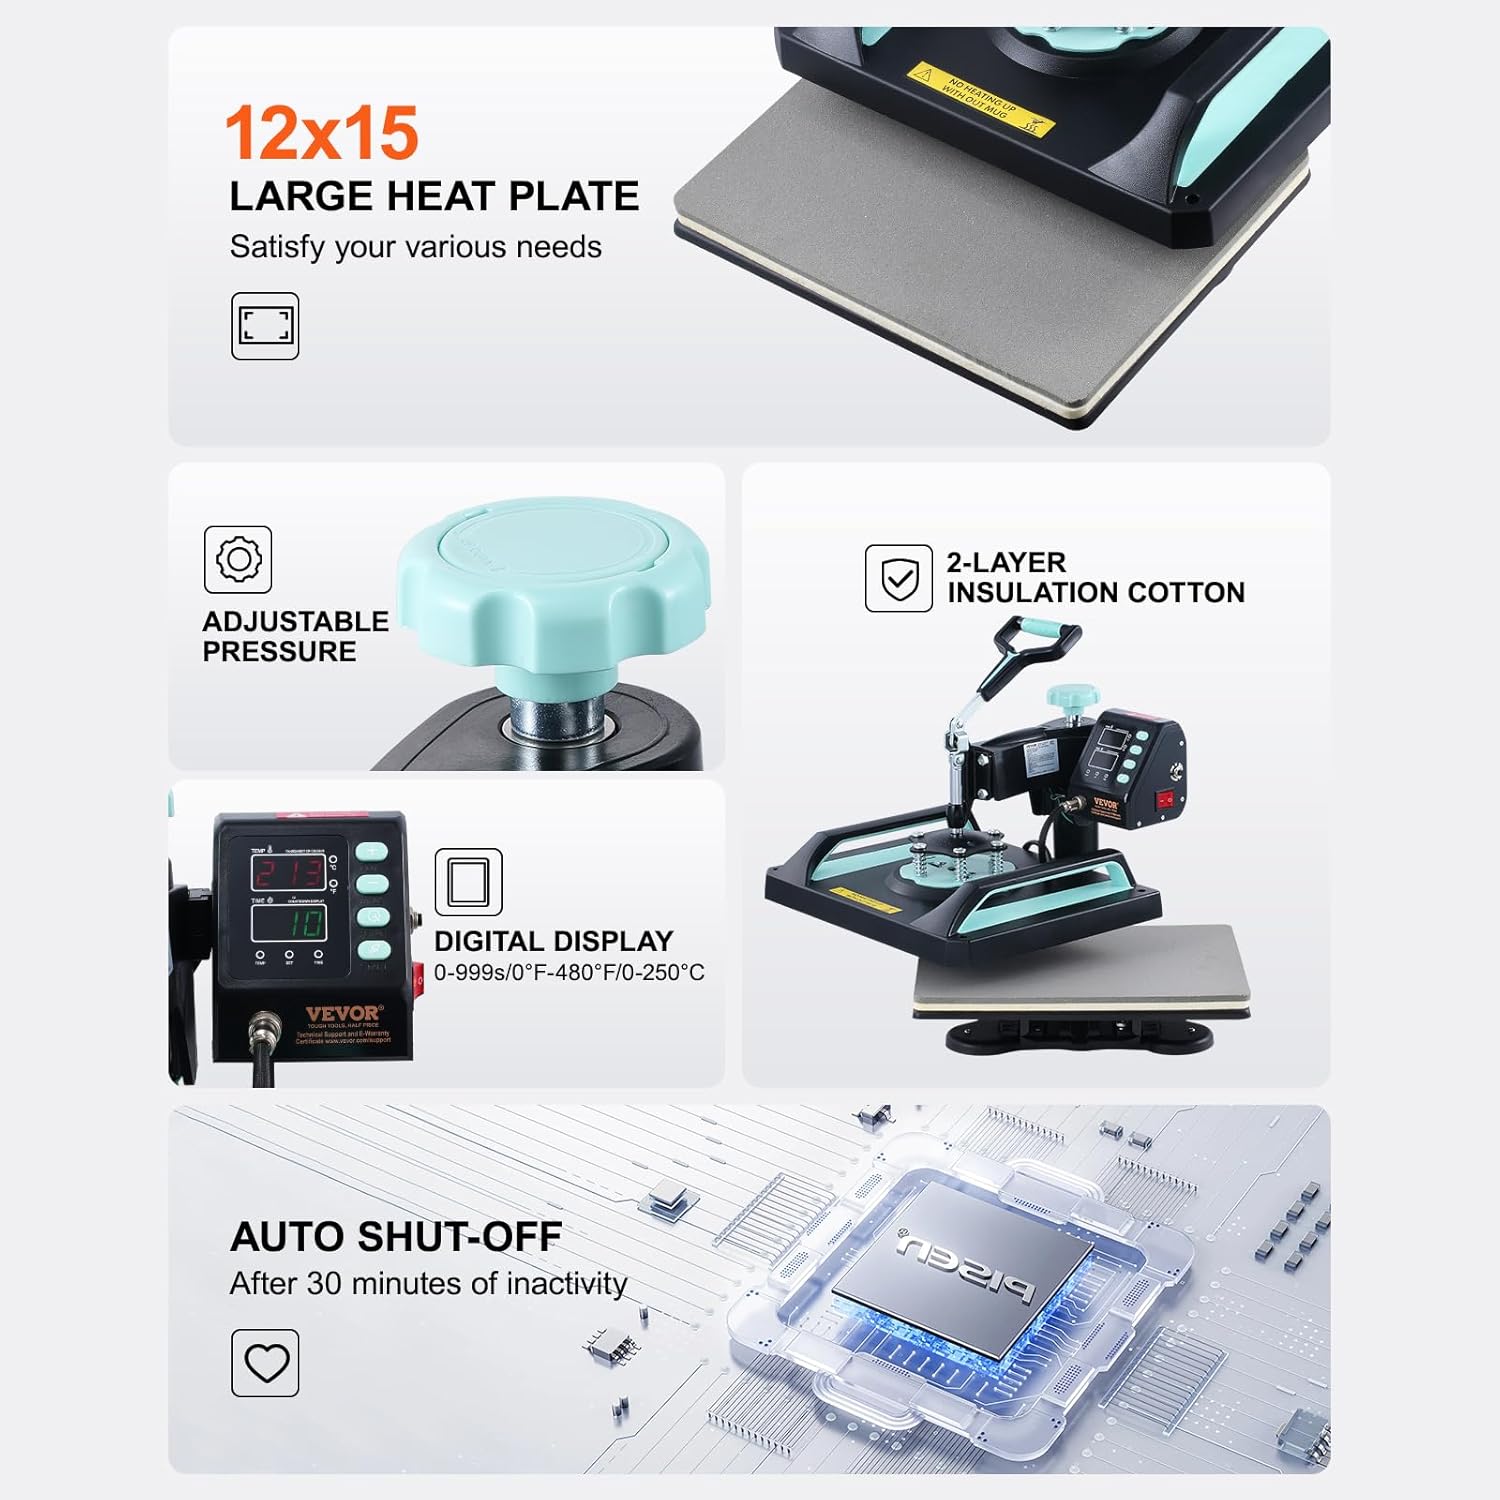
Image 5.2: Adjustable pressure knob.
5.3 General Pressing Procedure (T-shirts, Hoodies, Bags)
- With the heating plate swung away, pull out the lower platen (drawer design).
- Place your garment or item onto the lower platen, ensuring it is flat and smooth.
- Position your transfer design onto the item.
- Push the lower platen back into position.
- Swing the heating plate over the item.
- Press the handle down firmly to engage the heat press. The timer will automatically start.
- When the timer alarm sounds, lift the handle, swing the heating plate away, and pull out the lower platen.
- Carefully remove your pressed item (use heat-resistant gloves if necessary).

Image 5.3: Slide-out design for safe and easy item placement.

Image 5.4: Simple 4-step operation guide.
5.4 Using the Tumbler Press Attachment
- Ensure the tumbler press attachment is securely installed.
- Adjust temperature and time settings according to your tumbler and transfer material specifications.
- Wrap your transfer design around the tumbler and secure it with heat-resistant tape.
- Place the prepared tumbler into the tumbler press.
- Close the press handle firmly. The timer will start.
- Once the timer alarm sounds, open the press and carefully remove the hot tumbler.
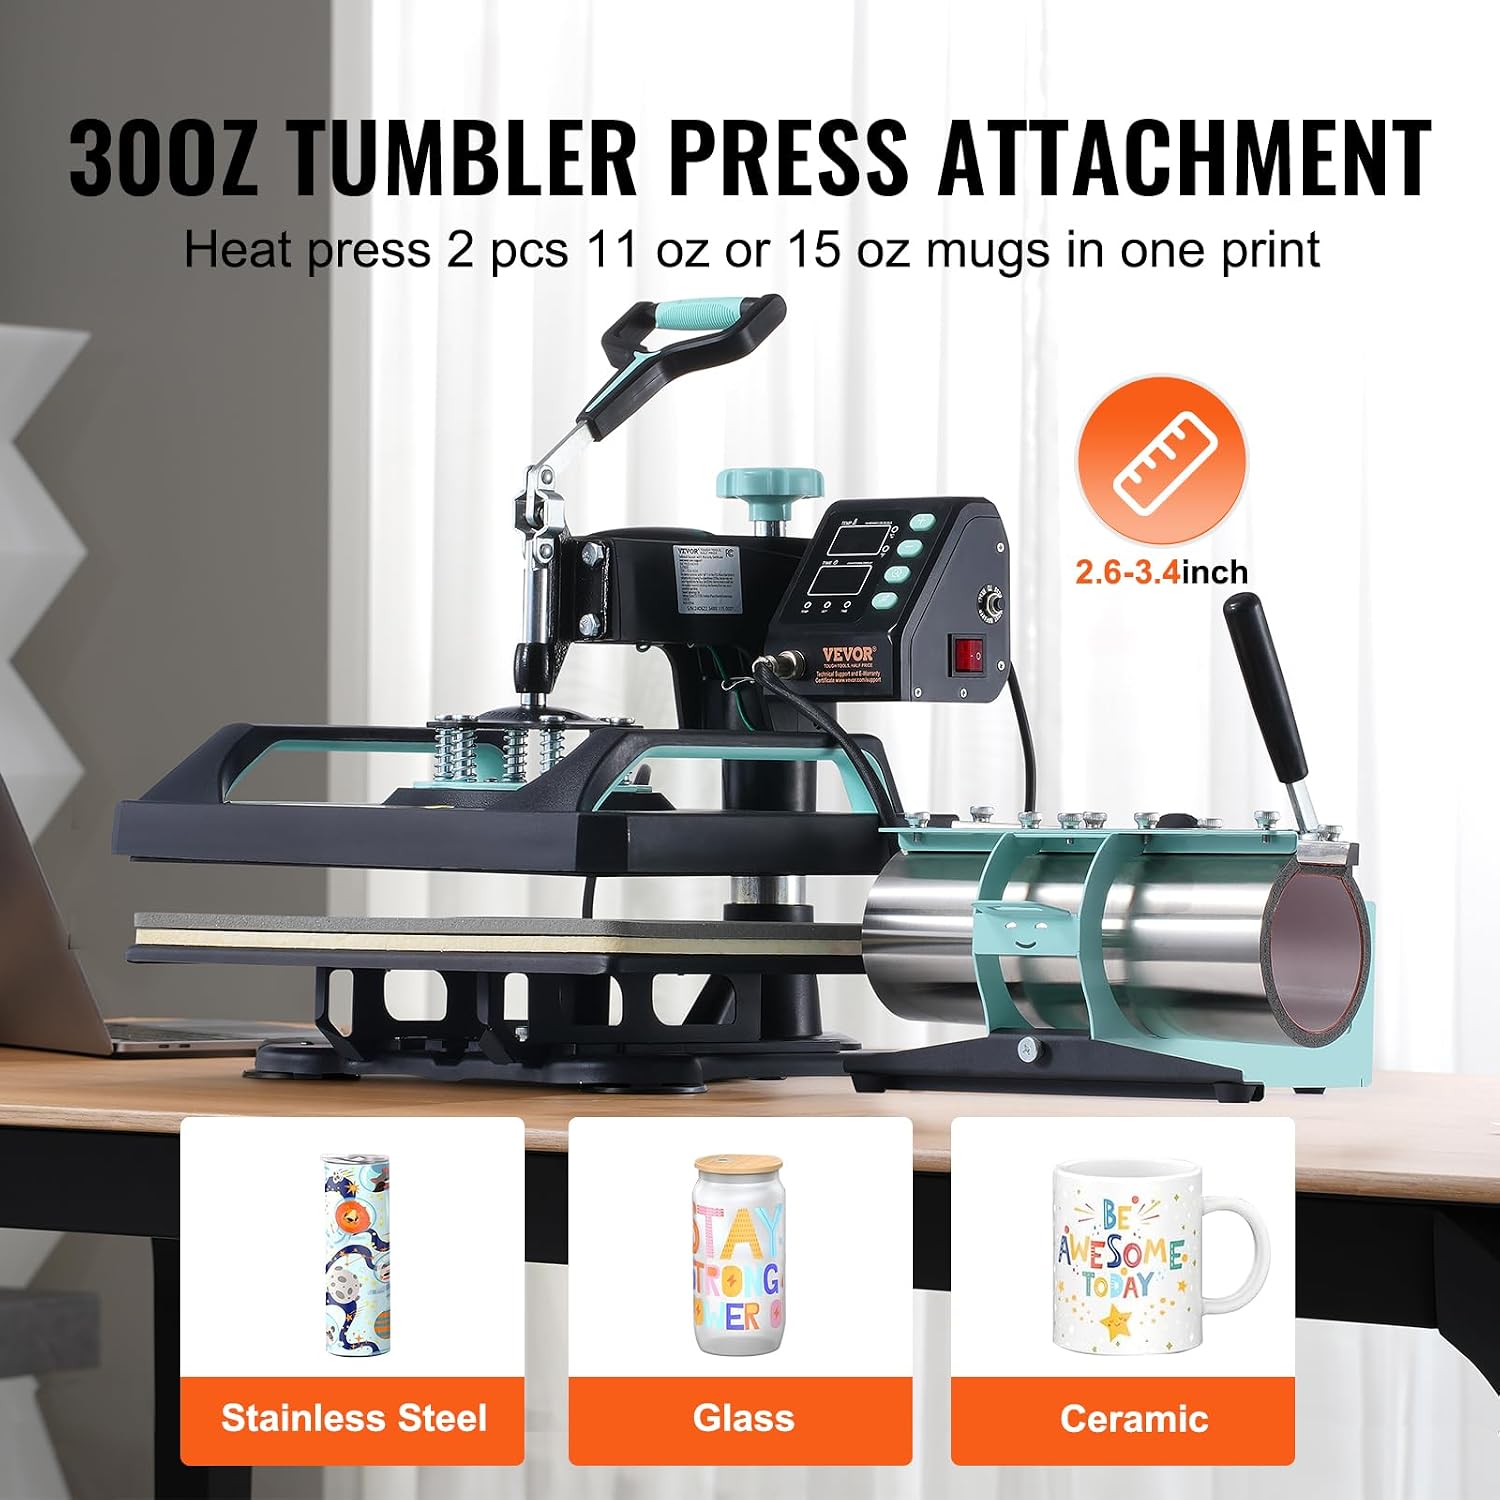
Image 5.5: 30oz Tumbler Press Attachment.
5.5 Using the Hat Press Attachment
- Ensure the hat press attachment is securely installed.
- Adjust temperature and time settings for your hat and transfer material.
- Place the hat onto the curved lower platen, ensuring it is smooth and centered.
- Position your transfer design onto the hat.
- Close the press handle firmly. The timer will start.
- When the timer alarm sounds, open the press and carefully remove the hat.
5.6 Using the Plate Press Attachments
- Ensure the correct size plate press attachment is securely installed.
- Adjust temperature and time settings for your plate and transfer material.
- Place the plate onto the lower platen.
- Position your transfer design onto the plate.
- Close the press handle firmly. The timer will start.
- When the timer alarm sounds, open the press and carefully remove the hot plate.
6. Тэхнічнае абслугоўванне
6.1 Ачыстка
- Always ensure the machine is unplugged and completely cool before cleaning.
- Wipe the Teflon-coated heating plate with a soft, damp cloth. Do not use abrasive cleaners or sharp objects that could damage the coating.
- Ачысціце вонкавыя паверхні мяккай сухой анучай.
- Regularly check and clean any debris from around the moving parts and attachments.
6.2 Захоўванне
- Store the heat press in a dry, dust-free environment.
- Keep the machine covered to prevent dust accumulation.
7. Выпраўленне непаладак
| праблема | Магчымая прычына | Рашэнне |
|---|---|---|
| Машына не ўключаецца | No power supply; Power switch off; Blown fuse/circuit breaker | Check power cord connection; Ensure power switch is ON; Check household circuit breaker. |
| Нераўнамернае размеркаванне цяпла | Heating element issue; Incorrect pressure setting | Ensure even pressure adjustment; Contact customer support if heating element is faulty. |
| Перадача не прылягае належным чынам | Incorrect temperature/time; Insufficient pressure; Wrong transfer material | Verify settings with transfer material instructions; Adjust pressure; Ensure correct transfer type for material. |
| Scorching or burning of material | Temperature too high; Time too long | Reduce temperature; Decrease press time; Use a Teflon sheet or parchment paper for protection. |
| Лічбавы дысплей не працуе | Loose connection; Control panel fault | Праверце падключэнні; звярніцеся ў службу падтрымкі кліентаў. |
8. Тэхнічныя характарыстыкі
| Асаблівасць | Дэталь |
|---|---|
| Марка | ВЕВОР |
| Нумар мадэлі | 1215GB2 |
| Main Platen Dimensions | 12 х 15 цалі |
| Tumbler Press Capacity | 30 oz (can handle two 11oz/15oz mugs) |
| Hat Press Dimensions | 6 х 3 цалі |
| Plate Press Sizes | 8 цаляў, 10 цаляў |
| Дыяпазон тэмператур | 32-480 ° F / 0-250 ° C |
| Дыяпазон часу | 0-999 секунды |
| Матэрыял | Aluminum, Metal, Plastic, Silicone |
| Памеры прадукту (Д х Ш х У) | 15 см Д х 15 см Ш х 16 см В |
| Вага прадмета | 35 фунта |
| Колер | Зялёны |
| UPC | 197988485445 |
9. Інфармацыя аб гарантыі
This VEVOR Heat Press Machine comes with a 2-гадовая гарантыя вытворцы. Please retain your proof of purchase for warranty claims. The warranty covers defects in materials and workmanship under normal use. It does not cover damage caused by misuse, accidents, unauthorized modifications, or failure to follow the instructions in this manual.
10. Падтрымка кліентаў
For technical assistance, troubleshooting beyond this manual, or warranty inquiries, please contact VEVOR customer support through their official website or the retailer where the product was purchased. Have your model number (1215GB2) and proof of purchase ready when contacting support.