usogood TC30
Інструкцыя па эксплуатацыі камеры для слядоў usogood TC30 4K 48MP
Model: TC30 | Brand: usogood
Уводзіны
This manual provides detailed instructions for the setup, operation, and maintenance of your usogood TC30 4K 48MP Trail Camera. Designed for wildlife monitoring and outdoor security, this camera captures high-resolution photos and videos with advanced night vision and motion detection capabilities. Please read this manual thoroughly before using the camera to ensure optimal performance and longevity.
Інфармацыя па бяспецы
- Do not immerse the camera in water, despite its IP66 rating, to prevent damage.
- Use only specified battery types (AA batteries). Ensure correct polarity during installation.
- Keep the camera away from extreme temperatures and direct sunlight for prolonged periods.
- Handle the lens and screen with care to avoid scratches.
- Захоўваць у месцах, недаступных дзецям.
Змест пакета
Праверце, ці ёсць усе прадметы ў вашай упакоўцы:
- usogood TC30 Trail Camera (1)
- Карта памяці 32 ГБ (1)
- Батарэі АА (8)
- Mounting Belt (1)
- USB-кабель (1)
- Інструкцыя па эксплуатацыі (1)

Figure 1: TC30 Trail Camera with included accessories.
Прадукт скончаныview
Familiarize yourself with the main components of your usogood TC30 Trail Camera.

Малюнак 2: Спераду view of the TC30 Trail Camera.
Ключавыя кампаненты:
- Асноўны аб'ектыў: Captures photos and videos.
- Infrared LEDs (36pcs 850nm): Provide illumination for night vision without visible flash.
- PIR Motion Sensors (120° detection): Detects movement to trigger recording.
- 2.0-цалевы ВК-экран: For menu navigation and viewзапісаныя медыяфайлы.
- Кнопкі кіравання: MENU, UP, DOWN, OK, MODE for camera settings.
- Пераключальнік рэжымаў: OFF, TEST, ON positions.
- Батарэйны адсек: Утрымлівае 8 батарэйкі тыпу АА.
- Слот для SD-карты: Для ўстаўкі карты памяці.
- Порт USB: Для падлучэння да кампутара.
- External Power Port (DC 6V/2.0A): For optional external power supply.
Настройка
1. Устаноўка батарэі
- Open the camera's latch on the right side and open the front cover.
- Знайдзіце адсек для батарэі ў ніжняй частцы камеры.
- Insert 8 new AA batteries, paying close attention to the positive (+) and negative (-) indicators inside the compartment to ensure correct polarity. The camera can also operate with 4 batteries installed on one side.
- Надзейна зачыніце крышку батарэйнага адсека.

Малюнак 3: Схема ўстаноўкі акумулятара.
2. Устаноўка SD-карты
- With the front cover open, locate the SD card slot on the side of the camera.
- Insert the provided 32GB SD card into the slot with the metal contacts facing the back of the camera until it clicks into place.
- Каб выняць, акуратна націсніце на карту да пстрычкі, затым адпусціце, і яна выскочыць.

Figure 4: SD card insertion.
3. Мантаж камеры
- Use the provided mounting belt to secure the camera to a tree or pole. Thread the belt through the slots on the back of the camera.
- Adjust the belt tightly to ensure the camera is stable and does not move.
- Position the camera to cover the desired monitoring area, ensuring no obstructions block the view or motion sensors.

Figure 5: Camera mounted on a tree.
4. Уключэнне і пачатковыя налады
- Ссуньце пераключальнік рэжымаў з ВЫКЛ каб ТЭСТ. The screen will turn on.
- Выкарыстоўвайце МЕНЮ button to access settings. Navigate with UP і УНІЗ arrows, and confirm with OK.
- Set the correct Date and Time first.
- Configure desired settings such as photo resolution (48MP), video resolution (4K), capture mode (photo, video, or photo+video), trigger interval, and PIR sensitivity.
- Once settings are complete, slide the switch from ТЭСТ каб ВЫКЛ, then to ON to activate the camera for monitoring. The screen will turn off, and the camera will enter monitoring mode.
Інструкцыя па эксплуатацыі
Рэжым маніторынгу
When the camera is in the ON position, it will automatically detect motion within its 120° detection angle and trigger recording based on your settings. The 0.3-second trigger speed ensures minimal delay in capturing events.

Figure 6: 120° PIR Wide Angle Detection.

Figure 7: 0.3s Fast Trigger Speed.
Начное бачанне
The camera is equipped with 36pcs 850nm infrared LEDs for clear night vision. These LEDs provide moderate fill light, ensuring detailed images and videos without overexposure or startling wildlife. Night vision activates automatically in low-light conditions.
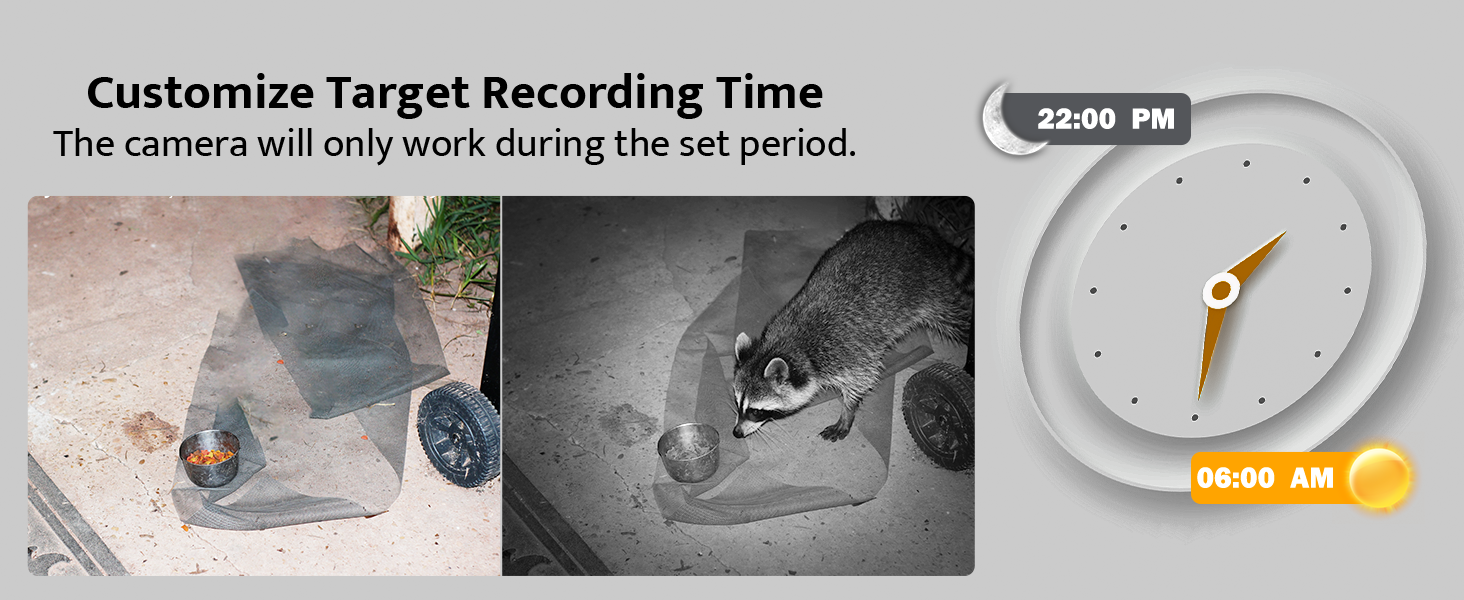
Figure 8: Night Vision Performance.
Viewing Captured Media
- On Camera: Перасуньце пераключальнік рэжымаў у становішча ТЭСТ. Выкарыстоўвайце РЭЖЫМ button to switch between photo and video playback. Use UP і УНІЗ arrows to browse files.
- На камп'ютары: Connect the camera to your computer using the provided USB cable, or remove the SD card and insert it into a card reader connected to your computer. The camera or SD card will appear as a removable disk, allowing you to access and transfer files.

Малюнак 9: Viewing on camera screen.

Figure 10: Transferring files на кампутар.
Тэхнічнае абслугоўванне
- Уборка: Выкарыстоўвайце мяккую сухую тканіну для чысткі аб'ектыва і корпуса камеры. Пазбягайце выкарыстання абразіўных ачышчальнікаў.
- Замена батарэі: Replace all 8 AA batteries when the low battery indicator appears on the screen or when performance degrades.
- Кіраванне SD-картай: Рэгулярна стварайце рэзервовыя копіі важных files and format the SD card in the camera's menu to ensure optimal recording performance and prevent data corruption.
- Воданепранікальная абарона: The camera has an IP66 waterproof rating, protecting it from dust and strong jets of water. Ensure all latches are securely closed to maintain its waterproof integrity, especially after accessing the battery or SD card compartments.

Малюнак 11: Воданепранікальная канструкцыя IP66.
Ліквідацыю непаладак
| праблема | Магчымая прычына | Рашэнне |
|---|---|---|
| Камера не ўключаецца. | Batteries are low or incorrectly installed. Mode switch is OFF. | Replace batteries or ensure correct polarity. Slide switch to TEST or ON. |
| Poor night vision images. | IR LEDs obstructed. Camera too far from subject. | Clear any obstructions. Reposition camera closer to the target area (within 65ft). |
| Camera not recording motion. | PIR sensitivity too low. SD card full or corrupted. | Increase PIR sensitivity in settings. Format or replace SD card. Ensure camera is in ON mode. |
| Date/Time is incorrect. | Not set or batteries removed for too long. | Re-enter Date/Time in TEST mode settings. |
| Fileне можа быць viewed on computer. | USB connection issue. SD card not properly inserted in reader. | Ensure USB cable is securely connected. Try a different USB port or card reader. |
Тэхнічныя характарыстыкі
| Асаблівасць | Дэталь |
|---|---|
| мадэль | TC30 |
| Эфектыўнае рашэнне | 48 мегапікселяў |
| Дазвол відэазахопу | 4K (30fps) |
| Кут выяўлення | 120 градусаў |
| Спускавая хуткасць | 0.3 секунд |
| Дыяпазон начнога бачання | 65 футаў (20 метраў) |
| ВК-святлодыёды | 36 штук 850 нм |
| Рэйтынг воданепранікальнасці | IP66 |
| Захоўванне | Micro SD Card (up to 128GB, 32GB included) |
| Крыніца харчавання | 8x AA Batteries (included) or DC 6V/2.0A external power supply (not included) |
| Памеры (Д х Ш х У) | 8.07 х 5.19 х 4 цалі |
| Вага | 1.59 фунта |
Гарантыя і падтрымка
usogood is committed to providing high-quality products and excellent customer service. Your usogood TC30 Trail Camera comes with a warranty and dedicated after-sales support.
For any inquiries, technical assistance, or warranty claims, please contact our customer service team. We aim to resolve any issues within 48 hours.
Адрас электроннай пошты службы падтрымкі: support@usogood.co

Figure 12: Customer Support Contact Information.
Ask a question about this manual
Ask about setup, troubleshooting, compatibility, parts, safety, or missing instructions. Manuals+ will review the question and use this page’s manual context to help answer it.