Важная інфармацыя па бяспецы
Please read all instructions carefully before using this monitor. Keep this manual for future reference.
- Не падвяргайце манітор уздзеянню дажджу або вільгаці, каб пазбегнуць узгарання або паражэння электрычным токам.
- Не адчыняйце манітор casing. Унутры няма дэталяў, якія можна абслугоўваць самастойна. Па ўсіх пытаннях абслугоўвання звяртайцеся да кваліфікаванага персаналу.
- Забяспечце належную вентыляцыю вакол манітора. Не блакуйце вентыляцыйныя адтуліны.
- Выкарыстоўвайце толькі адаптар сілкавання і кабелі, прадастаўленыя вытворцам.
- Адключыце вілку сілкавання ад разеткі, калі манітор не будзе выкарыстоўвацца працяглы час.
Змест пакета
Праверце, ці ёсць усе прадметы ў вашай упакоўцы:
- GIGABYTE MO32U Monitor
- Сілавы кабель
- Кабель HDMI 2.1
- Кабель DP (кабель DisplayPort)
- USB cable (USB Type-A to Type-B upstream cable)
- Кароткае кіраўніцтва карыстальніка / Кіраўніцтва карыстальніка (гэты дакумент)
Настройка
1. Мантаж стэнда
Carefully remove the monitor and stand components from the packaging. Attach the stand neck to the monitor panel, ensuring it clicks securely into place. Then, attach the base to the stand neck and tighten the screws if necessary. The stand allows for height adjustment (up to 130mm) and tilt (-5° to +21°).
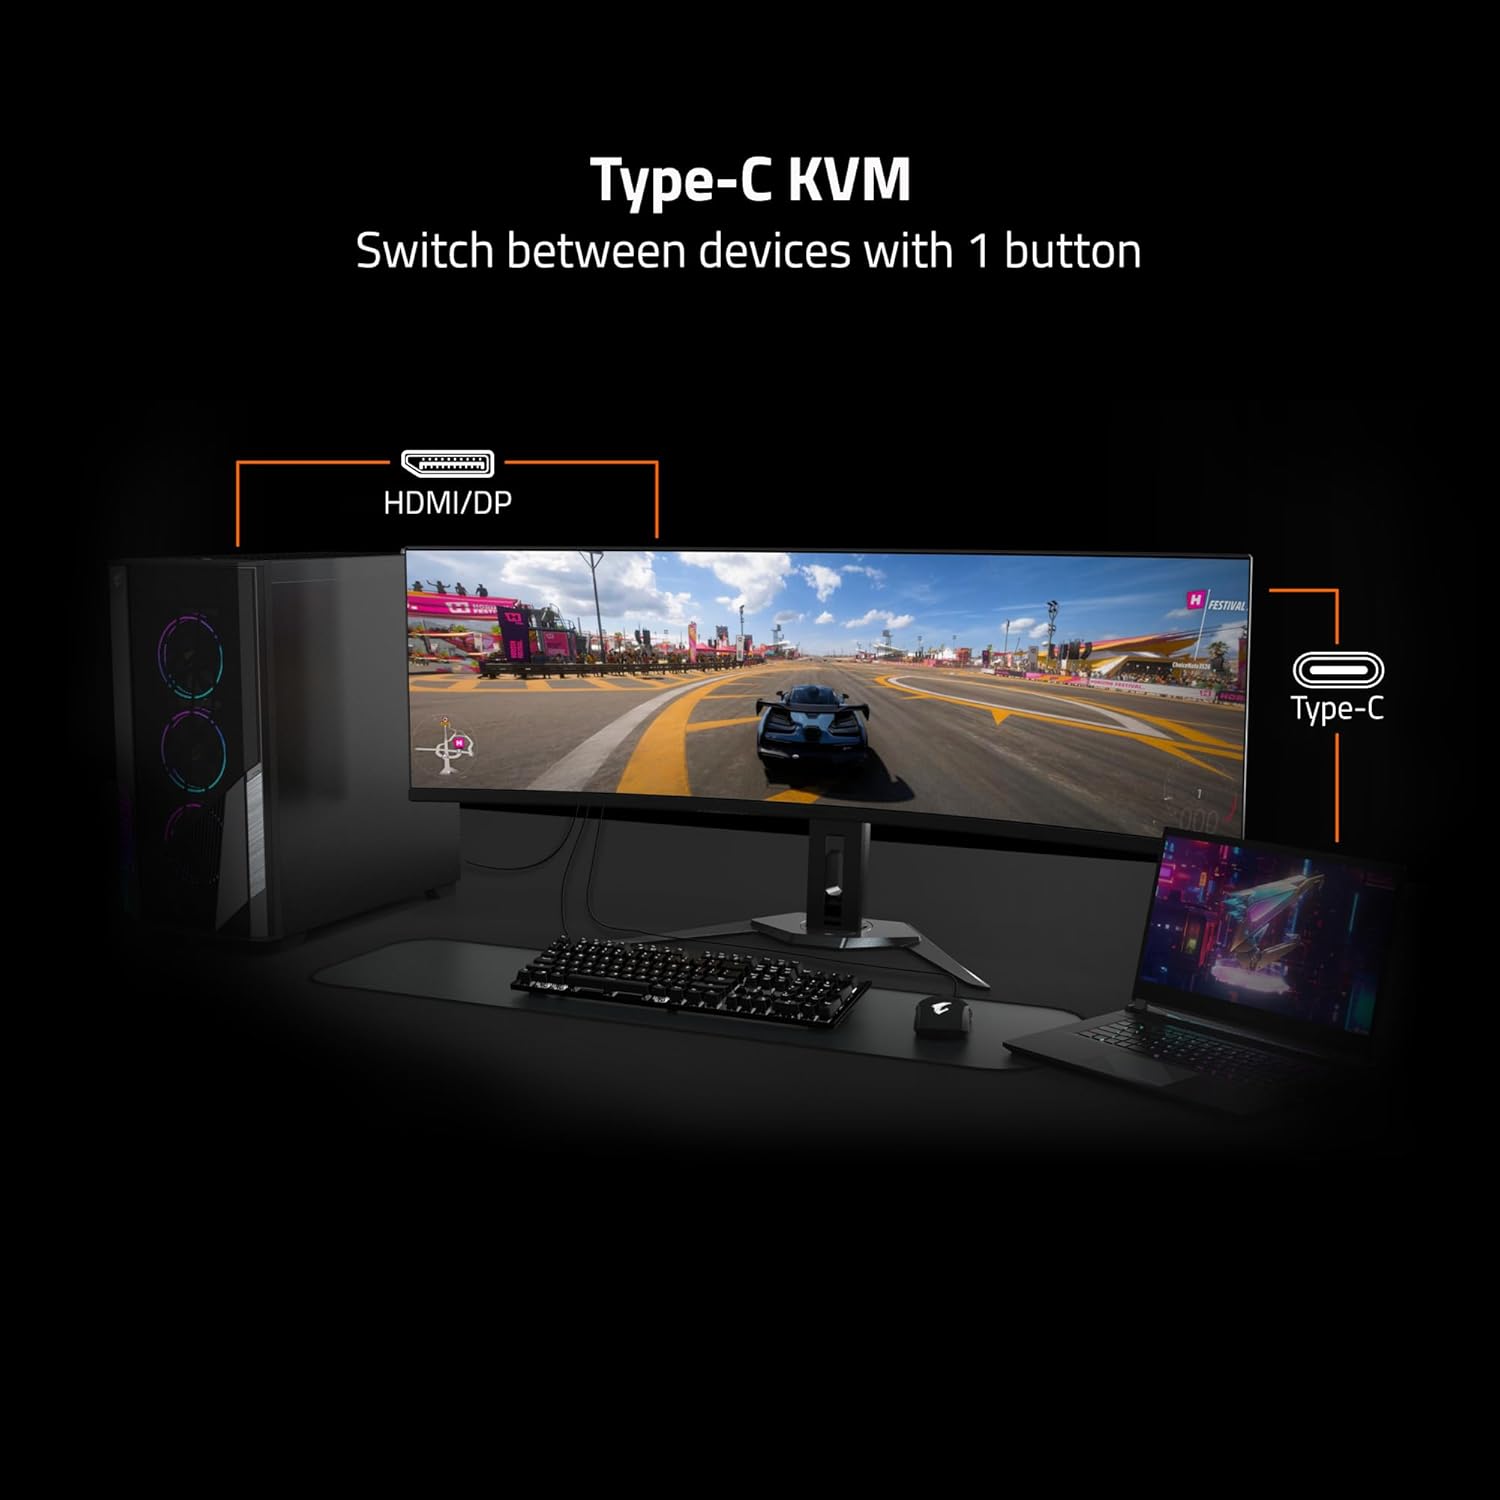
Image: Adjustable Stand and VESA Wall Mount points.
2. VESA Wall Mount Installation
The monitor supports VESA 100x100mm mounting. If using a VESA compatible wall mount or arm, remove the stand from the monitor. Secure the VESA mount to the monitor using appropriate screws (not included) according to the mount manufacturer's instructions. Refer to the image above for VESA mount point location.
3. Падключэнне манітора
Connect the necessary cables to the corresponding ports on the back of the monitor and to your computer or other devices. Ensure all connections are secure.
- Магутнасць: Падключыце кабель сілкавання да манітора і разеткі.
- Відэа ўваход: Use the provided HDMI 2.1 or DisplayPort 1.4 cables to connect to your graphics card. The monitor also supports USB Type-C for video input.
- USB уверх: Connect the USB upstream cable (USB Type-A to Type-B) from your computer to the monitor's USB 3.0 Upstream port to enable the monitor's USB downstream ports and KVM functionality.
- USB унізе: Connect USB devices (keyboard, mouse, USB drives) to the USB 3.0 Downstream ports.
- Раз'ём для навушнікаў: Падключыце навушнікі або знешнія дынамікі.

Image: I/O Ports diagram on the back of the monitor.
Кіраванне маніторам
1. Уключэнне/выключэнне харчавання
Press the power button, usually located on the back or bottom of the monitor, to turn the monitor on or off. The power indicator light will illuminate when the monitor is on.
3. KVM Functionality
The GIGABYTE MO32U features a built-in KVM (Keyboard, Video, Mouse) switch, allowing you to control multiple devices (e.g., a desktop PC and a laptop) with a single set of keyboard and mouse connected to the monitor. To use KVM, ensure both devices are connected to the monitor via video inputs (HDMI/DP and Type-C) and the USB upstream cable is connected to the primary device. You can switch between devices using a dedicated KVM button or through the OSD menu.

Image: Type-C KVM setup for switching between devices.
4. Налады і функцыі дысплея
The MO32U monitor offers advanced display features for an optimized viewвопыт:
- Раздзяленне і частата абнаўлення: Enjoy a 4K UHD (3840x2160) resolution with a 165Hz refresh rate for smooth visuals.
- Час водгуку: Experience ultra-fast 0.03ms GTG (Gray-to-Gray) response time, minimizing motion blur.
- AMD FreeSync Premium Pro: Сінхранізуе частату абнаўлення манітора з частатой кадраў вашага графічнага працэсара, каб пазбегнуць разрываў і заікання экрана.
- QD-OLED-панэль: Delivers vibrant colors, deep blacks, and high contrast (1.5M:1) with 99% DCI-P3 color gamut and 10-bit color depth.
- VESA DisplayHDR True Black 400: Provides enhanced contrast and color accuracy for HDR content.
- VESA ClearMR 9000: Ensures high motion clarity.
- Асаблівасці догляду за вачыма: Includes Flicker-Free and Low Blue Light technologies, certified by Eyesafe, to reduce eye strain during prolonged use.

Image: Key display features and certifications.

Image: Visual comparison of 0.03ms/165Hz performance versus 5ms/60Hz.
5. GIGABYTE OLED Care
The monitor incorporates GIGABYTE OLED Care, an AI-based algorithm designed to minimize the risk of OLED burn-in issues. This suite of technologies operates in the background with minimal user interference. OLED Care includes various adjustable settings within the OSD menu to help protect the panel and extend its lifespan.
Тэхнічнае абслугоўванне
Правільнае абслугоўванне забяспечвае даўгавечнасць і аптымальную прадукцыйнасць вашага манітора.
- Ачыстка экрана: Акуратна працярыце экран мяккай тканінай без ворса. Для ўстойлівых плям злёгку працярыцеampПрамыйце тканіну вадой або неабразіўным сродкам для чысткі экранаў. Не распыляйце вадкасць непасрэдна на экран.
- Ачыстка Casing: Выкарыстоўвайце мяккую сухую тканіну, каб праціраць манітор casinг. Пазбягайце выкарыстання моцных мыйных сродкаў або абразіўных ачышчальнікаў.
- Сыход за OLED-элементамі: Allow the monitor to perform its automatic OLED Care functions. Avoid prolonged display of static images at high brightness settings.
Ліквідацыю непаладак
Калі ў вас узніклі праблемы з маніторам, звярніцеся да наступных распаўсюджаных рашэнняў:
- Няма харчавання: Пераканайцеся, што кабель харчавання надзейна падключаны да манітора і спраўнай разеткі. Праверце, ці гарыць індыкатар харчавання.
- Няма сігналу: Verify that the video cables (HDMI, DisplayPort, USB-C) are correctly connected to both the monitor and your source device. Ensure the correct input source is selected in the monitor's OSD menu.
- Мігценне або скажэнне выявы: Check cable connections. Ensure your graphics card drivers are up to date. Try adjusting the refresh rate in your operating system's display settings.
- Захаванне/выгаранне выявы: While OLED Care minimizes this risk, prolonged static images can contribute. Utilize OLED Care features and avoid displaying static content for extended periods.
- KVM Not Switching: Ensure the USB upstream cable is connected to the active source device and that the KVM function is properly configured in the OSD menu.
If the problem persists after trying these steps, contact GIGABYTE customer support.
Тэхнічныя характарыстыкі
| Асаблівасць | Дэталь |
|---|---|
| Марка | ГІГАБАЙТ |
| Нумар мадэлі | МО32У |
| Памер экрана | 32 цалі |
| Тып дысплея | QD OLED |
| дазвол | 4K UHD (3840 x 2160) |
| Частата абнаўлення | 165 Гц |
| Час водгуку | 0.03 Milliseconds GTG |
| Суадносіны бакоў | 16:9 |
| Каэфіцыент кантраснасці | 1.5M:1 |
| Яркасць | 1000 Candela per Square Meter (Peak) |
| Колеравая гама | 99% DCI-P3 |
| Viewing кут | 178 градусаў |
| Сувязь | 2x HDMI 2.1, 1x DisplayPort 1.4, 1x USB Type-C, 1x USB 3.0 Upstream, 3x USB 3.0 Downstream, 1x Earphone Jack |
| Адаптыўная сінхранізацыя | AMD FreeSync Premium Pro |
| Падтрымка HDR | VESA DisplayHDR True Black 400 |
| KVM | Yes, Type-C KVM |
| Тып мацавання | VESA 100x100mm, Height Adjustable Stand |
| Энергаспажыванне | 54 ват |
| Колер | Чорны |
Інфармацыя аб гарантыі
This GIGABYTE MO32U monitor comes with a 3 гады гарантыі вытворцы. For detailed terms and conditions, please refer to the warranty card included in your product packaging or visit the official GIGABYTE webсайт.
Падтрымка
For technical assistance, troubleshooting beyond this manual, or warranty claims, please contact GIGABYTE customer support. You can find contact information and additional resources on the official GIGABYTE webсайт.
Інтэрнэт-рэсурсы: Visit the GIGABYTE support page for drivers, FAQs, and further documentation.


