
1. Уводзіны
This manual provides comprehensive instructions for the installation, operation, and maintenance of your THRONMAX S7 TUNE Low Profile Microphone Boom Arm. Designed for streaming, podcasting, and gaming, this all-metal mic arm offers 360° rotation, integrated cable management, and easy desk clamping for a clean and professional setup.
2. Што ў скрынцы
Калі ласка, пераканайцеся, што ўсе кампаненты наяўныя, перш чым працягваць усталёўку.
- THRONMAX S7 Tune Boom Arm
- Настольны клamp
- Кіраўніцтва карыстальніка
- THRONMAX Stickers
- Разьбовы адаптар 1/4”
- Hex Keys (for tension adjustment)

Figure 1: THRONMAX S7 TUNE Boom Arm packaging and contents.
3. Асноўныя магчымасці
- Premium All-Metal & Low-Profile дызайн: Crafted with anti-torsional all-metal construction for durability and a sleek, unobstructed look that saves desk space.
- Hidden Cable Management: Features built-in hidden cable trays with a magnetic lid for effortless cable organization, ensuring a tidy workspace.
- 360° Adjustable Tension & Full Rotation: Enjoy precise control with tension-adjustable joints (sway/fall resistance) and 360° horizontal rotation. The arm offers 150° vertical tilt and a 32-inch horizontal reach for flexible positioning.
- Multi-Device Compatibility & Heavy-Duty Load: Supports microphones, DSLR cameras, and lights via 1/4", 3/8", and 5/8" threads. Pre-weighted to counterbalance heavy gear up to 5.5 lbs (2.5 kg).
- Complete Kit for Quick Setup: Includes a desk clamp, hex keys, and a 1/4” thread adapter. The expandable clamp fits desks up to 3.15” (80mm) thick.
4. Настройка
4.1 Attaching the Desk Clamp
- Unpack the desk clamp з скрынкі.
- Змесціце склamp onto the edge of your desk. Ensure the desk surface is clean and free of obstructions.
- Tighten the screw mechanism until the clamp is securely fastened to the desk. The clamp can expand up to 3.15 inches (80mm) thick.
- Insert the base of the boom arm into the vertical socket of the desk clamp. Use the provided hex key to tighten the set screw on the clamp to secure the arm in place.
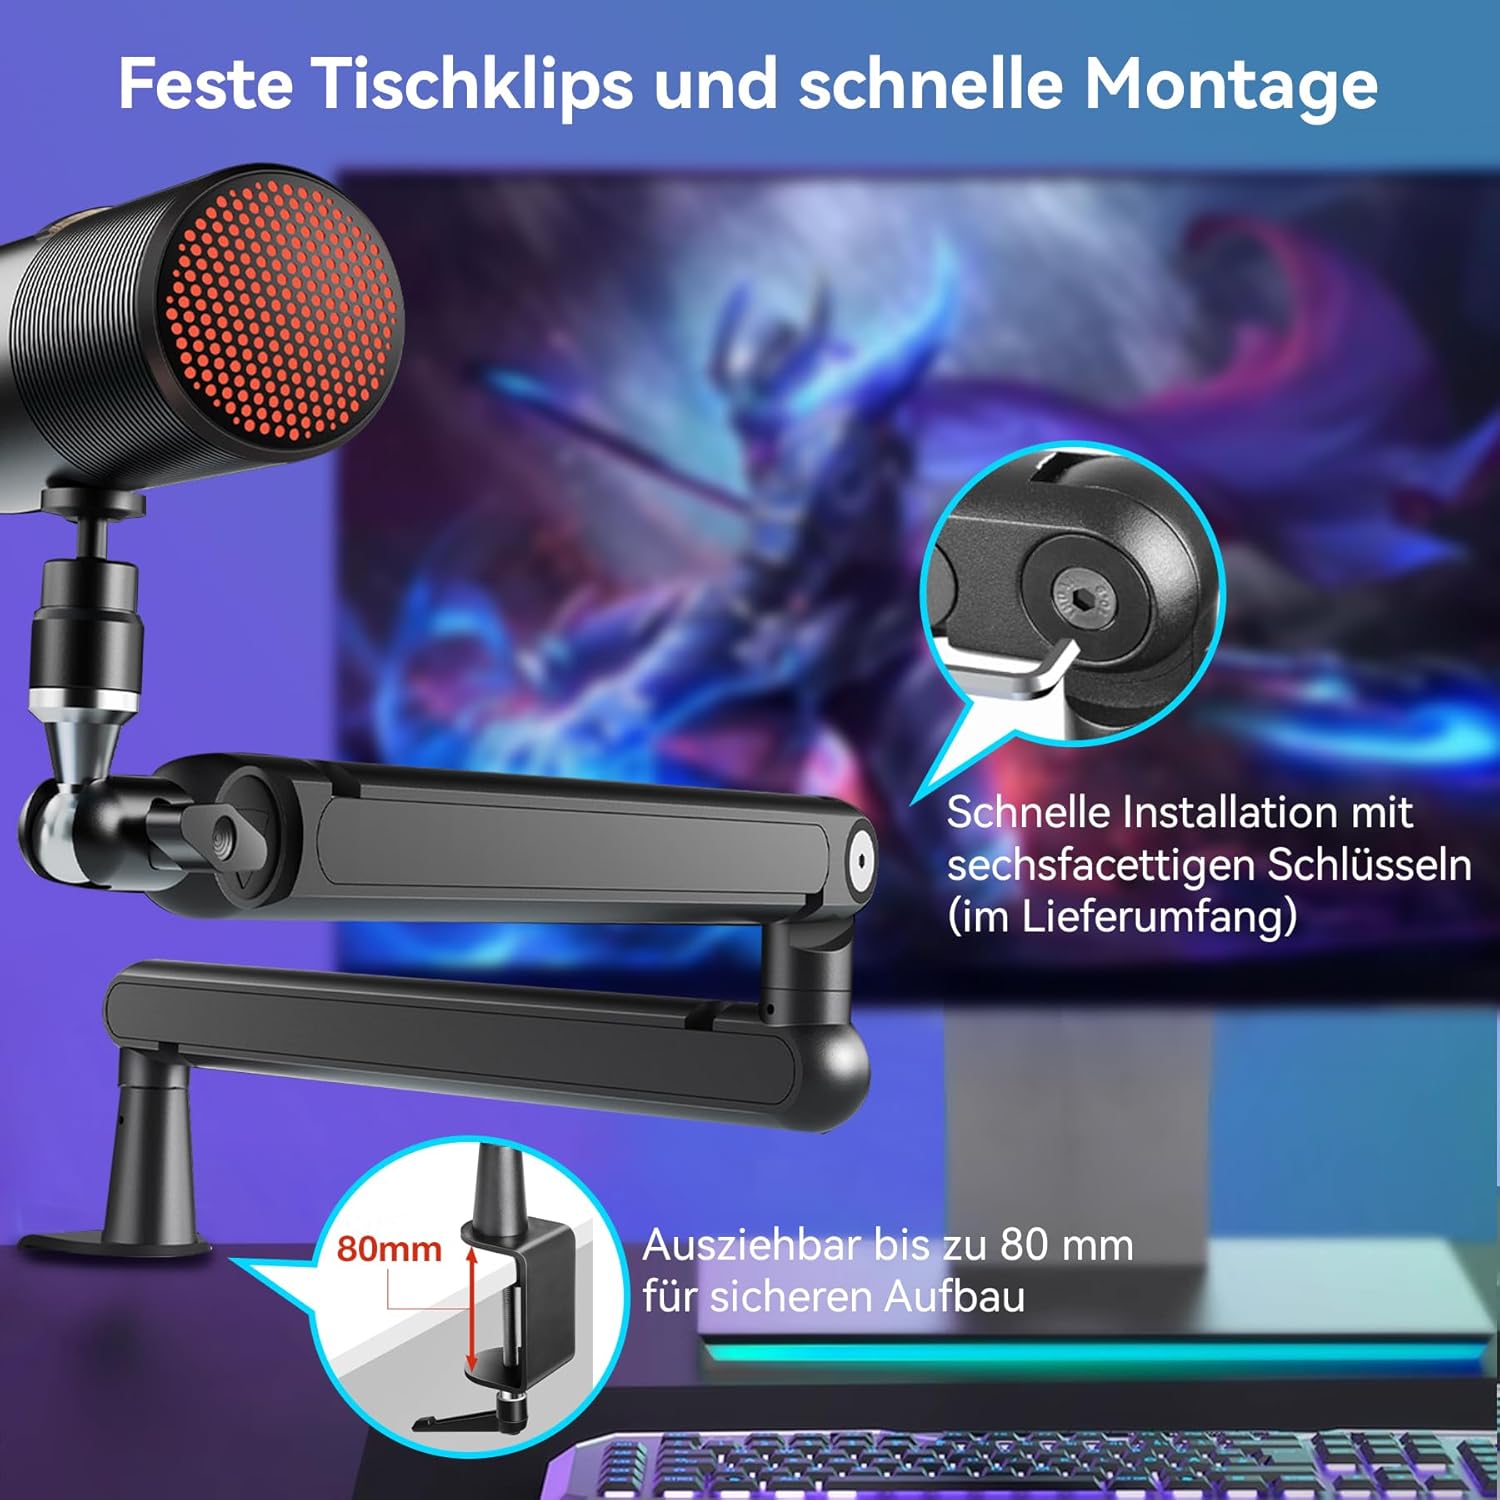
Figure 2: The desk clamp securely attached to a desk, ready for the boom arm.
4.2 Assembling the Boom Arm
- Connect the two main sections of the boom arm by aligning the pivot points and gently pushing them together.
- Attach your microphone, camera, or streaming light to the 1/4", 3/8", or 5/8" thread adapter at the end of the arm. Ensure it is securely tightened.
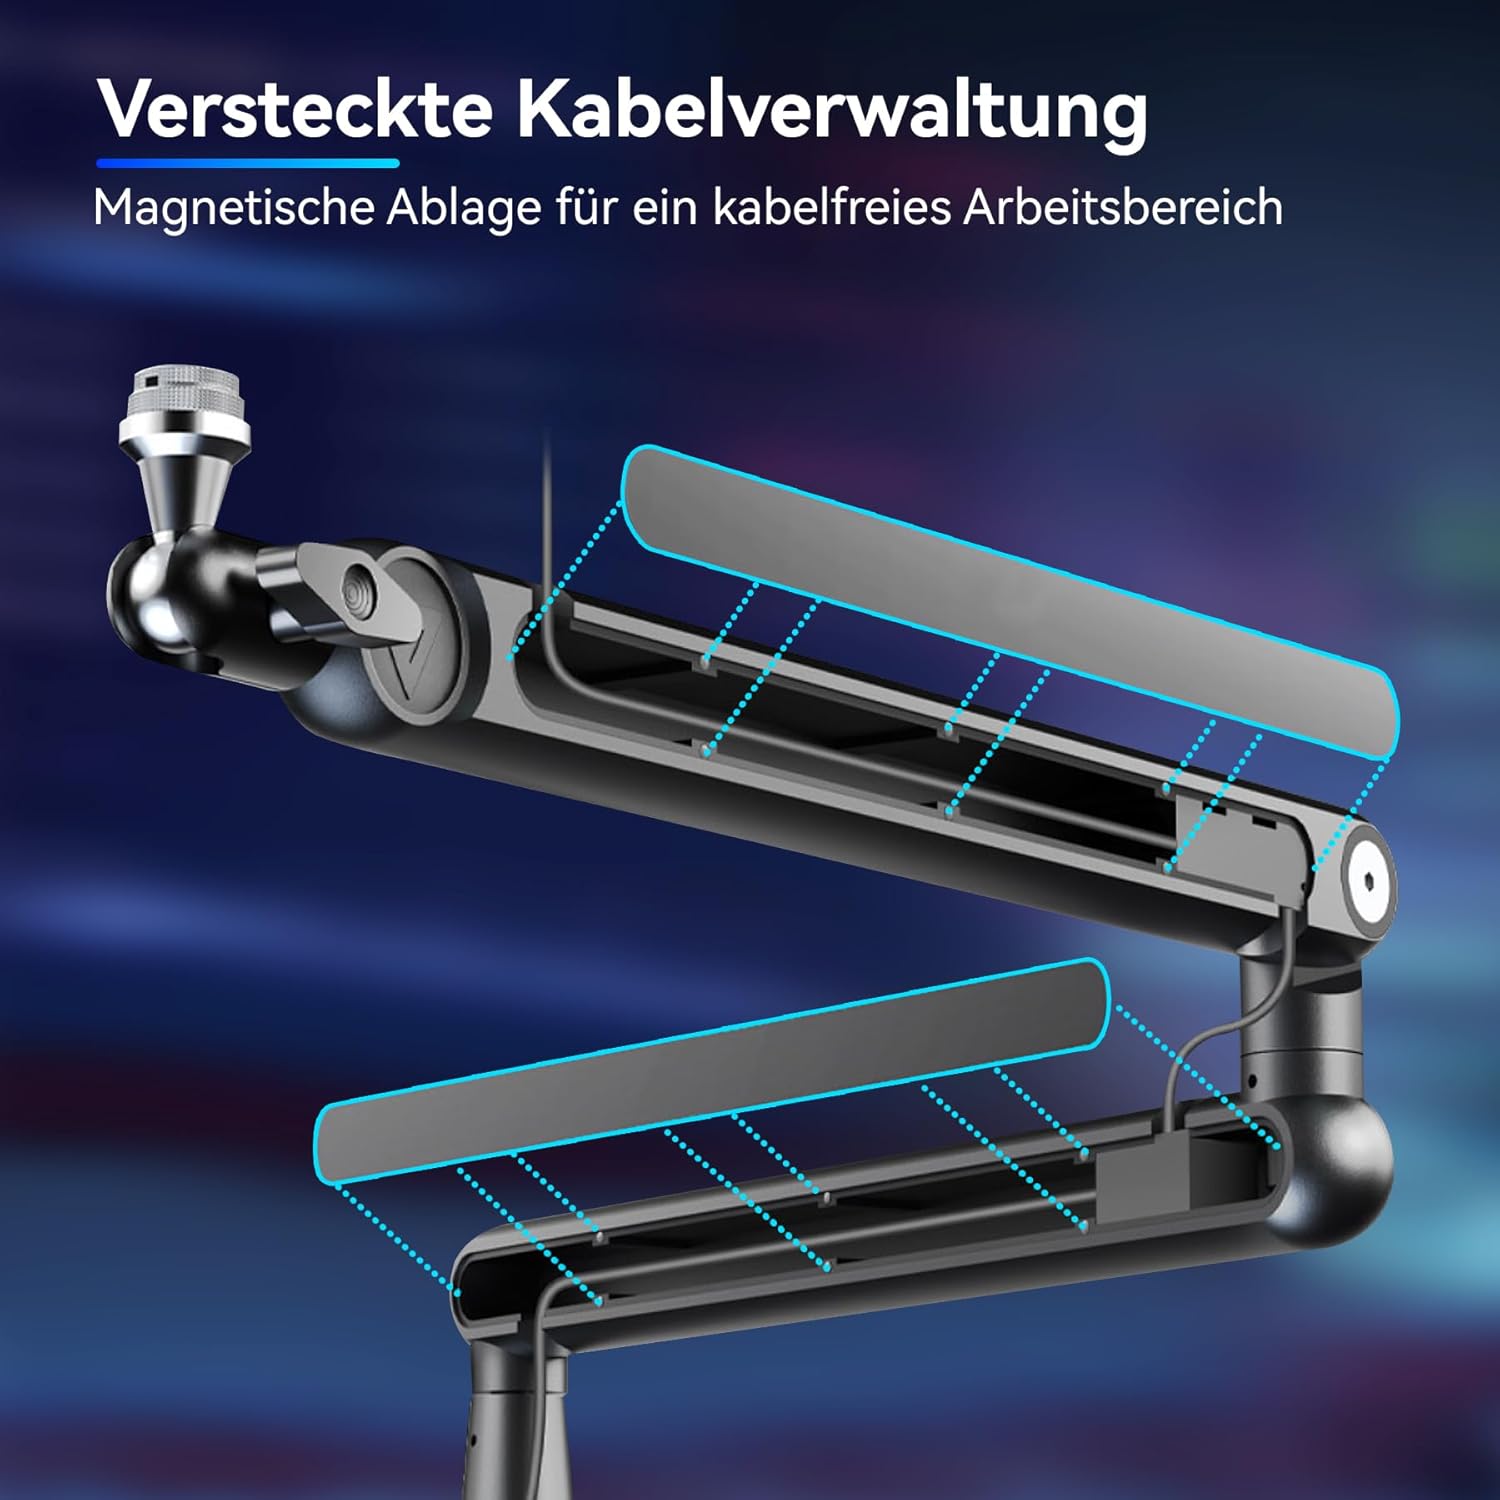
Figure 3: The THRONMAX S7 TUNE Boom Arm with a microphone mounted, showcasinг яго нізкапрафесійныfile дызайн.
5. Operating the Boom Arm
5.1 Adjusting Position and Tension
- The arm features 360° horizontal rotation at the base and elbow joints, allowing for flexible positioning.
- Adjust the vertical tilt up to 150° (90° up / 60° down at the elbow) to achieve your desired height and angle.
- Use the provided hex keys to adjust the tension of the joints. This allows you to customize the arm's resistance to sway and fall, accommodating different equipment weights up to 5.5 lbs (2.5 kg).
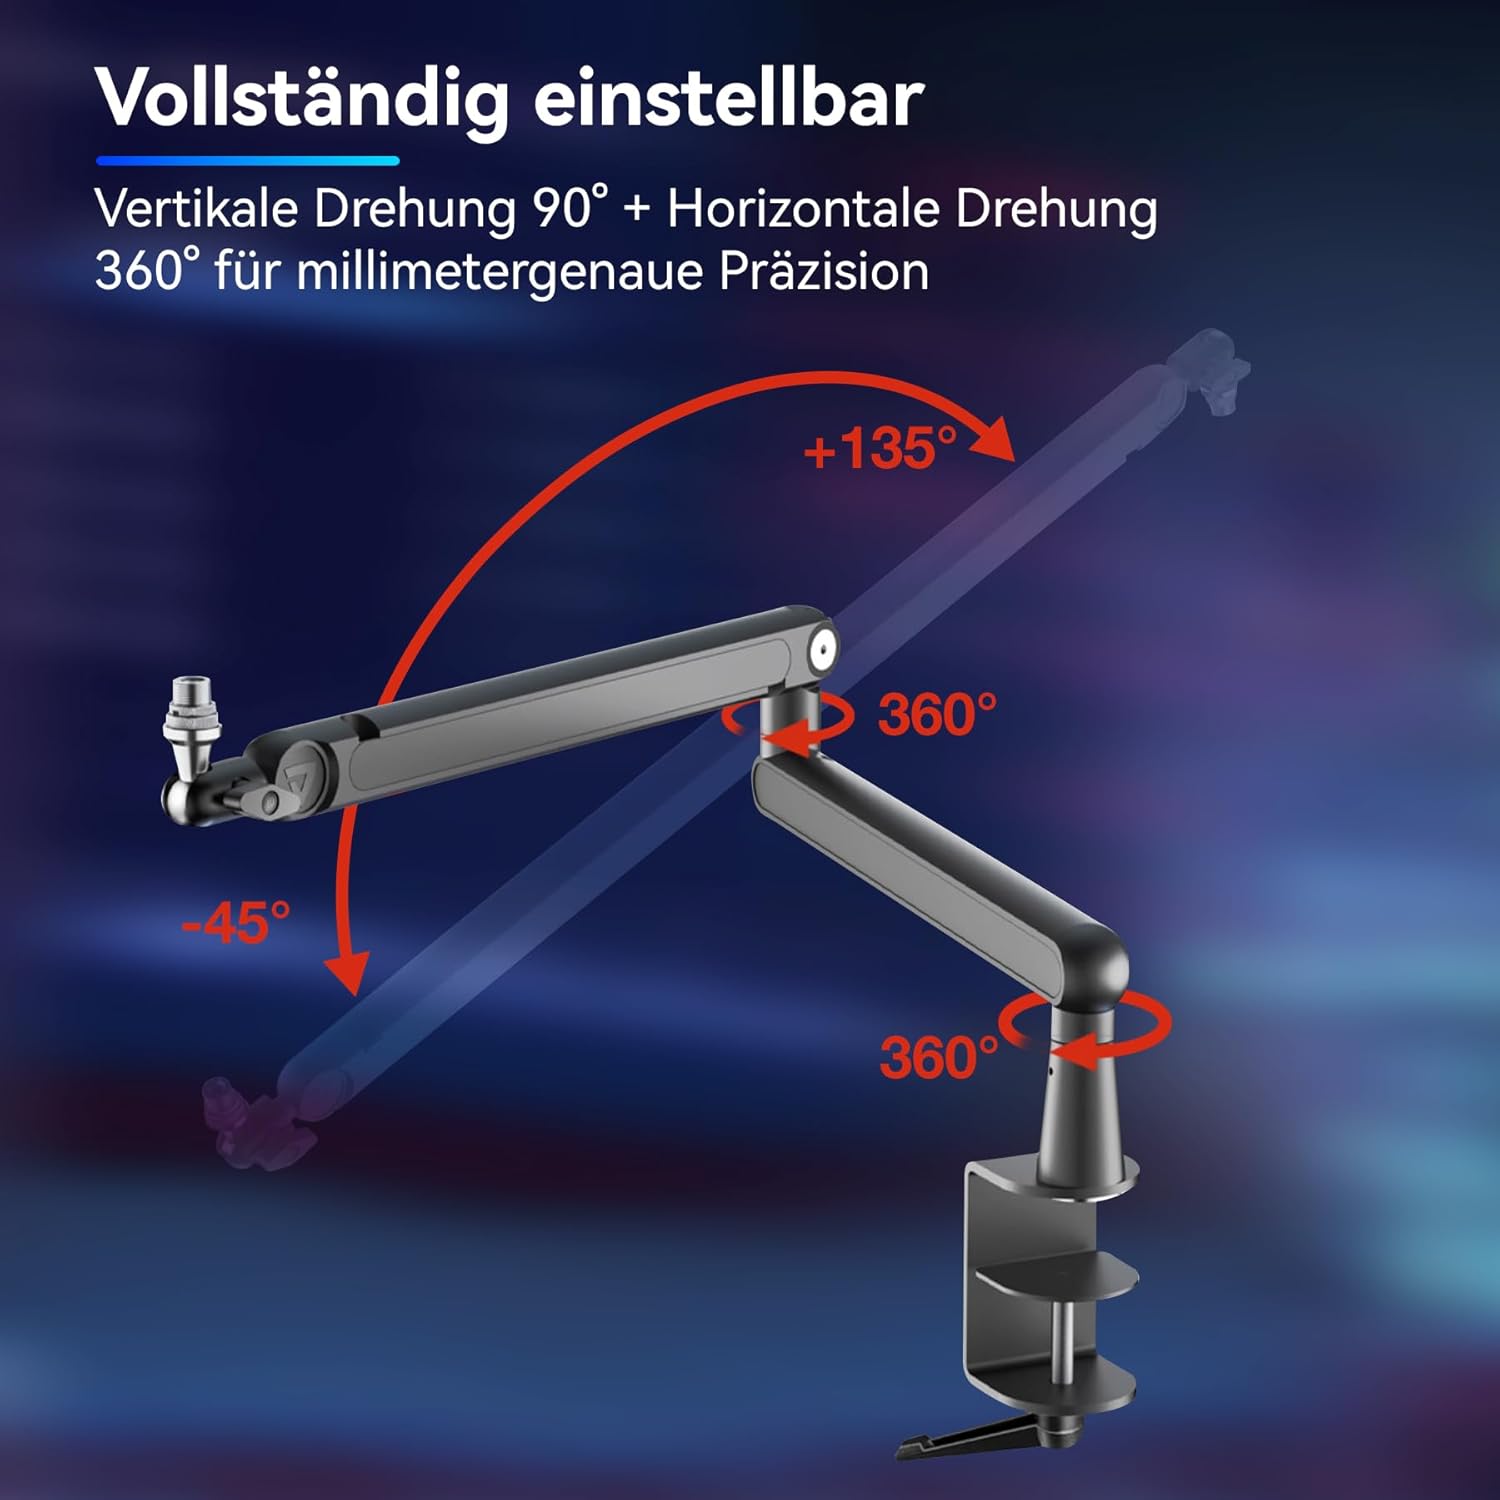
Figure 4: Illustration of the arm's extensive adjustability, including 360° horizontal rotation and 150° vertical tilt.
5.2 Арганізацыя кабеляў
- To manage cables, gently lift the magnetic covers on the top of the arm sections.
- Route your microphone or camera cables through the hidden cable trays.
- Once cables are routed, replace the magnetic covers to maintain a clean and organized setup.
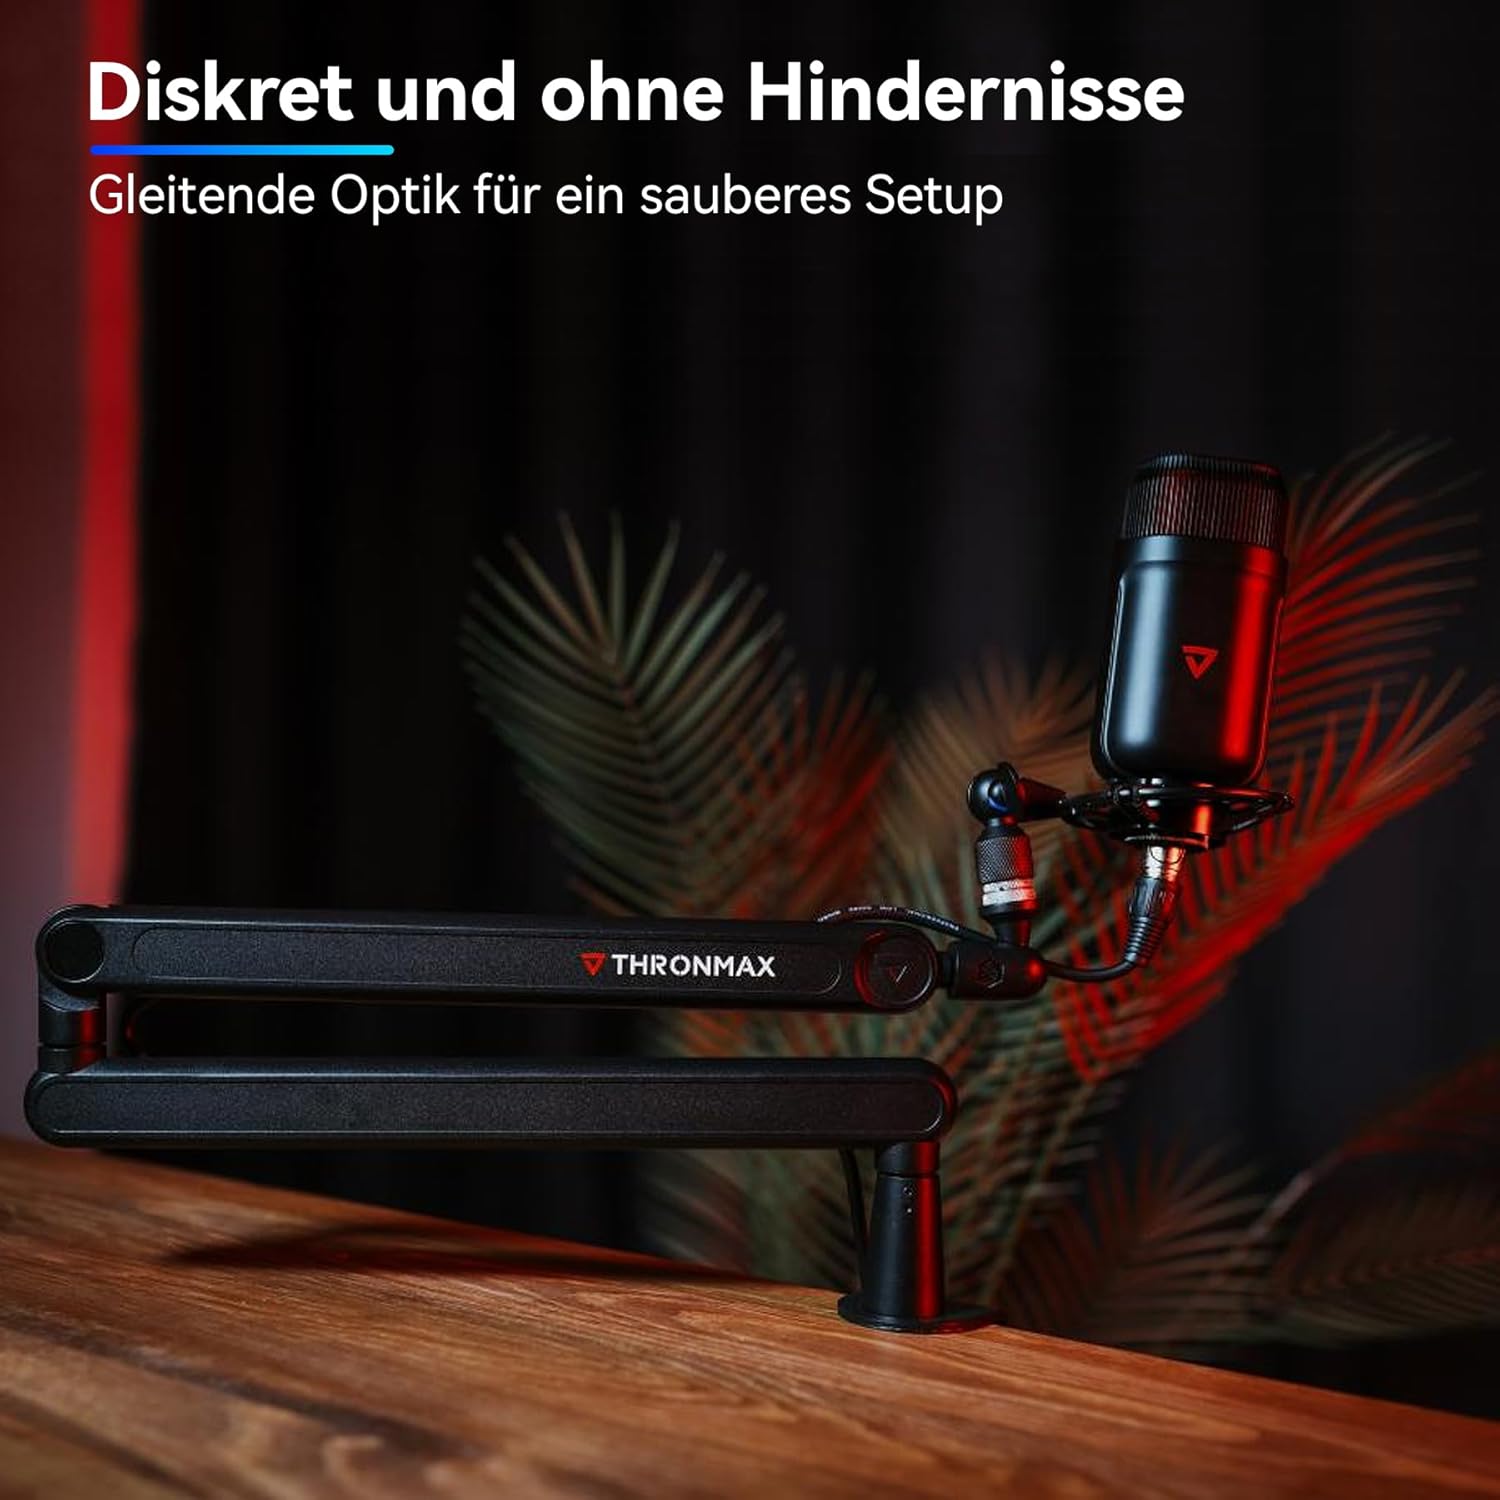
Figure 5: The magnetic cable management system keeps your workspace tidy.
6. Тэхнічнае абслугоўванне
- Уборка: Wipe the arm with a soft, dry cloth to remove dust. Avoid abrasive cleaners or solvents.
- Напружанне суставаў: Periodically check the tension of the joints. If the arm feels too loose or too stiff, use the provided hex keys to adjust the tension screws until the desired resistance is achieved.
- Кабельнае кіраванне: Ensure cables are not pinched or excessively bent within the cable trays to prevent damage.
7. Выпраўленне непаладак
| праблема | Магчымая прычына | Рашэнне |
|---|---|---|
| Arm is too loose/sags | Joint tension is too low for the attached equipment. | Use the hex keys to tighten the tension screws at the joints until the arm holds its position. |
| Arm is too stiff/difficult to move | Joint tension is too high. | Use the hex keys to loosen the tension screws at the joints until the arm moves smoothly. |
| Стол клamp нестабільны | Clamp not tightened sufficiently or desk surface is uneven. | Пераканайцеся, што клamp screw is fully tightened. If the desk surface is uneven, consider using a protective pad (not included) to create a stable contact point. |
| Cables are visible or messy | Cable management covers are open or cables are not routed correctly. | Open the magnetic covers, route cables neatly through the internal channels, and re-attach the covers. |
8. Тэхнічныя характарыстыкі
| Асаблівасць | Дэталь |
|---|---|
| Марка | ТРОНМАКС |
| Назва мадэлі | S7 TUNE |
| Нумар мадэлі | THR-S7 |
| Матэрыял | Легаваная сталь |
| Колер | ЧОРНЫ |
| Гарызантальны ахоп | 715 мм / 28.1 цалі |
| Гарызантальнае паварот | 360 degrees (base and elbow) |
| Вертыкальнае кручэнне | 90 degrees up / 60 degrees down (elbow) |
| Настольны клamp Сумяшчальнасць | Expandable up to 85 mm / 3.15 in |
| Максімальная нагрузка | 2.5 kg / 5.5 lbs (mic and accessories) |
| Microphone Stand Thread Size | 1/4 inch, 3/8 inch, 5/8 Inch |
9. Гарантыя
The THRONMAX S7 TUNE Low Profile Microphone Boom Arm comes with a Гарантыя 2 год. Please retain your proof of purchase for warranty claims. For detailed warranty terms and conditions, refer to the official THRONMAX webсайт або звярніцеся ў службу падтрымкі кліентаў.
10. Падтрымка
For further assistance, technical support, or to provide feedback, please visit the official THRONMAX webсайт або звязацца з нашай службай падтрымкі кліентаў.
- Webсайт: www.thronmax.com
- электронная пошта: support@thronmax.com
- Сацыяльныя сеткі: Follow THRONMAX on social media platforms for updates and community support.