Уводзіны
This manual provides detailed instructions for the installation, operation, and maintenance of your VASTEND VS-9A Magnetic Solar Wireless Backup Camera System. Designed for RVs, trucks, vans, and buses, this system offers enhanced visibility and safety with its HD 1080P display, powerful magnetic solar camera, and advanced features like loop recording and parking assistance. Please read this manual thoroughly before operating the device and retain it for future reference.
Змест пакета
Праверце, ці ўсе пералічаныя ніжэй прадметы ўваходзяць у вашу ўпакоўку:
- 1x 9.0 Inch Monitor
- 1x Magnetic Solar Camera
- 1x U-bracket for Monitor
- 1x Power Cable for Monitor
- 1x USB to Type-C Cable for Camera
- 3х антэны
- 1x Product Instruction Manual
- 1x Mounting Screw Set
- 1x адаптар прыпальвальніка

Настройка і ўстаноўка
1. Усталёўка камеры
The magnetic solar camera features a strong magnetic base for easy attachment to any metal surface on your vehicle, RV, or trailer. Ensure the solar panel is oriented to receive maximum sunlight for optimal charging. The camera's angle can be adjusted as needed after attachment.


2. Ўстаноўка манітора
Mount the 9-inch monitor on your dashboard or windshield using the provided U-bracket or suction cup mount. Connect the monitor to your vehicle's cigarette lighter adapter using the power cable. The adapter includes an on/off button and a USB port.


3. Пачатковая зарадка і спалучэнне
It is recommended to fully charge the camera's built-in 10,000mAh battery using the included USB-C cable before first use. The system is designed for automatic pairing. Once both the camera and monitor are powered on, they should connect wirelessly. If pairing is not automatic, refer to the 'Pairing' option in the monitor's menu.
Інструкцыя па эксплуатацыі
1. Уключэнне/выключэнне харчавання
The system features a low power consumption auto-on/off function. When you turn off the monitor, the camera automatically turns off. When you turn on the monitor, the camera automatically powers on again. This eliminates the need for manual camera operation and conserves battery life.
2. Рэжымы адлюстравання
The 9-inch monitor can display images in various modes:
- Single Screen: Адлюстроўвае view from one camera in full screen.
- Падзелены экран: Displays feeds from two cameras simultaneously (additional cameras sold separately).

3. Навігацыя па меню
Use the buttons on the side of the monitor to navigate through the menu options. Common settings include:
- Фота: Adjust brightness, contrast, and hue.
- Люстэрка/фліп: Change image orientation (normal, mirror, flip, mirror+flip).
- рэжым: Select display layout (single, two, three, or four screens).
- Разумны: Configure blind zone warnings and calibration.
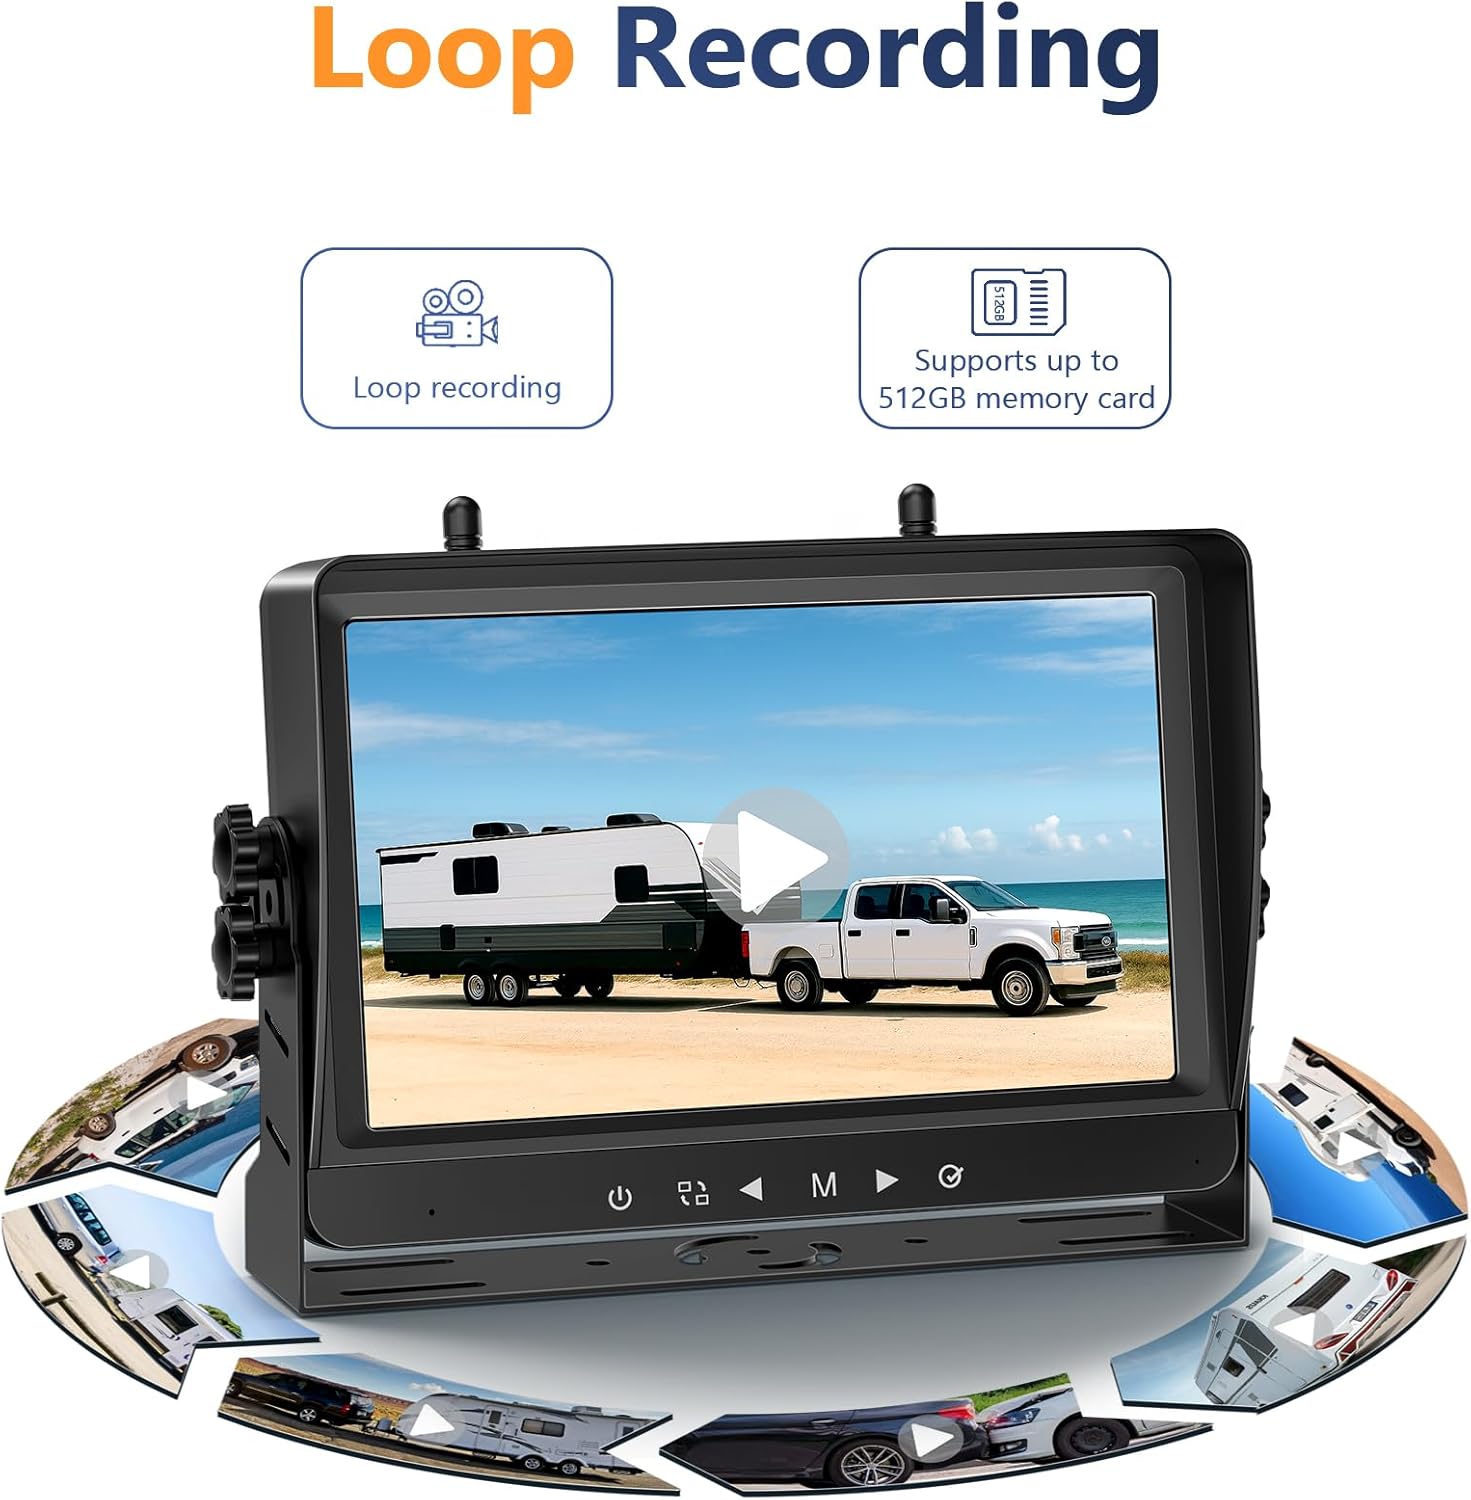
- Прайграванне: View запісана footage (requires an SD card).
- Запіс: Enable/disable loop recording and format the SD card.
- сістэма: Adjust volume, sleep settings, language, and time.
Асноўныя характарыстыкі
- Larger 9-inch Split-Screen Display: The large 9-inch screen provides HD 1080p resolution images for clear, detailed views. It can display two camera feeds simultaneously, enhancing confidence and safety during driving and backing up.
- Backup Camera with Strong Magnetic Base: The camera features a powerful magnetic base for secure attachment to any metal surface. Its wireless design allows for easy removal and reinstallation, simplifying setup without professional assistance.
- High-capacity 10000mAh Rechargeable Battery: This 100% wireless system includes a built-in 10,000mAh rechargeable battery, eliminating the need for drilling or complex wiring. Solar-assisted charging ensures extended operation, with a USB-C port available for charging in low sunlight conditions.
- Low Power Consumption Auto-On/Off Camera: Utilizing upgraded technology, the solar-powered camera automatically turns on when the monitor is activated and off when the monitor is turned off, preventing battery drain and requiring less frequent charging.
- Advanced Wireless Digital Signal Technology: The system employs advanced wireless digital signal technology for superior anti-interference capabilities, ensuring fast, stable transmission without image freezes. It offers a transmission distance of up to 300ft (open air) and displays real-time images without lag.
- Loop Recording & Parking Assist: Loop recording continuously records driving footage, providing potential evidence if needed. Adjustable parking lines enhance safety and ease of parking, making maneuvers simpler for various vehicles including cars, RVs, trucks, and trailers.

Тэхнічнае абслугоўванне
- Зарадка: Ensure the camera's solar panel is exposed to sunlight for continuous charging. In periods of low sunlight or during winter, use the provided USB-C cable to charge the camera.
- Уборка: Рэгулярна чысціце аб'ектыў камеры і сонечную панэль мяккай губкайamp тканінай для забеспячэння аптымальнай прадукцыйнасці і эфектыўнасці зарадкі.
- захоўванне: When not in use for extended periods, store the camera and monitor in a cool, dry place. Ensure the camera is fully charged before storage.
Ліквідацыю непаладак
- Няма сігналу: Check if both the camera and monitor are powered on. Ensure antennas are securely attached. Reduce the distance between the camera and monitor, or check for potential signal interference from other wireless devices.
- Дрэнная якасць выявы: Clean the camera lens. Ensure adequate lighting conditions. Verify that the camera is securely mounted and not vibrating excessively.
- Акумулятар не зараджаецца: Confirm the solar panel is clean and receiving direct sunlight. If using the USB-C cable, ensure it is properly connected to a power source.
- Манітор не ўключаецца: Check the cigarette lighter connection and ensure the adapter's on/off button is pressed. Verify the vehicle's power outlet is functional.
Тэхнічныя характарыстыкі
| Марка | ВАСТЭНД |
| мадэль | VS-9A |
| Памер экрана | 9 цалі |
| Дазвол відэазахопу | 1080p |
| тtage | 24 вольт |
| Ёмістасць батарэі | 10,000mAh (Camera) |
| Тып аб'ектыва | Шырокі кут |
| Рэйтынг воданепранікальнасці | IP69 |
Гарантыя і падтрымка
For warranty information, technical support, or any questions regarding your VASTEND VS-9A system, please contact VASTEND customer service. Refer to the contact details provided in your product packaging or visit the official VASTEND webсайт для дапамогі.