1. Уводзіны
This manual provides detailed instructions for the installation, operation, and maintenance of the Generic MY-7078 Biometric Fingerprint Time Attendance Machine. This device is designed to streamline workplace attendance tracking using advanced fingerprint recognition technology. Please read this manual thoroughly before operating the device to ensure proper usage and optimal performance.
2. Прадукт скончыўсяview
The MY-7078 is an advanced biometric time attendance system featuring a high-precision optical fingerprint sensor and a 2.4-inch TFT color display. It supports both offline and online operation, offering multiple identification methods including fingerprint and password authentication. The device is equipped with intelligent learning capabilities to adapt to environmental changes and minor finger injuries, ensuring fast and accurate recognition.
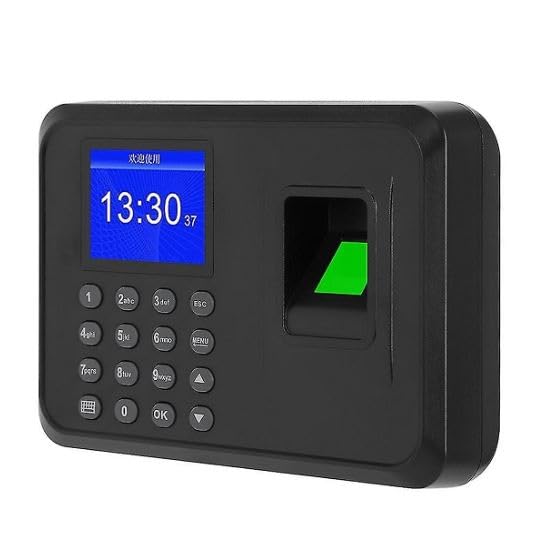
Figure 1: MY-7078 Device Front View. This image displays the device's screen, numeric keypad, and the illuminated fingerprint scanner on the right side.
Асноўныя характарыстыкі:
- Advanced Recognition: Sub-1-second fingerprint recognition with intelligent learning.
- Display & Interface: 2.4-inch TFT color screen, T9 input method, multi-language support (English, Chinese, Korean).
- Універсальнае падключэнне: USB communication for data transfer (attendance records, fingerprint data).
- Рэжымы працы: Supports both offline and online working modes.
- Метады ідэнтыфікацыі: Fingerprint and password authentication.
- Упраўленне харчаваннем: Energy-saving optical sensor and advanced power management with auto-sleep.
3. Змесціва ўпакоўкі
Калі ласка, пераканайцеся, што ўсе прадметы прысутнічаюць у камплекце:
- MY-7078 Biometric Fingerprint Time Attendance Machine
- DC 5V/1A Power Adapter (100-240V compatible)
- Крапежныя шрубы
- Кіраўніцтва карыстальніка (гэты дакумент)
4. Настройка
4.1 Насценны мантаж
The MY-7078 device is designed for wall mounting. Choose a suitable location that is easily accessible for users and protected from direct sunlight or moisture.
- Mark the desired drilling points on the wall using the device or a mounting template (if provided).
- Прасвідруйце адтуліны ў адзначаных месцах.
- Insert wall plugs (if necessary) into the drilled holes.
- Secure the device to the wall using the provided mounting screws.

Figure 2: Device Wall Mounted. This image shows the time attendance machine installed on a wall in an office setting, demonstrating its typical placement.
4.2 Падключэнне харчавання
Connect the DC 5V/1A power adapter to the device's power input port and then plug the adapter into a standard electrical outlet. The device will power on automatically.
5. Інструкцыя па эксплуатацыі
5.1 Пачатковая налада і рэгістрацыя адміністратара
Upon first power-on, it is recommended to set up an administrator account. This account will have access to the device's menu for configuration and user management.
- Націсніце МЕНЮ кнопка.
- If prompted, enter the default administrator password (consult your device's specific default, often 0000 or 1234) or enroll the first fingerprint as an administrator.
- Перайсці да Кіраванне карыстальнікамі і абярыце Дадаць карыстальніка.
- Assign a User ID and enroll the administrator's fingerprint multiple times for accuracy.
- Set the user's privilege level to Адміністратар.
5.2 User Enrollment (Fingerprint/Password)
To add new users to the system:
- Access the main menu using the administrator's fingerprint or password.
- Перайсці да Кіраванне карыстальнікамі > Дадаць карыстальніка.
- Enter a unique ID карыстальніка.
- Выберыце Зарэгістраваць адбітак пальца and follow the on-screen prompts to place the finger on the sensor multiple times until successful.
- У якасці альтэрнатывы выберыце Enroll Password and enter a numeric password.
- Set the user's privilege level (e.g., Карыстальнік).
- Repeat for all users.
5.3 Улік працоўнага часу
Users can record their attendance by:
- адбіткаў пальцаў: Place a registered finger on the optical sensor. The device will confirm successful recognition with a voice prompt and display.
- Пароль: Enter the assigned User ID, then press OK, then enter the password and press OK зноў.
The device automatically records the time and date of each successful authentication.
5.4 Data Management (USB)
Attendance records and user data can be transferred via a USB flash drive.
- Insert a formatted USB flash drive into the device's USB port.
- Access the main menu as an administrator.
- Перайсці да Кіраванне дадзенымі > Спампаваць даныя or Загрузіць даныя (for user/fingerprint data backup/restore).
- Select the desired data type (e.g., attendance records, user information).
- Confirm the transfer. The device will indicate completion.
- Safely remove the USB flash drive.
The device can generate attendance reports directly, simplifying workforce management.
5.5 Налады сістэмы
From the administrator menu, you can configure various system settings:
- Час і дата: Adjust the device's internal clock.
- мова: Select from available languages (English, Chinese, Korean).
- Галасавыя падказкі: Enable or disable voice feedback.
- Налады сеткі: (If applicable) Configure network parameters for online operation.
- Упраўленне харчаваннем: Adjust auto-sleep and other energy-saving features.
- Інфармацыя пра сістэму: View device details and firmware version.
6. Тэхнічнае абслугоўванне
- Уборка: Use a soft, dry cloth to clean the device's screen and fingerprint sensor. Avoid abrasive cleaners or liquids that could damage the components.
- Рэзервовае капіраванне даных: Regularly back up attendance records and user data to a USB flash drive to prevent data loss.
- Абнаўленні прашыўкі: Праверце вытворцы webсайт для атрымання даступных абнаўленняў прашыўкі, каб забяспечыць аптымальную прадукцыйнасць і бяспеку.
- Умовы навакольнага асяроддзя: Ensure the device is operated within its specified temperature and humidity ranges. Avoid extreme conditions.
7. Выпраўленне непаладак
| праблема | Магчымая прычына | Рашэнне |
|---|---|---|
| Прылада не ўключаецца. | Няма блока харчавання або няспраўны адаптар. | Check power connection. Ensure adapter is correctly plugged in and functional. |
| Fingerprint recognition fails frequently. | Finger is dirty, wet, or injured; poor enrollment quality; sensor is dirty. | Ensure finger is clean and dry. Re-enroll fingerprint if necessary, ensuring good contact. Clean the fingerprint sensor. |
| Немагчыма атрымаць доступ да меню. | No administrator set up or incorrect administrator authentication. | Ensure an administrator is enrolled. Use the correct administrator fingerprint or password. |
| USB data transfer fails. | USB drive not formatted correctly; USB drive faulty; incorrect menu operation. | Ensure USB drive is formatted to FAT32. Try a different USB drive. Follow data transfer instructions carefully. |
8. Тэхнічныя характарыстыкі
| Назва мадэлі | MY-7078 |
| Марка | Радавыя |
| Дысплей | 2.4-цалевы каляровы экран TFT |
| Датчык адбіткаў пальцаў | Optical, 500DPI |
| Метады ідэнтыфікацыі | Адбітак пальца, пароль |
| Хуткасць распазнання | < 1 секунды |
| Сувязь | USB (for data transfer) |
| Электразабеспячэнне | DC 5V/1A Adapter (100-240V compatible) |
| Матэрыял | АБС |
| Памеры (Д x Ш x В) | 28 см х 14 см х 5 см |
| Вага | 455 грам |
| Тып мацавання | Насценнае мацаванне |
| Падтрымліваюцца мовы | English, Chinese, Korean |
9. Гарантыя і падтрымка
This product comes with a limited warranty. For specific warranty terms and conditions, please refer to the documentation provided with your purchase or contact your retailer.
For technical support or inquiries, please contact your product vendor or refer to their official support channels.